Introduction
Welcome to the official documentation for Kinesis API, a powerful all-in-one framework that transforms how you create, manage, and scale APIs.
What is Kinesis API?
Kinesis API is a comprehensive solution for API development that combines:
- A custom-built, high-performance database system (Kinesis DB)
- A visual editor for creating API routes with the X Engine
- Integrated management tools that eliminate the need for multiple external services
Whether you’re prototyping a simple API or building complex, interconnected systems, Kinesis API provides the tools to accelerate development without sacrificing quality or control.
Key Features
- All-in-one Platform: API creation, database management, and execution in a single unified environment
- Visual Route Builder: Create complex API logic without writing traditional code using our block-based system
- Custom Database: Built-in ACID-compliant database system with multiple storage engines and strong schema management
- Performance-Focused: Developed in Rust for maximum efficiency and reliability
- Flexible Deployment: Deploy anywhere with our Docker images
- Comprehensive Management: User authentication, role-based access control, and extensive monitoring capabilities
Getting Started
New to Kinesis API? Start here:
- Installation Guide - Set up Kinesis API on your system
- Initialization - Configure your instance for first use
- API Tutorials - Build your first API with Kinesis API
Core Components
Dive deeper into the key technologies that power Kinesis API:
- Kinesis DB - Our custom-built database system
- X Engine - The visual API builder that makes complex logic accessible
- API Reference - Complete reference for all available endpoints
Usage Guides
Learn how to use Kinesis API effectively:
- Projects & Collections - Organize your APIs
- Structures - Define your data models
- Routes - Create and manage API endpoints
- User Management - Configure authentication and access control
Support & Community
If you need help or want to contribute:
- Check our FAQ for common questions
- Join our community discussions
- Submit bug reports or feature requests
- Follow our tutorials for practical examples
Further Steps
Once you’re familiar with the basics:
- Learn about upgrading to new versions
- Set up regular backups of your data
- Explore the playground for testing your APIs
Thank you for choosing Kinesis API. We’re excited to see what you’ll build!
Kinesis DB
Kinesis DB is a custom-built, ACID-compliant embedded database system written entirely in Rust. It forms the core data storage and management component of the Kinesis API platform, eliminating dependencies on external database systems while providing significant performance advantages.
Key Features
Multiple Storage Engines
Kinesis DB offers multiple storage engines to match your application’s specific needs:
-
In-Memory Engine: Ultra-fast, volatile storage ideal for temporary data, caching, or situations where persistence isn’t required. Provides maximum performance but data is lost on shutdown.
-
On-Disk Engine: Durable storage with ACID guarantees for critical data. Ensures data survives system restarts and power failures through persistent storage and write-ahead logging.
-
Hybrid Engine: Combines the speed of in-memory operations with the durability of on-disk storage. Uses intelligent caching with persistent backing for balanced performance, making it the recommended default choice for most applications.
Schema Management
Kinesis DB provides robust schema management capabilities:
-
Flexible Schema Definition: Create and modify schemas at runtime, allowing your data model to evolve with your application’s needs.
-
Strong Type System: Supports various data types with strict validation to ensure data integrity.
-
Comprehensive Constraints:
- Required fields (non-null constraints)
- Unique constraints to prevent duplicate values
- Default values for fields
- Pattern matching for string fields using regular expressions
- Min/max value constraints for numeric fields
- Custom validation rules
-
Schema Versioning: Track and manage schema changes over time.
Transaction Support
Kinesis DB is designed with full ACID compliance:
-
Atomicity: All operations within a transaction either complete fully or have no effect.
-
Consistency: Transactions bring the database from one valid state to another, maintaining all defined constraints.
-
Isolation: Multiple isolation levels to control how concurrent transactions interact:
ReadUncommitted: Lowest isolation, allows dirty readsReadCommitted: Prevents dirty readsRepeatableRead: Prevents non-repeatable readsSerializable: Highest isolation, ensures transactions execute as if they were sequential
-
Durability: Once a transaction is committed, its changes are permanent, even in the event of system failure.
-
Deadlock Detection and Prevention: Automatic detection and resolution of transaction deadlocks.
-
Write-Ahead Logging (WAL): Ensures durability and supports crash recovery.
Performance Optimizations
Kinesis DB incorporates several performance optimizations:
-
Efficient Buffer Pool Management: Minimizes disk I/O by caching frequently accessed data in memory.
-
Configurable Caching Strategies: Tune caching behavior to match your workload characteristics.
-
Automatic Blob Storage: Large string values are automatically managed for efficient storage and retrieval.
-
Asynchronous I/O Operations: Non-blocking I/O to maximize throughput.
-
Indexing: Supports various indexing strategies to speed up queries.
-
Query Optimization: Intelligent query planning and execution.
Query Interface
Kinesis DB provides an intuitive query interface:
-
SQL-Inspired Command Syntax: Familiar syntax for developers with SQL experience.
-
CRUD Operations: Comprehensive support for Create, Read, Update, and Delete operations.
-
Data Search Capabilities:
- Equality matching
- Range queries
- Pattern matching with regular expressions
- Full-text search capabilities
-
Multiple Output Formats:
- Standard output
- JSON formatting for API responses
- Table format for human-readable outputs
Configuration
Kinesis DB can be configured through environment variables:
| Variable | Description | Possible Values | Default |
|---|---|---|---|
DB_NAME | Name of the database (affects file names) | Any valid filename | main_db |
DB_STORAGE_ENGINE | Select storage engine | memory, disk, hybrid | hybrid |
DB_ISOLATION_LEVEL | Default transaction isolation level | read_uncommitted, read_committed, repeatable_read, serializable | serializable |
DB_BUFFER_POOL_SIZE | Configure the buffer pool size | Any positive integer | 100 |
DB_AUTO_COMPACT | Enable/disable automatic database compaction | true, false | true |
DB_RESTORE_POLICY | Control how transactions are recovered after a crash | discard, recover_pending, recover_all | recover_pending |
Best Practices
Performance Optimization
- Choose the appropriate storage engine for your use case
- Tune the buffer pool size based on your memory availability and working set size
- Use indexes for frequently queried fields
- Batch related operations in transactions
- Consider denormalizing data for read-heavy workloads
Data Integrity
- Use constraints to enforce business rules at the database level
- Always use transactions for related operations
- Implement proper error handling for database operations
- Regularly back up your data
Schema Design
- Design schemas with future growth in mind
- Use appropriate data types for each field
- Consider query patterns when designing your schema
- Use meaningful field names and conventions
Related Documentation
- Data Management - How to manage data in Kinesis API
- Structures - Working with data structures
- Backups - Backing up your Kinesis DB data
Current Schema

The above diagram illustrates the current database schema used in Kinesis API. The schema represents the relationships between core components of the system, including users, configs, projects, collections, structures and data objects. This schema is implemented directly in Kinesis DB, leveraging the type system and constraints described earlier to ensure data integrity across all operations.
Conclusion
Kinesis DB provides a powerful, embedded database solution that combines performance, reliability, and ease of use. By integrating directly with Kinesis API, it eliminates the need for external database dependencies while providing all the features expected of a modern database system.
X Engine
The X Engine is the core execution framework that powers Kinesis API’s visual API development capabilities. It allows developers to design, implement, and deploy complex API routes using a block-based visual system, dramatically reducing the learning curve and development time typically associated with API creation.
Overview
At its essence, the X Engine is a deterministic execution platform that transforms visual block definitions into functional API endpoints. It processes requests through a highly structured pipeline:
- Route matching based on path, method, and project
- Data collection from parameters, body, and headers
- Authentication verification via JWT when required
- Block ordering to create an execution plan
- Sequential execution of blocks with data flow between them
- Signal-based control for returns, errors, and loop control
- JSON response generation
The X Engine abstracts away complex implementation details while maintaining full capability, enabling developers to focus on business logic through a visual interface rather than traditional code.
Core Components
The X Engine consists of several interconnected systems that work together to process API requests:
1. Route Resolution
When a request arrives, the engine:
- Extracts the route path from the request URL
- Matches it against configured projects’ API paths
- Identifies the correct HTTP method (GET, POST, PUT, PATCH, DELETE, HEAD, OPTIONS)
- Retrieves the route configuration from the database
Each route includes:
- Path pattern matching
- HTTP method specification
- Authentication requirements (optional JWT)
- Body and parameter schemas
- Block definitions for execution
2. Request Data Processing
The engine collects and validates all input data:
Query Parameters:
- Split by configured delimiter (default:
&) - Parsed as key=value pairs
- Validated against parameter type definitions
Request Body:
- Parsed as JSON (supports double-encoded JSON)
- Validated against body schema definitions
- Extracted field-by-field
Authentication:
- JWT tokens verified if required
- Token payload validated against request data
- Per-project token validation
3. Block Ordering (GlobalBlockOrder)
Before execution, blocks are ordered based on their type and dependencies:
The engine creates an execution sequence that respects data flow. Blocks are prioritized in this order:
- BODY and PARAM blocks (input)
- FETCH and VAULT blocks (data retrieval)
- ASSIGN blocks (variable creation)
- TEMPLATE blocks (string generation)
- RANDOM blocks (number generation)
- CONDITION blocks (conditional logic)
- LOOP and END_LOOP blocks (iteration)
- FILTER, PROPERTY, FUNCTION blocks (transformation)
- OBJECT blocks (structure creation)
- CREATE, UPDATE, SIMPLE_UPDATE blocks (data modification)
- EMAIL blocks (communication)
- RETURN blocks (response generation)
This ordering ensures that variables are defined before they’re referenced and prevents circular dependencies.
4. Definition Store (Data Memory)
The Definition Store is the “memory” of route execution. It accumulates the results of each block:
DefinitionStore[0]: {name: "user_id", data: INTEGER(123)}
DefinitionStore[1]: {name: "user", data: DATA({id: 123, name: "Alice", ...})}
DefinitionStore[2]: {name: "posts", data: ARRAY([post1, post2, ...])}
Key Properties:
- Each block’s output is stored with a unique identifier
- Subsequent blocks can reference previous block outputs
- Variables persist throughout the entire request
- Data flows between blocks through named references
Data Types: The Definition Store uses a unified type system:
NULL- Empty or uninitialized valuesUNDEFINED- Undefined variable (error state)BOOLEAN- true/false logicSTRING- Text dataINTEGER- Whole numbersFLOAT- Decimal numbersARRAY- Collections of valuesDATA- Database records
5. Resolver System
The Resolver handles all data lookup and transformation:
resolve_raw_data(): Retrieves a previously computed block output
- Looks up variable by name in the Definition Store
- Returns
NULLif not found - Returns
UNDEFINEDif explicitly unset (error)
resolve_ref_data(): Resolves references and performs type conversion
- Variable resolution: looks up values if needed
- Type coercion: converts between types as required
- Example: String “true” → Boolean true, Integer 0 → Boolean false
resolve_conditions(): Evaluates conditional expressions
- Parses condition objects with multiple operations
- Combines operations with AND/OR logic
- Supports operations: EQUAL_TO, NOT_EQUAL_TO, GREATER_THAN, LESS_THAN, IN, NOT_IN, CONTAINS, NOT_CONTAINS
- Applies NOT modifier to results
resolve_operations(): Performs mathematical and logical operations
- Type-aware comparisons (handles mixed types)
- Automatic type coercion where sensible
- Returns final computed DefinitionData
6. Signal Processor
Signals are control-flow instructions that determine route behavior:
Signal Types:
NONE- Normal execution, proceed to next blockBREAK- Exit current loopCONTINUE- Skip to next loop iterationFAIL(status, message)- Return error response immediatelyRETURN(value)- Return response data and exit route
Signal Generation:
- CONDITION blocks evaluate conditions and can emit FAIL, BREAK, or CONTINUE
- RETURN blocks evaluate conditions and emit RETURN signal with JSON data
- Any block can return FAIL if an error occurs
7. Loop Processing
Loops enable iteration over arrays:
Loop Structure:
- LOOP blocks begin an iteration
- END_LOOP blocks mark boundaries
- Blocks between are repeated for each array element
Safety Features:
- Maximum iterations limit (default: 1000) prevents infinite loops
- Nested loops supported with proper scoping
- BREAK exits loop, CONTINUE skips to next iteration
- Loop variables accessible within loop scope
Iteration Model:
Loop over array [item1, item2, item3]:
  Iteration 1: Execute blocks with item1
  Iteration 2: Execute blocks with item2
  Iteration 3: Execute blocks with item3
  Exit loop and continue with next block
8. Block Execution
Each block follows a consistent execution pattern:
-
Definition Creation:
DefinitionStore::add_definition()- Based on block type, calls appropriate
define_*function - Computes the block’s output value
- Based on block type, calls appropriate
-
Signal Checking:
obtain_signal()- For CONDITION blocks: evaluate conditions, return action if matched
- For RETURN blocks: evaluate conditions, prepare response if matched
- For others: return NONE signal
-
Signal Handling:
- NONE: Move to next block
- BREAK/CONTINUE: Only meaningful in loops
- FAIL/RETURN: Exit route immediately with response
Block Types Overview
Data Source Blocks (Resolvers)
FETCH: Query database collections
- Retrieves records matching filter conditions
- Supports pagination and field selection
- Returns single record or array
BODY: Extract request body fields
- Parses and validates JSON body
- Type-coerces to expected types
- Required fields enforced
PARAM: Extract URL query parameters
- Parses key=value parameters
- Type-coerces values
- Validates against parameter definitions
VAULT: Access project vault secrets
- Retrieves encrypted vault entries by key
- Returns decrypted secret value
- Project-scoped vault access only
Data Transformation Blocks (Convertors)
ASSIGN: Create variables
- Store computed values for reuse
- Simple assignment operations
- Enable data organization
TEMPLATE: Generate strings
- String interpolation with variables
- Reference Definition Store values
- Format strings dynamically
RANDOM: Generate random numbers
- Generates random values within specified bounds
- Supports INTEGER, FLOAT and BOOLEAN data types
- Define min and max values for the range
- Useful for generating unique identifiers, test data, or stochastic operations
FUNCTION: Apply built-in functions
- String operations: uppercase, lowercase, trim, substring, etc.
- Array operations: length, map, filter, etc.
- Math operations: sum, average, min, max, etc.
- Date/time operations: format, parse, etc.
FILTER: Filter arrays
- Keep or remove array elements based on conditions
- Supports complex predicates
- Maintains array order
PROPERTY: Extract object properties
- Access nested object fields
- Navigate through DATA records
- Handle property chains
OBJECT: Construct new objects
- Build JSON objects from values
- Support nested object construction
- Combine multiple data sources
Data Modification Blocks
CREATE: Create new database records
- Insert records into collections
- Return created record with ID
- Support nested creation
UPDATE: Update database records
- Complex update operations
- Conditional updates via expressions
- Field-level modifications
SIMPLE_UPDATE: Update specific fields
- Straightforward field updates
- Simpler than UPDATE block
- Faster for simple changes
Communication Blocks
EMAIL: Send emails using templates
- Send transactional emails and notifications
- Use predefined email templates with variable substitution
- Support for single or multiple recipients
- Synchronous or asynchronous sending
- Conditional email delivery based on route data
- Replace template variables with dynamic values
- Optional custom subject and sender address
Control Flow Blocks (Processors)
CONDITION: Conditional execution
- Evaluate conditions
- Execute action if matched: FAIL (error), BREAK (exit loop), CONTINUE (next iteration)
- Multi-condition support with AND/OR logic
LOOP: Begin iteration
- Iterate over array data
- Support nested loops
- Create loop variable
END_LOOP: Mark loop boundary
- Paired with LOOP block
- Defines loop scope
RETURN: Generate response
- Evaluate conditions
- Build JSON response
- Terminate route execution
How It Works - Step by Step
Stage 1: Request Reception & Routing
GET /api/users/123/posts?limit=10
        ↓
    Parse URL
        ↓
Match /api/ project api_path
        ↓
Extract route: /users/123/posts
        ↓
Match GET method
        ↓
Find RouteComponent
Stage 2: Data Collection & Validation
Query params: {id: "123", limit: "10"}
Body: (JSON parsed and validated)
Auth: (JWT verified if required)
Stage 3: Block Ordering
GlobalBlockOrder creates execution sequence:
  [0] PARAM "id" → INTEGER(123)
  [1] PARAM "limit" → INTEGER(10)
  [2] FETCH "user" → DATA(user record)
  [3] CONDITION (check if user exists)
  [4] FETCH "posts" → ARRAY(posts)
  [5] LOOP "post"
  [6]   ASSIGN "post_formatted"
  [7] END_LOOP
  [8] RETURN response
Stage 4: Execution
For each block in sequence:
  1. Create DefinitionStore entry
  2. Compute output value
  3. Check for signals
  4. Handle signal (NONE=continue, FAIL=error, RETURN=response)
  5. If BREAK/CONTINUE: handle loop control
  6. Move to next block
Stage 5: Response
When block returns RETURN signal:
  - Gather specified data from Definition Store
  - Convert to JSON format
  - Send HTTP 200 response

Otherwise (no RETURN):
  - Send default HTTP 200 with empty body
Data Flow Visualization
REQUEST
  ↓
[Route Resolution]
  → Match project/route/method
  ↓
[Data Collection]
  → Parse params, body, auth
  ↓
[Block Ordering]
  → Create execution sequence
  ↓
[Execution Loop]
  → Fetch "user" → DefinitionStore[0]
  → Condition "user exists?" → Signal
  → Fetch "posts" → DefinitionStore[1]
  → Loop over posts → DefinitionStore[2-N]
  → Return response → Signal::RETURN
  ↓
[Response]
  → HTTP 200 + JSON body
Detailed Execution Pipeline
The X Engine processes API requests through a sophisticated multi-stage execution pipeline:
Stage 1: Request Reception & Routing
When an HTTP request arrives at any endpoint (/x/<path>):
- Handler Dispatch: The request is routed to the appropriate handler function based on HTTP method (GET, POST, PUT, PATCH, DELETE, HEAD, OPTIONS)
- Route Validation: A
CompleteRouteguard validates:- The request path matches a configured project’s
api_path - A route definition exists for that path and HTTP method
- The calling request meets all authentication requirements
- The request path matches a configured project’s
- Path Transformation: The URL path is converted from
/x/{api_path}/{route}to/{route}for processing
Stage 2: Data Collection & Validation
The engine collects and validates all necessary data:
-
Query Parameter Parsing:
- Query string is split by configurable delimiter (default:
&) - Each parameter is parsed as
key=valuepairs - Parameters are stored in
LocalParamDatastructures with key and value fields
- Query string is split by configurable delimiter (default:
-
Body Data Processing:
- Request body stream is read up to 10 megabytes
- Raw body is parsed as JSON into a
Valueobject - String values are recursively parsed to handle double-encoded JSON
- Validation occurs against the route’s defined body schema
-
Data Fetching:
- All projects, routes, configs, collections, data records, and constraints are fetched from the database
- Data records are filtered to the current project to ensure isolation
- This represents the “Definition Store” - the accumulated knowledge about the system
-
Parameter & Body Validation:
- Each query parameter is validated against its defined data type (
bdtype) - Each body field is validated against its schema definition
- Validation uses the
validate_body_data()function which checks type conformance - Returns 400+ error if validation fails
- Each query parameter is validated against its defined data type (
Stage 3: Authentication & Authorization
If the route requires JWT authentication (auth_jwt.active == true):
-
Payload Extraction:
- Searches the body data for the configured authentication field
- Falls back to query parameters if not found in body
- Returns 400 error if payload is missing
-
JWT Verification:
- Calls
verify_jwt_x()which validates:- Token signature and expiration
- Payload value matches the token’s embedded value
- Token is associated with the correct project
- Field value in token matches provided payload
- Returns 401 error if verification fails
- Calls
Stage 4: Block Execution Engine
This is the heart of the X Engine - where visual blocks are executed:
┌─────────────────────────────────────────────────────┐
│ GlobalBlockOrder::process_blocks()                  │
│ (Orders all blocks in execution sequence)           │
└────────────────────┬────────────────────────────────┘
                     │
                     ↓
          ┌──────────────────────┐
          │ Current Index = 0    │
          └──────────┬───────────┘
                     │
                     ↓
        ┌────────────────────────────────┐
        │ Index < Block Count?           │
        └────────────┬────────────────────┘
                   No│
                     │ (Exit loop)
                  Yes│
                     │
                     ↓
    ┌──────────────────────────────────────┐
    │ LoopObject::detect_loops()           │
    │ (Find loops containing current index)│
    └──────────────┬───────────────────────┘
                   │
          ┌────────┴────────┐
          │                 │
         Yes               No
    Has loops?         (Not in loop)
          │                 │
          │                 ↓
          │         ┌─────────────────────┐
          │         │ process_block()     │
          │         │ (Single execution)  │
          │         └────────┬────────────┘
          │                  │
          │         ┌────────v────────┐
          │         │ Signal returned?│
          │         └────────┬────────┘
          │              │   │
          │           RETURN FAIL
          │              │   │
          │              ↓   ↓
          │         (Return response)
          │
          ↓
    ┌─────────────────────────────────┐
    │ LoopObject::process_loop()      │
    │ (Execute all loop iterations)   │
    │ - Max iterations checked        │
    │ - Prevent infinite loops        │
    │ - Skip to end on break/return   │
    └──────────────┬──────────────────┘
                   │
                   ↓
    ┌──────────────────────────────────┐
    │ Current Index = Next block       │
    └──────────────┬───────────────────┘
                   │
                   └──→ (Loop back to index check)
DefinitionStore: Accumulates the results of each block execution:
- Each block’s output is stored with a unique identifier
- Subsequent blocks can reference previous block outputs
- Variables flow through the entire execution pipeline
- State persists across all blocks in a request
Signal Types:
Signal::RETURN(Value): Immediately sends response and exits pipelineSignal::FAIL(status_code, message): Returns error JSON with status codeSignal::CONTINUE: Proceed to next blockSignal::BREAK: Exit current loop (used in loop processors)
Loop Handling:
LoopObject::detect_loops()identifies nested loop structuresMAX_LOOP_ITERATIONSconfig prevents infinite loops (default: 1000)- Each iteration is processed as a complete block execution pass
- Loop variables are updated between iterations
- Variables within loops are scoped to loop iterations
Block Processing Order: Blocks are processed in a specific order determined by GlobalBlockOrder:
- Processor blocks start executing first (If/Else, Try/Catch, etc.)
- Loop blocks execute all their contained blocks before moving forward
- Normal blocks execute in linear sequence
- Nested structures are flattened into execution order
Stage 5: Error Handling
Errors can occur at multiple stages:
- Configuration Errors: Returns 400 (missing api_path, invalid route)
- Validation Errors: Returns 400 (invalid parameters or body data)
- Authentication Errors: Returns 400 or 401 (JWT issues)
- Block Execution Errors: Propagated from blocks via Signal::FAIL
- Database Errors: Returns 500 (data fetch failures)
All errors return JSON format: {"status": <code>, "message": "<error>"}
Stage 6: Response Generation
Final response is determined by:
- Explicit Return: If any block executes a Return processor, that response is sent immediately
- Explicit Fail: If any block executes a Fail processor with error details
- Default Success: If all blocks execute without error:
{"status": 200}
All responses are JSON Value objects sent to the client.
Block Connections
Blocks in the X Engine are connected through a visual interface that represents the flow of data and execution:
- Inputs: Each block can accept inputs from:
- Other block outputs (by reference to DefinitionStore)
- Query parameters (via
LocalParamData) - Body data (via JSON
Valuepaths) - Configuration values (via resolver access)
- Outputs: Blocks produce outputs that are stored in DefinitionStore:
- Can be referenced by subsequent blocks
- Can be included in final response
- Can be used as inputs to loop processors
- Conditions: Control blocks (like If/Else) can have multiple output paths:
- True branch executes one set of blocks
- False branch executes alternative blocks
- Rejoins into the main execution flow
- Variables: Named references allow data to flow between different parts:
- Block outputs are referenced by name
- Variables can be transformed by Convertors
- Variables persist through entire request lifecycle
Advanced Features
The X Engine includes several advanced features for complex API development:
Nested Loops & Conditionals
The engine supports complex control flow:
- Nested Loops: Loops within loops with proper variable scoping
Each nesting level has its own scope, and variables are properly isolated.LOOP user in users: LOOP post in user.posts: TEMPLATE "User {user.name} - Post {post.title}" - Conditionals in Loops: Make decisions within loop iterations
- Loop Break: Exit early from loops using Break processor
- Loop Variables: Access current iteration data and index
Type System & Coercion
The unified type system enables flexible data handling:
- String
"123"↔ Integer123 - Boolean
true↔ Integer1↔ Float1.0 - Array
[1]compared with Integer1 - String
"true"→ Booleantrue
Error Handling
Errors propagate through the pipeline:
- Input Validation Errors (400): Invalid parameters or body
- Authentication Errors (401): Invalid JWT token
- Not Found Errors (404): Route or resource not found
- Condition FAIL Signals: Block explicitly fails with status/message
- Server Errors (500): Database failures, loop limits exceeded
All errors return JSON format:
{ "status": 400, "message": "Error description" }
Authentication Integration
The X Engine seamlessly integrates with Kinesis API’s authentication system:
- Role-based Access: Control which users can access specific routes
- JWT Validation: Automatically validate authentication tokens
- Permission Checking: Enforce granular permissions within routes
- JWT Fields: Custom field mapping for payload extraction
Custom Functions
Extend the X Engine with custom functions:
- Reusable Logic: Create custom blocks for frequently used operations
- Library Integration: Wrap third-party libraries in custom blocks
- Complex Algorithms: Implement specialized business logic as reusable components
Middleware Support
Apply consistent processing across multiple routes:
- Pre-processing: Validate requests before main processing
- Post-processing: Format responses consistently
- Error Handling: Implement global error management
Versioning
Manage API changes over time:
- Route Versioning: Maintain multiple versions of the same endpoint
- Migration Paths: Provide smooth transitions between versions
- Deprecation Management: Gracefully phase out older endpoints
Configuration
The X Engine uses database configuration for tuning:
- MAX_LOOP_ITERATIONS (default: 1000): Maximum loop repetitions to prevent infinite loops
- Other config values retrievable via resolver access during block execution
Best Practices
Design
- Clear Block Names: Use descriptive names for easy tracking
- Logical Organization: Group related blocks together
- Minimal Nesting: Keep loop depth shallow
- Reusable Variables: Store frequently used values in ASSIGN blocks
Performance Optimization
- Minimize Queries: Combine FETCH filters to reduce database calls
- Filter Before Loop: Use FILTER block before LOOP when possible
- Selective Fields: Only fetch needed fields from database
- Monitor Loop Iterations: Ensure loops don’t exceed 1000 iterations
- Process only the data you need using selective field retrieval
- Limit loop iterations to necessary data to stay under MAX_LOOP_ITERATIONS
Security
- Input Validation: Always validate parameters and body (enforced automatically)
- Authentication: Use JWT for sensitive endpoints
- Data Isolation: Routes automatically filtered by project_id
- Prepared Queries: Database queries use parameterized statements
- Avoid exposing sensitive data in responses
- Filter data by project_id to maintain multi-tenant isolation
Maintainability
- Name blocks clearly to document their purpose
- Group related functionality into logical sections
- Comment complex logic for future reference
- Use consistent patterns across similar routes
- Keep block output names descriptive for downstream references
Debugging
- Test Edge Cases: Empty arrays, null values, type mismatches
- Validate Response Format: Ensure RETURN block produces expected JSON
- Check Loop Counts: Verify loop iterations match expectations
- Trace Variable References: Ensure variables are defined before use
- Test with realistic data volumes
- Verify loop iteration limits don’t block legitimate use cases
Visual Editor Integration
The X Engine integrates with Kinesis API’s visual editor:
- Drag-and-drop block arrangement
- Real-time validation of configurations
- Visual debugger showing execution flow
- Testing tools for direct route testing
- Version history tracking changes
The editor abstracts the complex systems described here, allowing non-programmers to create powerful APIs.
Related Documentation
- Routes - Creating and configuring routes
- Block Reference - Detailed block specifications
- API Reference - API endpoints reference
- Playground - Interactive testing environment
Conclusion
The X Engine represents a paradigm shift in API development, combining the power and flexibility of traditional programming with the accessibility and speed of visual development. By abstracting complex implementation details while maintaining full capability, it enables developers of all skill levels to create professional-grade APIs in a fraction of the time typically required.
The execution pipeline—from request reception through routing, validation, authentication, block execution, and response generation—provides a robust foundation for building complex, maintainable APIs. The DefinitionStore pattern ensures data flows cleanly between blocks, while signal-based control flow provides elegant handling of returns, errors, and loop control.
Whether you’re prototyping a simple API or building complex, interconnected systems, the X Engine provides the tools to accelerate development without sacrificing quality or control.
API Reference
The Kinesis API provides a comprehensive set of RESTful endpoints that allow you to interact with all aspects of the platform programmatically. This reference documentation will help you understand how to authenticate, make requests, and interpret responses when working with the API.
Accessing the API Documentation
Kinesis API includes interactive OpenAPI documentation that allows you to:
- Browse all available endpoints
- View request and response schemas
- Test API calls directly from your browser
- Understand authentication requirements
You can access this documentation at:
- Local installation:
http://your-server-address/scalar - Official instance: https://api.kinesis.world/scalar
Authentication
Most API endpoints require authentication using one of the following methods:
Personal Access Tokens (PAT)
The recommended method for programmatic access is using Personal Access Tokens:
- Generate a token in the web interface under Personal Access Tokens or PATs
- Include the token in your requests using the
Authorizationheader:
Authorization: Bearer your-token-here
Session-based Authentication
For web applications, you can use session-based authentication:
- Call the
/user/loginendpoint with valid credentials - Store the returned token
- Include the token in subsequent requests
Common Request Patterns
Standard Request Format
Most endpoints follow this pattern:
- GET endpoints accept query parameters
- DELETE endpoints accept query parameters
- POST endpoints accept JSON data in the request body
- PATCH endpoints accept JSON data in the request body
- All endpoints return JSON responses
Request Example
POST /user/login HTTP/1.1
Host: api.kinesis.world
Content-Type: application/json

{
  "auth_data": "john_doe",
  "password": "Test123*"
}
Response Example
{
  "status": 200,
  "message": "Login Successful!",
  "user": {
    "id": 1,
    "first_name": "John",
    "last_name": "Doe",
    "username": "john_doe",
    "email": "[email protected]",
    "password": "",
    "role": "VIEWER",
    "reset_token": "",
    "bio": "",
    "profile_picture": "",
    "is_public": false,
    "links": []
  },
  "uid": 1,
  "jwt": "eyJhbGciOiJIUzI1NiJ9.eyJzdWIiOiIxIiwiZXhwIjoxNjcyNTI2NDAwfQ.example_token"
}
Response Structure
All API responses follow a consistent structure:
{
  "status": 200,
  "message": "Operation successful",
  "data": {
    // Optional: Operation-specific data
  }
}
Status Codes
The API uses standard HTTP status codes:
- 2xx: Success
- 200: OK
- 201: Created
- 204: No Content
- 4xx: Client errors
- 400: Bad Request
- 401: Unauthorized
- 403: Forbidden
- 404: Not Found
- 422: Unprocessable Entity
- 5xx: Server errors
- 500: Internal Server Error
Error Handling
Error responses follow the same structure and include error details in the message field itself:
{
  "status": 400,
  "message": "Error: Invalid input data"
}
Pagination
For endpoints that return collections of items, pagination is supported:
- Use
offsetandlimitquery parameters to control pagination - Responses include
amountfor the total amount of items
Example:
GET /config/fetch/all?uid=0&offset=2&limit=10
Using the API with the X Engine
The X Engine’s visual API builder generates endpoints that follow the same patterns and conventions as the core Kinesis API. When you publish a route in the X Engine, it becomes available as a standard RESTful endpoint that can be accessed using the same authentication mechanisms.
Related Documentation
- Routes - More information on route management
- Personal Access Tokens - Detailed guide on token management
Demo
Kinesis API offers a live demo instance where you can explore the platform’s features without setting up your own installation. This allows you to get hands-on experience with the system and follow along with our tutorials using a ready-to-use environment.
Demo Instance
The demo instance is available at:
https://demo.kinesis.world/web/
Important Notice
⚠️ Data Erasure Warning: All data on the demo instance is automatically erased at regular intervals (typically every 24 hours at midnight UTC+4). Do not use the demo instance for storing any important information or for production purposes.
Default Credentials
You can access the demo instance using the following default credentials:
| Role | Username | Password |
|---|---|---|
| Root | root | Test123* |
What You Can Try
The demo instance is fully functional and provides access to all features of Kinesis API. Here are some activities you can explore:
- Create and manage API routes using the X Engine
- Define data structures and collections
- Test API endpoints using the built-in playground
- Upload and manage media files
- Configure user settings and preferences
Following Tutorials
All tutorials in our documentation can be followed using the demo instance. When a tutorial refers to “your Kinesis API installation,” you can use the demo instance instead.
Limitations
The demo instance has some limitations you should be aware of:
- Some security settings (such as CORS policies) aren’t properly configured, as the instance is intended for demonstration purposes only
- Email functionality is disabled, preventing features like user registration and password reset from working completely
- Media uploads are restricted to a maximum of 20MB per file to preserve server resources
- The database may experience occasional performance throttling during periods of high user activity
Next Steps
Once you’ve explored the demo and are ready to set up your own instance:
- Follow the Installation Guide to install Kinesis API on your system
- Complete the Initialization process to set up your instance with default values
- Configure your new installation using the Setup Guide to customize it for your specific needs
Feedback
We welcome feedback on your experience with the demo instance. If you encounter any issues or have suggestions for improvements, please contact us through the contact page or by emailing [email protected]. We also encourage you to create a new ticket in the issue tracker.
Getting Started with Kinesis API
Welcome to the Getting Started guide for Kinesis API. This section will walk you through the process of installing, initializing, and setting up your first Kinesis API instance.
Prefer video tutorials? You can follow along with our YouTube walkthrough of this same project.
What You’ll Learn
In this section, you’ll learn how to:
- Install Kinesis API using Docker or Rust
- Initialize your installation with default settings
- Secure your instance with proper credentials
- Understand the key components created during initialization
- Configure your system for production use
Quick Start Overview
Getting Kinesis API up and running involves two main steps:
- Installation: Set up the Kinesis API software on your system
- Initialization: Configure the system with initial data and settings
If you’re eager to start right away, follow these quick steps:
# Create necessary directories
mkdir -p data/ public/ translations/

# Create configuration file
echo "TMP_PASSWORD=yourSecurePassword" > .env
echo "API_URL=http://your-domain-or-ip:8080" >> .env

# Run the Docker container
docker run --name kinesis-api \
  -v $(pwd)/.env:/app/.env \
  -v $(pwd)/data:/app/data \
  -v $(pwd)/public:/app/public \
  -v $(pwd)/translations:/app/translations \
  -p 8080:8080 -d \
  --restart unless-stopped \
  edgeking8100/kinesis-api:latest

# Initialize the system
curl "http://your-domain-or-ip:8080/init?code=code"
Then access the web interface at http://your-domain-or-ip:8080/web and log in with:
- Username:
root - Password:
Test123*
Remember to change the default password immediately!
Detailed Guides
For more detailed instructions, refer to these guides:
- Installation Guide - Comprehensive instructions for setting up Kinesis API
- Initialization Guide - Detailed steps for initializing your installation
System Requirements
Before you begin, ensure your system meets these minimum requirements:
- Memory: 128MB RAM minimum (512MB+ recommended for production)
- CPU: 1 core minimum (2+ cores recommended)
- Storage: 100MB for installation + additional space for your data
- Operating System: Any OS that can run Docker or Rust
- Network: Outbound internet access for installation
Next Steps After Installation
Once you’ve completed the installation and initialization process, you’ll want to:
Let’s get started with the Installation Guide.
Installation
This guide covers how to install and set up Kinesis API on your system. We offer two installation methods: Docker (recommended for most users) and direct Rust installation (useful for developers contributing to the project).
System Requirements
Before installing Kinesis API, ensure your system meets these minimum requirements:
- Memory: 128MB RAM minimum (512MB+ recommended for production use)
- CPU: 1 core minimum (2+ cores recommended for production)
- Storage: 100MB for installation + additional space for your data
- Operating System: Any OS that can run Docker or Rust (Linux, macOS, Windows)
- Network: Outbound internet access for installation
Configuration Options
Before installing Kinesis API, you should decide on your configuration settings. These can be set through environment variables.
Essential Environment Variables
| Variable | Description | Example |
|---|---|---|
TMP_PASSWORD | Temporary password for setup | StrongPassword123! |
API_URL | URL where Kinesis API will be accessed | http://localhost:8080 |
Database Configuration
You can configure the database system through additional environment variables:
| Variable | Description | Possible Values | Default |
|---|---|---|---|
DB_NAME | Database filename (for Kinesis DB) | Any valid filename | main_db |
DB_STORAGE_ENGINE | Storage engine type (for Kinesis DB) | memory, disk, hybrid | hybrid |
DB_ISOLATION_LEVEL | Transaction isolation level (for Kinesis DB) | read_uncommitted, read_committed, repeatable_read, serializable | serializable |
DB_BUFFER_POOL_SIZE | Buffer pool size (for Kinesis DB) | Any positive integer | 100 |
DB_AUTO_COMPACT | Automatic compaction (for Kinesis DB) | true, false | true |
DB_RESTORE_POLICY | Recovery policy (for Kinesis DB) | discard, recover_pending, recover_all | recover_pending |
DB_BACKEND | Database backend to use | kinesis_db, kinesisdb, sqlite, mysql, postgresql, postgres, pgsql | kinesis_db |
DATABASE_URL | Database connection string or file path | File path for SQLite, connection URI for MySQL/PostgreSQL | data/db.sqlite (for SQLite) |
Database Backend Options
-
Kinesis DB (default): Custom-built database optimized for Kinesis API
- Set
DB_BACKEND=kinesis_dborDB_BACKEND=kinesisdb(or leave unset) - Uses the
DB_NAME,DB_STORAGE_ENGINE, and other Kinesis DB-specific variables
- Set
-
SQLite: Embedded database, no separate server required
- Set
DB_BACKEND=sqlite - Optionally set
DATABASE_URLto specify the.sqlitefile path (default:data/db.sqlite)
- Set
-
MySQL: Popular open-source relational database
- Set
DB_BACKEND=mysql - Required: Set
DATABASE_URLto the MySQL connection URI - Example:
DATABASE_URL=mysql://username:password@localhost:3306/database_name
- Set
-
PostgreSQL: Advanced open-source relational database
- Set
DB_BACKEND=postgresql(orpostgresorpgsql) - Required: Set
DATABASE_URLto the PostgreSQL connection URI - Example:
DATABASE_URL=postgresql://username:password@localhost:5432/database_name
- Set
Important: Changing database-related environment variables after your initial setup may cause data access issues or corruption. It’s best to decide on these settings before your first initialization and maintain them throughout the lifecycle of your installation.
Docker Installation (Recommended)
Using Docker is the simplest and most reliable way to deploy Kinesis API.
Prerequisites
- Install Docker on your system
- Ensure you have permissions to create and manage Docker containers
Installation Steps
- Create necessary directories for persistent storage:
mkdir -p data/ public/ translations/
- Create a
.envfile with your configuration:
echo "TMP_PASSWORD=yourSecurePassword" > .env
echo "API_URL=http://your-domain-or-ip:8080" >> .env
Replace yourSecurePassword with a strong password and your-domain-or-ip with your server’s domain or IP address.
-
Add any additional configuration options from the Configuration Options section above to your
.envfile. -
Run the Docker container:
docker run --name kinesis-api \
  -v $(pwd)/.env:/app/.env \
  -v $(pwd)/data:/app/data \
  -v $(pwd)/public:/app/public \
  -v $(pwd)/translations:/app/translations \
  -p 8080:8080 -d \
  --restart unless-stopped \
  edgeking8100/kinesis-api:latest
This command:
- Names the container
kinesis-api - Mounts your local
.envfile and data/public/translations directories - Exposes port 8080
- Runs in detached mode (
-d) - Configures automatic restart
- Uses the latest Kinesis API image
Using a Specific Version
If you need a specific version of Kinesis API, replace latest with a version number:
docker run --name kinesis-api \
  -v $(pwd)/.env:/app/.env \
  -v $(pwd)/data:/app/data \
  -v $(pwd)/public:/app/public \
  -v $(pwd)/translations:/app/translations \
  -p 8080:8080 -d \
  --restart unless-stopped \
  edgeking8100/kinesis-api:0.26.0
Available Registries
Kinesis API images are available from multiple registries:
| Registry | Image |
|---|---|
| Docker Hub | docker.io/edgeking8100/kinesis-api:latest |
| Docker Hub | docker.io/edgeking8100/kinesis-api:<version> |
| Gitea Registry | gitea.konnect.dev/rust/kinesis-api:latest |
| Gitea Registry | gitea.konnect.dev/rust/kinesis-api:<version> |
Rust Installation (For Development)
If you’re a developer who wants to build from source or contribute to Kinesis API, you can install using Rust.
Prerequisites
- Install Rust (version 1.86 or newer)
- Install development tools for your platform:
- Linux:
build-essentialpackage or equivalent - macOS: Xcode Command Line Tools
- Windows: Microsoft Visual C++ Build Tools
- Linux:
Installation Steps
- Clone the repository:
git clone https://gitea.konnect.dev/rust/kinesis-api.git
cd kinesis-api/
- Create and configure the environment file:
cp .env.template .env
-
Edit the
.envfile to set at minimum:TMP_PASSWORDwith a secure valueAPI_URLwith your server address (e.g., “http://localhost:8080”)
-
Build and run the application:
cargo run --bin kinesis-api
For a production build:
cargo build --release --bin kinesis-api
./target/release/kinesis-api
Post-Installation Steps
After installation, you need to initialize Kinesis API:
-
Access the initialization endpoint:
- Make a GET request to
<your-api-url>/init?code=code, or - Navigate to the web interface at
<your-api-url>/web
- Make a GET request to
-
This creates a root user with:
- Username:
root - Password:
Test123*
- Username:
-
Important: Change the default password immediately after first login
For more details on initialization, see the Initialization Guide.
Verifying the Installation
To confirm Kinesis API is running correctly:
- Open your browser and navigate to
<your-api-url>/web - You should see the Kinesis API login page
- Try logging in with the default credentials
- Check that you can access the API documentation at
<your-api-url>/scalar
Troubleshooting
Common Issues
-
Container won’t start:
- Check Docker logs:
docker logs kinesis-api - Ensure ports aren’t already in use
- Verify directory permissions
- Check Docker logs:
-
Can’t access the web interface:
- Confirm the container is running:
docker ps - Check your firewall settings
- Verify the URL and port configuration
- Confirm the container is running:
-
Database connection errors:
- Check the data directory permissions
- Verify your DB configuration variables
Getting Help
If you encounter issues not covered here:
- Check our FAQ page
- Contact support at [email protected]
- Submit a detailed bug report through our issue tracker
Next Steps
After installation, proceed to:
Initialization
After installing Kinesis API, you need to initialize the system before you can start using it. This one-time process creates the necessary database structures, default user, and configuration settings.
Initialization Methods
You can initialize Kinesis API using one of two methods:
Method 1: Using the Web Interface (Recommended)
-
Open your web browser and navigate to your Kinesis API installation:
http://your-domain-or-ip:8080/web -
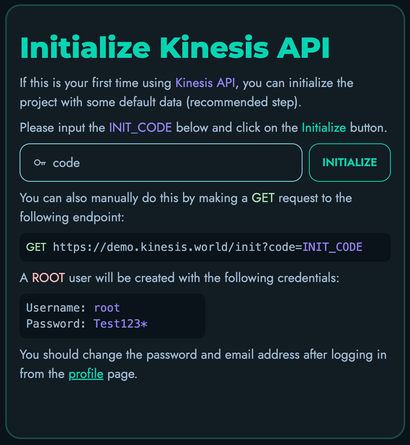
You’ll be presented with an initialization screen if the system hasn’t been set up yet.
-
Click the “Initialize” button to begin the process.
-
The system will create the necessary database structures and a default root user.
-
Once initialization is complete, you’ll be redirected to the login page.
Method 2: Using a REST API Request
If you prefer to initialize the system programmatically or via command line, you can use a REST API request:
curl "http://your-domain-or-ip:8080/init?code=code"
Or using any HTTP client like wget:
wget -qO - "http://your-domain-or-ip:8080/init?code=code"
A successful initialization will return a JSON response indicating that the system has been set up.
Default Root User
After initialization, a default root user is created with the following credentials:
- Username:
root - Password:
Test123*
⚠️ IMPORTANT SECURITY NOTICE: You should change the default password immediately after your first login to prevent unauthorized access to your system.
What Gets Initialized
During initialization, Kinesis API sets up:
- Database tables and their structures
- Encryption key for securing sensitive data
- System constraints for data validation
- Default root user account
- Core configuration settings
- Initial projects structure
- Collection templates
- Media storage system
These components form the foundation of your Kinesis API installation, creating the necessary structure for you to start building your APIs.
Verifying Initialization
To verify that your system has been properly initialized:
- Try logging in with the default credentials.
- Check that you can access the dashboard.
- Navigate to the Users section to confirm the root user exists.
- Ensure the API documentation is accessible at
/scalar.
Reinitializing the System
In most cases, you should never need to reinitialize your system after the initial setup. Reinitializing will erase all data and reset the system to its default state.
If you absolutely must reinitialize (for example, during development or testing):
-
Stop the Kinesis API service:
docker stop kinesis-api -
Remove the data directory:
rm -rf data/ -
Create a fresh data directory:
mkdir -p data/ -
Restart the service:
docker start kinesis-api -
Follow the initialization steps again.
Next Steps
After successfully initializing your Kinesis API instance:
Setup
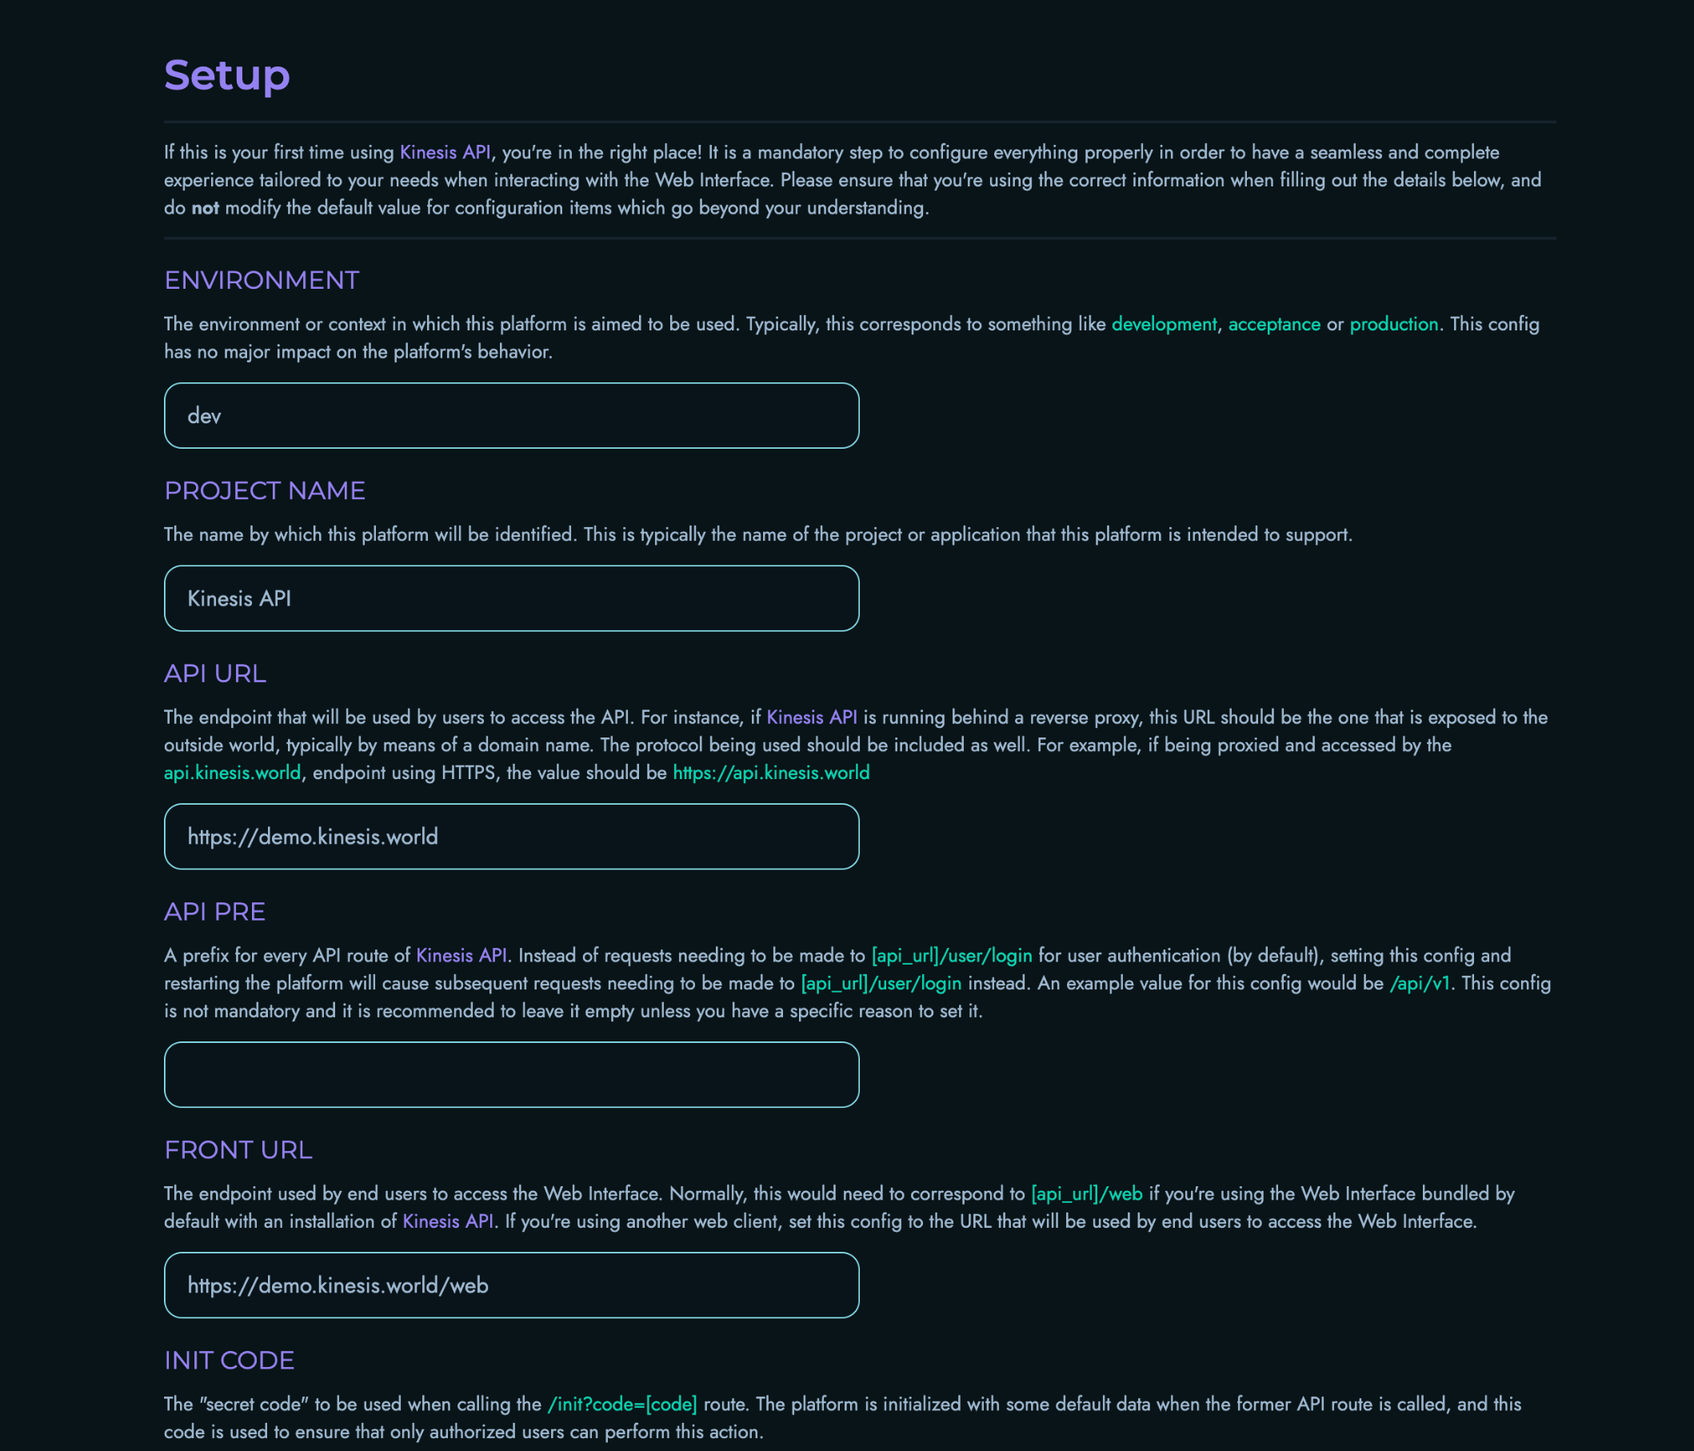
After initializing your Kinesis API instance and logging in for the first time, you will be presented with a setup screen where you can configure various system settings. This page explains each configuration option to help you make informed decisions.
The Setup Process
The setup process is a one-time configuration wizard that appears after the first login with your root account. It allows you to customize essential system settings before you start using Kinesis API.
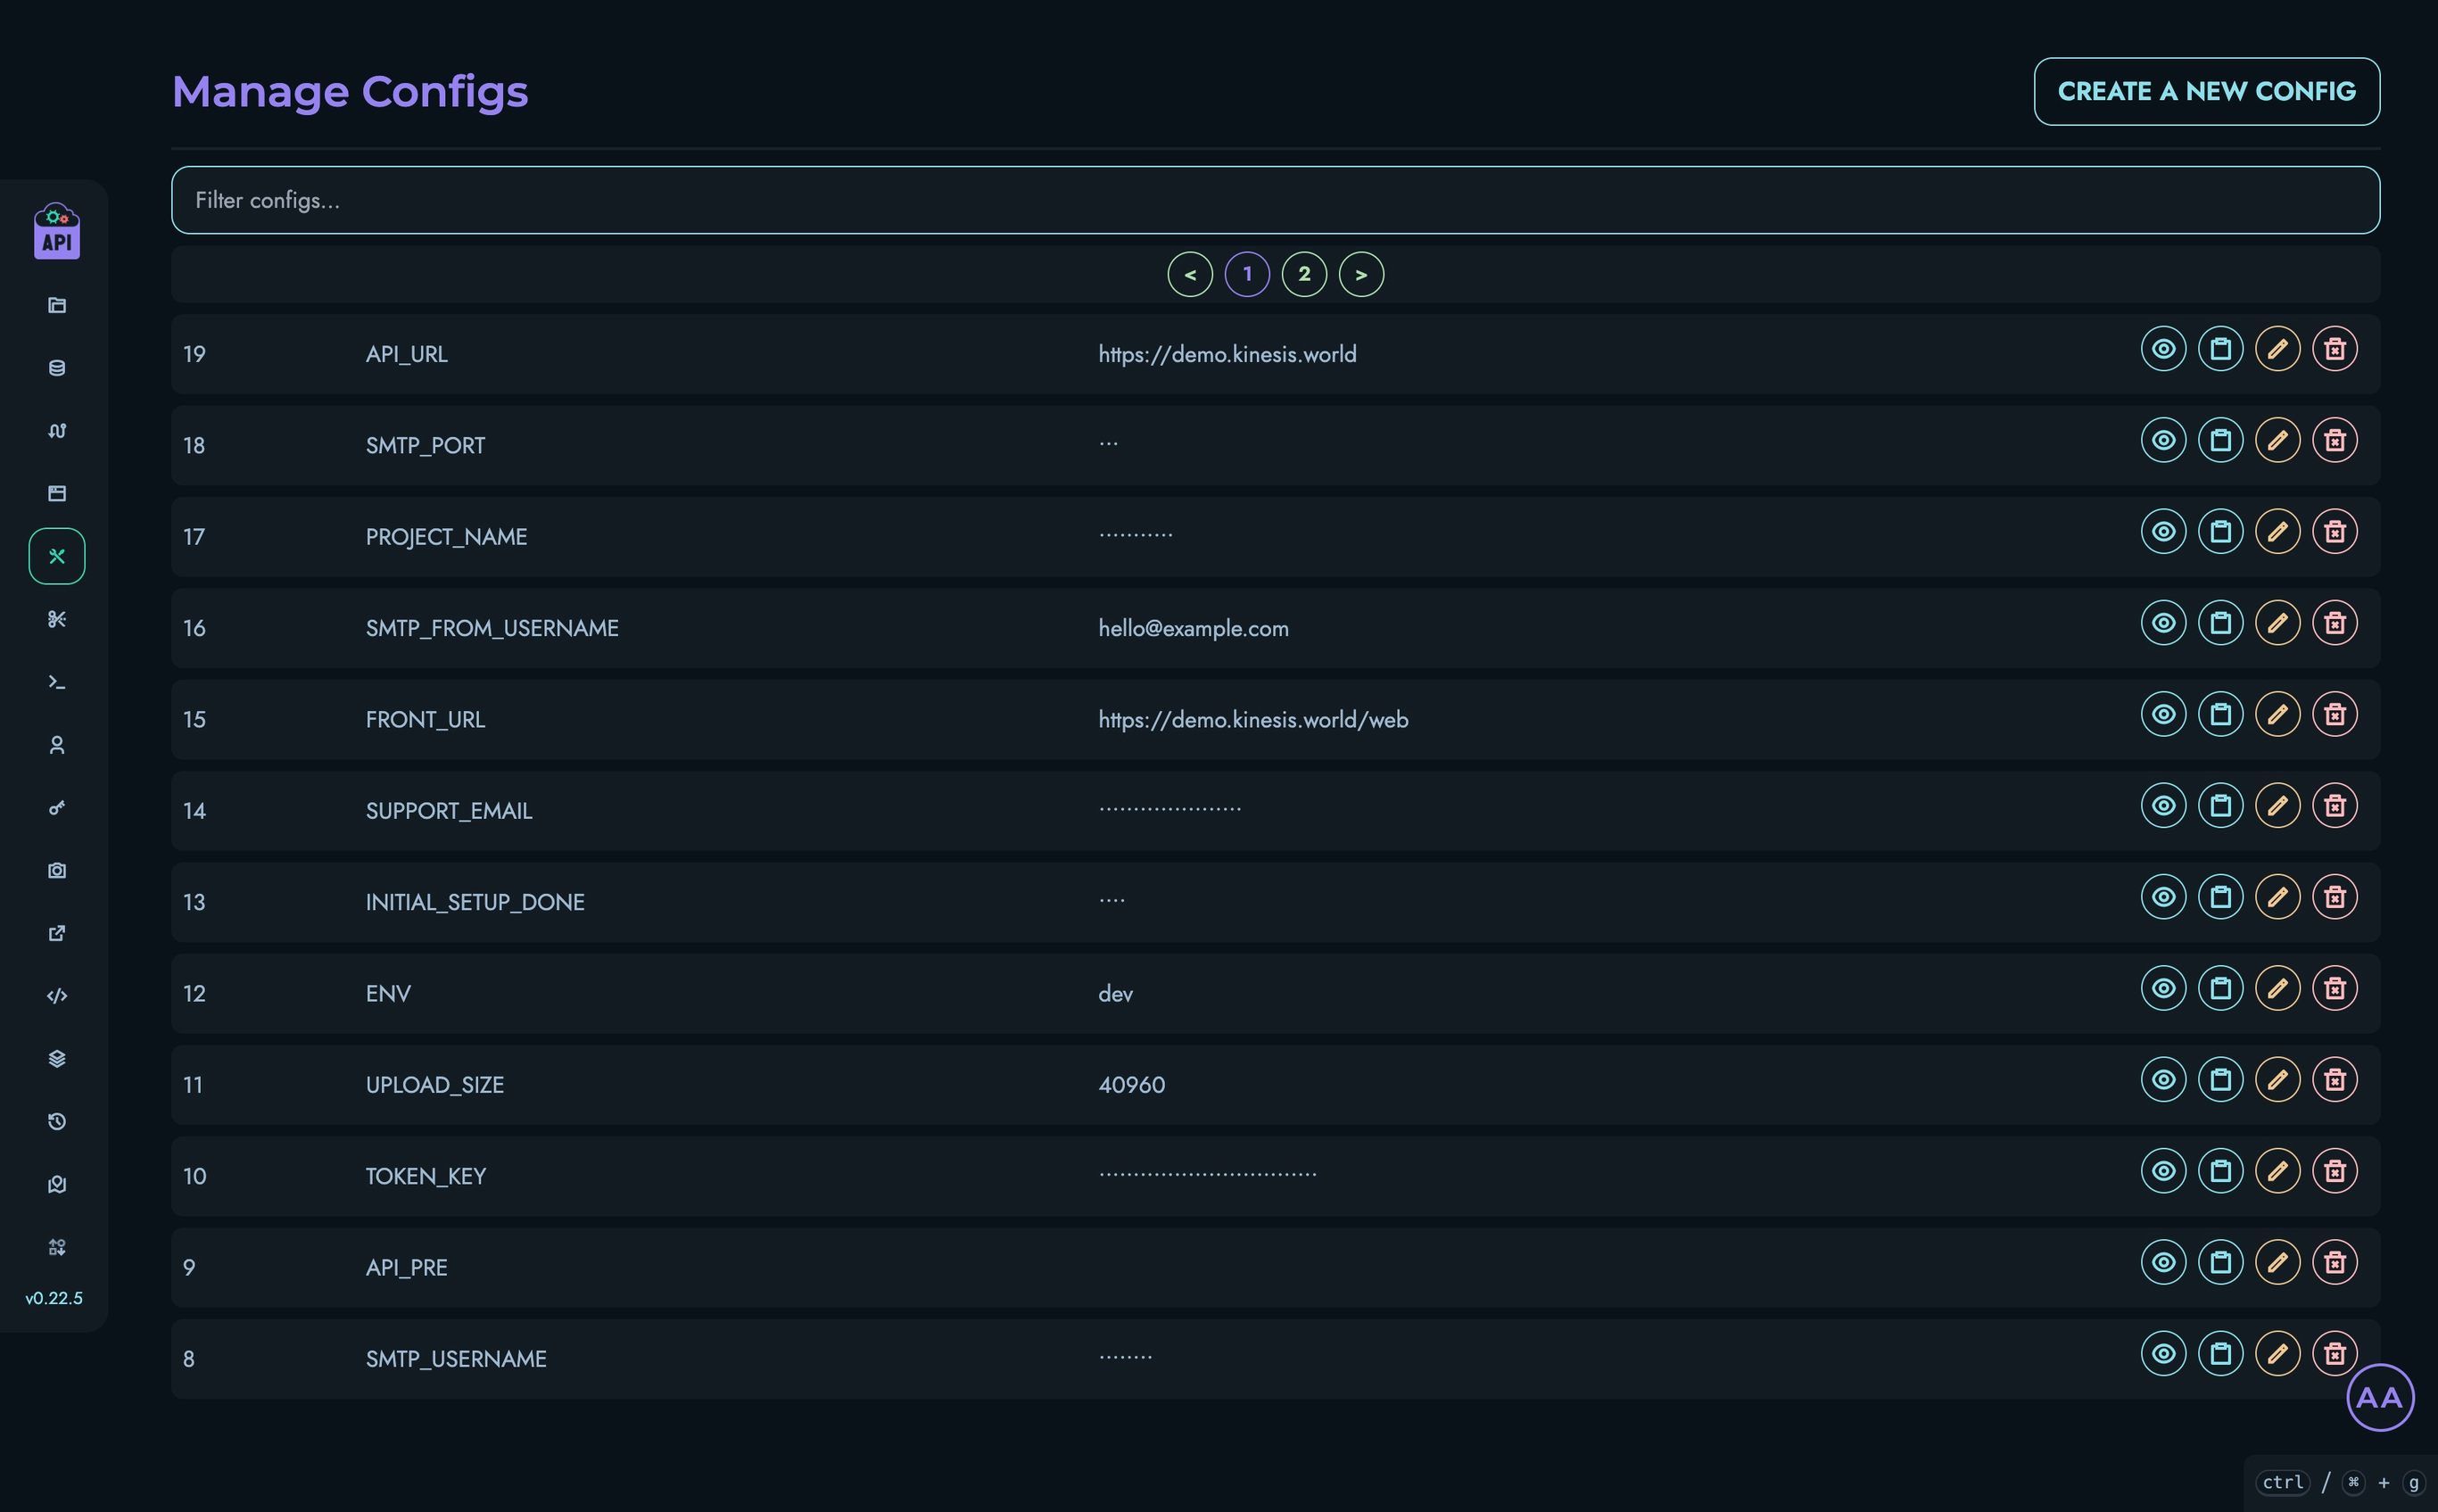
Note: All settings configured during this initial setup can be modified later from the Configs page accessible at
/web/configs. If you’re unsure about any setting, it’s generally safer to keep the default value.
Configuration Options
Environment
Default value: dev
The environment context in which this platform is being used. Typically corresponds to development stages such as:
dev(Development)staging(Staging/Testing)prod(Production)
This setting has minimal impact on system behavior but helps to identify the instance’s purpose.
Project Name
Default value: Kinesis API
The name by which this platform will be identified. This appears in the user interface, email templates, and other user-facing areas. You can customize this to match your organization or project name.
API URL
Default value: Detected from your installation
The base URL where your API endpoints are accessible. This should include the protocol (http/https) and domain name or IP address.
Example: https://api.example.com
If your Kinesis API instance is running behind a reverse proxy, this should be the publicly accessible URL, not the internal address.
API Prefix (API PRE)
Default value: Empty
An optional prefix for all API routes. When set, all API endpoints will be prefixed with this value.
Example: Setting this to /api/v1 would change endpoint paths from:
/user/loginto/api/v1/user/login
Leave this empty unless you have a specific need for URL path prefixing, such as API versioning or integration with other systems.
Front URL
Default value: [API_URL]/web
The URL where users will access the web interface. If you’re using the default web interface, this should be your API URL followed by /web.
Example: https://api.example.com/web
If you’re using a custom frontend or have deployed the web interface separately, specify its URL here.
Init Code
Default value: code
The security code required when calling the /init endpoint to initialize the system. Changing this provides a small layer of security against unauthorized initialization.
Recommendation: Change this from the default value to something unique, especially in production environments.
JWT Expire
Default value: 3600 (1 hour)
The lifetime of JWT authentication tokens in seconds. After this period, users will need to log in again.
Common values:
3600(1 hour)86400(24 hours)604800(1 week)
Shorter times enhance security but require more frequent logins. Longer times improve user convenience but may increase security risks if tokens are compromised.
Upload Size
Default value: 2048 (2 MB)
The maximum allowed size for file uploads in kilobytes. Adjust based on your expected usage and server capacity.
Examples:
1024(1 MB)5120(5 MB)10240(10 MB)
Setting this too high could lead to server resource issues if users upload very large files.
CORS Whitelist
Default value: Empty
A comma-separated list of domains that are allowed to make cross-origin requests to your API.
Examples:
example.com,api.example.com(Allow specific domains)*(Allow all domains - not recommended for production)
For security reasons, only whitelist domains that legitimately need to access your API.
SMTP Settings
These settings configure the email sending capabilities of Kinesis API, which are required for features like user registration and password reset.
SMTP Username
Default value: Empty
The username for authenticating with your SMTP server. This is typically your email address.
Example: [email protected]
SMTP From Username
Default value: Same as SMTP Username
The email address that will appear in the “From” field of emails sent by the system. If left empty, the SMTP Username will be used.
Example: [email protected]
SMTP Password
Default value: Empty
The password for authenticating with your SMTP server.
SMTP Host
Default value: Empty
The hostname or IP address of your SMTP server.
Examples:
smtp.gmail.com(for Gmail)smtp.office365.com(for Office 365)smtp.mailgun.org(for Mailgun)
SMTP Port
Default value: 587
The port number used to connect to your SMTP server.
Common values:
25(Standard SMTP - often blocked by ISPs)465(SMTP over SSL)587(SMTP with STARTTLS - recommended)
SMTP Login Mechanism
Default value: PLAIN
The authentication mechanism used when connecting to the SMTP server.
Options:
PLAIN(Standard plain text authentication)LOGIN(Alternative plain text authentication)XOAUTH2(OAuth 2.0-based authentication)
Most SMTP servers use PLAIN authentication. Only change this if your email provider specifically requires a different mechanism.
SMTP StartTLS
Default value: true (Checked)
Whether to use STARTTLS when connecting to the SMTP server. This upgrades an insecure connection to a secure one.
Most modern SMTP servers require this to be enabled for security reasons.
Testing SMTP Settings
Before completing the setup, you can test your SMTP configuration by clicking the “Check SMTP Credentials” button. This will attempt to connect to your SMTP server and verify that your credentials are correct.
Completing Setup
After configuring all settings, review your choices carefully before clicking “Complete Setup”. The system will save your configuration and redirect you to the login page.
Important: It’s recommended to restart your Kinesis API instance after completing the setup to ensure all settings take effect properly.
Skipping Setup
While it’s possible to skip the setup process, this is not recommended as it may leave your system with incomplete or incorrect configuration. Only skip setup if you’re an advanced user who plans to configure the system manually.
Modifying Settings Later
All settings configured during initial setup can be modified later from the Configs page at /web/configs. This allows you to make adjustments as your needs change without having to reinstall the system.
Changing the Default Password
To change the default password:
- Log in to the web interface using the default credentials.
- Navigate to User Settings (click on your username in the bottom-right corner then “Edit profile”).

- Select “Change Password”.
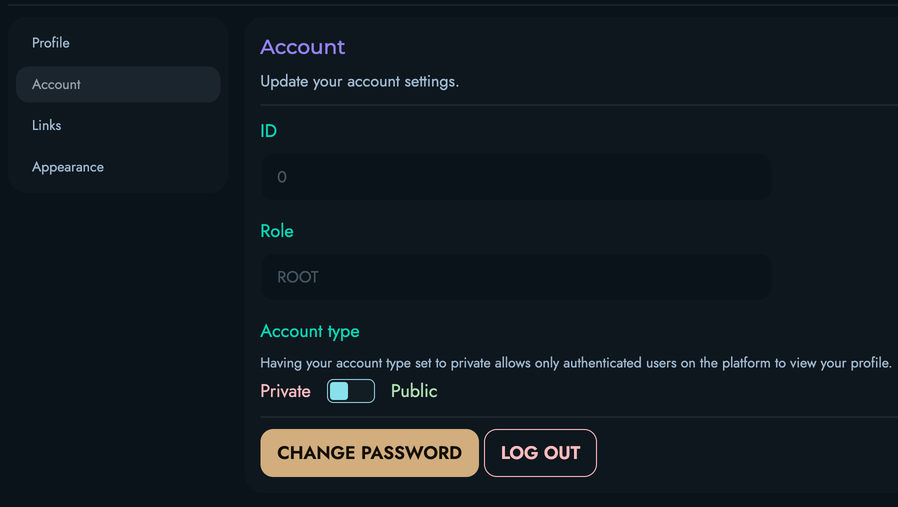
- Enter your new secure password twice.
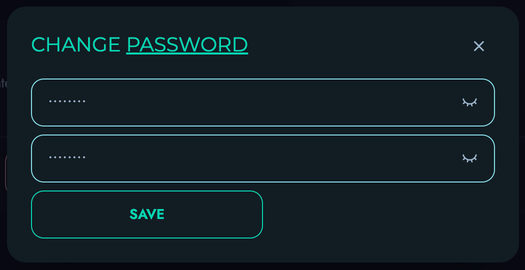
- Click “Save” to confirm updating the password.
Next Steps
After completing the setup, you’ll be ready to start using Kinesis API. Consider exploring these areas next:
- Building a Simple Counter App
- Managing users and permissions
- Configuring projects
- Setting up collections and structures
Licenses
Kinesis API uses a license-based model to provide you with access to its features and capabilities. Whether you’re self-hosting or using our managed platform, all deployments require a valid license to operate beyond the free Community tier.
What is a License?
A license in Kinesis API is a digital authorization that:
- Grants Access: Enables you to use Kinesis API and its features according to your selected plan
- Defines Limits: Specifies the number of instances you can run and users you can have
- Controls Features: Determines which capabilities and components are available to you
- Ensures Compliance: Validates that your usage aligns with your subscription level
Why Licenses Matter
The licensing system serves several important purposes:
For Users
- Predictable Costs: Know exactly what you’re paying for with clear pricing tiers
- Scalability: Easily upgrade or downgrade as your needs change
- Feature Access: Get the features you need without paying for what you don’t
- Support Levels: Higher tiers include better support and SLAs
For the Platform
- Sustainable Development: License fees support ongoing development and improvements
- Resource Management: Helps manage server resources on managed platforms
- Quality Assurance: Ensures users receive proper support and maintenance
License Types
Kinesis API offers several license tiers to match different use cases:
Community (Free)
Perfect for learning, personal projects, and small applications:
- Self-hosting only
- Basic features with limited API routes
- Community support through forums
- No cost, ideal for getting started
Essential ($99/month)
For growing applications and small teams:
- Self-hosting or managed platform
- Unlimited API routes with 5M monthly requests
- Email support with 48-hour response time
- Standard feature set including webhooks
Professional ($499/month)
For professional teams and larger applications:
- All Essential features
- 25M monthly requests
- Advanced features including SSO
- Priority support with 12-hour response time
Enterprise ($50/user/month)
For large organizations with specific needs:
- Unlimited everything
- Custom block development
- Dedicated support representative with SLA
- On-premise deployment assistance
How Licensing Works
License Activation Flow
- Purchase: Select a plan and complete payment through the License Server
- Receive Key: Get a unique license key for your purchase
- Activate: Enter the license key in your Kinesis API instance
- Validation: The system validates your license with the License Server
- Feature Access: Your instance unlocks features based on your plan
License Components
A complete license consists of:
- License Key: A unique identifier for your purchase
- Activation: The connection between your license and specific instance(s)
- Plan: The tier of service you’ve purchased
- Features: The capabilities included in your plan
Self-Hosted vs. Managed
The licensing model works differently depending on your deployment:
Self-Hosted Deployments
- Database and media storage limits don’t apply
- Use as much as your hardware allows
- Still require a valid license for feature access
- Full control over your infrastructure
Managed Platform
- Storage limits apply based on your plan
- Infrastructure managed by us
- Automatic backups and updates
- License included with subscription
Getting Started with Licenses
To begin using Kinesis API with a license:
- Access the License Server: Create an account and explore available plans
- Purchase a License: Select your plan and complete payment
- Register Your License: Activate your license in your Kinesis API instance
Current Phase: Free Development Access
Important: Kinesis API is currently in active development. During this phase, all features are available completely free. When we launch our commercial version, existing users will receive special early-adopter benefits. This is a great time to start exploring the platform and building your applications!
License Validation and Compliance
Automatic Validation
Kinesis API automatically validates your license:
- Check-In: Every 5 minutes, your instance checks in with the License Server
- Validation: Every 15 minutes, your license is fully validated
- Feature Control: Features are enabled or disabled based on validation results
What Happens If…
License Expires
- You’ll receive email notifications before expiration
- Grace period allows for renewal without interruption
- After grace period, access is restricted to Community features
Payment Fails
- Automatic retries for temporary payment issues
- Email notifications about payment problems
- Suspension if payment isn’t resolved
License is Revoked
- Immediate restriction to Community features
- Data remains intact and accessible
- Can purchase new license to restore access
Support and Assistance
If you have questions about licensing:
- General Questions: Review this documentation section
- Purchase Help: Contact our sales team through the License Server
- Technical Issues: Log a support ticket
- License Problems: Check the License management page in your instance
Next Steps
Ready to get started with licensing?
- Access the License Server to create an account
- Explore purchasing options to find the right plan
- Learn to activate your license in your Kinesis API instance
For detailed pricing information and plan comparisons, visit our Pricing Page.
Accessing the License Server
The Kinesis API License Server is a separate platform where you manage your licenses, view available plans, and handle billing. This guide will walk you through accessing and using the License Server.
Overview
The License Server provides:
- Account Management: Create and manage your license account
- Plan Browsing: View available plans and their features
- License Management: Track your active licenses and their status
- Billing Control: Manage payments and renewal settings
- Support Access: Get help with licensing issues
Getting Started
Accessing the License Server
- Navigate to https://license.kinesis.world in your web browser
- You’ll see the License Server homepage with options to log in or register
Note: The License Server uses a separate account from your Kinesis API instance. You’ll need to create a new account even if you already have a Kinesis API user account.

Creating Your Account
To register for a License Server account:
- Fill in the registration form with:
- Full Name: Your first and last legal names
- Email Address: Your business or personal email (will be used for license communications)
- Click the “Submit” button at the bottom of the registration section
- Click “Register” to submit your information
First-Time Login
After registering:
- Check your email inbox for a message from the License Server
- The email will contain:
- Your username (typically your email address)
- A temporary password
- Instructions for first login
- Return to https://license.kinesis.world
- Enter your credentials (email address and password) on the login form
- Click the “Submit” button at the bottom of the login section
Security Tip: Change your password and choose a strong password that includes uppercase and lowercase letters, numbers, and special characters.
Setting Up Your Profile

After your first login, it’s important to complete your profile information:
Accessing Profile Settings
- Click on your profile icon or username in the top-right corner
- Select “Edit Profile” from the dropdown menu
Completing Your Profile

Fill in all relevant information:
Personal Information
- Full Name: Your complete legal name
- Email Address: Primary contact email
Business Information
- Company Name: Your organization’s legal name
- Company Address: Complete business address including:
- Street address
- City
- State/Province
- ZIP/Postal code
- Country
Saving Your Profile
- Review all entered information for accuracy
- Click the various “Save” buttons where applicable
- You’ll receive a confirmation message when your profile is updated
Important: Accurate profile information is essential for:
- Proper license activation
- Receiving invoices and receipts
- Tax compliance
- Support communications
Exploring Available Plans
The License Server allows you to browse all available plans before making a purchase:
Viewing Plans
- From the main dashboard, click on “Plans” or “Pricing” in the navigation menu
- You’ll see a comparison of all available plans:
- Community: Free tier with basic features
- Essential: Entry-level paid plan
- Professional: Advanced features for teams
- Enterprise: Custom solutions for large organizations

Plan Details
For each plan, you can view:
Features
- API creation limits
- Monthly request quotas
- Storage allocations (for managed hosting)
- Available blocks and components
- Support level details
Pricing Information
- Monthly pricing
- Annual pricing (if applicable)
- Per-user costs (for Enterprise)
- Any setup fees or minimums
Plan Documentation
Each plan section includes:
- Feature List: Detailed breakdown of included features
- Limitations: Any restrictions or quotas
Navigation
The main dashboard page includes:
- Profile: Account settings
- Plans: Browse available plans
- Licenses: Manage existing licenses
- Activations: View existing license activations
Getting Help
Support Resources
Access help through:
Documentation
- Browse the knowledge base
- Read getting started guides
- View FAQs
Support Tickets
Use the Kinesis API support system.
Security Best Practices
Account Security
To keep your license account secure:
- Use Strong Passwords: Choose unique, complex passwords
- Enable Two-Factor Authentication: If available, activate 2FA
- Regularly Review Activity: Check for unauthorized access
- Keep Profile Updated: Maintain current contact information
- Secure Email Access: Protect the email account associated with your license
License Key Protection
- Never share your license keys publicly
- Store license keys securely
- Rotate keys if compromised
- Report suspicious activity immediately
Next Steps
Now that you have access to the License Server and have set up your profile:
- Explore purchasing a license to get started with a paid plan
- Learn how to activate your license in your Kinesis API instance
- Review the main licensing overview for more information
If you encounter any issues accessing the License Server or setting up your account, please contact support through the Kinesis API ticketing system.
Purchasing Licenses
This guide walks you through the process of purchasing a Kinesis API license through the License Server. Whether you’re upgrading from the Community plan or purchasing your first license, this documentation will help you complete your purchase successfully.
Before You Purchase
Prerequisites
Before purchasing a license, ensure you have:
- Created a License Server Account: See Accessing the License Server
- Completed Your Profile: Updated all business and billing information
- Chosen Your Plan: Reviewed available plans and selected the right tier
- Determined Your Needs: Calculated required instances and users
Planning Your Purchase
Consider these factors when planning your license purchase:
Number of Instances
- Instance: A single installation of Kinesis API
- Self-Hosted: Each server running Kinesis API counts as one instance
- Managed: Each environment (production, staging, etc.) counts as one instance
- Development: Community licenses work for development environments
Number of Users
- Per Instance: User limits apply to each instance separately
- User: Anyone with login credentials to access the instance
- API-Only Users: May not count depending on your use case
- Service Accounts: Typically count as users
Billing Period
- Monthly: Pay month-to-month with flexibility to cancel
- Yearly: Save money with annual commitment (typically 2 months free)
The Purchase Process
Step 1: Select Your Plan
- Log in to the License Server
- Navigate to “Plans” or “Purchase License”
- Review available plans:
- Essential ($99/month): For growing applications
- Professional ($499/month): For professional teams
- Enterprise ($50/user/month): For large organizations
Step 2: Configure Your License

On the license configuration page, click on the “Purchase a new License” button and specify:
Instance Count
- Enter the number of instances you need
- The system will calculate the total based on:
- Plan base price
- Number of instances
- Billing period selection
User Count
- Enter the number of users per instance
- For Enterprise plans, this determines your per-user pricing
- For other plans, ensure you stay within plan limits
Important: User counts should represent your maximum expected users per instance. Exceeding limits may require an upgrade.
License Name
- Give your license a descriptive name
- Examples:
- “Production Environment”
- “Company Name - Main API”
- “Project Name License”
Step 3: Apply Coupons (Optional)
If you have a promotional or discount coupon:
- Enter your coupon code
- Verify the discount is reflected in the total
Coupon types may include:
- Percentage Off: Reduces price by a percentage (e.g., 20% off)
- Fixed Amount: Reduces price by a set amount (e.g., $50 off)
- Free Trial Extension: Adds free months to your subscription
- Feature Unlock: Grants access to specific features
Step 4: Choose Billing Period
Select your preferred billing cycle:
Monthly Billing
- Pros:
- Lower upfront cost
- Month-to-month flexibility
- Easy to cancel or change
- Cons:
- Higher overall yearly cost
- Monthly payment processing
Yearly Billing
- Pros:
- Significant savings (typically 2 months free)
- Single annual payment
- Locked-in pricing for the year
- Cons:
- Higher upfront cost
- Annual commitment
- Refund policies may apply
Step 5: Review Your Order
Before completing your purchase, review:
- Plan Name: Confirm correct plan selected
- Instance Count: Verify number of instances
- User Count: Check user allocation
- Billing Period: Confirm monthly or yearly
- Subtotal: Base price calculation
- Discounts: Applied coupons or promotions
- Total Amount: Final price to be charged
Step 6: Complete Payment
Supported Payment Methods
The License Server doesn’t currently support payment methods but should feature various ones in the future:
- Credit Cards: Visa, MasterCard, American Express
- Debit Cards: Major providers accepted
- Bank Transfer: For Enterprise customers (contact sales)
- PayPal: Available in most regions
- Other Methods: May vary by region
Payment Information
- Select your payment method
- Enter required details:
- Card number
- Expiration date
- CVV/Security code
- Billing address
- Review the payment terms
- Click “Complete Purchase” or “Pay Now”
Payment Confirmation
After successful payment:
- You’ll see a confirmation screen with:
- Order number
- Transaction ID
- License details
- Check your email for:
- Payment receipt
- License key
- Activation instructions
After Purchase
License Activation

Once your payment is confirmed:
- Administrator Review: An administrator will validate your payment
- License Activation: Your license status will change to ACTIVE
- Email Notification: You’ll receive confirmation when activated
- License Key: Available in your License Server dashboard
Timeline: License activation typically occurs within 24 business hours. For urgent activations, contact [email protected].
Accessing Your License Key
To retrieve your license key:
- Log in to the License Server
- Navigate to “Manage Licenses”
- Find your purchased license
- Copy your License Key (format:
XXXXXX-XXXXXX-XXXXXX-XXXXXX)
Next Steps
After receiving your license key:
- Activate it in your Kinesis API instance
- Verify all features are accessible
- Configure your instance according to your plan
- Review the usage documentation to get started
Managing Your License
Viewing License Details
In your License Server dashboard, you can view:
- License Status: Active, Suspended, Expired, Revoked
- Plan Details: Current plan and features
- Instance/User Counts: Allocated resources
- Billing Information: Next payment date and amount
License Statuses
INACTIVE
- Payment received but not yet validated
- Awaiting administrator approval
- Temporary status during processing
ACTIVE
- License is valid and working
- All features accessible
- Payment current
SUSPENDED
- Payment failure or overdue
- Temporary restriction
- Can be reactivated by updating payment
REVOKED
- Permanent license termination
- Violation of terms or non-payment
- Requires new purchase to restore access
Renewal and Changes
Automatic Renewal
For active licenses:
- Monthly: Automatically renews on the same date each month
- Yearly: Renews on anniversary of purchase date
- Payment Method: Uses saved payment information
- Notifications: Email reminders sent before renewal
Manual Renewal
If automatic renewal fails:
- You’ll receive email notification
- Log in to License Server
- Navigate to your license details
- Click “Renew Now”
- Update payment information if needed
- Complete renewal payment
Modifying Your License
Upgrading
To upgrade your plan:
- Go to license details in License Server
- Click “Upgrade Plan”
- Select new plan tier
- Pay difference for remaining billing period
- Changes apply immediately
Downgrading
To downgrade your plan:
- Go to license details
- Click “Change Plan” or “Downgrade”
- Select lower plan tier
- Changes apply at next billing cycle
- Credit may be applied to next bill
Changing Instance/User Counts
To modify allocations:
- Contact support via the ticketing system
- Specify required changes
- Additional fees may apply
- Changes processed by administrator
Important: Changes to licenses after purchase may incur additional fees based on the modifications requested, and should be requested via a support ticket.
Payment Issues
Failed Payments
If a payment fails:
- Email Notification: Sent to registered email
- Grace Period: Typically 7 days to update payment
- Retry Attempts: Automatic retries every 3 days
- License Suspension: After grace period expires
Updating Payment Method
To update your payment information:
- Log in to License Server
- Go to “Billing” or “Payment Methods”
- Add new payment method or update existing
- Set as default for renewals
- Manually trigger retry if needed
Requesting Refunds
For refund requests:
- Review refund policy in terms of service
- Contact support within applicable window
- Provide reason for refund request
- Administrator will review and respond
Getting Help with Purchases
Pre-Purchase Questions
- Review the pricing page
- Check the main licensing documentation
- Contact sales through License Server
Purchase Issues
- Log a support ticket
- Include order/transaction number
- Describe the issue clearly
- Support team typically responds within 48 hours
Billing Questions
- Check License Server billing section
- Review payment history
- Contact billing support through the ticketing system
Next Steps
After purchasing your license:
- Wait for administrator activation (usually within 24 hours)
- Check email for license key and confirmation
- Learn how to activate your license in Kinesis API
- Start building with your new features!
For questions about the purchasing process or your order, please contact support.
Registering Your License
After purchasing a license from the License Server, you need to activate it in your Kinesis API instance. This guide explains how to register your license and understand how the activation system works.
Overview
License registration connects your Kinesis API instance to your purchased license, enabling features and capabilities based on your plan. The process involves:
- Entering your license key in Kinesis API
- Automatic validation with the License Server
- Feature activation based on your plan
- Ongoing validation to maintain access
Prerequisites
Before registering your license:
- ✅ You must have ROOT user permissions
- ✅ Your license must be ACTIVE in the License Server
- ✅ You have your license key from the License Server
- ✅ Your Kinesis API instance can connect to the internet
Accessing License Management
Via Web Interface
- Log in to your Kinesis API instance with a ROOT account
- Navigate to
/web/licensein your browser, or - Click “License” in the sidebar menu (visible only to ROOT users)

License Page Components
The license management page displays:
- License Key Input: Field for entering your license key
- Show/Hide Key Button: Toggle visibility of your license key
- Submit Button: Activate your license
- Validation Button: Manually validate current license
- Deactivation Button: Remove current license activation
- License Details: Information about your active license (after activation)
Activating Your License
Step 1: Enter Your License Key
- Locate the license key input field on the license page
- Click the eye icon to show the input field (if hidden)
- Paste your license key from the License Server
- Format:
XXXXXX-XXXXXX-XXXXXX-XXXXXX - Ensure no extra spaces or characters
- Format:
Step 2: Submit for Activation
- Click the submit button (save icon) next to the input field
- The system will display a loading indicator
- Wait for the activation process to complete
Step 3: Activation Process
When you submit your license key, Kinesis API:
- Validates Format: Checks if the key is properly formatted
- Contacts License Server: Sends activation request with:
- Your license key
- Instance ID (unique identifier for your installation)
- Current user count
- Receives Response: License Server returns:
- Activation confirmation
- Plan details
- Feature list
- Authentication token
- Stores Locally: Saves activation information securely
- Enables Features: Unlocks capabilities based on your plan
Step 4: Verify Activation
After successful activation:
- Success Message: Green notification appears confirming activation
- License Details Appear: Panel shows:
- Plan name and type
- License status
- Instance and user limits
- Billing information
- Next renewal date
- Feature Buttons: Validation and deactivation buttons become visible
- License Status Indicator: Bottom-right corner shows “Activated: [Plan Name]”
Manual License Management
Validating Your License
To manually validate your license:
- Click the “Validate License” button
- System performs immediate validation with License Server
- Updates displayed license information
- Shows success or error message
Use Cases:
- After purchasing an upgrade
- If features seem unavailable
- After plan changes
- Troubleshooting license issues
Deactivating Your License
To remove your license activation:
- Click the “Deactivate License” button
- Confirm deactivation in the warning dialog
- System:
- Notifies License Server
- Removes local activation
- Resets to Community features
- Clears license displays
Warnng: Deactivating your license immediately restricts access to paid features. Your data remains intact, but capabilities are limited to the Community tier.
Troubleshooting
Common Activation Issues
“License has already been activated”
Cause: This license key is already in use
Solution:
- Check if you’re trying to activate the same license on multiple instances
- Deactivate the license from the other instance first
- Or purchase an additional license for more instances
“License key not found”
Cause: Invalid or mistyped license key
Solution:
- Copy the license key directly from License Server
- Check for extra spaces or characters
- Verify the license status is ACTIVE in License Server
“License is not active”
Cause: License needs administrator activation or payment issue
Solution:
- Check License Server for license status
- Verify payment was processed
- Wait for administrator activation (up to 24 hours)
- Contact support if delayed
“Failed to connect to License Server”
Cause: Network connectivity issue
Solution:
- Verify your instance has internet access
- Check firewall settings allow outbound HTTPS
- Confirm License Server is accessible (https://license.kinesis.world)
- Check proxy settings if applicable
Validation Issues
“Activation token has expired”
Cause: Authentication token needs refresh
Solution:
- Click “Validate License” to get new token
- System automatically reauthenticates
- If that fails, try deactivating and reactivating
“License has expired”
Cause: Subscription period has ended
Solution:
- Renew license in License Server
- Wait for renewal processing
- Click “Validate License” in Kinesis API
- Features should restore after successful renewal
“User count exceeded”
Cause: More users than your plan allows
Solution:
- Upgrade plan to increase user limit
- Or remove inactive users
- Contact support for temporary increase
License Status Indicators
Monitor your license status through the indicator in the bottom-right corner:
- Green “Activated: [Plan]”: License is active and validated
- Red “License Inactive”: No active license or validation failed
Best Practices
Security
- Protect License Keys: Never share publicly or commit to version control
- ROOT Access Only: Only ROOT users can manage licenses
- Monitor Status: Regularly check license status indicator
- Update Promptly: Renew before expiration to avoid interruption
Reliability
- Stable Internet: Ensure consistent connectivity for validation
- Monitor Check-Ins: Watch for validation errors in logs
- Plan Ahead: Renew licenses before expiration
- Test Upgrades: Verify feature access after plan changes
Compliance
- Stay Within Limits: Monitor user and instance counts
- Timely Renewal: Pay invoices promptly
- Accurate Information: Keep License Server profile updated
- Proper Usage: Follow terms of service for your plan
Next Steps
After successfully activating your license:
- Explore features available in your plan
- Review the usage documentation
- Configure your instance for production use
- Start building your APIs
For issues with license activation or validation, please contact support.
Core Components
Kinesis API is built around a set of core components that work together to provide a complete API development and management solution. Understanding these components is essential for effectively using the platform.
Architecture Overview
At a high level, Kinesis API’s architecture consists of:
- User Management System - Controls access and permissions
- Projects & Collections - Organizes your API resources
- Data Management - Stores and manipulates your application data
- API Routes - Exposes functionality through RESTful endpoints
- Supporting Systems - Provides additional functionality like events, media handling, and more
These components interact through the custom Kinesis DB database system and are exposed via both the web interface and API endpoints.
Key Components
Configs
The configuration system allows you to control how Kinesis API operates. This includes settings for:
- Environment variables
- SMTP settings for email
- Security parameters
- API endpoint behavior
Configs can be set during initial setup and modified later through the admin interface.
Constraints
Constraints define rules and validations that maintain data integrity across your API. They enforce:
- Data type validations
- Required fields
- Value ranges and patterns
- Relationship integrity
- Business rules
Proper constraint management ensures your API behaves predictably and data remains valid.
Users
The user management system controls access to your Kinesis API instance. It includes:
- User accounts with varying permission levels
- Role-based access control (ROOT, ADMIN, AUTHOR, VIEWER)
- Personal Access Tokens for API authentication
- User profiles with customizable information
User management is critical for security and collaboration in multi-user environments.
Projects
Projects are the top-level organizational units in Kinesis API. They allow you to:
- Group related APIs and resources
- Separate concerns between different applications
- Manage permissions at a high level
- Create logical boundaries between different parts of your system
Each project can contain multiple collections, structures, and routes.
Collections
Collections are containers for data records of a specific type. They:
- Organize your data into logical groups
- Provide CRUD operations for data manipulation
- Apply structure definitions to ensure data consistency
- Enable efficient data retrieval and manipulation
Collections are the primary way you’ll interact with data in Kinesis API.
Structures
Structures define the schema for your data. They:
- Specify fields and their data types
- Apply validation rules through constraints
- Support nested and complex data models
- Allow for custom structures with specialized behavior
Structures ensure your data follows a consistent format and meets your application’s requirements.
Data
The data component provides interfaces for working with your stored information:
- Creating, reading, updating, and deleting records
- Querying and filtering data
- Importing and exporting datasets
- Managing relationships between records
Efficient data management is essential for building performant APIs.
Routes
Routes are the endpoints that expose your API functionality:
- Created through the visual X Engine or programmatically
- Define how requests are processed and responses are formed
- Support various HTTP methods (GET, POST, PUT, DELETE, etc.)
- Include the Playground for testing API behavior
Routes are the primary way external applications interact with your Kinesis API.
Events
The event system tracks important activities and changes:
- Records system actions and user operations
- Provides an audit trail for security and debugging
Events give you visibility into what’s happening within your API.
Media
The media component handles file uploads and management:
- Stores images, videos, documents, and other file types
- Categorizes files by type (IMAGE, VIDEO, DOCUMENT, OTHER)
- Tracks file sizes for storage management
- Offers integration with API responses
Media management allows your API to work with files and binary data.
Workflow
The workflow component provides a Trello-like project management system:
- Kanban-style boards with lists, cards, and drag-and-drop
- Checklists with progress tracking, due dates, and assignees
- File attachments with automatic type detection
- Comments with emoji reactions
- Granular permission system with roles and capabilities
- Activity audit trail and real-time notifications
Workflow enables teams to organize, track, and collaborate on work directly within Kinesis API.
REPL
The Read-Eval-Print Loop provides a command-line interface to interact with your API:
- Execute commands directly against your database
- Test operations without using the web interface
- Perform advanced data manipulations
The REPL is a powerful tool for developers and administrators.
How Components Work Together
A typical workflow in Kinesis API might look like:
- Setup: Configure the system with appropriate settings
- Organization: Create projects to organize your work
- Data Modeling: Define structures and custom structures
- Storage: Create collections to group your data
- API Creation: Build routes to expose functionality
- Testing: Use the playground to verify behavior
- Deployment: Make your API available to users
- Monitoring: Track events and system performance
Understanding how these components interact is key to making the most of Kinesis API’s capabilities.
Next Steps
To dive deeper into each component, follow the links to their dedicated documentation pages. A good starting point is understanding Users and Projects, as these form the foundation for most other operations in the system.
Configs
The configuration system in Kinesis API allows you to control and customize various aspects of the platform. These settings determine how the system behaves, what features are available, and how components interact with each other.
Accessing Configs
You can access and modify configuration settings from the Configs page in the web interface:
- Log in to your Kinesis API instance
- Navigate to
/web/configsin your browser - You’ll see a list of all available configuration options
Configuration Categories
Configuration items in Kinesis API are grouped into several categories for the purpose of this documentation:
- Environment Settings: Control the overall environment context
- System Identifiers: Determine how the system identifies itself
- URL Configuration: Define endpoints and access points
- Security Settings: Control authentication and security parameters
- SMTP Configuration: Settings for email functionality
- Resource Limits: Define system resource boundaries
- Feature Toggles: Enable or disable specific features
Core Configuration Options
Environment Settings
ENV
- Default:
dev - Description: The environment context in which the platform is being used.
- Possible Values:
dev(Development),staging(Staging/Testing),prod(Production) - Impact: Primarily used for identification and logging; has minimal impact on system behavior.
System Identifiers
PROJECT_NAME
- Default:
Kinesis API - Description: The name by which the platform is identified in the UI and emails.
- Impact: Appears in the user interface, email templates, and other user-facing areas.
URL Configuration
API_URL
- Default: Determined during installation
- Description: The base URL where API endpoints are accessible.
- Example:
https://api.example.com - Impact: Used as the base for all API communication and for generating links.
API_PRE
- Default: Empty
- Description: A prefix for all API routes.
- Example: Setting this to
/api/v1would change endpoint paths from/user/loginto/api/v1/user/login - Impact: Affects how all API endpoints are accessed.
FRONT_URL
- Default:
[API_URL]/web - Description: The URL where users access the web interface.
- Example:
https://api.example.com/web - Impact: Used for redirects and generating links to the web interface.
Security Settings
INIT_CODE
- Default:
code - Description: The security code required when calling the
/initendpoint. - Impact: Protects against unauthorized initialization of the system.
JWT_EXPIRE
- Default:
3600(1 hour) - Description: The lifetime of JWT authentication tokens in seconds.
- Common Values:
3600(1 hour)86400(24 hours)604800(1 week)
- Impact: Determines how frequently users need to reauthenticate.
CORS_WHITELIST
- Default: Empty
- Description: A comma-separated list of domains allowed to make cross-origin requests.
- Example:
example.com,api.example.comor*(allow all) - Impact: Critical for security; controls which external domains can access your API.
TOKEN_KEY
- Default: Automatically generated during initialization
- Description: The encryption key used for generating and validating JWT tokens.
- Impact: Critical for security; changing this will invalidate all existing JWT tokens, forcing all users to log in again.
SMTP Configuration
These settings are required for user registration, password reset, and other email functionality.
SMTP_USERNAME
- Default: Empty
- Description: The username for SMTP server authentication.
- Impact: Required for sending emails from the system.
SMTP_FROM_USERNAME
- Default: Same as SMTP_USERNAME
- Description: The email address that appears in the “From” field.
- Impact: Affects how email recipients see the sender.
SMTP_PASSWORD
- Default: Empty
- Description: The password for SMTP server authentication.
- Impact: Required for sending emails from the system.
SMTP_HOST
- Default: Empty
- Description: The hostname or IP address of the SMTP server.
- Examples:
smtp.gmail.com,smtp.office365.com - Impact: Determines which email server handles outgoing mail.
SMTP_PORT
- Default:
587 - Description: The port used to connect to the SMTP server.
- Common Values:
25,465,587 - Impact: Must match the requirements of your SMTP server.
SMTP_MECHANISM
- Default:
PLAIN - Description: The authentication mechanism for the SMTP server.
- Options:
PLAIN,LOGIN,XOAUTH2 - Impact: Must match the authentication method supported by your SMTP server.
SMTP_STARTTLS
- Default:
true - Description: Whether to use STARTTLS when connecting to the SMTP server.
- Impact: Security feature for encrypted email transmission.
SUPPORT_EMAIL
- Default:
[email protected] - Description: The email address where contact form submissions are sent.
- Impact: Determines where user inquiries are directed.
SMTP_FAKE_RECIPIENT
- Default:
[email protected] - Description: The email address used for testing SMTP configurations.
- Impact: Used when testing email delivery; emails sent during testing will be addressed to this recipient.
Resource Limits
UPLOAD_SIZE
- Default:
5120(5 MB) - Description: Maximum allowed size for file uploads in kilobytes.
- Impact: Affects media uploads and other file-related operations.
Feature Toggles
INITIAL_SETUP_DONE
- Default:
false(before setup),true(after setup) - Description: Indicates whether the initial setup process has been completed.
- Impact: Controls whether the setup wizard appears on login.
Custom Configuration Items
In addition to the built-in configuration options, Kinesis API allows you to create and manage your own custom configuration settings:
Adding Custom Configs
- On the Configs page, click the “Add Config” button
- Enter a unique key name (use uppercase and underscores for consistency, e.g.,
MY_CUSTOM_CONFIG) - Enter the value for your configuration
- Click “Save” to create the new configuration
Important Disclaimers
⚠️ Caution: Modifying or deleting configuration items can have serious consequences for your Kinesis API instance. Incorrect changes may lead to system instability, security vulnerabilities, or complete system failure. Be particularly careful when modifying:
- Security-related settings like
TOKEN_KEY- URL configurations like
API_URLorAPI_PRE- SMTP settings that enable email functionality
Always test changes in a non-production environment first, and ensure you understand the purpose and impact of each configuration item before modifying it.
Managing Configuration Items
Modifying Configs
To modify a configuration:
- Find the config you want to change in the list
- Click the edit button (pencil icon) next to it
- Enter the new value in the input field
- Click “Save” to apply the change
Most configuration changes take effect immediately, but some may require a system restart.
Deleting Configs
You can delete configuration items that are no longer needed:
- Find the config you want to delete in the list
- Click the delete button (trash icon) next to it
- Confirm the deletion when prompted
Configuration History
Kinesis API maintains a history of configuration changes, including:
- What was changed
- When it was changed
- Who made the change
This audit trail is valuable for troubleshooting and compliance purposes.
Best Practices
- Environment-Specific Settings: Use different configuration items for development, staging, and production environments
- Security Configs: Regularly rotate sensitive settings like
INIT_CODE - SMTP Testing: Always test email settings after changes using the “Test SMTP” function
- Documentation: Keep a record of non-default configuration items and why they were changed
- Review Regularly: Periodically review configuration items to ensure they remain appropriate
Constraints
Constraints in Kinesis API are system-level validation rules that enforce data integrity across different components of the system. They organize into a hierarchical structure that provides comprehensive validation for various system elements.
Understanding the Constraint System
The constraint system in Kinesis API has two primary levels:
- Constraints: Top-level categories that apply to a group of related items (e.g., “config”, “user”, “project”)
- Constraint Properties: Specific validation rules within each constraint (e.g., “name” and “value” for configs)
This hierarchical approach ensures consistent validation across all aspects of the system while maintaining flexibility for different data types.
Constraint Structure
Constraints
Constraints are the top-level categories that group related validation rules. Examples include:
- CONFIG: Applies to configuration settings
- USER: Applies to user account data
- PROJECT: Applies to project details
- COLLECTION: Applies to collection information
Each constraint contains one or more constraint properties.
Constraint Properties
Constraint properties are the specific elements within a constraint that have defined validation rules. For example, the CONFIG constraint includes properties like:
- name: Validates the configuration key name
- value: Validates the configuration value
Each constraint property has its own set of validation rules:
-
Character Type:
- Alphabetical: Only letters (a-z, A-Z) are allowed
- Numerical: Only numbers (0-9) are allowed
- Alphanumerical: Both letters and numbers are allowed
-
Character Restrictions:
- Allow List: Specific characters that are permitted
- Deny List: Specific characters that are forbidden
-
Length Restrictions:
- Min Length: Minimum number of characters required
- Max Length: Maximum number of characters allowed
Viewing Constraints
Users with appropriate permissions can view the constraints system:
- Log in to your Kinesis API instance
- Navigate to
/web/constraintsin your browser - You’ll see a list of all system constraints
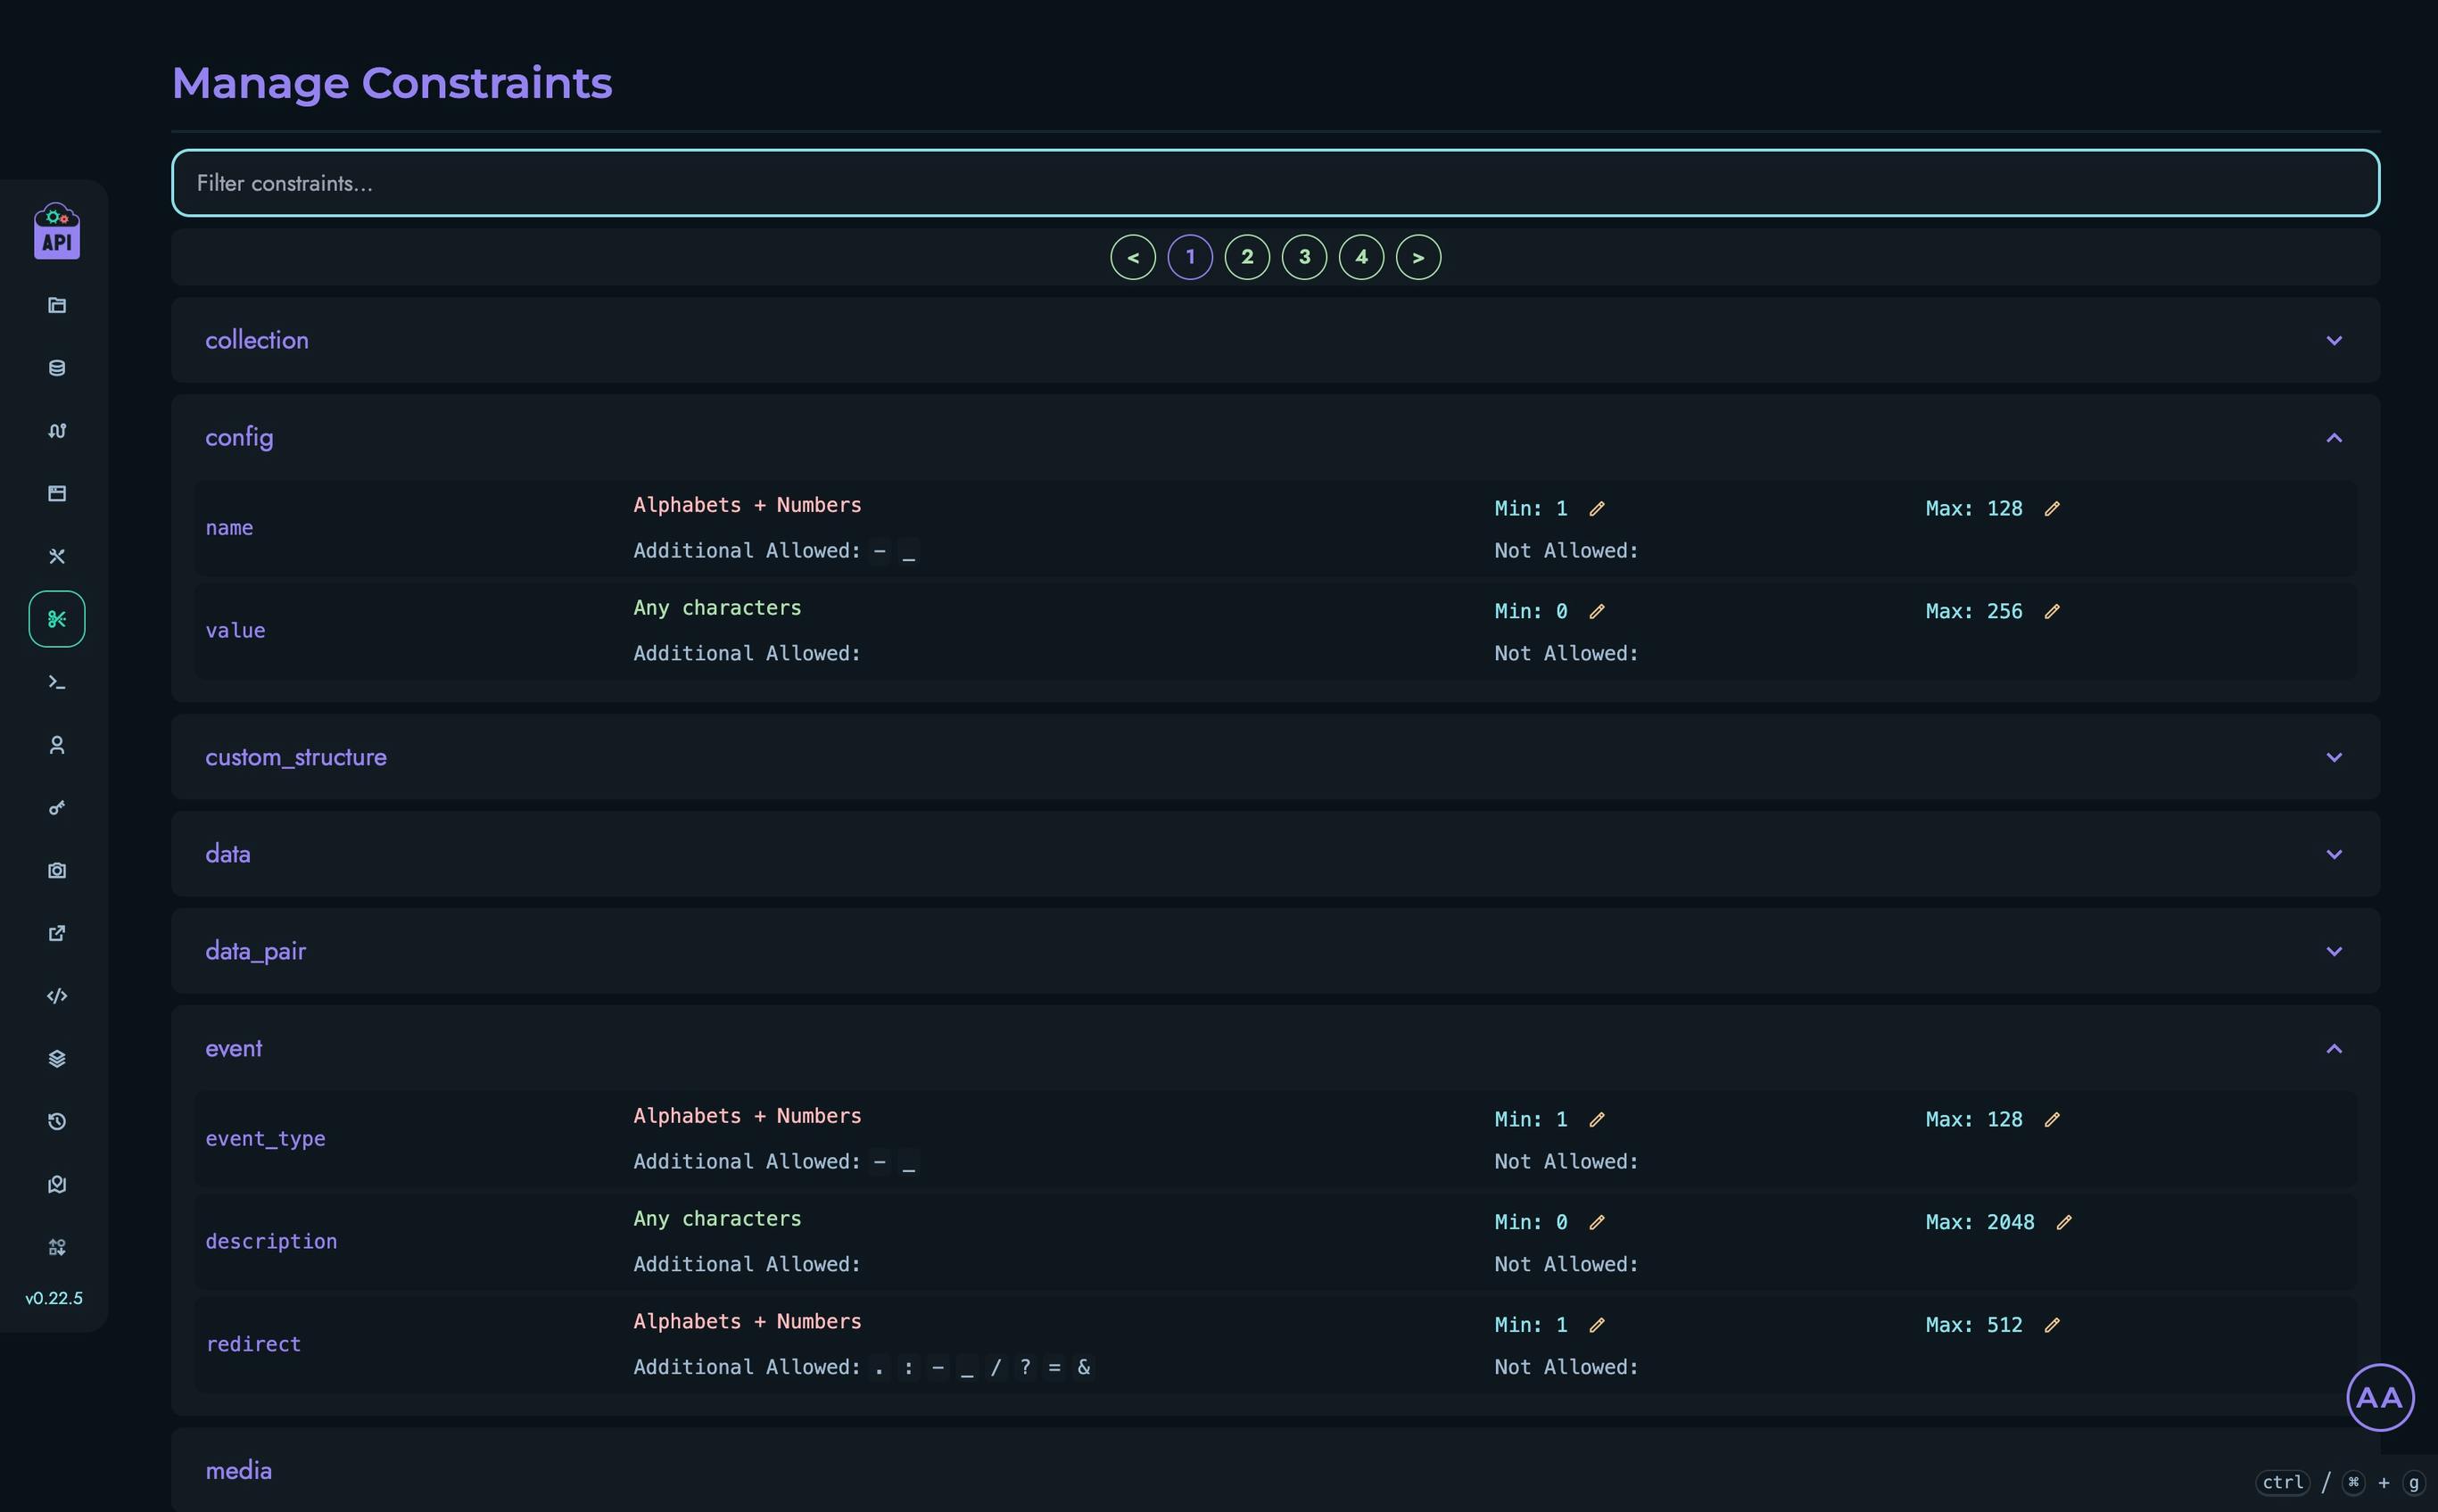
Each constraint can be expanded to show its associated constraint properties.
Viewing Constraint Properties
To view the properties of a specific constraint:
- On the Constraints page, click on a constraint name
- You’ll see a list of properties associated with that constraint
- Each property displays its:
- Character type (alphabetical, numerical, alphanumerical)
- Allow/deny lists
- Current min/max length settings
Modifying Constraints
⚠️ Important: End users can only modify the minimum and maximum length settings of constraint properties. The character types, allow/deny lists, and other fundamental aspects are locked to preserve system integrity.
Modifying Min/Max Values
To modify the min/max settings of a constraint property:
- Navigate to the Constraints page (
/web/constraints) - Click on a constraint to view its properties
- Find the constraint property you want to modify
- For the minimum value:
- Click the edit (pencil) icon next to the Min value
- Enter the new minimum value
- Click “Save” to apply the change
- For the maximum value:
- Click the edit (pencil) icon next to the Max value
- Enter the new maximum value
- Click “Save” to apply the change
Best Practices
When modifying constraint property length settings:
- Maintain Balance: Set minimum lengths to ensure data quality while setting maximum lengths to prevent excessive data
- Consider Real-World Usage: Adjust length limits based on realistic use cases
- Test After Changes: After modifying constraints, test affected components to ensure proper functionality
- Document Changes: Keep a record of any constraint modifications for future reference
- Preserve Relationships: Ensure related constraint properties have compatible settings
Users
The Users page in Kinesis API provides comprehensive user management capabilities for administrators. This interface allows root users to view, add, modify, and delete user accounts across the platform.
Access Control
Important: The Users management page is only accessible to users with the ROOT role. Other users attempting to access this page will be redirected to the dashboard.
Accessing the Users Page
To access the Users management page:
- Log in with a ROOT user account
- Navigate to
/web/usersin your browser or use the navigation menu
User Interface Overview

The Users management interface includes:
- A searchable list of all users in the system
- Pagination controls for navigating through large user lists
- Actions for adding new users, changing roles, and deleting accounts
- User details including ID, username, name, email, and role
Viewing and Filtering Users
User List
The main section of the page displays a table of users with the following information:
- ID: The unique identifier for each user
- Username: The login name (links to user profile)
- Name: The user’s full name (first and last name)
- Email: The user’s email address
- Role: The user’s permission level (ROOT, ADMIN, AUTHOR, or VIEWER)
- Actions: Buttons for available actions on each user
Filtering Users
To find specific users:
- Use the search box at the top of the user list
- Type any part of the username, name, email, or role
- The list will automatically filter to show matching users
Pagination
For systems with many users:
- Navigate between pages using the pagination controls
- The page displays up to 15 users at a time
User Roles
Kinesis API implements a role-based access control system with four permission levels:
| Role | Description |
|---|---|
| ROOT | Full system access, including user management and critical system settings |
| ADMIN | Administrative access to most features, but cannot manage users and configs |
| AUTHOR | Can create and modify content but has limited administrative access |
| VIEWER | Read-only access to most parts of the system |
Adding New Users
Prerequisite: SMTP settings must be properly configured for the user registration process to work. See Configs for details on setting up email.
To add a new user:
- Click the “Add a New User” button at the top of the page
- Fill in the required information:
- First Name
- Last Name
- Username
- Email Address
- Select the appropriate role for the user
- Click “Create”
Behind the Scenes
When you create a new user:
- The system generates a secure random password
- An email is sent to the new user with their:
- Username
- Generated password
- Login instructions
- The password is hashed before storage and cannot be retrieved later

Changing User Roles
To change a user’s role:
- Find the user in the list
- Click the role change button (star icon)
- Select the new role from the available options
- Confirm the change
Note that:
- You cannot change the role of ROOT users
- You cannot downgrade your own ROOT account
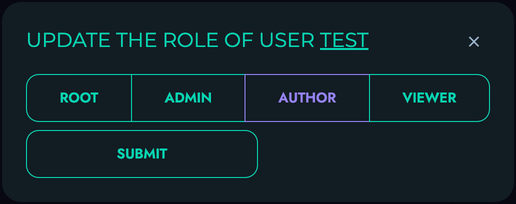
Deleting Users
To delete a user account:
- Find the user in the list
- Click the delete button (trash icon)
- Confirm the deletion in the modal that appears
Important considerations:
- User deletion is permanent and cannot be undone
- All user data and associated content will be removed
- ROOT users cannot be deleted through this interface
- You cannot delete your own account

Password Management
The Kinesis API user management system handles passwords securely:
- Passwords for new users are automatically generated with strong entropy
- Passwords must contain lowercase letters, uppercase letters, numbers, and special characters
- Passwords are never stored in plain text—only secure hashes are saved
- Users can reset their passwords via the “Forgot Password” functionality
- Admin users cannot see or reset passwords directly, only trigger the password reset process
Related Documentation
- User Profiles - Information about user profiles and settings
- Personal Access Tokens - Managing API access tokens
- Configs - System configuration including email settings
Personal Access Tokens
Personal Access Tokens (PATs) provide a secure way to authenticate with the Kinesis API programmatically. They allow you to interact with the API without using your username and password, making them ideal for automated scripts, external applications, and CI/CD pipelines.
Understanding Personal Access Tokens
PATs function similarly to passwords but have several advantages:
- Fine-grained Permissions: Limit tokens to specific actions and resources
- Limited Lifespan: Set expiration dates to reduce security risks
- Independent Revocation: Revoke individual tokens without affecting other access methods
- Traceability: Track which token is used for which operations
Accessing the PAT Management Page
To manage your Personal Access Tokens:
- Log in to your Kinesis API account
- Navigate to
/web/patsin your browser or use the sidebar navigation

Creating a New Token
To create a new Personal Access Token:
-
Click the “Create a New Personal Access Token” button
-
Fill in the required information:
- Name: A descriptive name to identify the token’s purpose
- Valid From: The date and time when the token becomes active
- Valid To: The expiration date and time for the token
- Permissions: Select the specific actions this token can perform
-
Click “Create” to generate the token
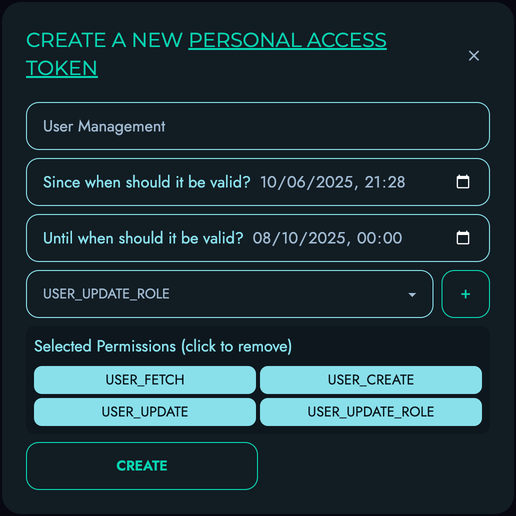
Token Display - Important Notice
⚠️ Critical Security Information: When a token is first created, the actual token value is displayed only once. Copy this token immediately and store it securely. For security reasons, Kinesis API only stores a hashed version of the token and cannot display it again after you leave the page.
Managing Existing Tokens
The PAT management page displays all your existing tokens with their details:
- Name: The descriptive name you assigned
- ID: The unique identifier for the token
- Valid From: The start date of the token’s validity period
- Valid Until: The expiration date of the token
- Rights: The permissions assigned to the token
Updating Token Details
You can modify several aspects of an existing token:
- Name: Click the pencil icon next to the token name
- Valid From: Click the pencil icon next to the start date
- Valid Until: Click the pencil icon next to the expiration date
- Rights: Click the star icon to modify permissions
Note: For security reasons, you cannot view or modify the actual token value after creation. If you need a new token value, you must create a new token and delete the old one.
Deleting Tokens
To revoke access for a token:
- Click the trash icon next to the token you want to delete
- Confirm the deletion in the modal that appears
Once deleted, a token cannot be recovered, and any applications using it will lose access immediately.
Token Permissions
Kinesis API uses a granular permission system for PATs. When creating or editing a token, you can select specific permissions that control what actions the token can perform:
| Permission Category | Examples |
|---|---|
| User Management | USER_FETCH, USER_CREATE, USER_UPDATE, USER_DELETE |
| Config Management | CONFIG_FETCH, CONFIG_CREATE, CONFIG_UPDATE |
| Project Management | PROJECT_FETCH, PROJECT_CREATE, PROJECT_UPDATE |
| Data Operations | DATA_FETCH, DATA_CREATE, DATA_UPDATE, DATA_DELETE |
| Media Management | MEDIA_FETCH, MEDIA_CREATE, MEDIA_UPDATE |
| Route Management | ROUTING_FETCH, ROUTING_CREATE_UPDATE |
The available permissions depend on your user role. For example, ROOT users have access to all permissions, while other roles have a more limited set.
Using Personal Access Tokens
To use a PAT in API requests:
GET /user/fetch HTTP/1.1
Host: api.example.com
Authorization: Bearer your-token-here
Include the token in the Authorization header with the Bearer prefix for all authenticated requests.
Best Practices
- Use Descriptive Names: Give each token a name that identifies its purpose or the application using it
- Set Appropriate Expirations: Use shorter lifespans for tokens with broader permissions
- Limit Permissions: Grant only the specific permissions needed for each use case
- Rotate Regularly: Create new tokens and delete old ones periodically
- Secure Storage: Store tokens securely, treating them with the same care as passwords
- Monitor Usage: Regularly review your active tokens and delete any that are no longer needed
Token Security
Personal Access Tokens are equivalent to your password for the granted permissions. To keep your account and data secure:
- Never share tokens in public repositories, client-side code, or insecure communications
- Use environment variables or secure secret management systems to store tokens
- Set expiration dates appropriate to the use case (shorter is better)
- Delete tokens immediately if they might be compromised
Related Documentation
- API Reference - Learn how to use tokens with API endpoints
- Users - Overview of user management
- Security - Additional security considerations
Profile
User profiles in Kinesis API provide a way for users to personalize their identity within the platform and share information with others. This page explains how to view, edit, and manage user profiles.
Understanding User Profiles
Each user in Kinesis API has a profile that includes:
- Basic Information: Name, username, and email address
- Profile Picture: A visual representation of the user
- Bio: A free-form text area for users to describe themselves
- Links: Customizable links to external sites (social media, portfolio, etc.)
- Visibility Settings: Controls who can view the profile
Profiles help users identify each other within the platform and provide context about their roles and expertise.
Viewing Profiles
Accessing Your Own Profile
To view your own profile:
- Click your username in the navigation bar
- Select “View Profile” from the dropdown menu
Alternatively, navigate directly to /web/user?id=your_username.
Viewing Other Users’ Profiles
To view another user’s profile:
- Click on their username anywhere it appears in the interface
- Navigate directly to
/web/user?id=their_username
Note that you can only view profiles of other users if:
- Their profile is set to public, or
- You are logged in and have appropriate permissions
Profile Content
A typical user profile displays:
- Profile Picture: Either an uploaded image or initials if no image is provided
- Full Name: The user’s first and last name
- Username: Prefixed with @ (e.g., @john_doe)
- Email Address: Clickable to send an email
- Bio: The user’s self-description
- Links: Icons linking to external sites
Profile Visibility
Profiles can be set to either:
- Public: Visible to anyone, even unauthenticated visitors
- Private: Only visible to authenticated users of the platform
This setting can be changed in the user settings page.
Editing Your Profile
To edit your profile:
- Click your username in the navigation bar
- Select “Edit Profile” from the dropdown menu
- The settings page opens with the Profile tab active
Profile Settings
The profile settings page allows you to edit:
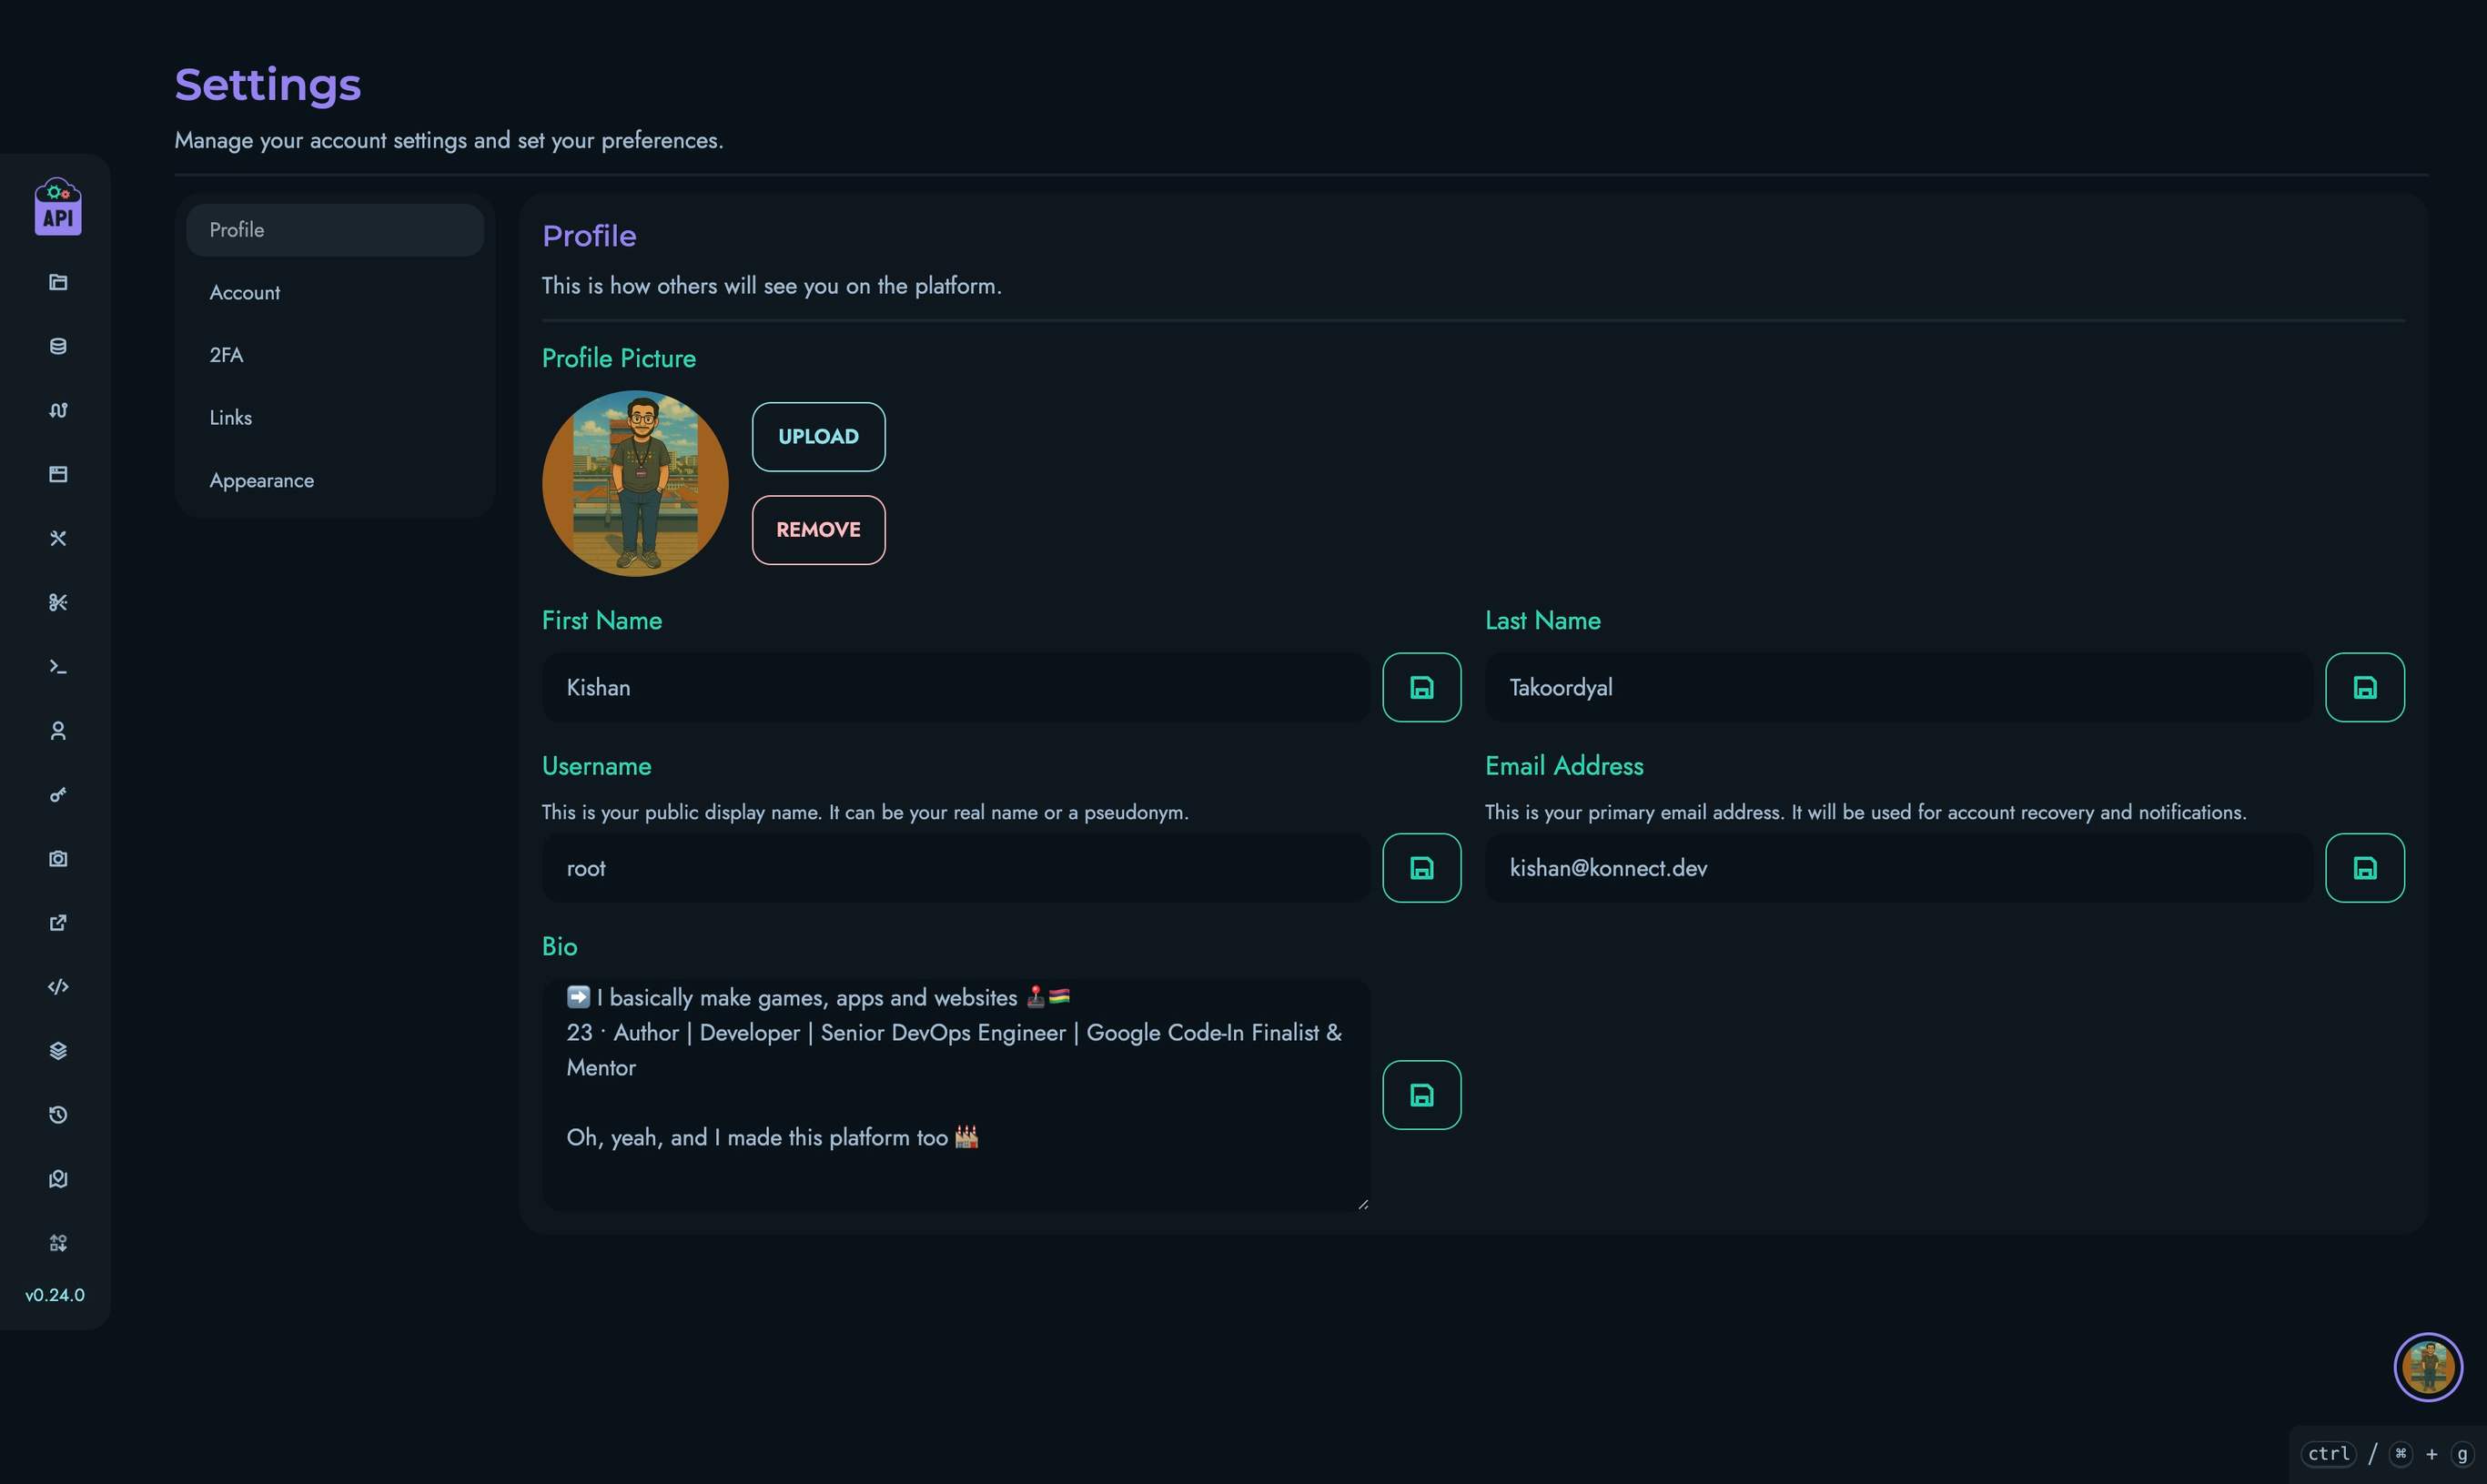
Profile Picture
- Upload: Click “Upload” to select an image from your device
- Remove: Click “Remove” to delete your current profile picture and revert to initials
Profile pictures are automatically resized and optimized for display.
Basic Information
You can edit the following fields:
- First Name: Your given name
- Last Name: Your family name
- Username: Your unique identifier on the platform (must be unique)
- Email Address: Your contact email (must be unique)
Bio
The bio field supports plain text where you can describe yourself, your role, or any information you wish to share. Line breaks are preserved in the display.
Account Settings
The Account tab provides additional options:
- ID: Your unique numeric identifier (non-editable)
- Role: Your assigned role in the system (non-editable)
- Account Type: Toggle between public and private profile visibility
- Change Password: Update your login password
- Log Out: End your current session
Two-Factor Authentication (2FA)
The 2FA tab allows you to add an additional security layer to your account. Two-factor authentication requires both your password and a time-based verification code when logging in.
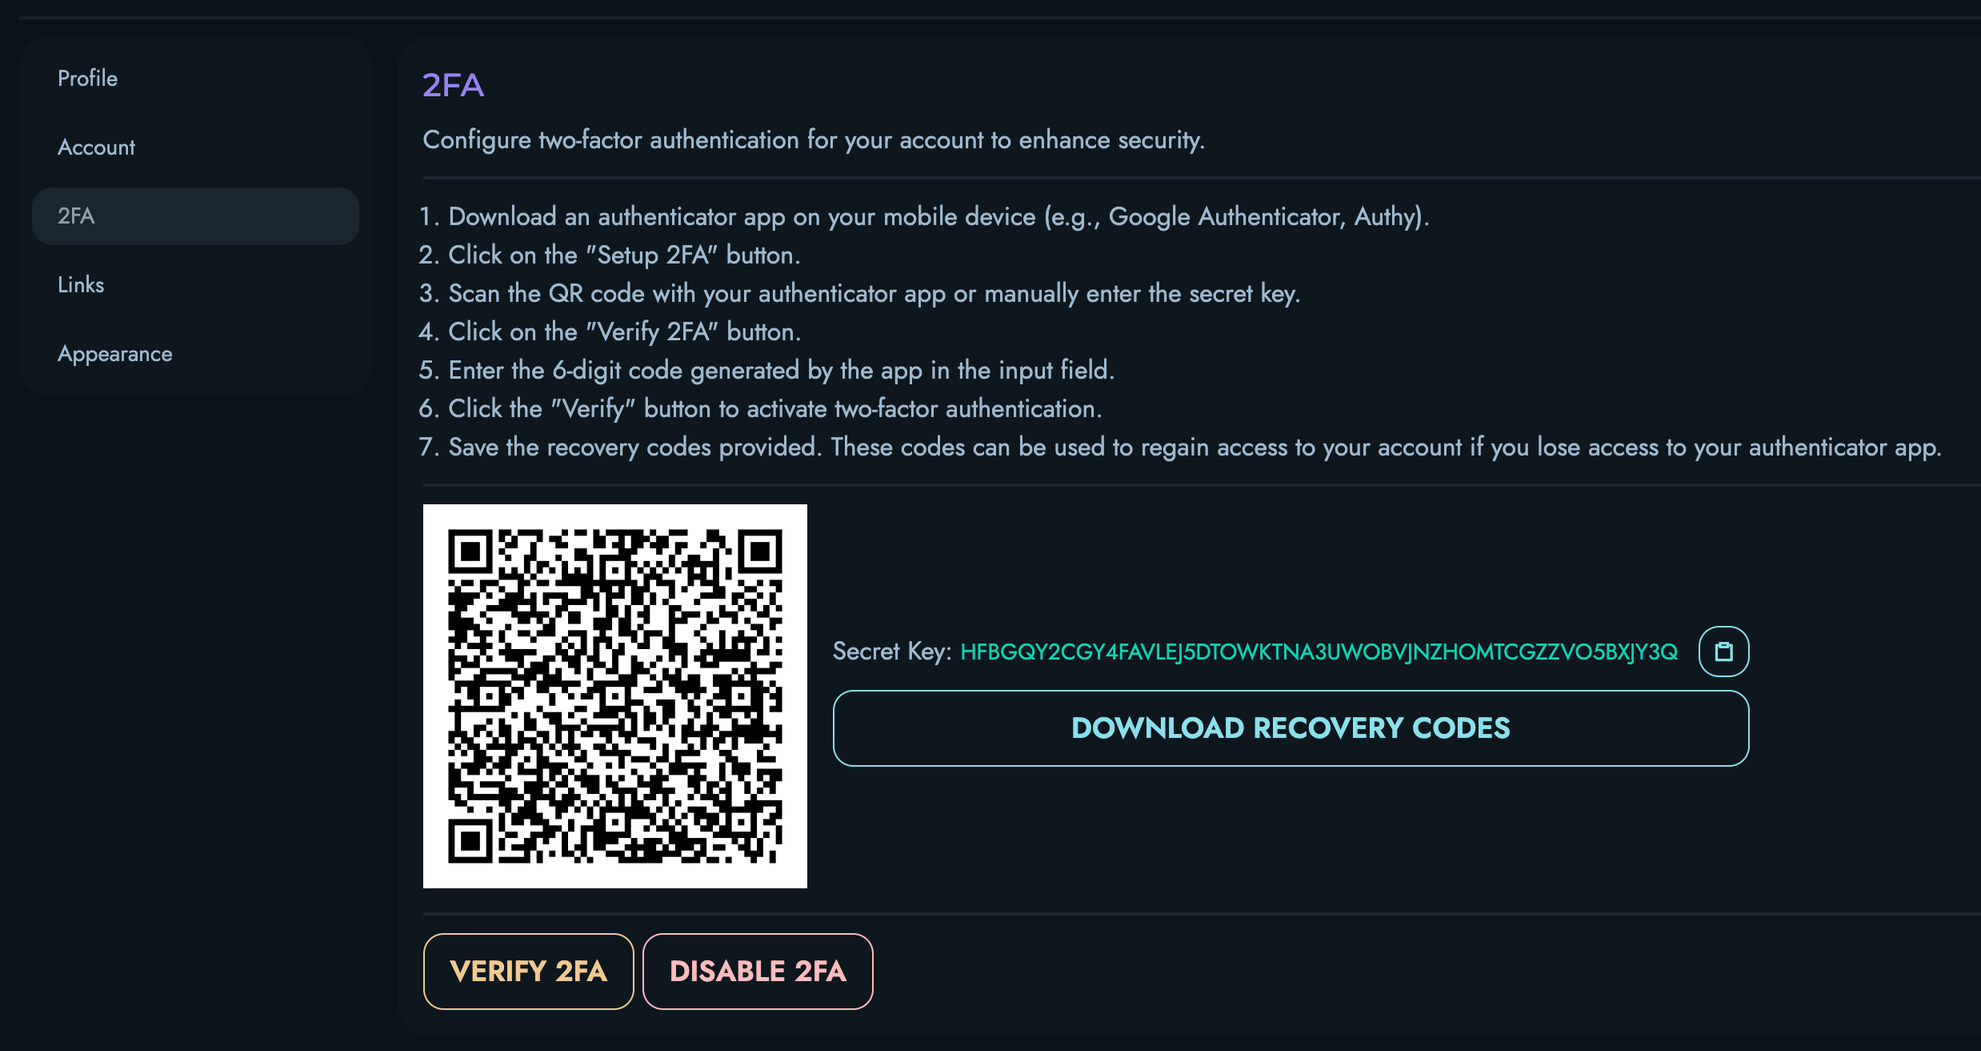
Setting Up 2FA
- Navigate to the 2FA tab in Settings
- Click the “Setup 2FA” button
- A QR code and secret key will appear
- Scan the QR code with an authenticator app (such as Google Authenticator, Authy, or Microsoft Authenticator)
- Click “Verify 2FA” and enter the 6-digit code displayed in your authenticator app
- After successful verification, your 2FA is active
Recovery Codes
When setting up 2FA, you’ll receive a set of recovery codes. These one-time use codes allow you to access your account if you lose your authenticator device.
- Click “Download Recovery Codes” to save these codes
- Store them securely in a password manager or other safe location
- Each code can be used only once
Disabling 2FA
If you need to disable 2FA:
- Navigate to the 2FA tab in Settings
- Click the “Disable 2FA” button
- Confirm your decision when prompted
Security Best Practices
- Never share your 2FA secret key or QR code with anyone
- Store recovery codes securely and separately from your password
- If you get a new device, set up 2FA again before disposing of your old device
- Consider using a password manager that supports TOTP (Time-based One-Time Password) as a backup
Links
The Links tab allows you to manage external links displayed on your profile:
- Click “New” to add a link
- For each link, you can specify:
- URL: The full web address (must include https://)
- Icon: A Remix Icon class name (e.g., ri-github-fill)
- Name: A label for the link
- Click “Save” to update all links at once
You can add multiple links and delete existing ones as needed.
Appearance
The Appearance tab lets you customize the interface:
- Theme: Select from various color themes
- Sidebar: Choose which items appear in your navigation sidebar
Profile Usage Best Practices
- Complete Your Profile: A complete profile helps others identify and contact you
- Appropriate Content: Keep profile information professional and relevant
- Regular Updates: Keep your information current, especially contact details
- Consider Visibility: Set appropriate visibility based on your role and preferences
Related Documentation
- Users - Overview of user management
- Personal Access Tokens - Managing API access tokens
Projects
Projects in Kinesis API serve as the primary organizational units that group related collections, structures, and routes. They provide logical separation between different API initiatives and help maintain clear boundaries for access control and resource management.
Accessing Projects
The Projects page can be accessed by navigating to /web/projects in your browser after logging in.
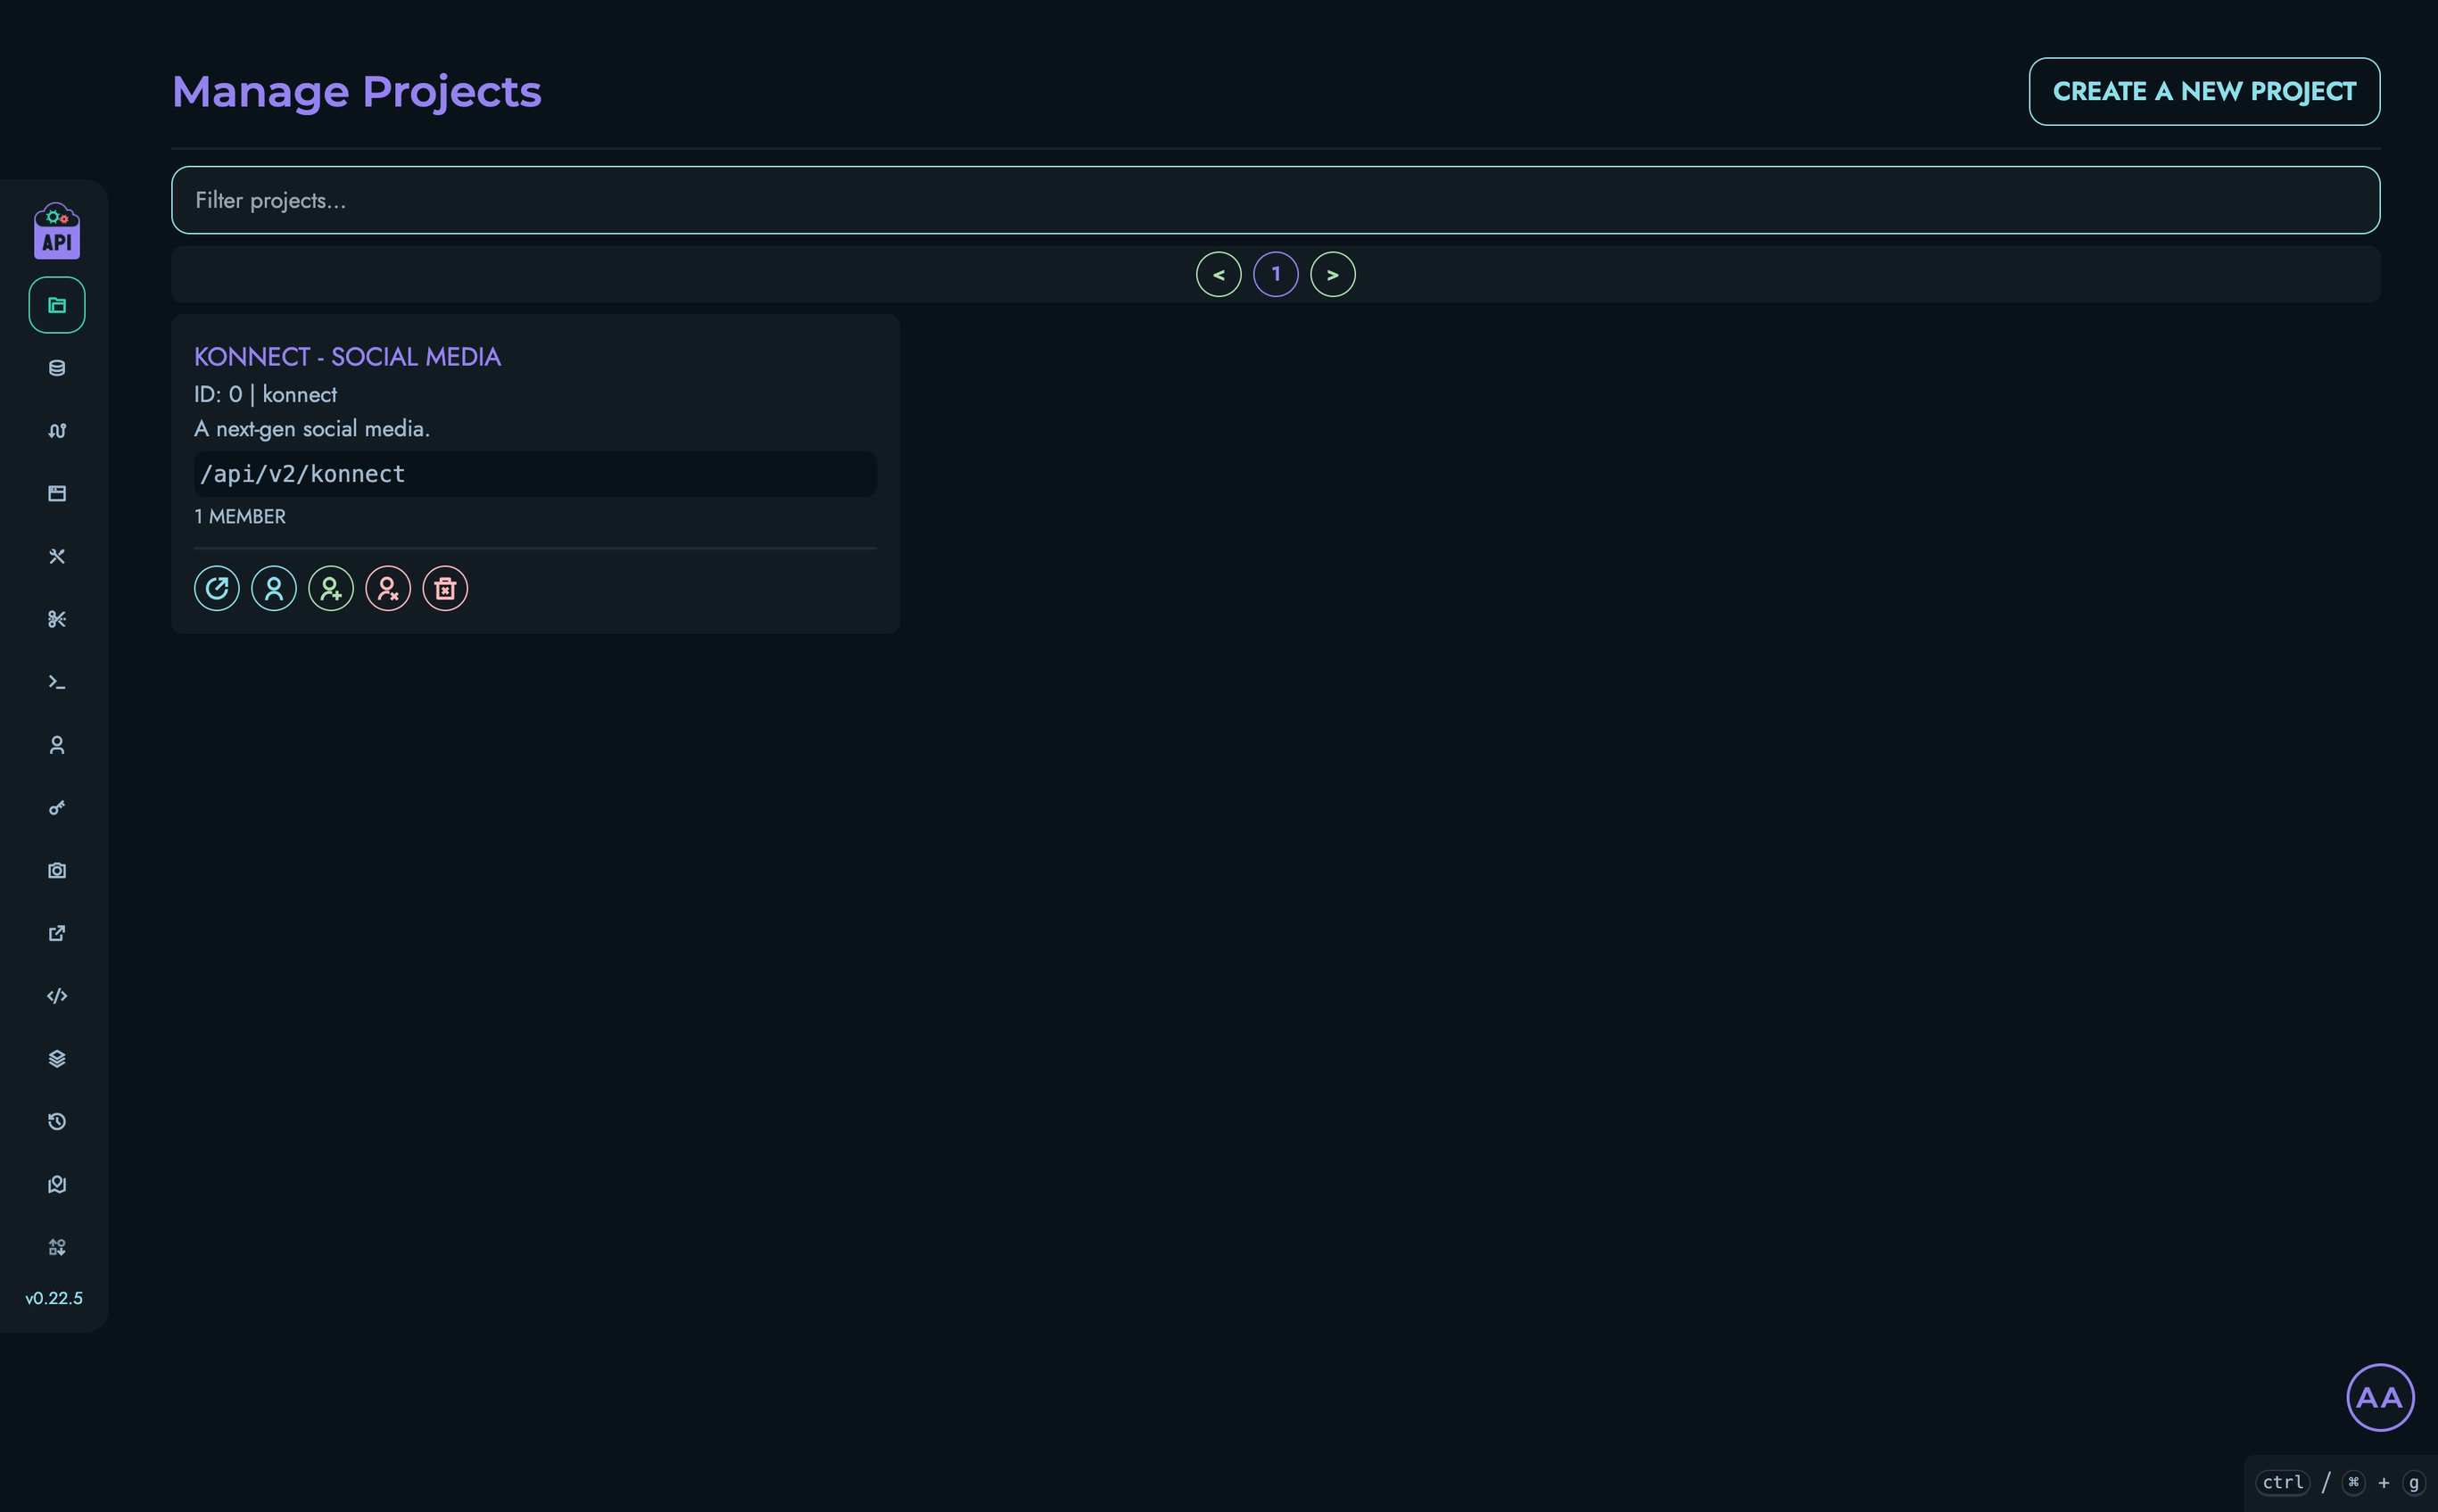
Projects Visibility
The visibility of projects depends on your user role:
- ROOT Users: Can see all projects created within the Kinesis API instance
- All Other Users: Can only see projects they are members of
This role-based visibility ensures that users only have access to projects relevant to their work.
Project List Interface
The Projects interface includes:
- A filterable, paginated list of projects
- Project cards showing key information
- Action buttons for various operations
- A creation button for ROOT and ADMIN users
Each project card displays:
- Project name
- Project ID
- Description
- API path
- Number of members
Creating a New Project
ROOT and ADMIN users can create new projects:
- Click the “Create a new project” button
- Fill in the required information:
- Name: A human-readable name for the project
- ID: A unique identifier (used in URLs and API paths)
- Description: A brief explanation of the project’s purpose
- API Path: The base path for all API routes in this project
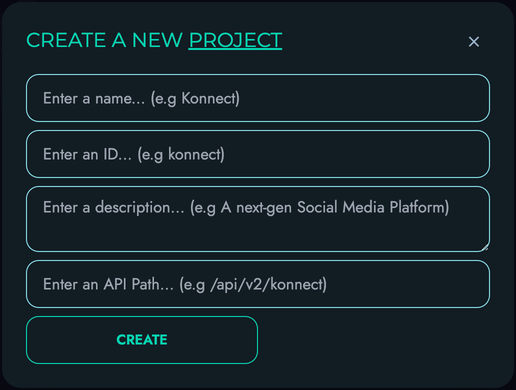
Project ID Requirements
Project IDs must:
- Be unique across the Kinesis API instance
- Contain only lowercase letters, numbers, and underscores
- Start with a letter
- Be between 3 and 50 characters long
API Path Conventions
API paths should:
- Start with a forward slash (
/) - Follow RESTful conventions
- Be unique across all projects
- Reflect the project’s purpose
Example: /api/v1/inventory for an inventory management project
Project Member Management
Projects use member-based access control. Only users who are members of a project can access its resources.
Viewing Project Members
To view the members of a project:
- Click the “View Members” button (user icon) on the project card
- A modal will display all users who have access to the project
Adding Project Members
ROOT and ADMIN users can add members to a project:
- Click the “Add Member” button (plus user icon)
- Select users from the list to add them to the project
- Click the add icon next to each user you want to add
Removing Project Members
ROOT and ADMIN users can remove members from a project:
- Click the “Remove Member” button (user with x icon)
- Select users from the list to remove them from the project
- Click the remove icon next to each user you want to remove
Accessing a Project
To view or manage a specific project:
- Click on the project name or use the “View Project” button
- You’ll be taken to the project detail page (
/web/project?id=[project_id])
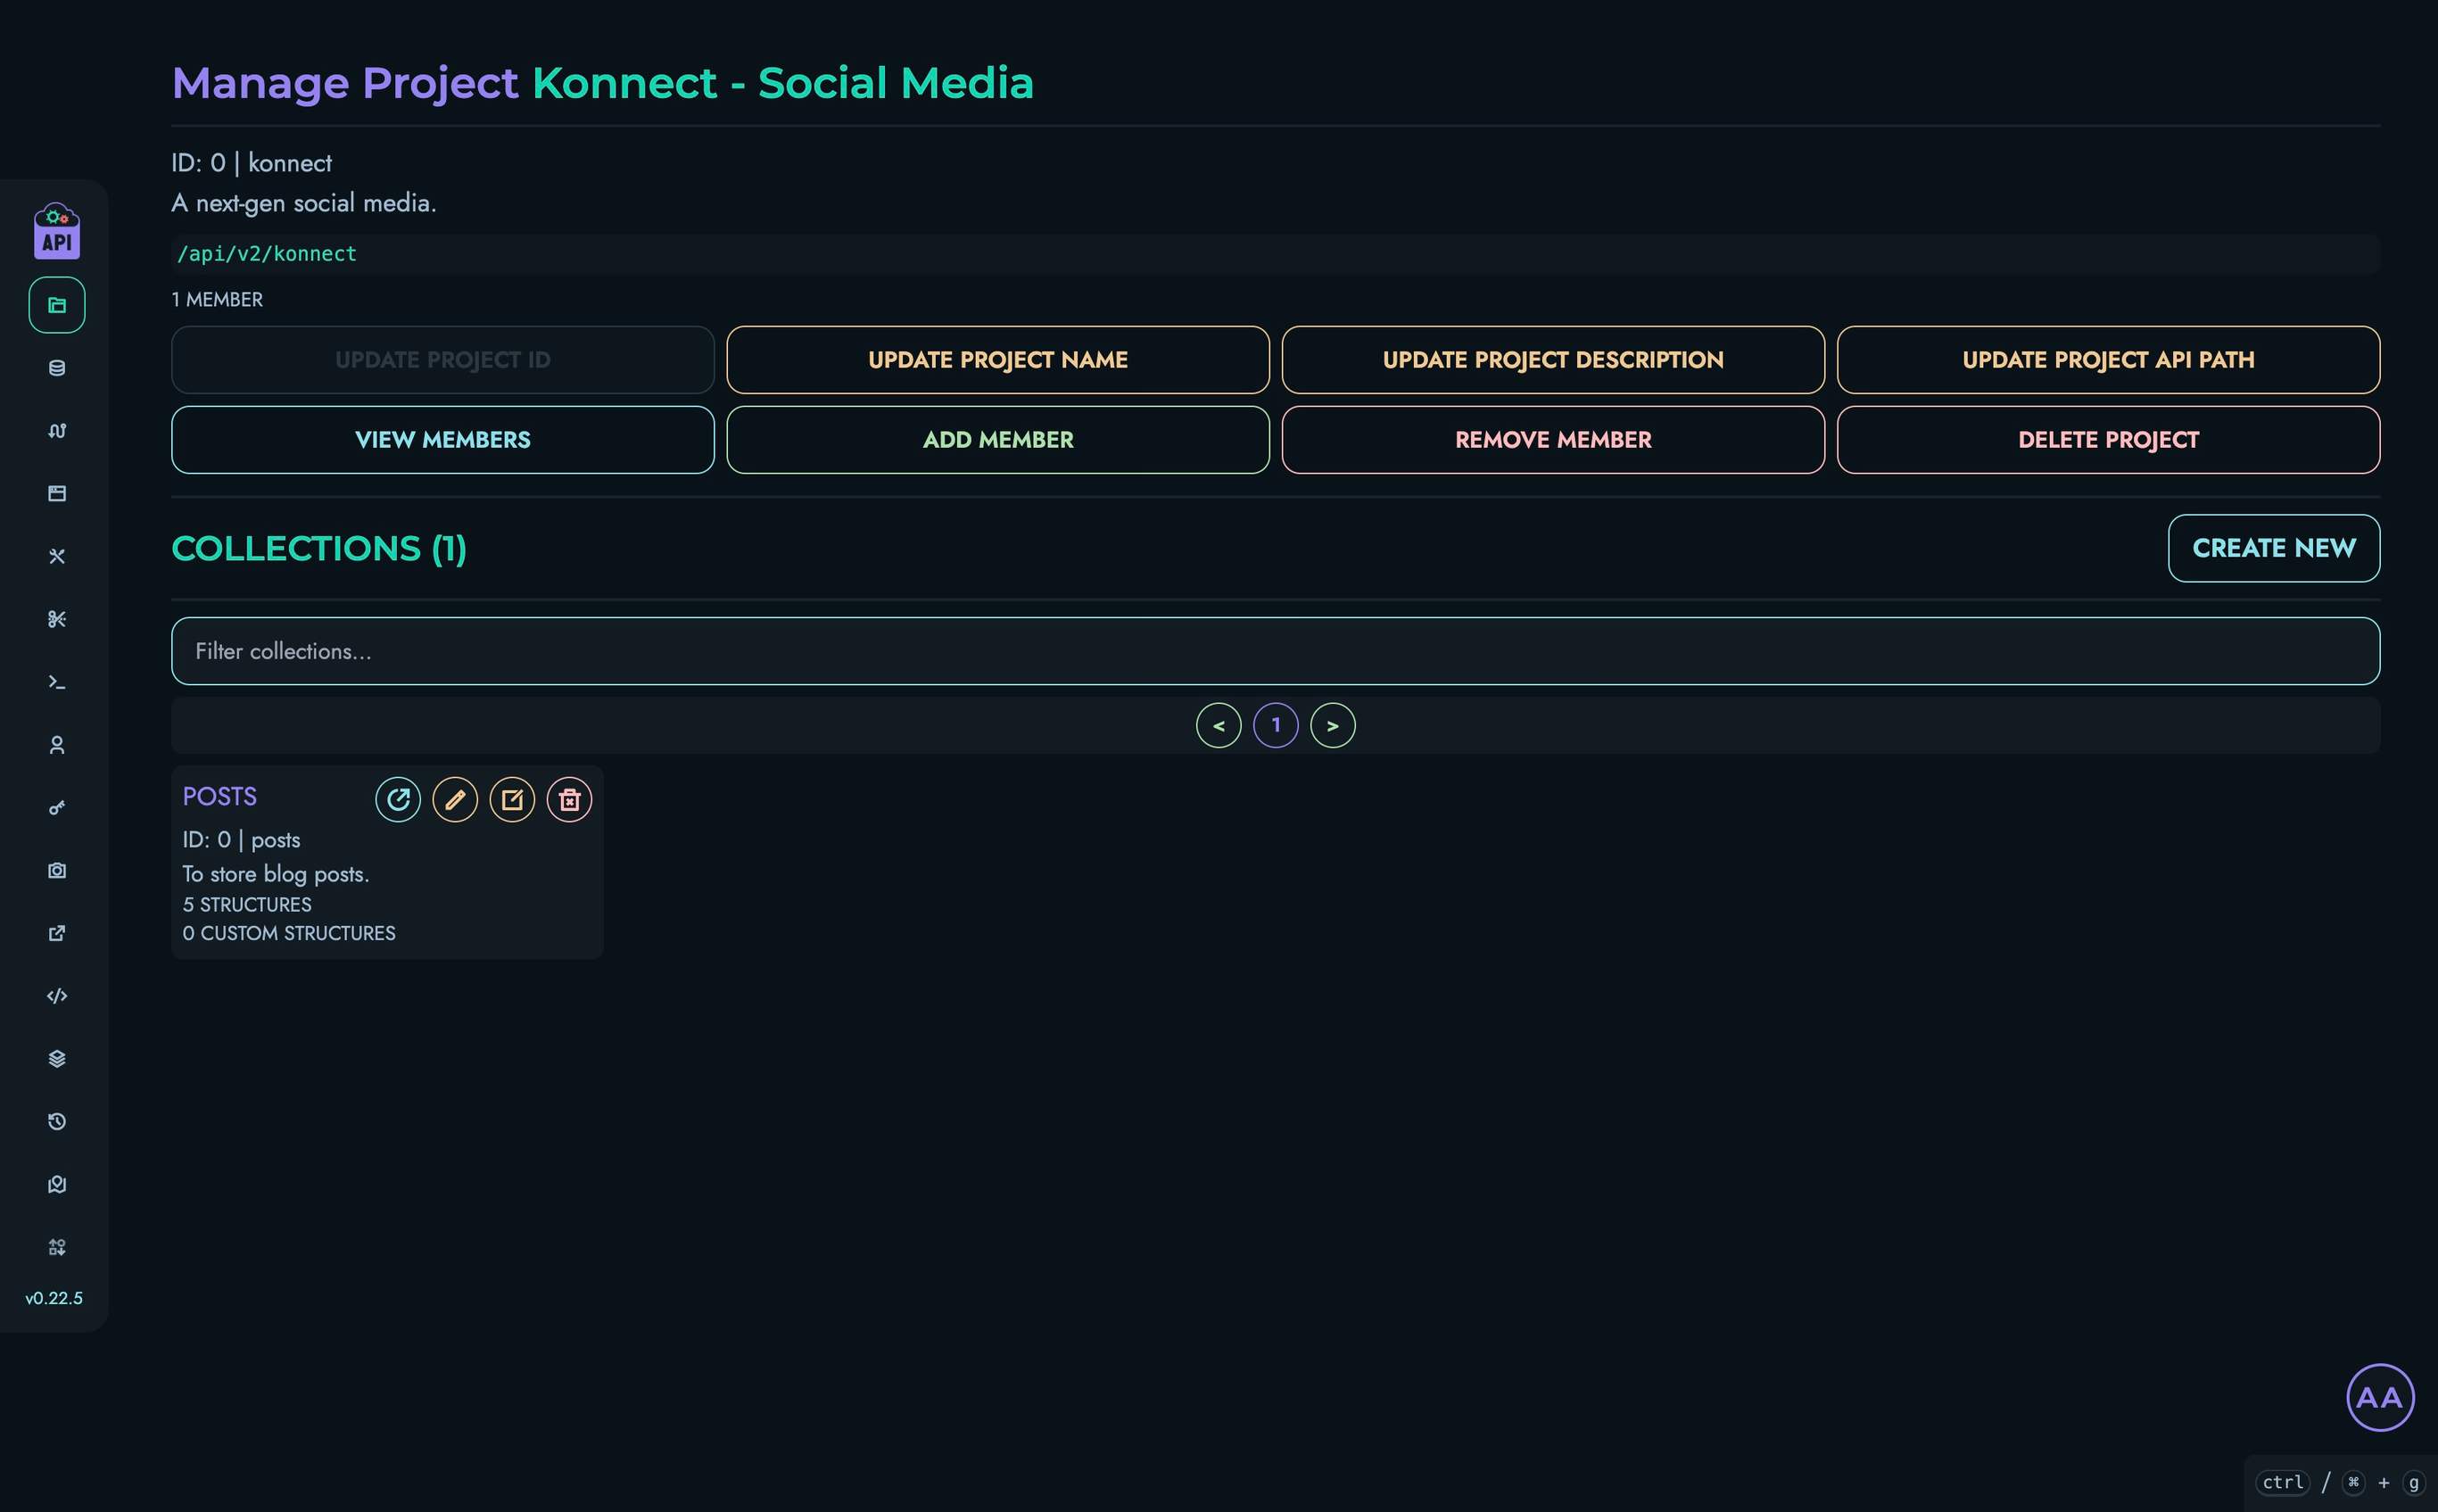
The project detail page provides access to all collections within that project. Most operations described above (such as managing members and deleting the project) can also be performed directly from this page.
Project Page Capabilities
From the project detail page, you can:
- View and edit the project’s information (name, description, API path)
- Manage project members (add or remove users)
- Delete the project entirely
- View and interact with all collections belonging to the project
- Create new collections directly from this interface
- Access collections to manage their data and structures
The centralized project interface makes it convenient to perform all project-related operations without returning to the main projects list, streamlining your workflow when working within a specific project context.
Deleting Projects
ROOT and ADMIN users can delete projects:
- Click the “Delete Project” button (trash icon) on the project card
- Confirm the deletion in the modal that appears
⚠️ Warning: Deleting a project permanently removes all collections, structures, data, and routes associated with it. This action cannot be undone.
Filtering Projects
To find specific projects:
- Use the filter input at the top of the project list
- Type any part of the project name, ID, description, or API path
- The list will automatically filter to show matching projects
Pagination
For systems with many projects:
- Navigate between pages using the pagination controls
- The page displays up to 8 projects at a time
Project Lifecycle
Projects typically follow this lifecycle:
- Creation: A ROOT or ADMIN user creates the project
- Configuration: Collections and structures are defined
- Development: API routes are created using the X Engine
- Maintenance: The project evolves with new features and updates
- Retirement: When no longer needed, the project is deleted
Related Documentation
- Collections - Manage data collections within projects
- Structures - Define data structures for collections
- Data - Work with data stored in collections
- Routes - Create API endpoints for project resources
Collections
Collections in Kinesis API are containers for related data within a project. They serve as the primary way to organize, structure, and access your API’s data resources.
Understanding Collections
Collections in Kinesis API work similarly to tables in a traditional database or collections in document databases. Each collection:
- Belongs to a specific project
- Contains data records that conform to defined structures
- Can be accessed via API endpoints
Collections are the building blocks for storing and organizing your application data in a logical, accessible manner.
Accessing Collections
Collections can be accessed in two ways:
- Via the Web Interface: Navigate to
/web/project?id=[project_id]and view the collections listed for that project - Via the API: Use the collections endpoints with appropriate authentication
Collection Management Interface
The collection management interface within a project includes:
- A list of all collections in the project
- Tools for creating new collections
- Access to individual collection settings and structures
Creating a Collection
To create a new collection:
- Navigate to a project page
- Click the “Create a New Collection” button
- Fill in the required information:
- Name: A human-readable name for the collection
- ID: A unique identifier (used in API paths and queries)
- Description: An optional description of the collection’s purpose
- Click “Create” to save the collection
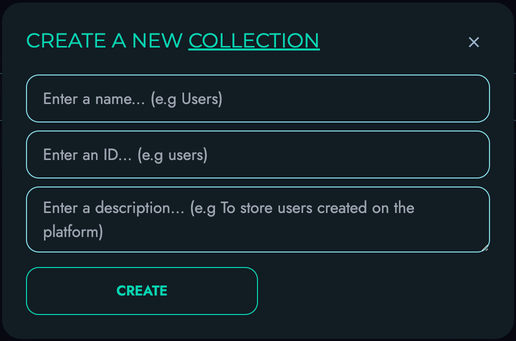
Collection ID Requirements
Collection IDs must:
- Be unique within a project
- Contain only lowercase letters, numbers, and underscores
- Start with a letter
- Be between 3 and 50 characters
Collection Details Page
Clicking on a collection name takes you to the collection details page, where you can:
- View and edit collection information
- Manage structures within the collection
- Manage custom structures
- Delete the collection if needed
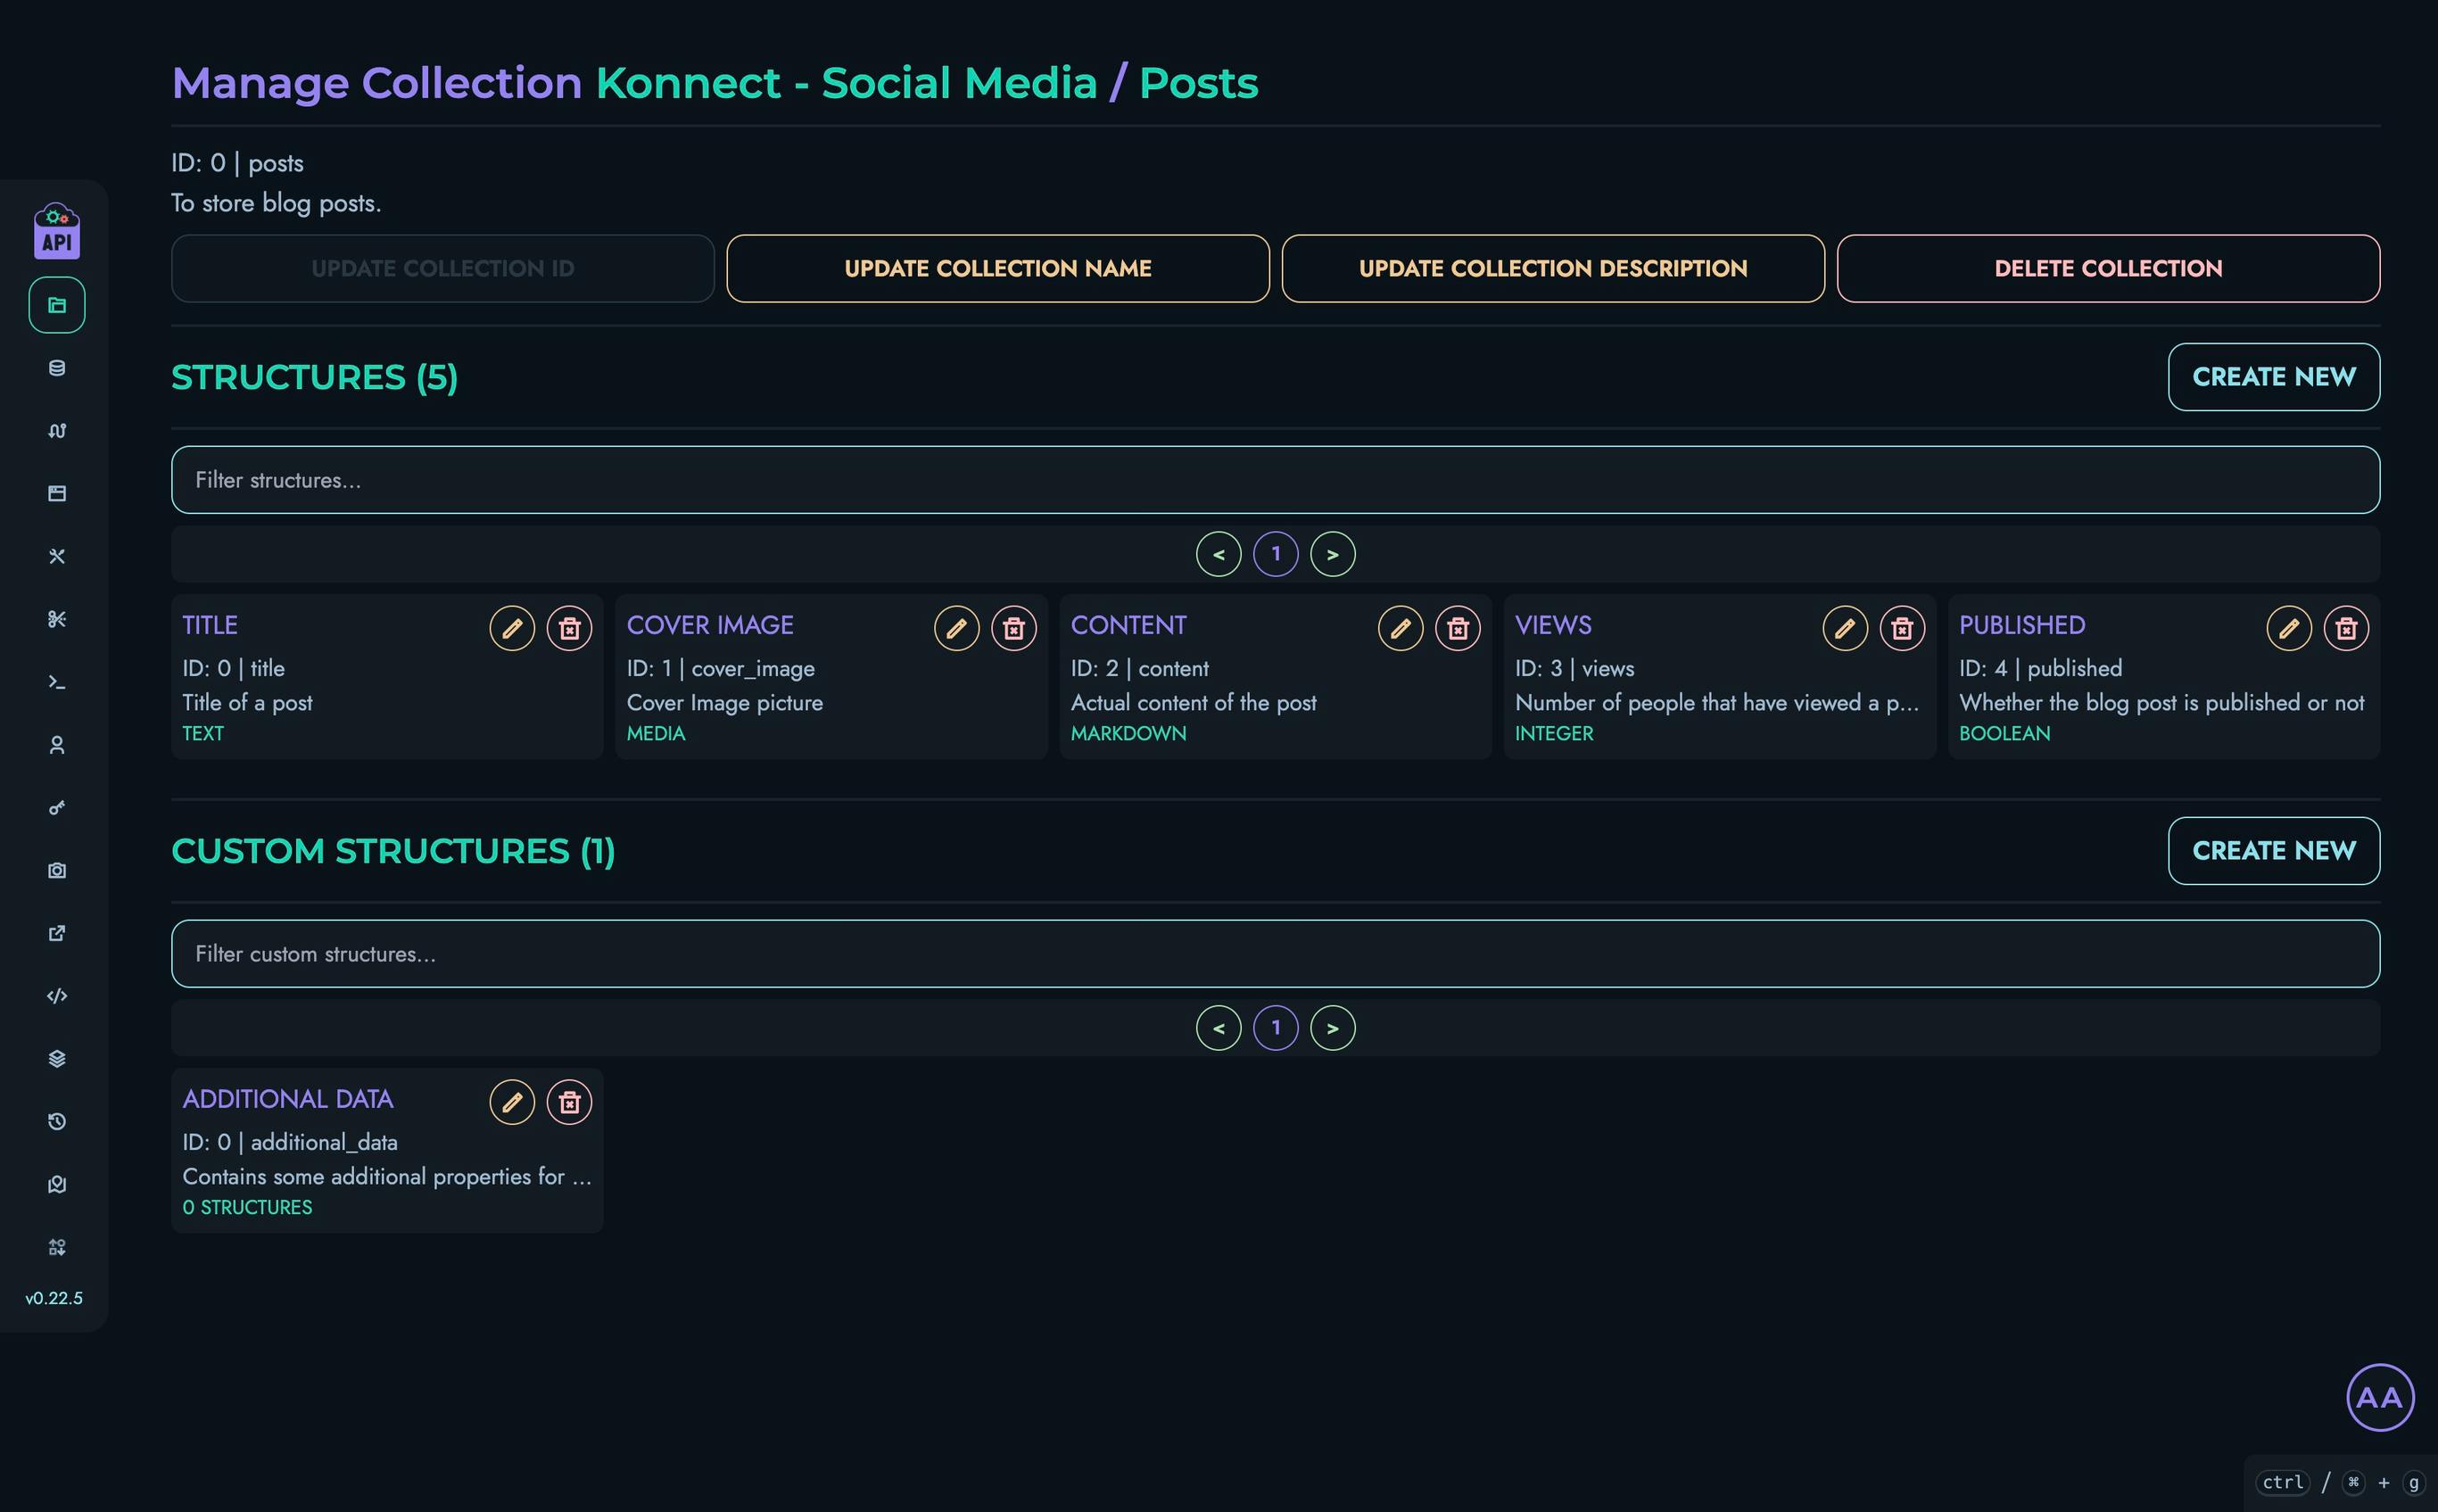
Updating Collection Information
You can update a collection’s information by:
- Clicking the appropriate edit button next to the collection detail
- Modifying the information in the modal that appears
- Saving your changes
Available updates include:
- Changing the collection name
- Modifying the collection description
Note that the collection ID cannot be changed after creation as it would break existing data references.
Managing Structures
Each collection contains structures that define the fields of data it can store. From the collection details page, you can:
- Create new structures using the “Create New” button in the Structures section
- Edit existing structures by clicking the edit icon
- Delete structures when they’re no longer needed
See the Structures documentation for more details on creating and managing structures.
Managing Custom Structures
Custom structures allow you to create complex, reusable data templates. From the collection details page, you can:
- Create new custom structures
- Navigate to existing custom structures to edit their components
- Delete custom structures when they’re no longer needed
See the Custom Structures documentation for more information.
Deleting a Collection
To delete a collection:
- Navigate to the collection details page
- Click the “Delete Collection” button
- Confirm the deletion in the modal that appears
⚠️ Warning: Deleting a collection permanently removes all its structures and associated data. This action cannot be undone.
Data Operations
Once you’ve set up a collection with appropriate structures, you can perform various operations on its data:
- Create new records
- Retrieve records through queries
- Update existing records
- Delete records
See the Data documentation for details on working with collection data.
Best Practices
For optimal collection management:
- Logical Organization: Group related data into collections
- Clear Naming: Use descriptive names and IDs that reflect the collection’s purpose
- Documentation: Add thorough descriptions to help team members understand the collection’s use
- Structure Planning: Design your structures carefully before adding significant amounts of data
- Regular Maintenance: Periodically review collections to ensure they remain relevant and well-organized
Related Documentation
- Projects - Information about project management
- Structures - Defining data structures for collections
- Custom Structures - Creating complex, reusable structures
- Data - Working with collection data
Structures
Structures in Kinesis API define individual fields within collections. Unlike traditional database systems where you might define an entire schema at once, Kinesis API uses structures to represent each individual field in your data model. This granular approach offers greater flexibility and reusability.
Understanding Structures
Each structure represents a single field that can be used within collections. Key characteristics of structures include:
- Each structure defines exactly one field with its data type and validation rules
- Structures can be reused across multiple collections
- They establish specific validation rules for individual data elements
- They support both simple and complex data types
Database Analogy: If a collection is like a database table, a structure is like a single column in that table.
Managing Structures from Collections
Structures are created, edited, and deleted from within the collection interface. To access and manage structures:
- Navigate to a project page
- Click on a collection to view its details
- Locate the “Structures” section on the collection details page
Creating a Structure
To create a new structure:
- From the collection details page, click the “Create New” button in the Structures section
- Fill in the required information:
- Name: A unique identifier for the structure (field name)
- Description: Optional explanation of the structure’s purpose
- In the same modal, define the properties for this field:
- Select the appropriate data type
- Configure validation rules
- Set default values if needed
- Click “Create” to save the structure
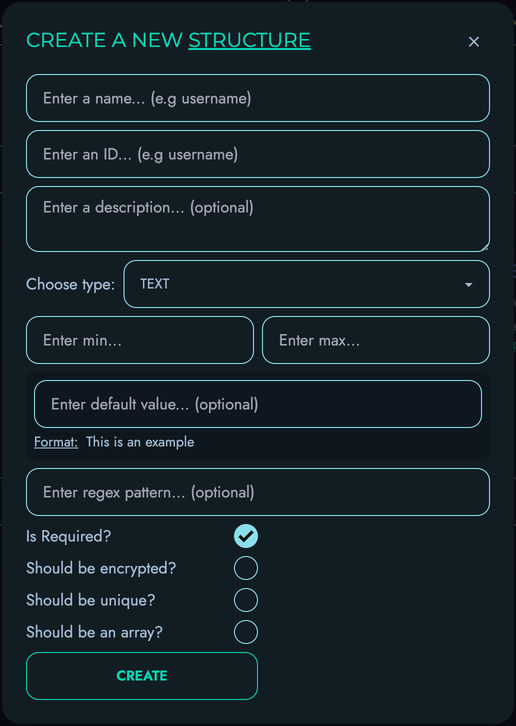
Structure Properties
When creating or editing a structure, you configure properties for that specific field:
- Type: The type of data to be represented (Text, Email, Password, Markdown, Integer, etc.)
- Required: Whether this field must be present in all records
- Unique: Whether values must be unique across all records
- Default: An optional default value
- Min/Max: Constraints for strings (length) or numbers (value)
- Pattern: A regular expression pattern for validation (strings only)
Field Types
Structures support various field types to model different kinds of data:
| Type | Description | Example |
|---|---|---|
| TEXT | Basic text data for names, descriptions, etc. | "Hello World" |
| Email addresses with validation | "[email protected]" | |
| PASSWORD | Securely stored password strings | "********" |
| MARKDOWN | Rich text with markdown formatting | "# Heading\n\nParagraph with **bold** text" |
| INTEGER | Whole number values | 42, -7 |
| FLOAT | Decimal number values | 3.14159, -2.5 |
| ENUM | Value from a predefined list of options | "pending" (from [“pending”, “approved”, “rejected”]) |
| DATE | Calendar date values | "2023-04-15" |
| DATETIME | Date and time values with timezone | "2023-04-15T14:30:00Z" |
| MEDIA | References to uploaded media files | "uploads/image-123.jpg" |
| BOOLEAN | True/false values | true, false |
| UID | System-generated unique identifier | "5f8d43e1b4ff..." |
| JSON | Arbitrary JSON data structures | {"name": "John", "tags": ["important", "new"]} |
Note on List/Array Types: Kinesis API supports array/list structures through the “array” flag. When enabled for a structure, it allows storing multiple values of the same type. Each element in the array must conform to the structure’s validation rules (e.g., min/max values). In the interface, array elements are split by commas. This approach maintains type validation while providing flexibility for storing multiple related values within a single field. Arrays are useful for simple collections of values; for more complex relationships, consider using separate collections with UID references (similar to foreign keys in traditional databases).
Editing Structures
To modify an existing structure:
- From the collection details page, find the structure in the list
- Click the edit icon (pencil) next to the structure
- Make your changes in the structure editor
- Save your changes
Note: Modifying structures may affect existing data. Be cautious when changing field types or removing fields that contain data.
Deleting Structures
To remove a structure:
- From the collection details page, find the structure in the list
- Click the delete icon (trash) next to the structure
- Confirm the deletion when prompted
⚠️ Warning: Deleting a structure will affect any data that uses it. Ensure that no critical data depends on the structure before deleting.
Best Practices
When designing structures:
- Use Clear Naming: Choose descriptive, consistent names for structures and fields
- Start Simple: Begin with minimal structures and evolve them as needed
- Consider Validation: Use constraints to ensure data quality
- Think About Relationships: Plan how structures will relate to each other
- Document Your Design: Add clear descriptions to structures and fields
- Versioning Strategy: Consider how to handle structure changes over time
Related Documentation
- Collections - Managing collections that contain structures
- Custom Structures - Creating reusable structure templates
- Data - Working with data based on structures
Custom Structures
Custom structures in Kinesis API provide a way to create reusable, complex data templates that can be referenced across multiple collections. They function as user-defined object types that encapsulate related fields, enabling more sophisticated data modeling than is possible with basic structures alone.
Understanding Custom Structures
While regular structures define individual fields within a collection, custom structures allow you to define composite data types with multiple fields grouped together. Think of them as objects or complex data types that:
- Act as templates for complex data
- Can be reused across multiple collections
- Encapsulate related fields
- Support nested data models
- Enable modular data design
Accessing Custom Structures
Custom structures are managed through the collection interface but have their own dedicated pages:
- Navigate to a project page
- Select a collection
- Find the “Custom Structures” section
- Click on a custom structure name to access its dedicated page
Creating a Custom Structure
To create a new custom structure:
- From a collection page, find the “Custom Structures” section
- Click the “Create New” button
- Fill in the required information:
- Name: A descriptive name for the custom structure
- ID: A unique identifier used in API references
- Description: An explanation of the custom structure’s purpose
- Click “Create” to save the custom structure
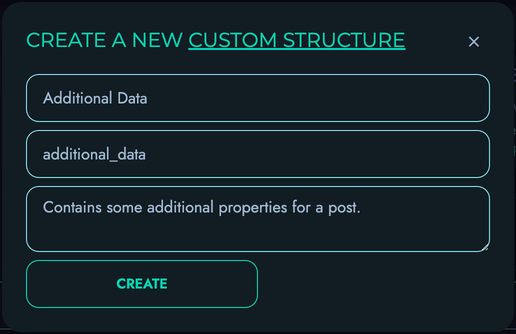
Custom Structure Detail Page
After creating a custom structure, you can access its detail page by clicking on its name. The custom structure page allows you to:
- View and edit the custom structure’s information
- Add structures (fields) to the custom structure
- Manage existing structures
- Delete the custom structure
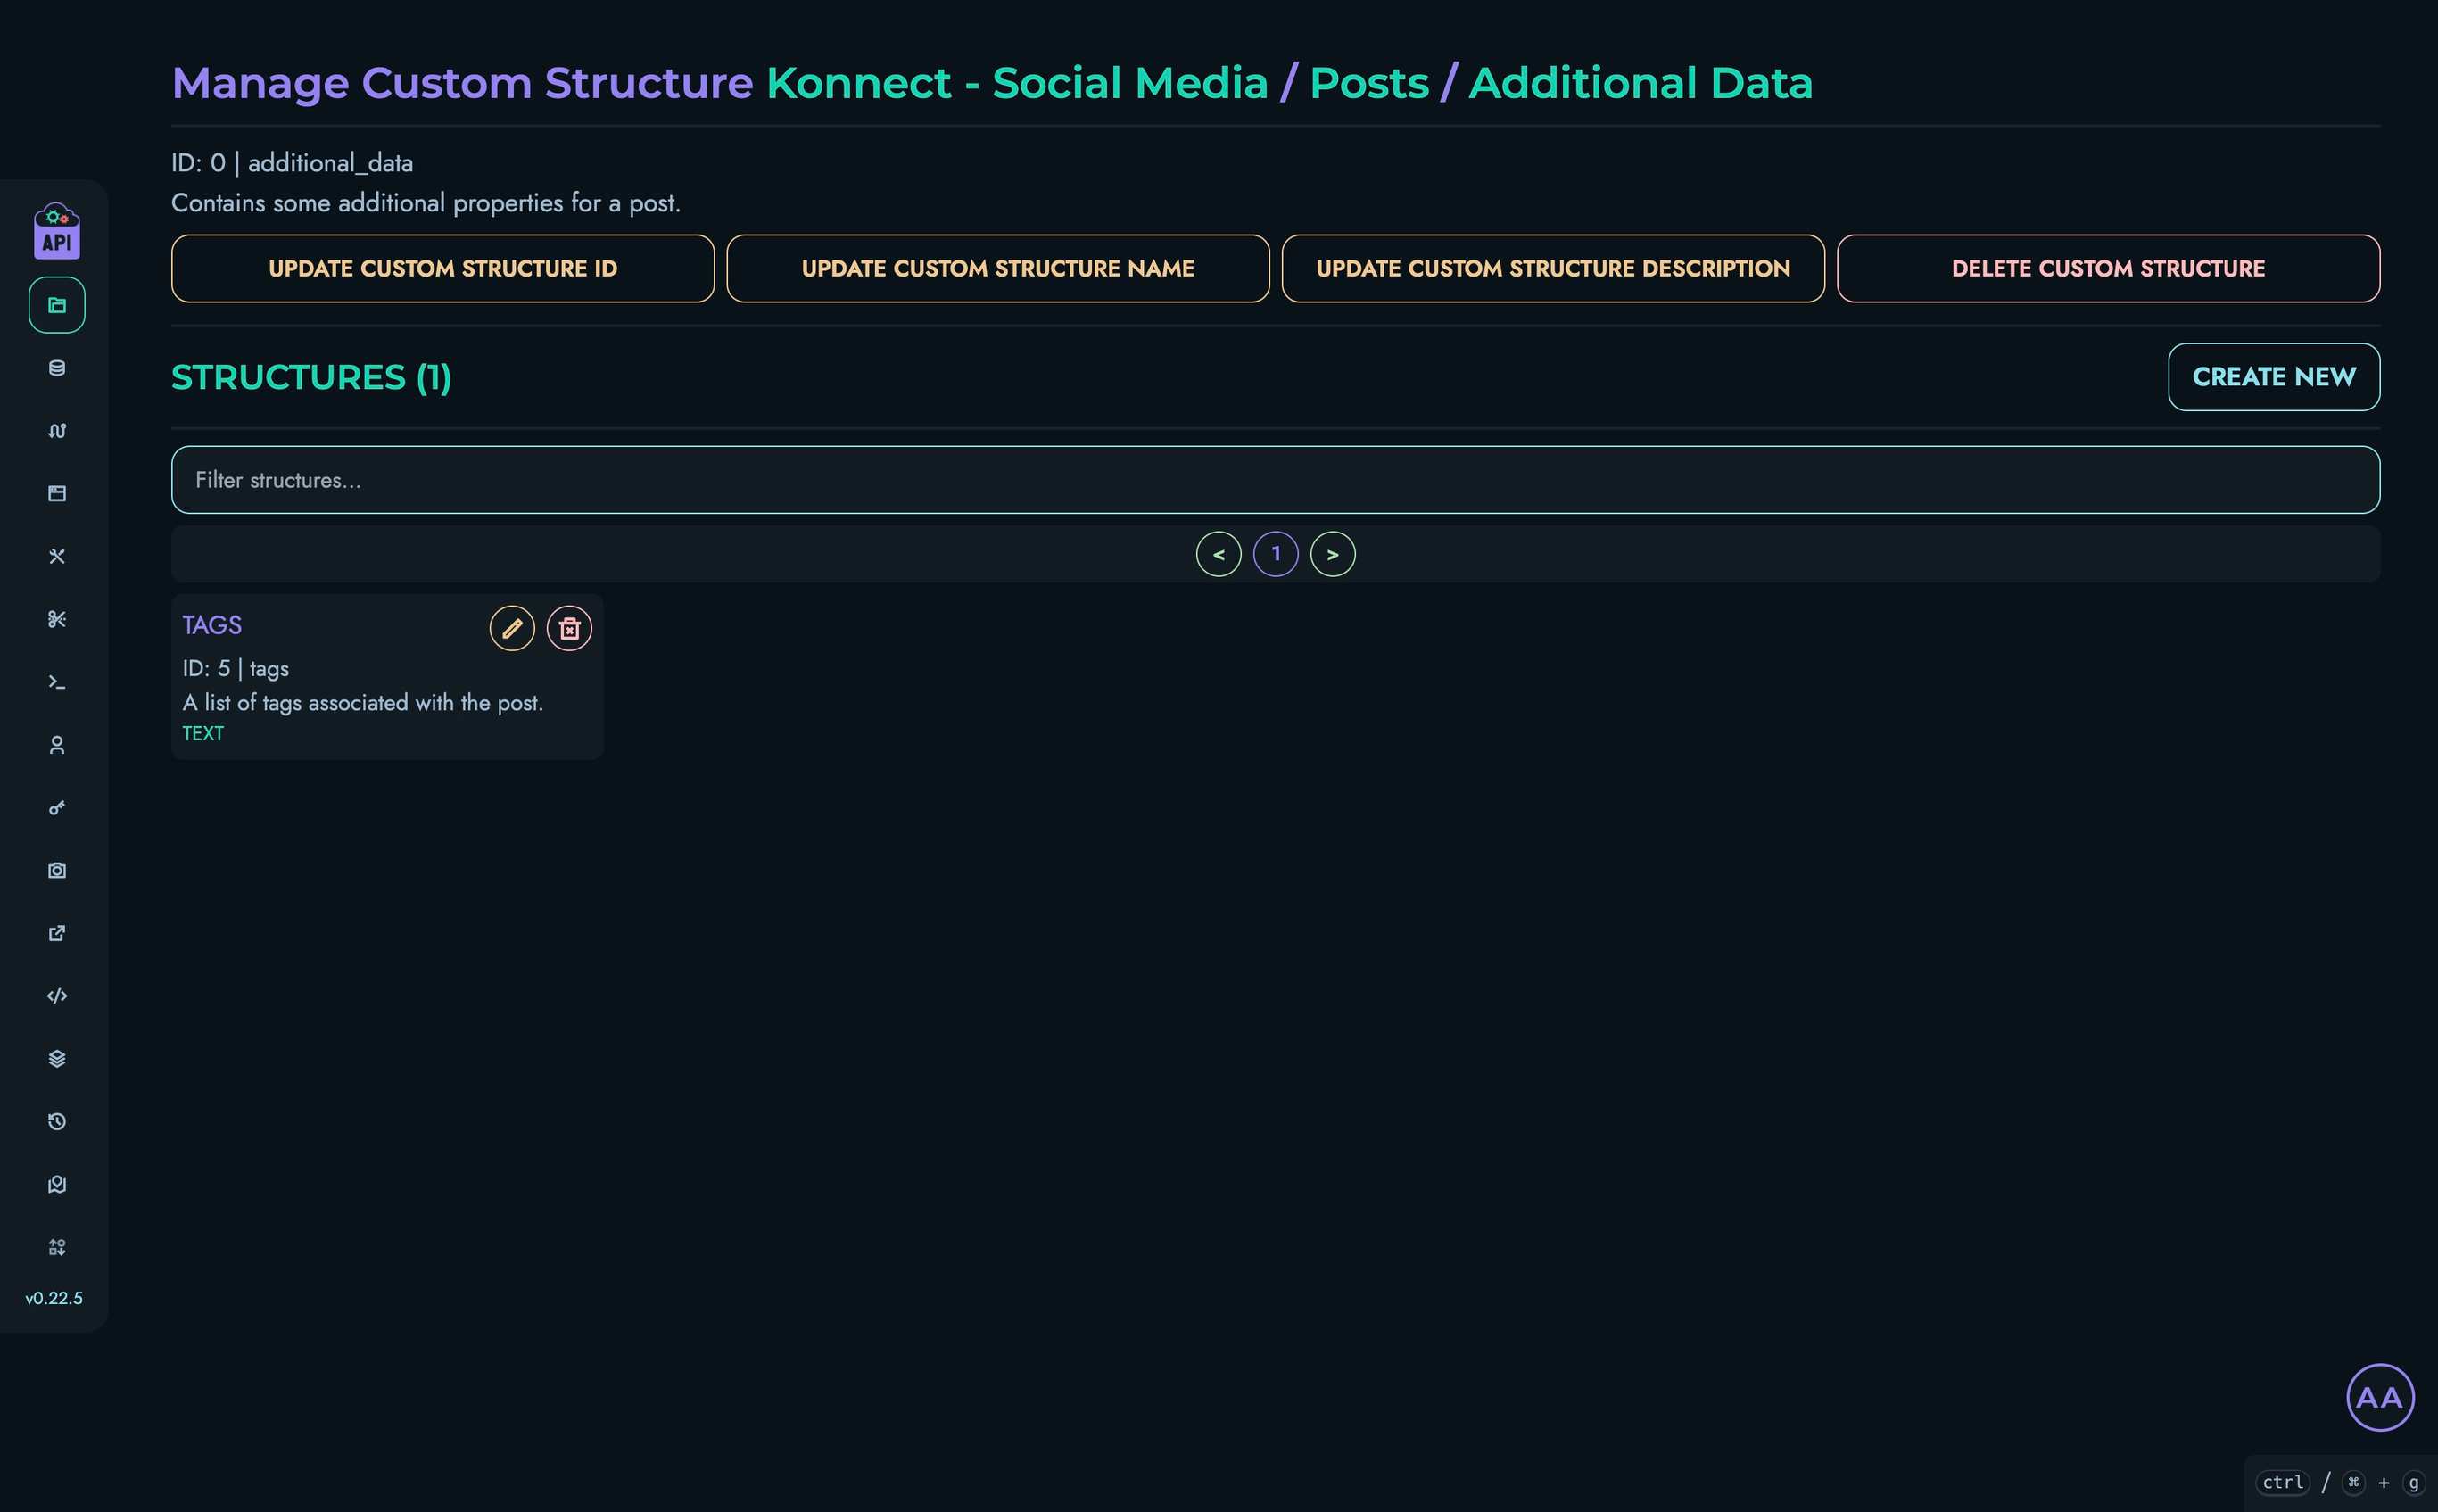
Managing Custom Structure Information
From the custom structure page, you can modify various aspects:
Updating Custom Structure ID
- Click the “Update Custom Structure ID” button
- Enter the new ID in the modal
- Click “Submit” to save the changes
Updating Custom Structure Name
- Click the “Update Custom Structure Name” button
- Enter the new name in the modal
- Click “Submit” to save the changes
Updating Custom Structure Description
- Click the “Update Custom Structure Description” button
- Enter the new description in the modal
- Click “Submit” to save the changes
Adding Structures to a Custom Structure
To add a field to a custom structure:
- From the custom structure page, click the “Create New” button in the Structures section
- Fill in the field details:
- Name: Field name
- ID: Field identifier
- Description: Field description
- Type: Data type selection
- Additional properties like min/max values, default value, etc.
- Click “Create” to add the field
The process for adding fields to a custom structure is identical to adding structures to a collection. See the Structures documentation for more details on field types and properties.
Example Use Cases
Custom structures are particularly useful for:
Address Information
Create an “Address” custom structure with fields like:
- Street
- City
- State/Province
- Postal Code
- Country
This can then be used in “Customer”, “Shipping”, “Billing” and other collections.
Contact Details
Build a “Contact Info” custom structure containing:
- Phone
- Website
- Social Media Profiles
Product Specifications
Define “Product Specs” with varying attributes based on product type:
- Dimensions
- Weight
- Material
- Technical Specifications
Modifying Custom Structures
When you modify a custom structure by adding, changing, or removing fields, these changes affect all places where the custom structure is used. This provides a powerful way to update data models across your entire API without making changes in multiple locations.
However, be aware that:
- Removing fields from a custom structure could impact existing data
- Changing field types might require data migration
- Adding required fields to an existing custom structure could cause validation errors
Deleting Custom Structures
To delete a custom structure:
- From the custom structure page, click the “Delete Custom Structure” button
- Confirm the deletion in the modal that appears
⚠️ Warning: Deleting a custom structure will affect all places where it’s used. Ensure it’s not referenced by any other structures before deletion.
Best Practices
When working with custom structures:
- Descriptive Naming: Use clear, descriptive names that indicate the custom structure’s purpose
- Logical Grouping: Group related fields that naturally belong together
- Appropriate Granularity: Create custom structures at the right level of detail
- Reusability: Design custom structures to be reusable across multiple collections
- Documentation: Add thorough descriptions to help team members understand the purpose and usage of each custom structure
- Versioning Strategy: Consider how to handle changes to custom structures over time
Related Documentation
- Collections - Managing collections that contain custom structures
- Structures - Understanding basic structures and field types
- Data - Working with data based on complex structures
Data
Data objects in Kinesis API represent the actual content stored within your collections. Each data object is associated with a specific collection and contains values for the structures (fields) defined within that collection. This page explains how to create, view, edit, and manage your data.
Understanding Data in Kinesis API
In Kinesis API, data is organized as follows:
- Projects contain Collections
- Collections define Structures (fields)
- Data Objects store values for these structures
- Each data object contains Data Pairs (structure-value associations)
A data pair links a specific structure (field) with its corresponding value. For example, if you have a “title” structure, a data pair might associate it with the value “My First Article”.
🔒 Security Note: All data pairs in Kinesis API are encrypted by design by default. This ensures your data remains secure both at rest and during transmission, providing built-in protection for sensitive information without requiring additional configuration.
Accessing Data Management
To access data management in Kinesis API using the web UI:
- Navigate to
/web/datain your browser or click “Data” in the main navigation menu - You’ll see a list of all projects you have access to
- Click on a project to go to
/web/data/project?id=project_idand view its collections - Click on a collection to go to
/web/data/collection?project_id=project_id&id=collection_idand view its data objects
This hierarchical navigation allows you to drill down from projects to collections to individual data objects.
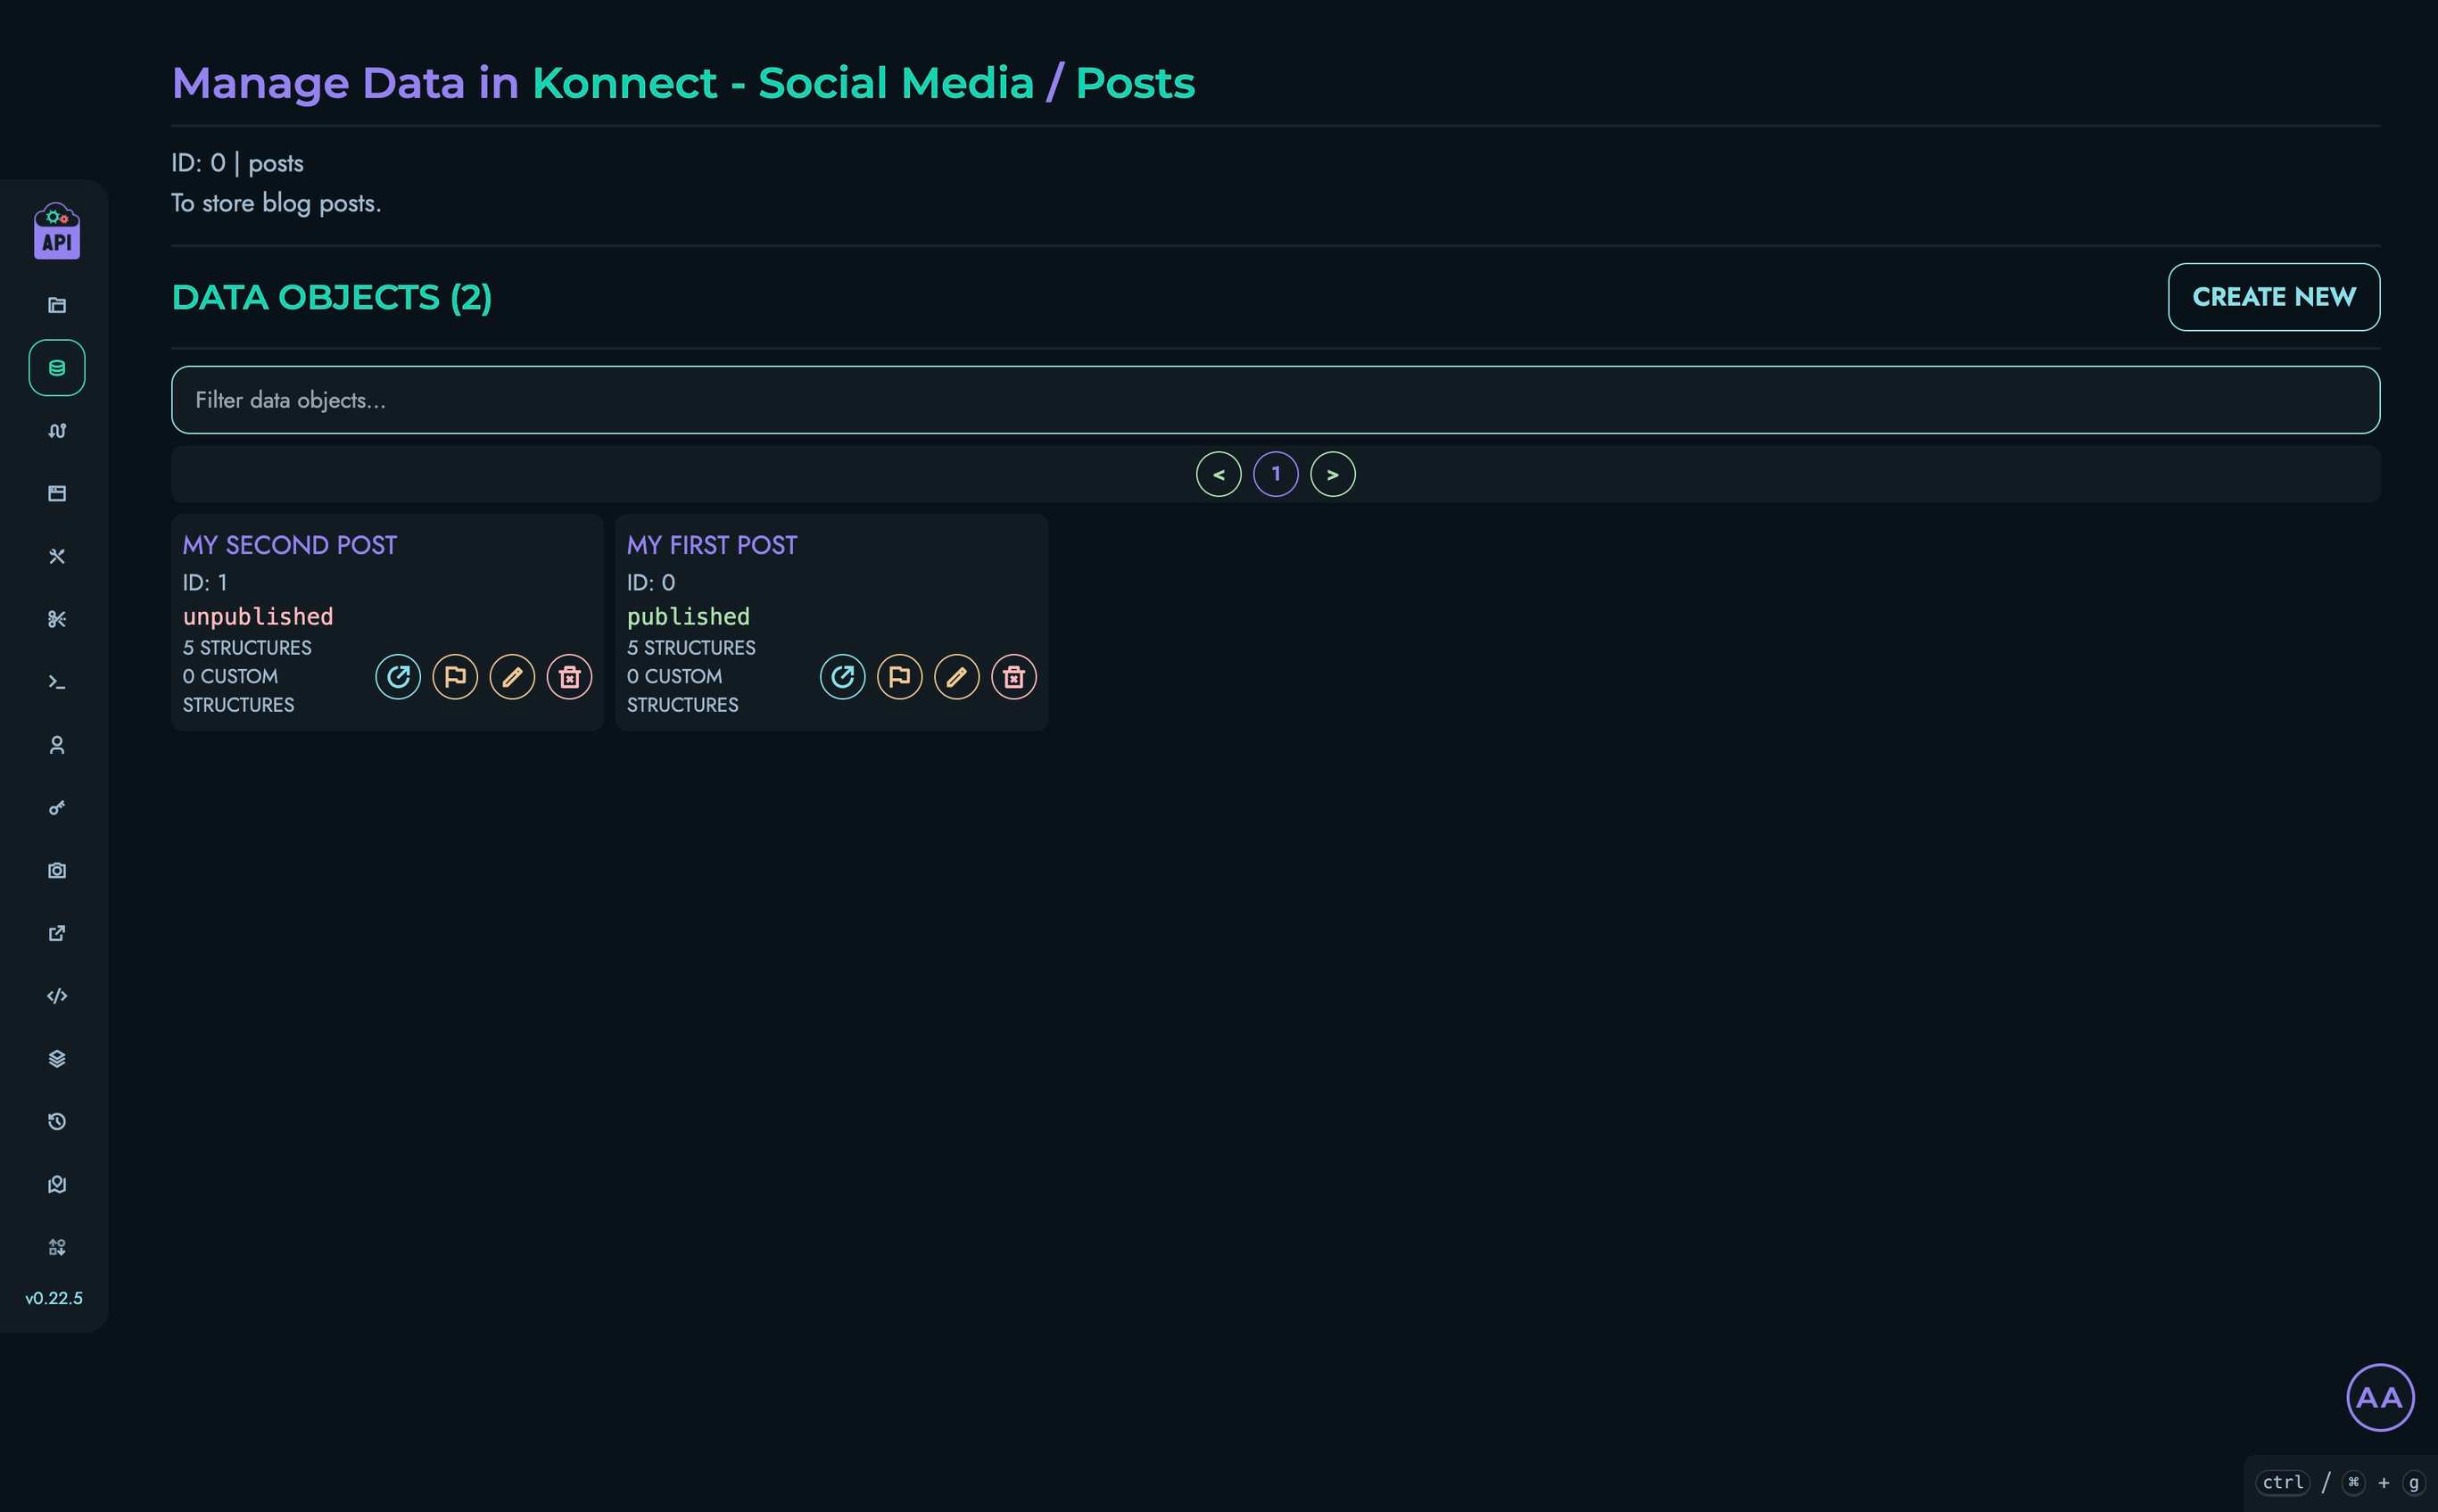
Browsing Projects and Collections
The data management interface follows a logical structure that mirrors your data organization:
Projects Level
At /web/data, you’ll see all projects you have access to:
- Each project is displayed as a card with its name and description
- You can filter projects using the search box at the top of the page
- Click on any project to navigate to its collections
Collections Level
At /web/data/project?id=project_id, you’ll see all collections within the selected project:
- Each collection is displayed with its name and description
- Click on any collection to view its data objects
Viewing Data Objects
From a collection page, you can see all data objects within that collection:
Each data object card displays:
- The object’s nickname (if set) or ID
- Number of structures and custom structures
- Action buttons for various operations
Data Object Details
To view the details of a data object:
- Click the view button (open link icon) or its title on a data object card
- You’ll be taken to a page displaying all structure values
- Regular structures are displayed at the top
- Custom structures are displayed below, grouped by their custom structure type
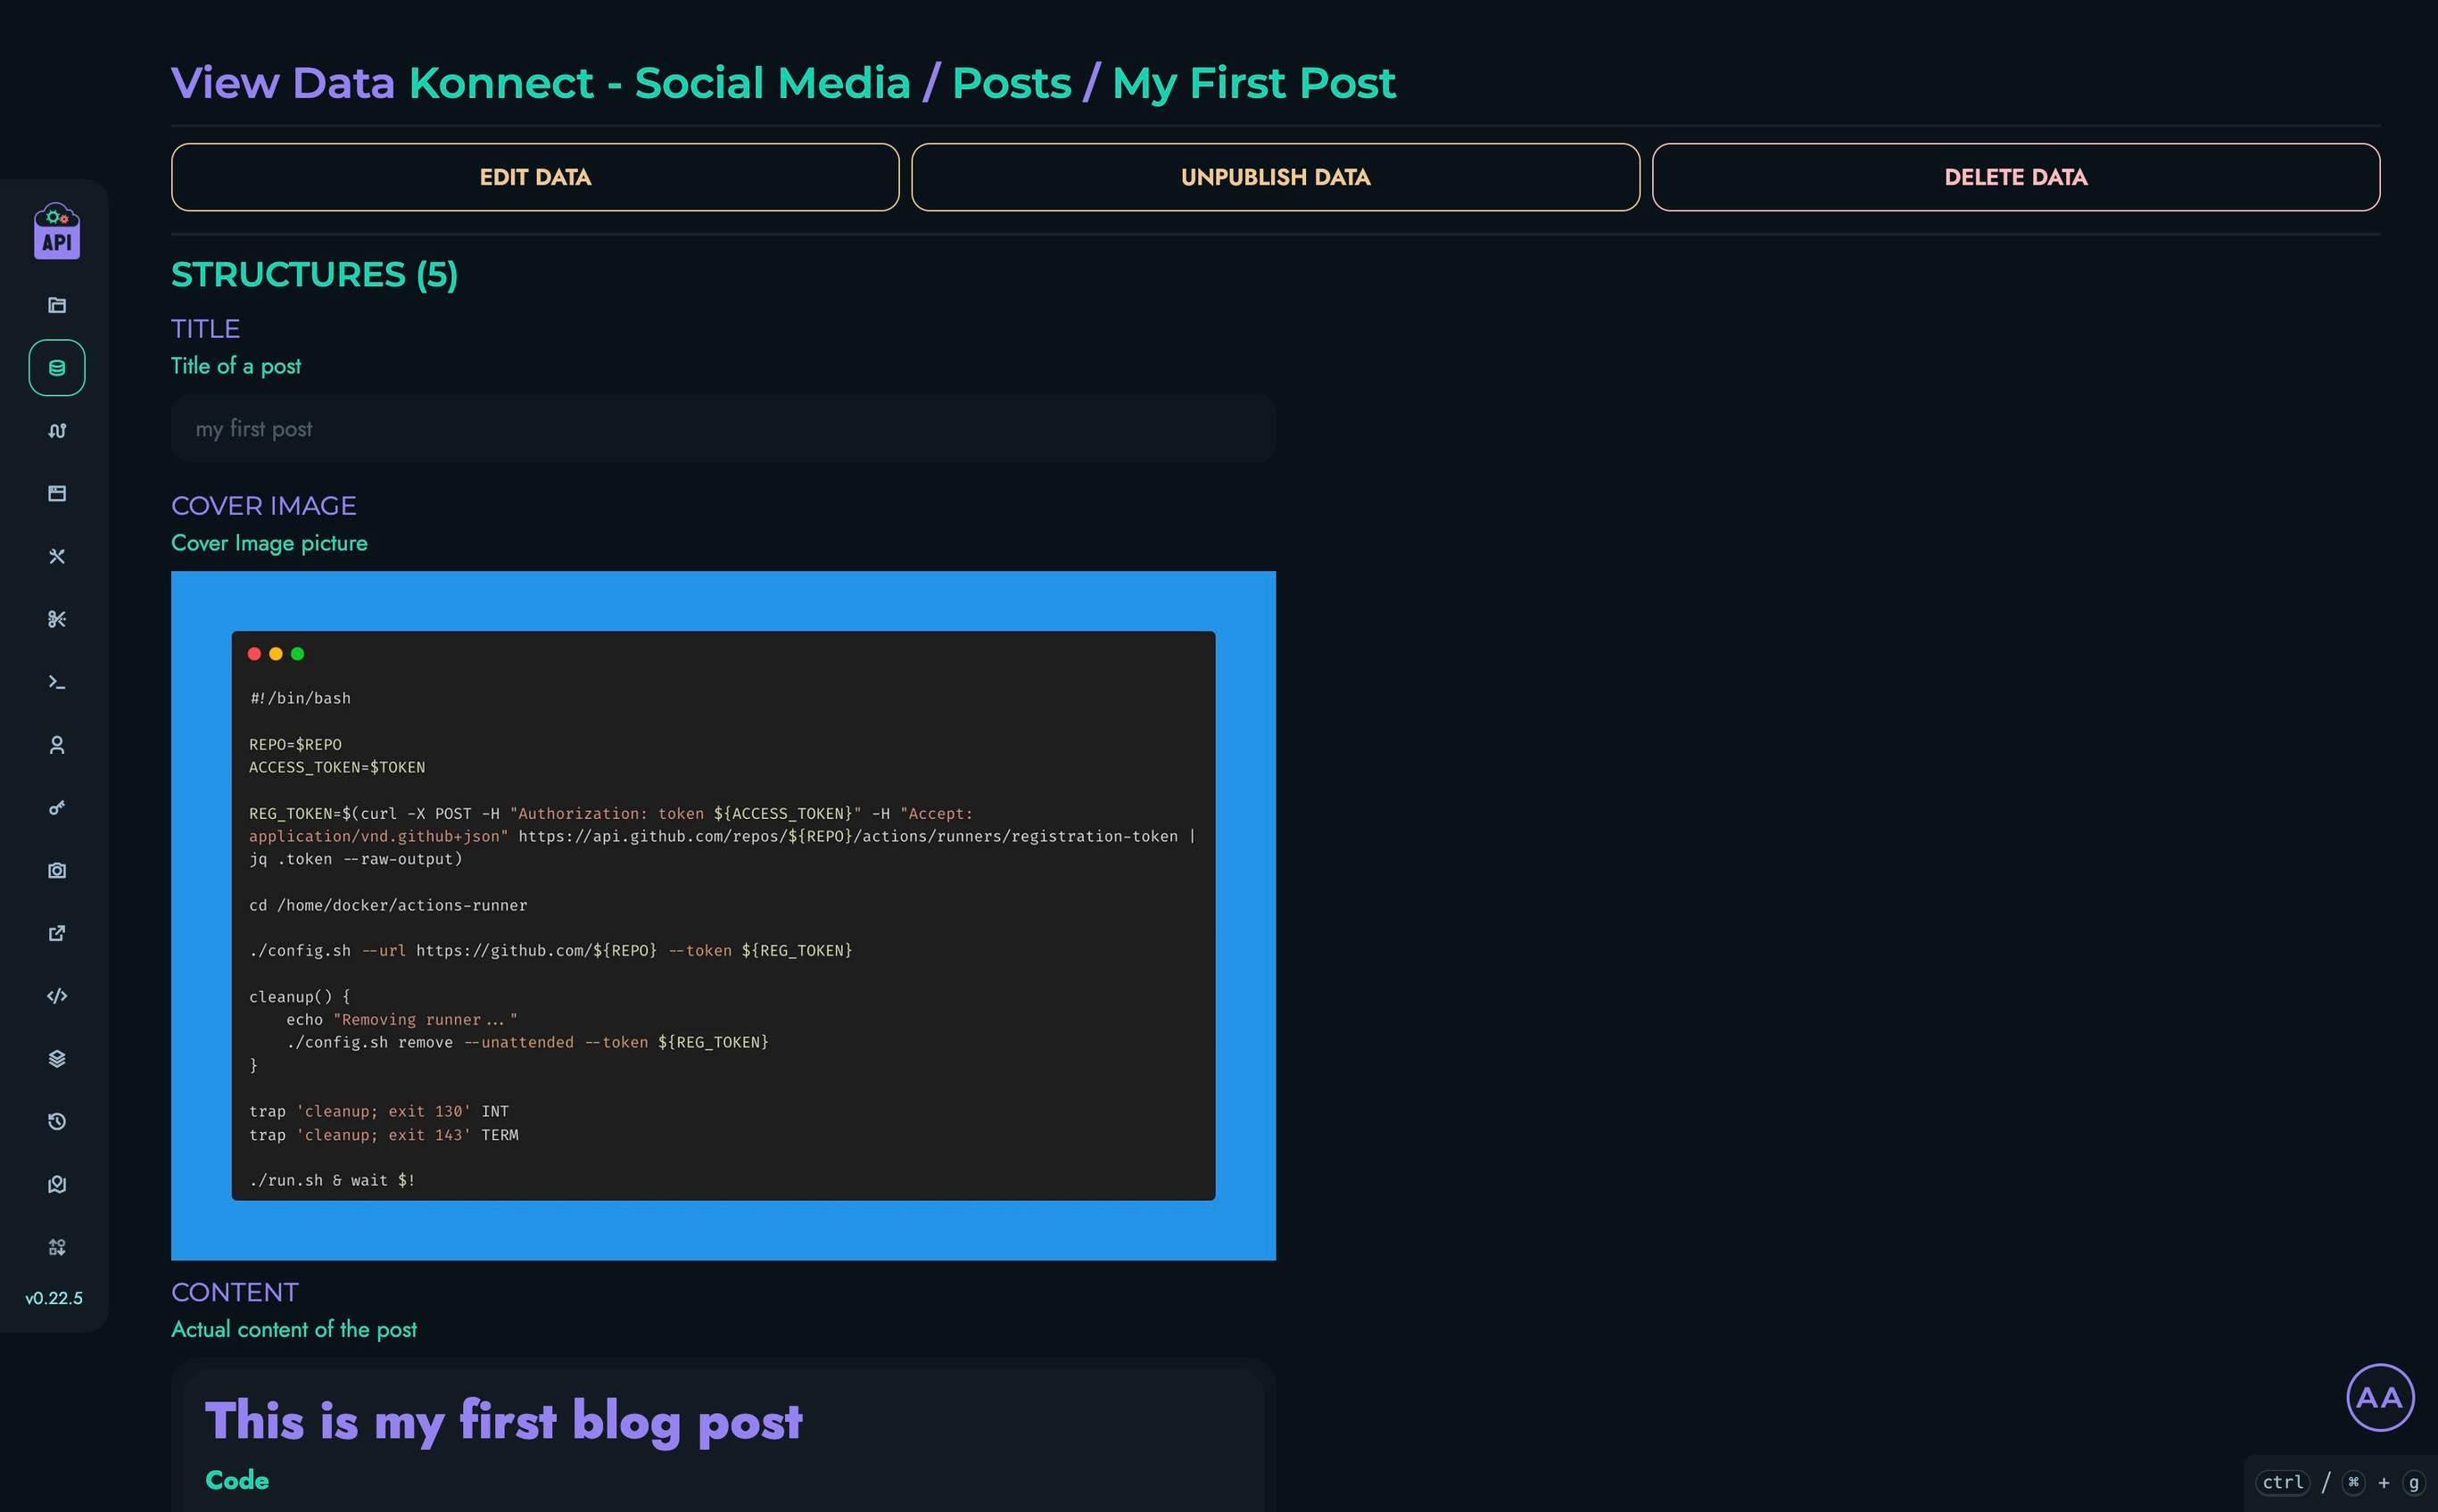
Creating Data Objects
Users with ROOT, ADMIN, or AUTHOR roles can create new data objects:
- From a collection page, click the “Create New” button
- Enter an optional nickname for the data object
- Fill in values for each structure (field)
- For custom structures, fill in values for their component fields
- Click “Create” to save the data object
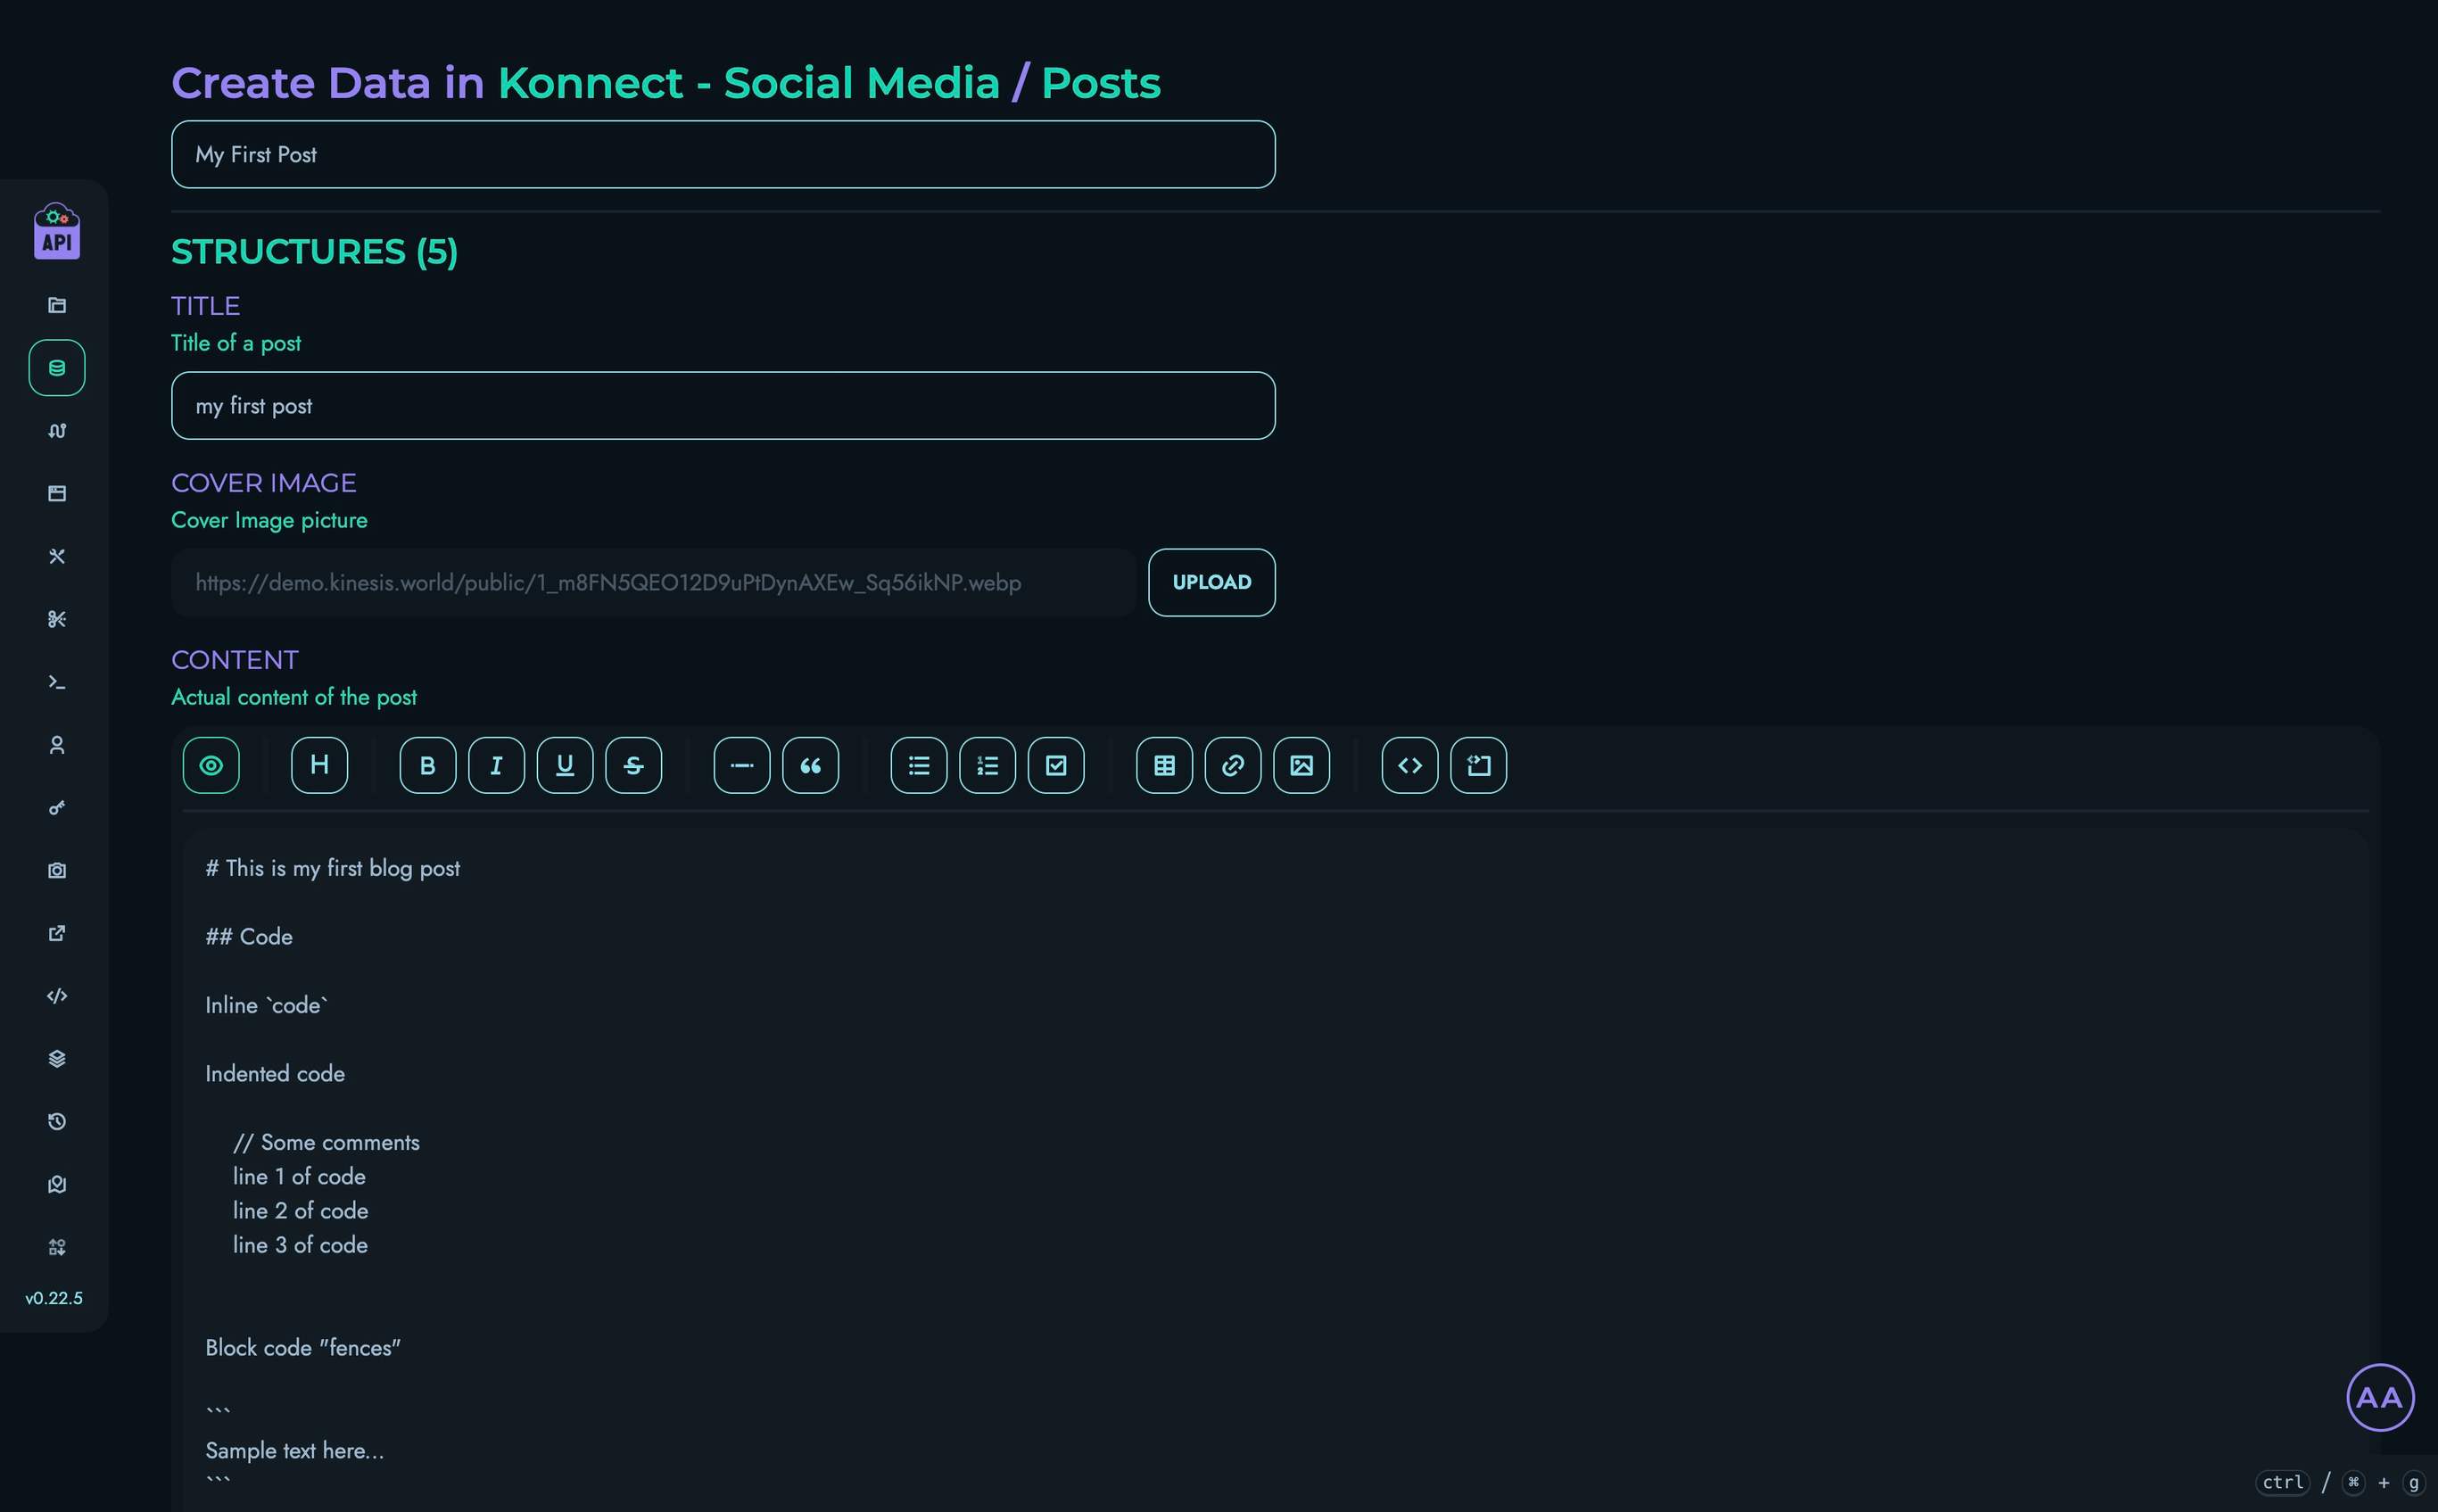
Structure Value Types
When creating or editing data objects, different structure types accept different kinds of input:
| Structure Type | Input Method | Notes |
|---|---|---|
| TEXT | Text field | Regular text input |
| Email field | Validates email format | |
| PASSWORD | Password field | Masked input with show/hide option |
| MARKDOWN | Markdown editor | With formatting toolbar |
| INTEGER | Number input | Whole numbers only |
| FLOAT | Number input | Decimal values allowed |
| ENUM | Dropdown | Select from predefined options |
| DATE | Date picker | Calendar interface |
| DATETIME | Date-time picker | Date and time selection |
| MEDIA | File upload | Upload images |
| BOOLEAN | Checkbox | True/false toggle |
| UID | Text field | Valid ID |
| JSON | Text area | Raw JSON input |
Editing Data Objects
Users with ROOT, ADMIN, or AUTHOR roles can edit existing data objects:
- From the data object view page, click “Edit Data”
- Modify the values for any structures
- Click “Update” to save your changes
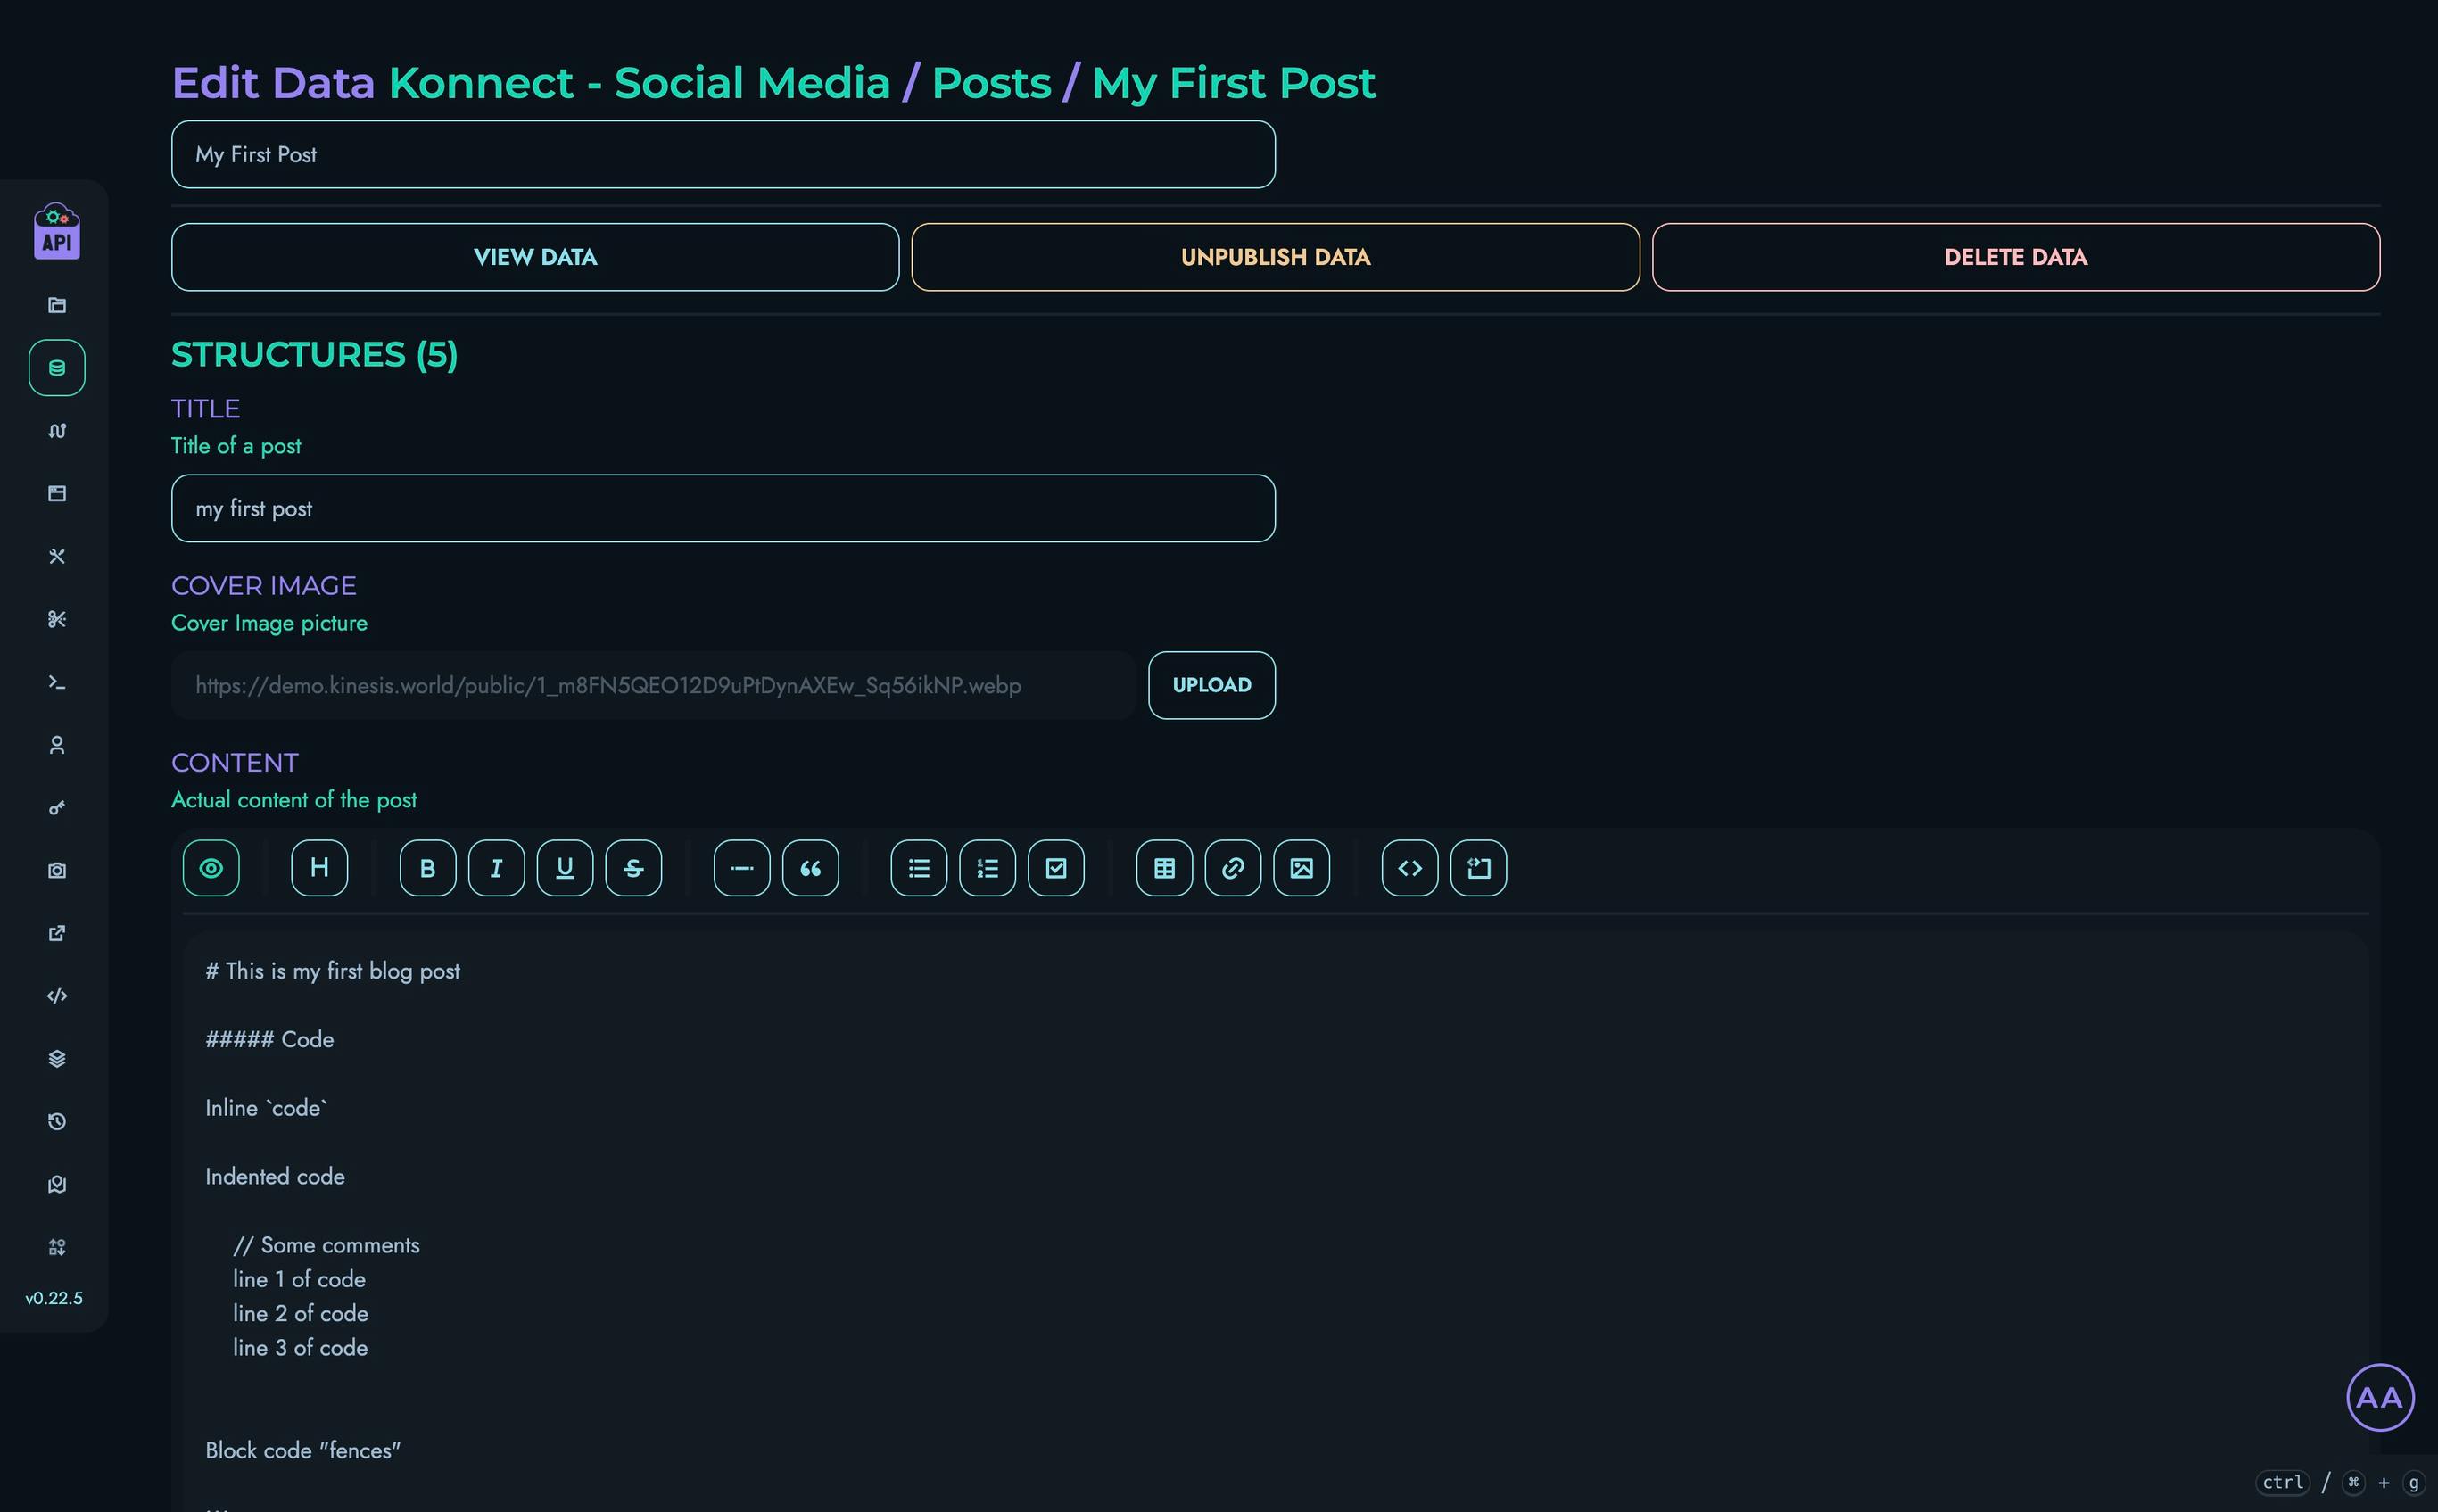
Deleting Data Objects
Users with ROOT, ADMIN, or AUTHOR roles can delete data objects:
- From the data object view or edit page, click “Delete Data”
- Confirm the deletion in the modal that appears
⚠️ Warning: Deleting a data object permanently removes it from the system. This action cannot be undone.
User Permissions
Access to data objects is controlled by user roles:
| Role | View | Create | Edit | Delete |
|---|---|---|---|---|
| ROOT | ✓ | ✓ | ✓ | ✓ |
| ADMIN | ✓ | ✓ | ✓ | ✓ |
| AUTHOR | ✓ | ✓ | ✓ | ✓ |
| VIEWER | ✓ | ✗ | ✗ | ✗ |
Additionally, users can only access data within projects they are members of.
Working with Custom Structures
When a collection includes custom structures, data objects for that collection will include sections for each custom structure type:
- Each custom structure is displayed in its own card
- The card contains fields for all structures within the custom structure
- Values are entered and displayed just like regular structures
Custom structures allow for more complex, nested data models within your collections.
Filtering and Pagination
When viewing data objects in a collection:
- Use the filter box to search for objects by nickname or ID
- Use pagination controls to navigate through large collections
- Adjust the page size if needed
Best Practices
For effective data management:
- Use Descriptive Nicknames: Give data objects clear, meaningful nicknames to make them easier to identify
- Regular Backups: Back up your data regularly, especially before making major changes
- Consider Relationships: Design your data structure to reflect relationships between different objects
Related Documentation
- Collections - Managing collections that contain data
- Structures - Understanding field types and data validation
- Custom Structures - Working with complex data structures
Routes
Routes in Kinesis API are the endpoints that expose your API functionality to the outside world. They define how your API responds to HTTP requests, what logic executes when an endpoint is called, and what data is returned to clients. Kinesis API provides a powerful visual route builder called the Flow Editor to create complex API routes without having to write traditional code.
Understanding Routes
Each route in Kinesis API has:
- Route ID: A unique identifier for the route within the project
- Path: The URL path through which the route is accessed
- HTTP Method: The HTTP method the route responds to (GET, POST, PUT, PATCH, DELETE, etc.)
- Authentication Settings: Optional JWT authentication requirements
- Parameters: URL parameters the route can accept
- Body: JSON body structure the route expects (for POST, PUT, PATCH)
- Flow: The visual logic flow that defines the route’s behavior
Routes belong to projects and are managed at the project level, allowing you to organize related functionality in a logical way.
Accessing Routes Management
To access the routes management interface:
- Log in to your Kinesis API account
- Navigate to
/web/routesin your browser or click “Routes” in the main navigation menu - You’ll see a list of all projects you have access to
- Click on a project to view and manage its routes at
/web/routes/project?id=project_id
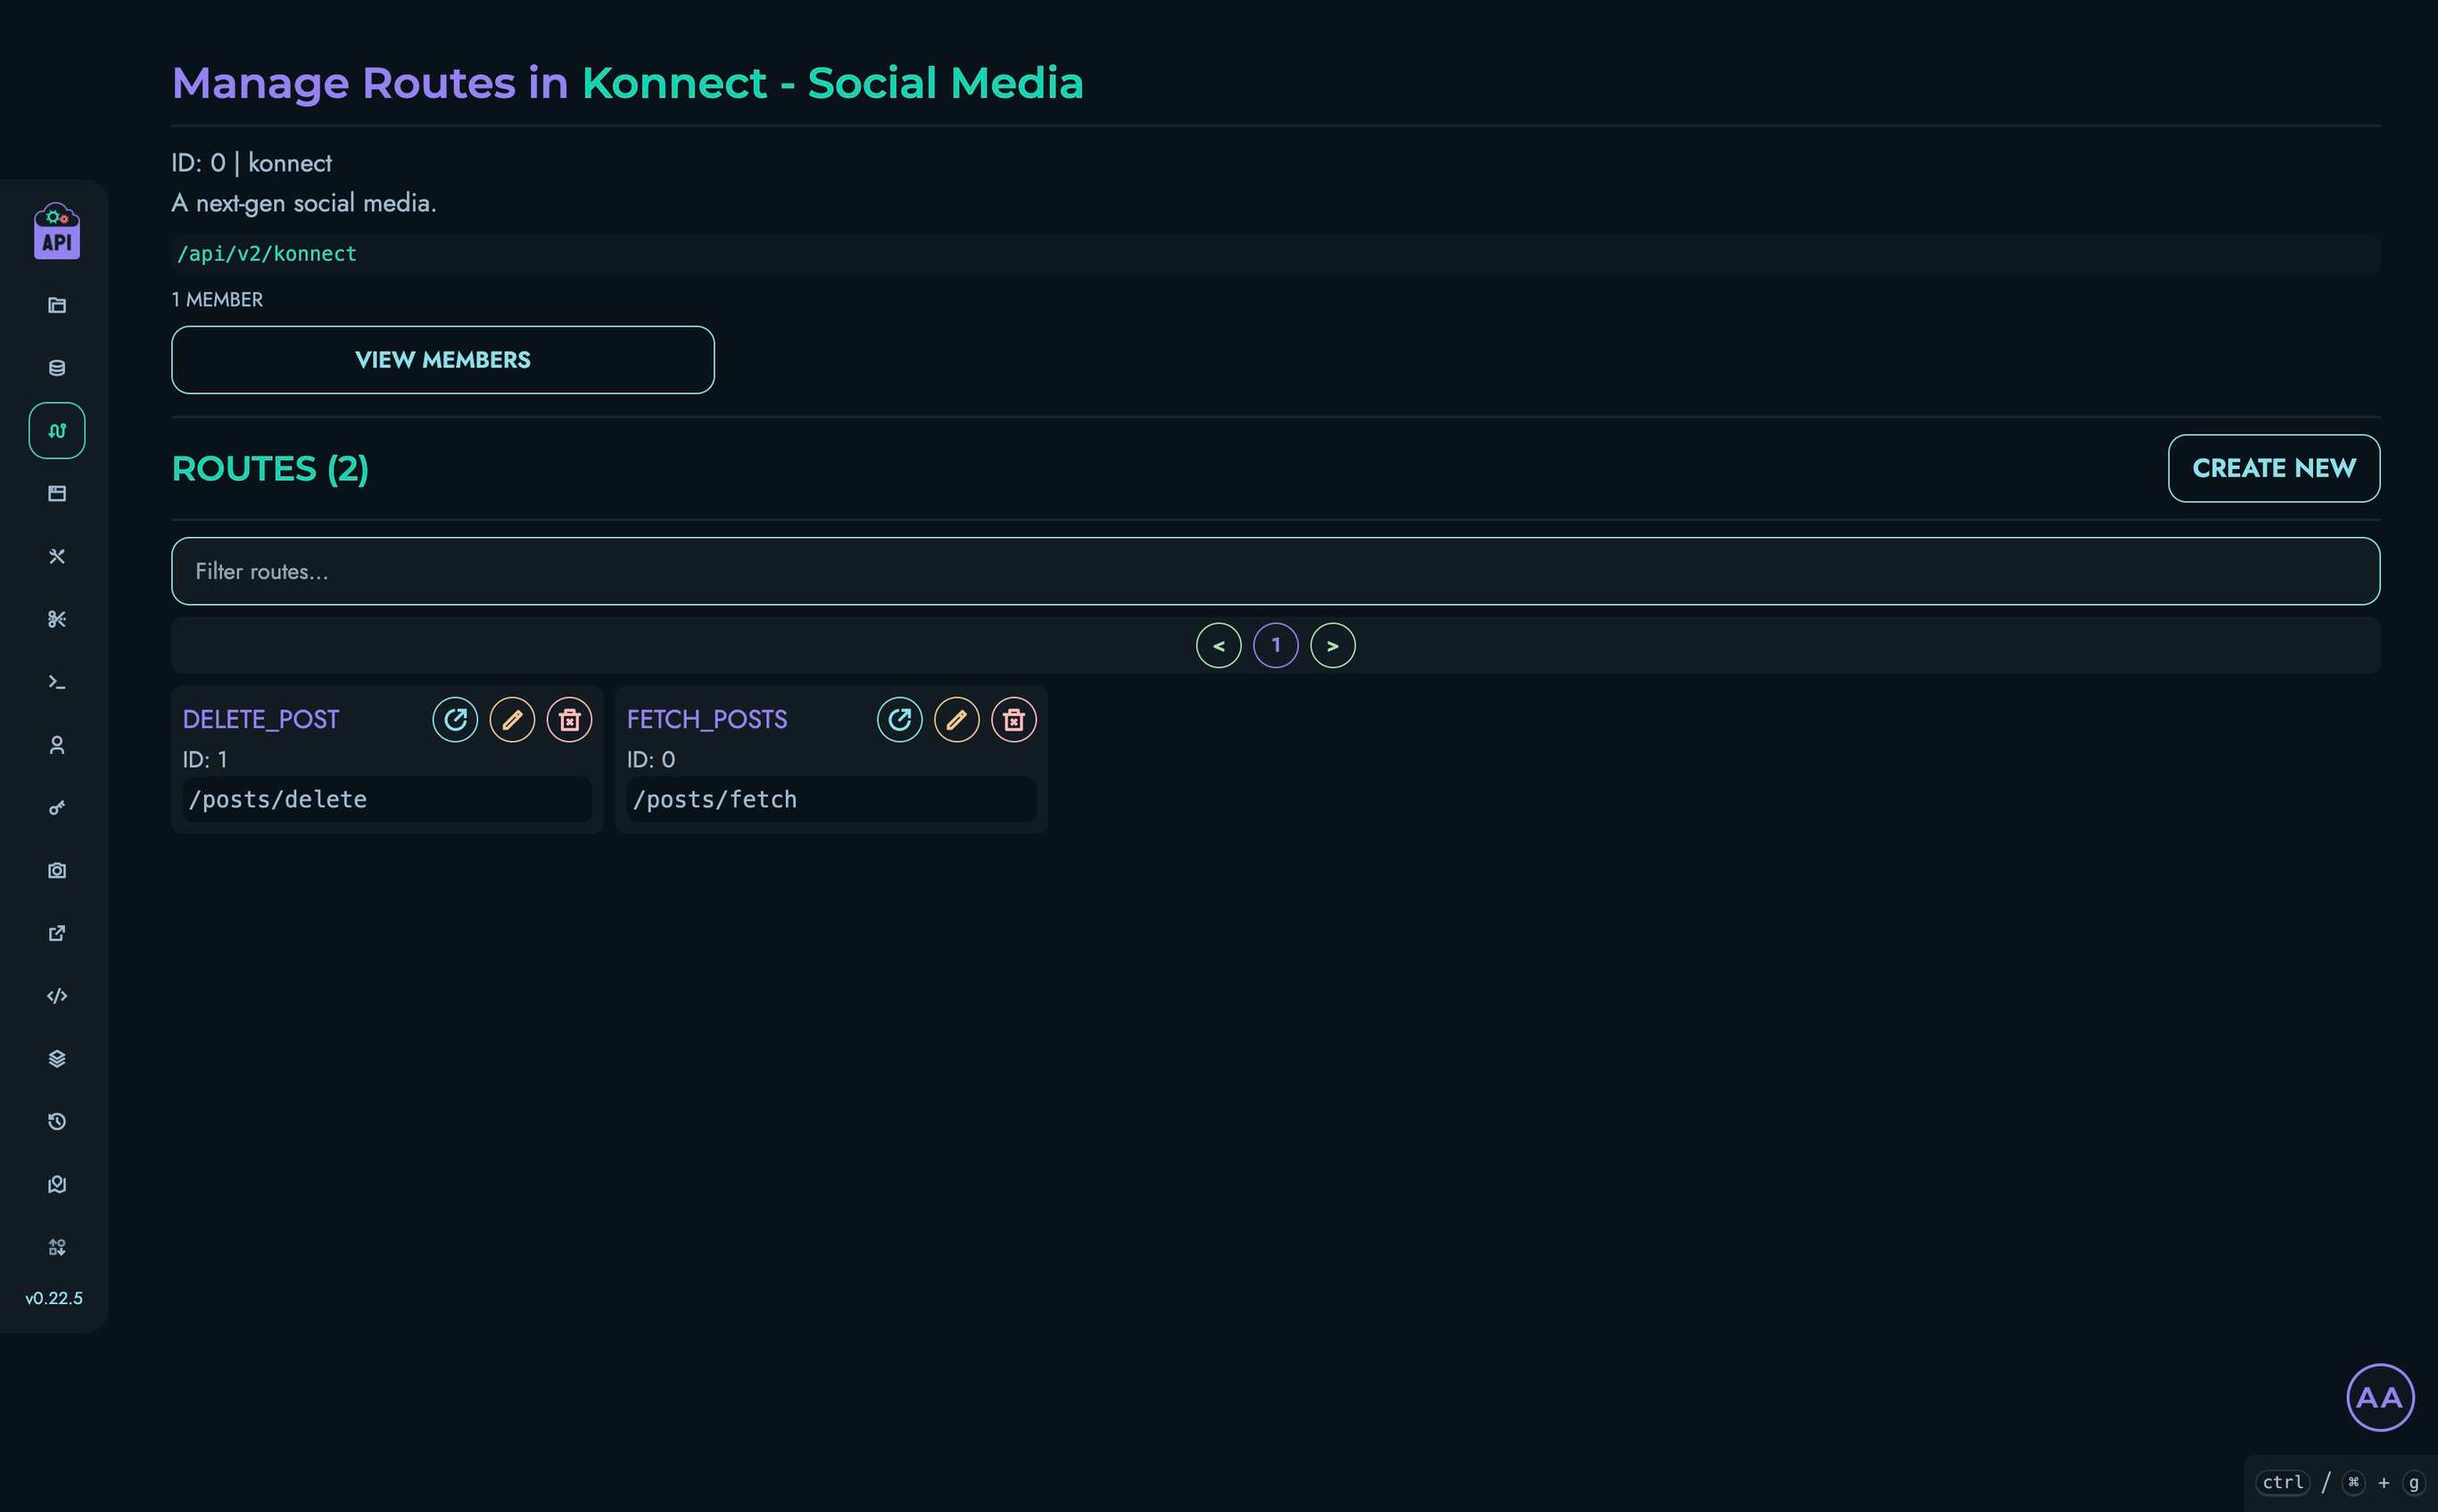
Browsing Projects and Routes
Projects Level
At /web/routes, you’ll see all projects you have access to:
- Each project card displays the project’s name, ID, description, and API path
- You can filter projects using the search box
- View the number of members in each project
- Click the eye icon to view project members
- Click on any project to navigate to its routes
Routes Level
At /web/routes/project?id=project_id, you’ll see all routes within the selected project:
- Each route card shows the route’s ID and path
- You can filter routes using the search box
- View, edit, or delete routes using the action buttons
- Create new routes using the “Create New” button (ADMIN and ROOT users only)
Route API Path Construction
The complete API path that clients will use to access your route is constructed from multiple components:
- Base URL: The root URL of your Kinesis API instance (e.g.,
https://api.kinesis.world) - API Prefix: The global prefix for all routes in your instance (e.g.,
/api/v1) - Project Path: The API path segment for the project the route belongs to (e.g.,
/my_project) - Route Path: The path defined for the route (e.g.,
/users/fetch/all)
The final API path is a concatenation of these components, forming a URL like https://api.kinesis.world/api/v1/x/my_project/users/fetch/all (notice the /x/).
HTTP Methods
When creating a route, you must select which HTTP method it will respond to. Each method has a specific purpose:
| Method | Description | Body Support | Typical Use |
|---|---|---|---|
| GET | Retrieve data without modifying resources | No | Fetching data, searching, filtering |
| POST | Create new resources or submit data | Yes | Creating new records, submitting forms |
| PUT | Replace an entire resource with new data | Yes | Complete resource updates |
| PATCH | Apply partial updates to a resource | Yes | Partial resource updates |
| DELETE | Remove a resource | No* | Deleting records |
| OPTIONS | Describe communication options for the resource | No | CORS preflight requests, API discovery |
| HEAD | Like GET but returns only headers, no body | No | Checking resource existence/metadata |
*Note: While DELETE technically can have a body according to HTTP specifications, it’s uncommon and not supported in all clients.
JWT Authentication
Routes can be configured to require JSON Web Token (JWT) authentication. To implement JWT authentication in your API:
-
Create a collection to store user data with at least:
- A unique identifier field (e.g.,
uidorusername) - Password field (should be stored securely)
- Any additional user information
- A unique identifier field (e.g.,
-
Create two essential routes:
- Login/Token Creation: Validates credentials and issues a JWT
- Token Validation: Verifies the JWT and extracts user information
JWT Authentication Flow
- User sends credentials to the login route
- Route validates credentials against the user collection
- If valid, a JWT containing the user’s identifier is created and returned
- For subsequent requests to protected routes, the client includes this token
- Protected routes verify the token before processing the request
Note: For a detailed implementation guide, see the JWT Authentication Tutorial.
URL Parameters
URL parameters allow clients to pass data to your API through the URL. When configuring a route, you can define:
-
Parameter Delimiter: The character that separates parameters in the URL
- Typically
?for the first parameter and&for subsequent ones - Example:
/users/search?name=John&age=30
- Typically
-
Parameter Definitions: For each parameter, you define:
- Name: The parameter identifier
- Type: Data type (String, Number, Boolean, etc.)
Kinesis API automatically validates incoming parameter values against these definitions, rejecting requests with invalid parameters.
Request Body
For routes using HTTP methods that support a request body (POST, PUT, PATCH), you can define the expected structure of that body. Define each field in the body with:
- Name: The field identifier
- Type: Data type expected (Integer, Float, String, Boolean, Array, Other)
Kinesis API validates incoming request bodies against this defined structure, ensuring data integrity before your route logic executes.
⚠️ Important Note: For comprehensive understanding of routes, authentication flows, and advanced API features, please refer to the Tutorials Section. These tutorials provide step-by-step guides and real-world examples that demonstrate how to effectively use Kinesis API’s routing capabilities.
Flow Editor: Visual Route Builder
The Flow Editor is a visual programming tool that allows you to build complex API logic without writing traditional code. Unlike a traditional node-graph editor, the Flow Editor uses a linear block sequence — blocks execute top to bottom in the order they appear on the canvas.
The editor is split into three areas:
- Left sidebar — Lists all available block types. Click a block type to append it to the end of the flow.
- Center canvas — Displays the current flow as a vertical sequence of blocks connected by arrows, representing execution order. Click any block to select it.
- Right details panel — Slides in when a block is selected, showing all configuration fields for that block. Close it with the
←button or by clicking elsewhere on the canvas.
Blocks can be reordered with the up/down arrows in the details panel, and deleted with the trash icon. Every flow begins with a mandatory START block.
Available blocks include:
| Block Type | Purpose |
|---|---|
| START | Mandatory starting point of every flow |
| FETCH | Retrieve data from collections |
| ASSIGNMENT | Assign values to variables using conditions/ops |
| TEMPLATE | Build a string value from a template and data items |
| CONDITION | Branch or fail based on conditions |
| LOOP | Iterate over a range with a loop variable |
| END_LOOP | Mark the end of a LOOP block |
| FILTER | Filter a list of objects by a property |
| PROPERTY | Apply an operation to a value (length, split, etc.) |
| FUNCTION | Call a built-in function (e.g. generate UUID) |
| RANDOM | Generate a random value within a range |
| VAULT | Retrieve a secret from the project vault |
| OBJECT | Construct an object from key/value pairs |
| UPDATE | Update records in a collection |
| SIMPLE_UPDATE | Update records with a simple set operation |
| CREATE | Save a variable as a new record in a collection |
| Send an email using a named template | |
| RETURN | Return a response and end execution |
Creating Routes
Users with ROOT or ADMIN roles can create new routes:
- From a project’s routes page, click the “Create New” button
- Fill in the route configuration details:
- Route ID: Unique identifier for the route (e.g.,
fetch_users) - Route Path: The URL path (e.g.,
/users/fetch/all) - HTTP Method: Select GET, POST, PUT, PATCH, DELETE, etc.
- Route ID: Unique identifier for the route (e.g.,
- Configure optional JWT authentication requirements
- Define URL parameters and their delimiter (typically
∨) - Define the expected request body structure (for POST, PUT, PATCH)
- Build your route logic using the visual X Engine flow editor
- Click “Create” to save the route

Viewing Routes
To view a route’s details:
- From a project’s routes page, click the view button (open link icon) on a route card
- You’ll see the route’s configuration details:
- Basic information (ID, path, method)
- Authentication settings
- Parameter definitions
- Body structure
- Visual representation of the route’s logic flow
From the route view page, you can:
- Test the route using the Playground
- Edit the route (if you have appropriate permissions)
- Delete the route (if you have appropriate permissions)
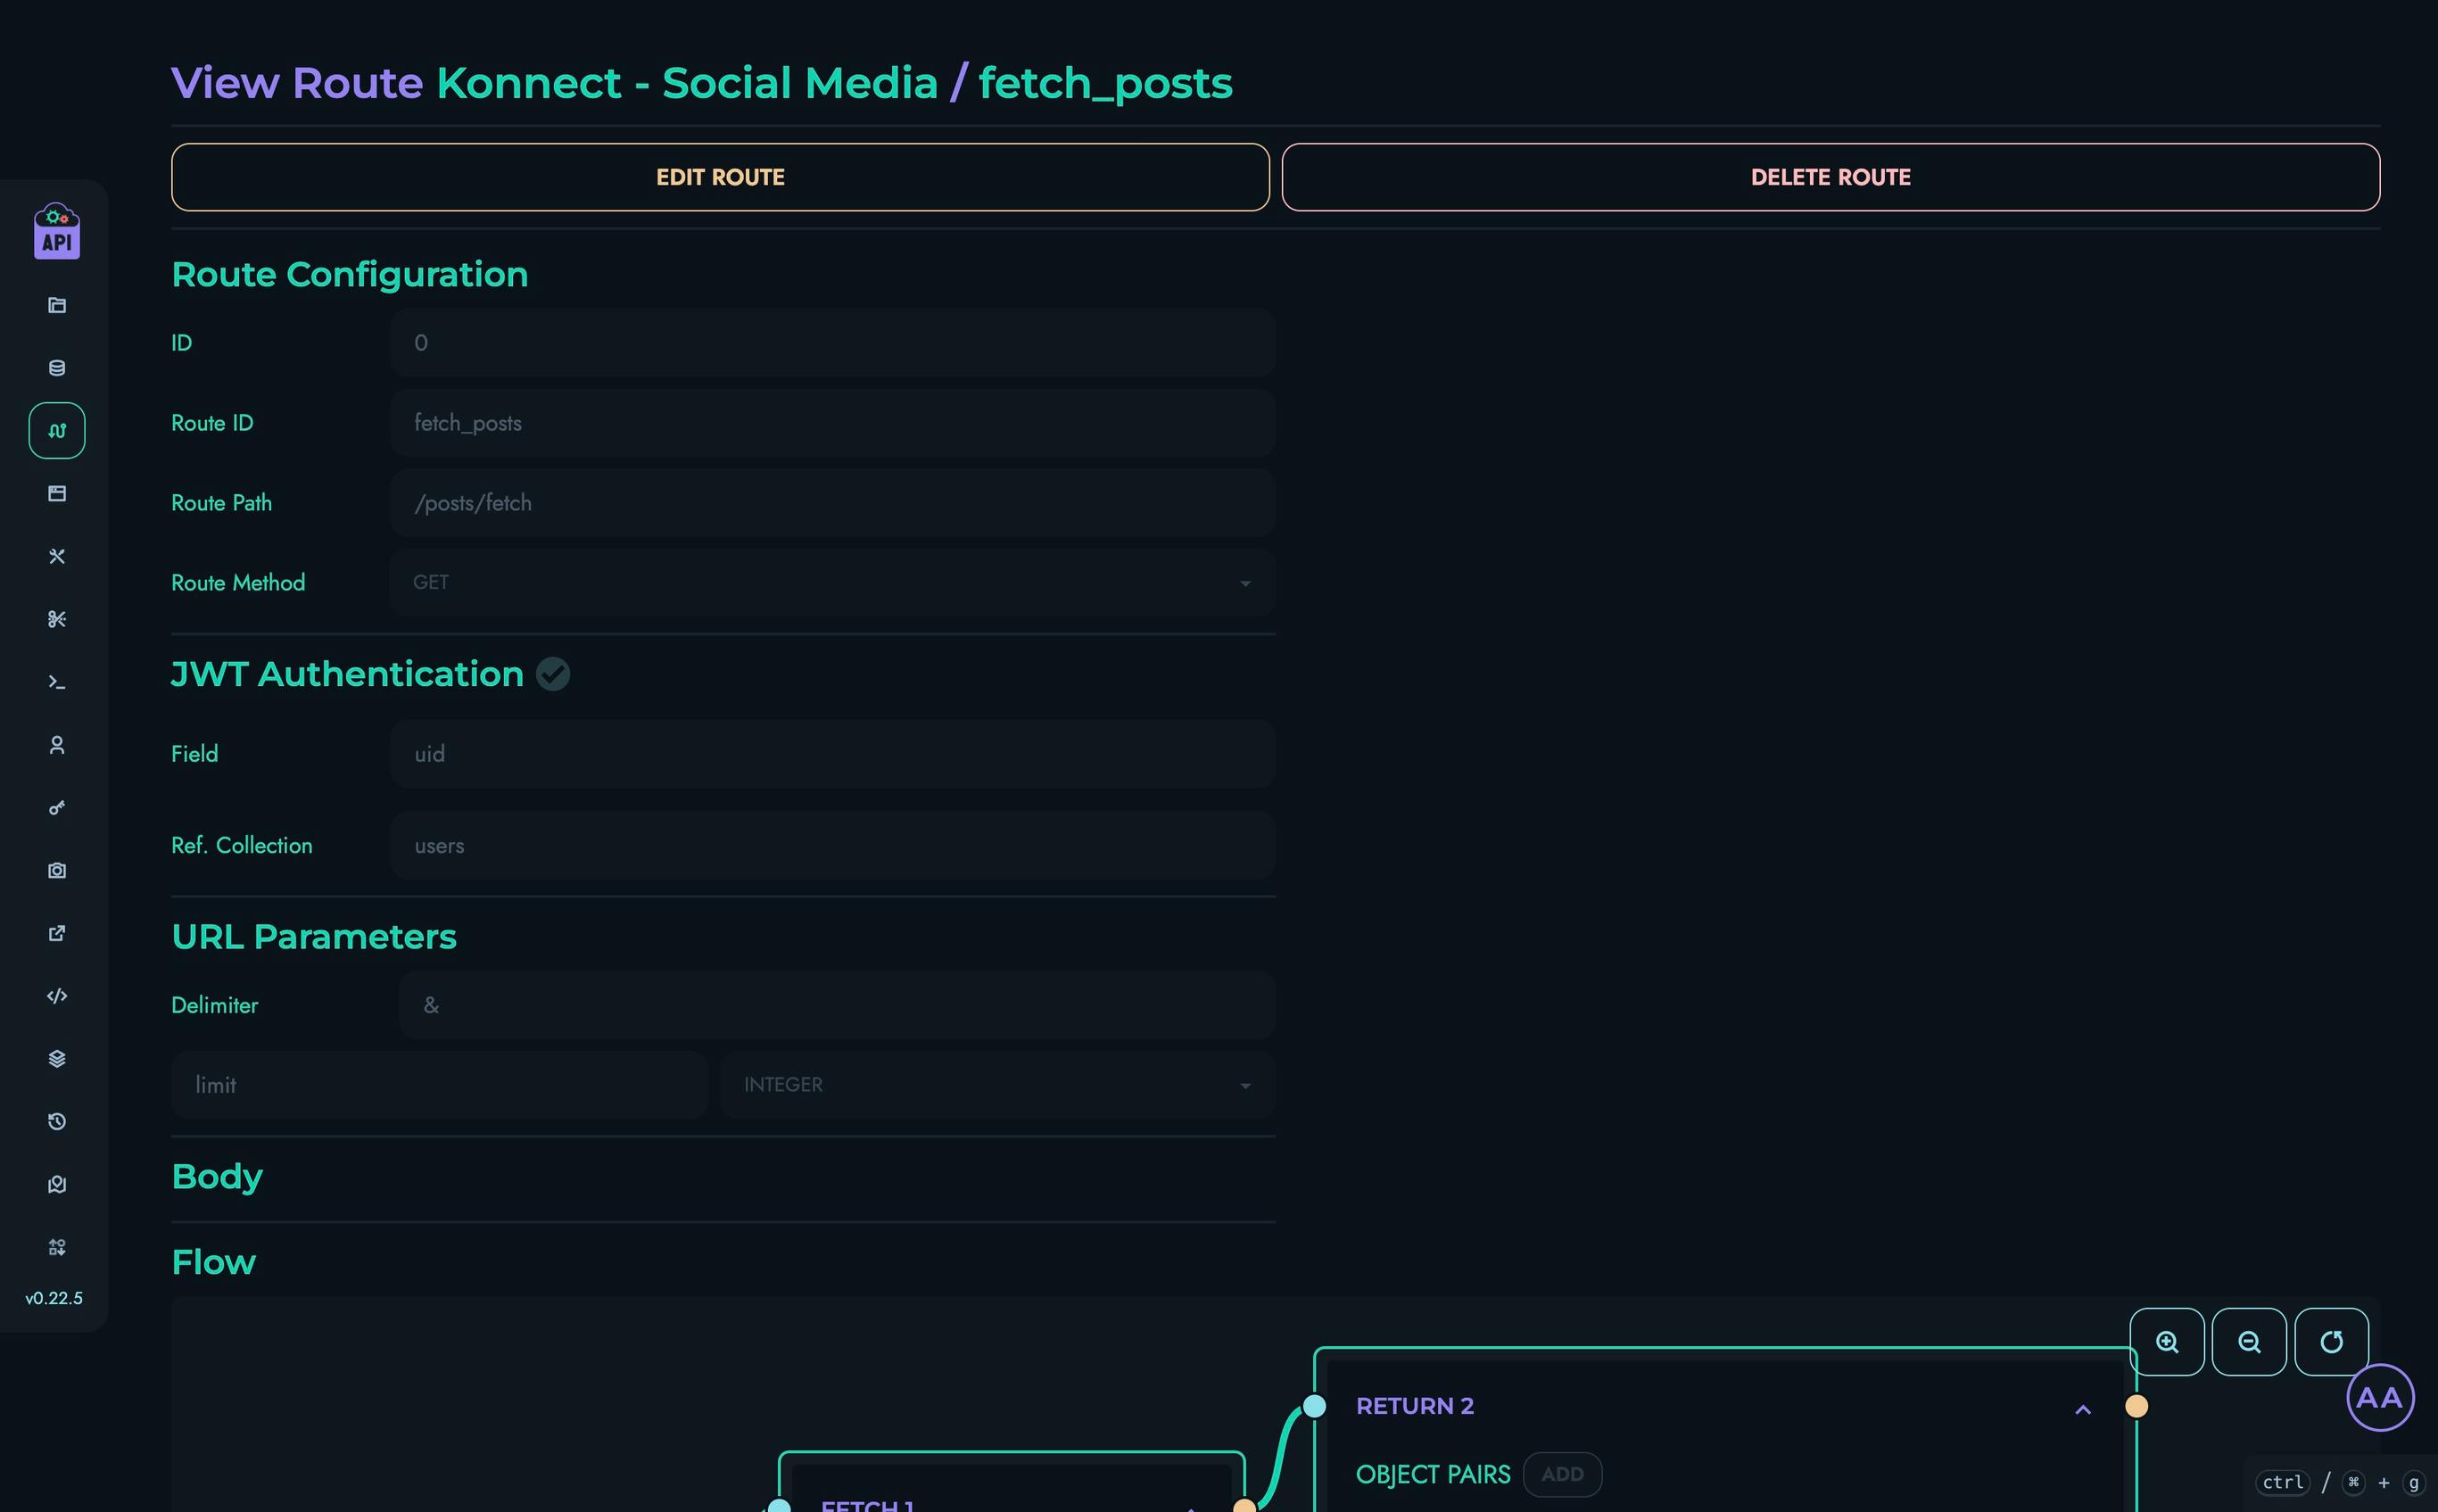
Editing Routes
Users with ROOT or ADMIN roles can edit existing routes:
- From a project’s routes page, click the edit button (pencil icon) on a route card
- Modify any aspect of the route:
- Update the route path
- Change the HTTP method
- Modify authentication settings
- Add or remove parameters
- Change body structure
- Redesign the logic flow using the X Engine
- Click “Update” to save your changes
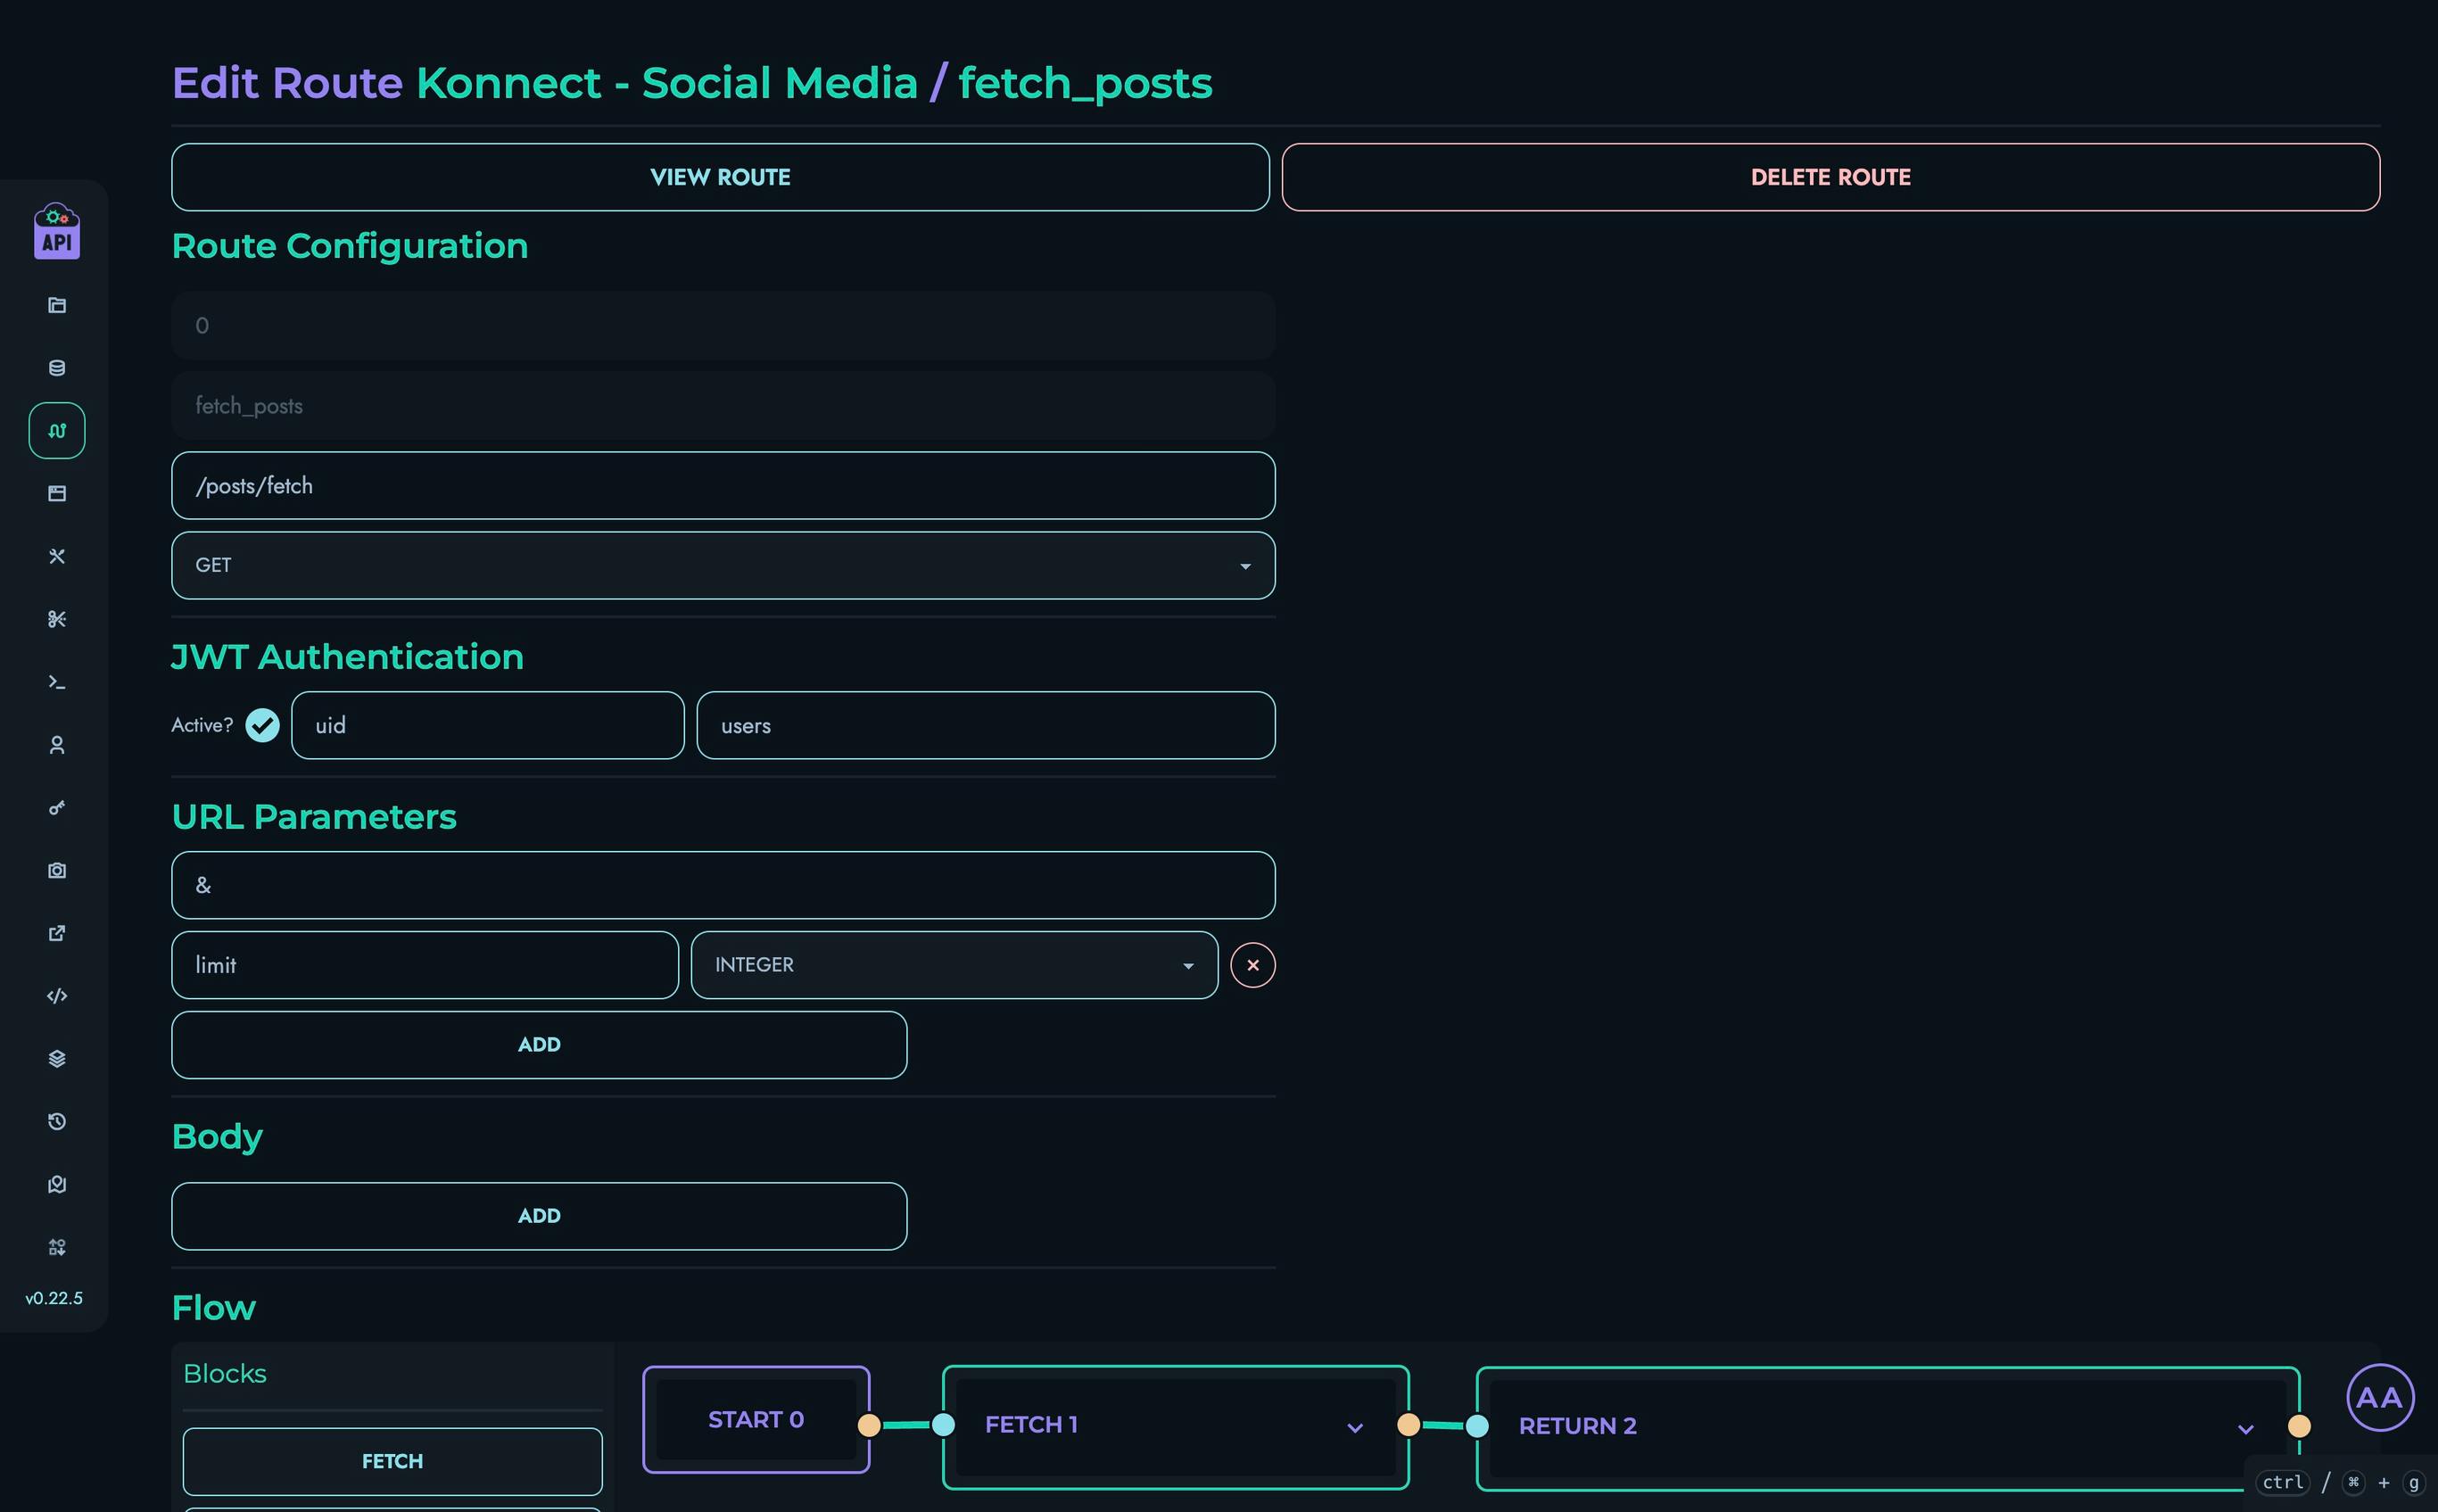
Deleting Routes
Users with ROOT or ADMIN roles can delete routes:
- From a project’s routes page, click the delete button (trash icon) on a route card
- Alternatively, click “Delete Route” on the route view or edit page
- Confirm the deletion in the modal that appears
⚠️ Warning: Deleting a route permanently removes it from the system. Any applications or services relying on this route will no longer be able to access it.
User Permissions
Access to routes management is controlled by user roles:
| Role | View Routes | Create Routes | Edit Routes | Delete Routes |
|---|---|---|---|---|
| ROOT | ✓ | ✓ | ✓ | ✓ |
| ADMIN | ✓ | ✓ | ✓ | ✓ |
| AUTHOR | ✓ | ✗ | ✗ | ✗ |
| VIEWER | ✓ | ✗ | ✗ | ✗ |
Additionally, users can only access routes within projects they are members of.
Testing Routes
After creating or modifying a route, you should test it to ensure it behaves as expected:
- Use the Playground to send test requests to your route
- Verify that the response matches your expectations
- Test different parameter values and edge cases
- Check error handling by sending invalid requests
Route Security Best Practices
- Authentication: Use JWT authentication for routes that access sensitive data or perform modifications
- Input Validation: Validate all incoming data using appropriate blocks in your flow
- Error Handling: Add proper error handling to provide meaningful feedback on failures
- Rate Limiting: Consider implementing rate limiting for public-facing routes
- Minimal Exposure: Only expose the minimum data necessary in responses
- Testing: Thoroughly test routes before making them available to clients
Related Documentation
- X Engine - Detailed information about the X Engine
- Playground - Testing your API routes
Blocks
Blocks are the building components of Kinesis API’s X Routing system. Each block represents a specific operation that can be connected together to form a complete route logic. This guide explains how to use each block type and its configuration options.
Overview
The X Routing system uses a visual flow-based approach where you connect different blocks to process requests, manipulate data, and return responses. Each block has specific inputs, outputs, and configuration options.
Common Block Properties
All blocks share some common properties:
- Connections: Each block (except START) has an input connector and an output connector
- Expansion: Click the header to expand/collapse a block’s configuration panel
- Deletion: Click the X button to delete a block (not available for START block)
Block Types
START Block
The START block is the entry point of every route flow. It is automatically created and cannot be deleted.
- Purpose: Indicates where the request processing begins
- Configuration: None required
- Connections: Can only connect to one block via its output
FETCH Block
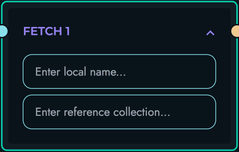
The FETCH block retrieves data from a collection and stores it in a local variable.
- Purpose: Retrieve data from collections
- Configuration:
- Local Name: Variable name to store the fetched data
- Reference Collection: Name of the collection to fetch data from
- Usage: Use FETCH to retrieve data that you’ll need later in your route processing
- Example: Fetching user data to validate permissions
{
  "local_name": "users",
  "ref_col": "users_collection"
}
ASSIGNMENT Block
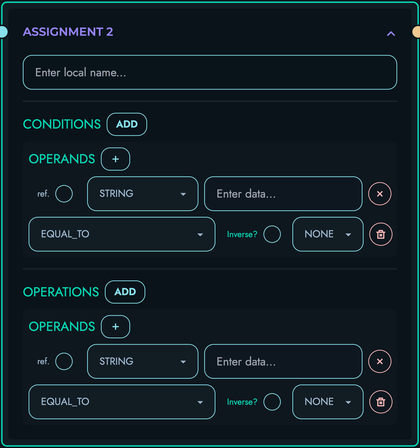
The ASSIGNMENT block assigns a value to a variable based on conditions and operations.
- Purpose: Create or modify variables
- Configuration:
- Local Name: Variable name to store the result
- Conditions: Optional conditions to evaluate
- Operations: Operations to perform if conditions are met
- Usage: Use for variable creation, data transformation, or conditional assignments
- Example: Creating a status variable based on user role
{
  "local_name": "isAdmin",
  "conditions": [
    {
      "operands": [
        {
          "ref_var": true,
          "rtype": "STRING",
          "data": "role"
        },
        {
          "ref_var": false,
          "rtype": "STRING",
          "data": "admin"
        }
      ],
      "condition_type": "EQUAL_TO",
      "not": false,
      "next": "NONE"
    }
  ],
  "operations": [
    {
      "operands": [
        {
          "ref_var": false,
          "rtype": "BOOLEAN",
          "data": "true"
        }
      ],
      "operation_type": "NONE",
      "not": false,
      "next": "NONE"
    }
  ]
}
TEMPLATE Block
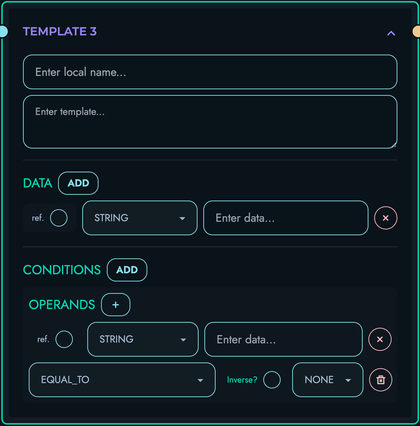
The TEMPLATE block creates a string using a template with variable substitution.
- Purpose: Create dynamic strings by combining static text and variable values
- Configuration:
- Local Name: Variable name to store the templated string
- Template: The template string with placeholders
- Data: Variables to use in the template
- Conditions: Optional conditions for template processing
- Usage: Use for creating dynamic messages, formatted content, or SQL queries
- Example: Creating a personalized greeting
{
  "local_name": "greeting",
  "template": "Hello, {}! Welcome to {}.",
  "data": [
    {
      "ref_var": true,
      "rtype": "STRING",
      "data": "user.name"
    },
    {
      "ref_var": false,
      "rtype": "STRING",
      "data": "Kinesis API"
    }
  ],
  "conditions": []
}
CONDITION Block
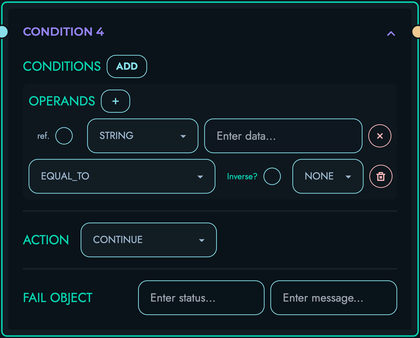
The CONDITION block evaluates logical conditions and controls flow based on the result.
- Purpose: Implement conditional logic and flow control
- Configuration:
- Conditions: Set of conditions to evaluate
- Action: What to do if conditions are met (CONTINUE, BREAK, FAIL)
- Fail Object: Status and message to return if action is FAIL
- Usage: Use for validation, permission checks, or branching logic
- Example: Validating user permissions
{
  "conditions": [
    {
      "operands": [
        {
          "ref_var": true,
          "rtype": "STRING",
          "data": "user.role"
        },
        {
          "ref_var": false,
          "rtype": "STRING",
          "data": "admin"
        }
      ],
      "condition_type": "NOT_EQUAL_TO",
      "not": false,
      "next": "NONE"
    }
  ],
  "action": "FAIL",
  "fail": {
    "status": 403,
    "message": "Unauthorized: Insufficient permissions"
  }
}
LOOP Block
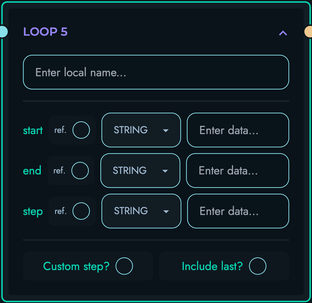
The LOOP block iterates over a range of values or an array.
- Purpose: Process multiple items or iterate a specific number of times
- Configuration:
- Local Name: Variable name for the current loop value
- Start: Starting value for the loop
- End: Ending value for the loop
- Step: Optional increment value (defaults to 1)
- Include Last: Whether to include the end value in the iteration
- Usage: Use for batch processing, pagination, or iterative operations
- Example: Processing a list of items
{
  "local_name": "index",
  "start": {
    "ref_var": false,
    "rtype": "INTEGER",
    "data": "0"
  },
  "end": {
    "ref_var": true,
    "rtype": "INTEGER",
    "data": "items.length"
  },
  "step": null,
  "include_last": false
}
END_LOOP Block
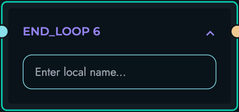
The END_LOOP block marks the end of a loop section.
- Purpose: Indicates where a loop section ends
- Configuration:
- Local Name: Must match the corresponding LOOP block’s local name
- Usage: Must be paired with a LOOP block
- Example: Closing a loop that processes items
{
  "local_name": "index"
}
FILTER Block
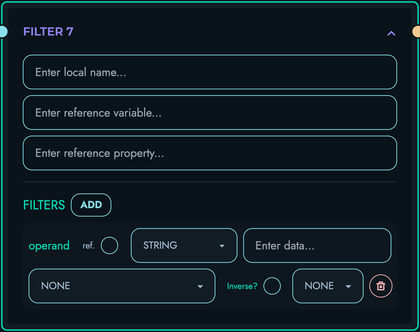
The FILTER block filters items in an array based on specified criteria.
- Purpose: Reduce an array to only items that match criteria
- Configuration:
- Local Name: Variable name to store the filtered results
- Reference Variable: Variable containing the array to filter
- Reference Property: Optional property to filter by
- Filters: Filtering criteria
- Usage: Use to find matching items or remove unwanted elements
- Example: Filtering active users
{
  "local_name": "activeUsers",
  "ref_var": "users",
  "ref_property": "status",
  "filters": [
    {
      "operand": {
        "ref_var": false,
        "rtype": "STRING",
        "data": "active"
      },
      "operation_type": "EQUAL_TO",
      "not": false,
      "next": "NONE"
    }
  ]
}
PROPERTY Block

The PROPERTY block accesses or manipulates properties of objects or arrays.
- Purpose: Extract values from objects/arrays or perform operations on them
- Configuration:
- Local Name: Variable name to store the result
- Data: The object or array to operate on
- Apply: Operation to apply (GET_PROPERTY, LENGTH, GET_FIRST, GET_LAST, GET_INDEX, JOIN, SPLIT, TO_UPPERCASE, TO_LOWERCASE)
- Additional: Additional information for the operation (e.g., property name, index)
- Usage: Use to extract specific data or compute properties of collections
- Example: Getting an object’s property
{
  "local_name": "userName",
  "property": {
    "data": {
      "ref_var": true,
      "rtype": "OTHER",
      "data": "user"
    },
    "apply": "GET_PROPERTY",
    "additional": "name"
  }
}
FUNCTION Block
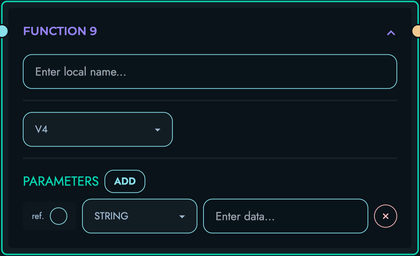
The FUNCTION block executes predefined functions.
- Purpose: Perform common operations using built-in functions
- Configuration:
- Local Name: Variable name to store the function result
- Function ID: The function to execute (e.g., V4, GENERATE_TIMESTAMP, GENERATE_JWT_TOKEN, PAGINATE)
- Parameters: Function parameters
- Usage: Use for utility operations like generating IDs or formatting dates
- Example: Generating a UUID
{
  "local_name": "newId",
  "func": {
    "id": "V4",
    "params": []
  }
}
RANDOM Block

The RANDOM block generates random numbers within a specified range and stores the result in a variable.
- Purpose: Generate random numeric values for IDs, test data, or stochastic operations
- Configuration:
- Local Name: Variable name to store the randomly generated value
- Min: The minimum value for the random range (inclusive)
- Max: The maximum value for the random range (inclusive)
- Data Type: The type of random value to generate (INTEGER, FLOAT or BOOLEAN)
- Usage: Use to create unique identifiers, generate test data, or implement randomized logic
- Example: Generating a random user ID between 1 and 1000
{
  "local_name": "random_user_id",
  "min": {
    "ref_var": false,
    "rtype": "INTEGER",
    "data": "1"
  },
  "max": {
    "ref_var": false,
    "rtype": "INTEGER",
    "data": "1000"
  },
  "data_type": "INTEGER"
}
Example 2: Generating a random float between 0.0 and 1.0
{
  "local_name": "random_score",
  "min": {
    "ref_var": false,
    "rtype": "FLOAT",
    "data": "0.0"
  },
  "max": {
    "ref_var": false,
    "rtype": "FLOAT",
    "data": "1.0"
  },
  "data_type": "FLOAT"
}
- Notes:
- Min and max can reference variables using
ref_var: true - The generated value is stored in the Definition Store for use in other blocks
- When using FLOAT type, results are decimal numbers
- When using INTEGER type, results are whole numbers
- Min and max can reference variables using
VAULT Block

The VAULT block retrieves secrets from the project’s vault and stores them in a variable for use in route processing.
- Purpose: Securely access encrypted vault secrets for authentication, API keys, or sensitive configuration
- Configuration:
- Local Name: Variable name to store the retrieved secret value
- Key: The vault entry key to retrieve
- Usage: Use to access stored secrets like API keys, passwords, tokens, or other sensitive data without hardcoding them
- Example: Retrieving an API key from the vault
{
  "local_name": "api_key",
  "key": "EXTERNAL_API_KEY"
}
Example 2: Retrieving a database password
{
  "local_name": "db_password",
  "key": "DATABASE_PASSWORD"
}
- Notes:
- Vault entries are encrypted at rest and only decrypted when accessed
- Secrets are stored in the Definition Store for use in other blocks
- Vault access is project-scoped; each project has its own vault
- Keys are case-sensitive
- A FAIL signal is returned if the specified key does not exist
OBJECT Block

The OBJECT block creates a new object with specified key-value pairs.
- Purpose: Construct custom objects
- Configuration:
- Local Name: Variable name to store the created object
- Pairs: Key-value pairs for the object
- Usage: Use to create response objects or structured data
- Example: Creating a user profile object
{
  "local_name": "profile",
  "pairs": [
    {
      "id": "name",
      "data": {
        "ref_var": true,
        "rtype": "STRING",
        "data": "user.name"
      }
    },
    {
      "id": "email",
      "data": {
        "ref_var": true,
        "rtype": "STRING",
        "data": "user.email"
      }
    }
  ]
}
UPDATE Block
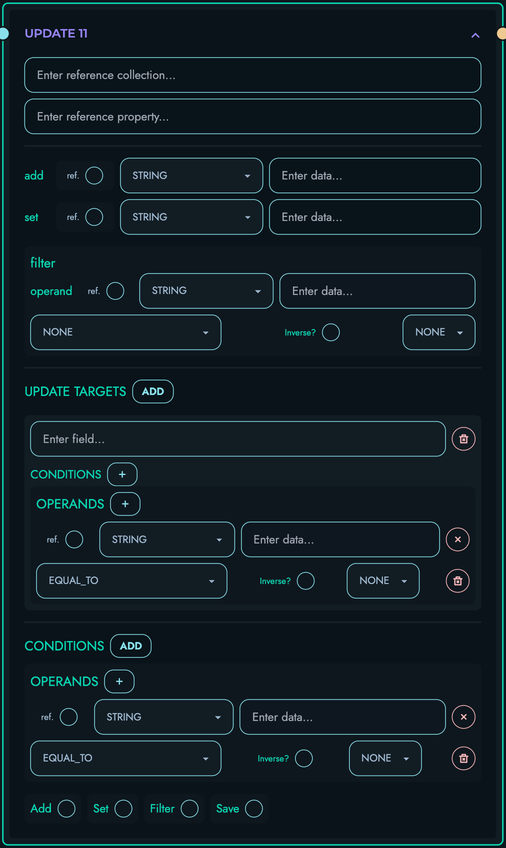
The UPDATE block modifies existing data in a collection based on specified criteria and rules.
- Purpose: Perform targeted updates to collection data
- Configuration:
- Reference Collection: Collection containing the data to update
- Reference Property: Property path used to identify or navigate the data structure (can be empty or in the form ‘field’ or ‘custom_structure.field’)
- Add: Optional value to add (used for arrays or numeric additions)
- Set: Optional value to set (used for direct replacement of values)
- Filter: Used when the property is an array to filter which elements of the array should be updated
- Targets: Specifies which data objects to update by doing checks against the fields within them
- Save: Boolean indicating whether to persist changes immediately
- Conditions: Optional conditions that must be met for the update to proceed
- Usage: Use for complex data updates, especially when you need to update specific fields conditionally or work with arrays
- Example: Updating specific fields of user records that match certain criteria
{
  "ref_col": "users",
  "ref_property": "profile.settings",
  "add": null,
  "set": {
    "ref_var": true,
    "rtype": "OTHER",
    "data": "newSettings"
  },
  "filter": {
    "operand": {
      "ref_var": false,
      "rtype": "STRING",
      "data": "darkMode"
    },
    "operation_type": "EQUAL_TO",
    "not": false,
    "next": "NONE"
  },
  "targets": [
    {
      "field": "userId",
      "conditions": [
        {
          "operands": [
            {
              "ref_var": false,
              "rtype": "STRING",
              "data": "123"
            }
          ],
          "condition_type": "EQUAL_TO",
          "not": false,
          "next": "NONE"
        }
      ]
    }
  ],
  "save": true,
  "conditions": []
}
How the UPDATE Block Works:
-
Initial Conditions Check: The block first evaluates any conditions to determine if the update should proceed.
-
Target Selection:
- The block evaluates the
targetsto determine which data objects should be updated - Each target specifies a field and conditions for selecting data objects
- For example, in the above JSON, it will select data objects where userId equals “123”
- The block evaluates the
-
Property Navigation:
- The
ref_propertyspecifies which property path to update within the selected objects - If empty, the entire object is considered for update
- The
-
Filter Application:
- If the property is an array,
filterdetermines which array elements to update - For example, it might update only array elements where a certain property equals a certain value
- If the property is an array,
-
Value Modification:
set: Directly replaces the value of the specified propertyadd: For arrays, adds elements; for numbers, performs addition operation
-
Persistence:
- If
saveis true, changes are immediately persisted to the database - If false, changes remain in memory for further processing
- If
SIMPLE UPDATE Block

The SIMPLE UPDATE block modifies existing data in a collection with a more streamlined configuration than the standard UPDATE block.
- Purpose: Perform straightforward updates to collection data
- Configuration:
- Reference Collection: Collection containing the data to update
- Reference Property: Property path used to identify or navigate the data structure (can be empty or in the form ‘field’ or ‘custom_structure.field’)
- Set: Value to set (used for direct replacement of values)
- Targets: Specifies which data objects to update by doing checks against the fields within them
- Save: Boolean indicating whether to persist changes immediately
- Usage: Use for simple updates where you don’t need to add values, filter arrays, or use conditions
- Example: Updating a user’s email address
{
  "ref_col": "users",
  "ref_property": "email",
  "set": {
    "ref_var": false,
    "rtype": "STRING",
    "data": "[email protected]"
  },
  "targets": [
    {
      "field": "userId",
      "conditions": [
        {
          "operands": [
            {
              "ref_var": false,
              "rtype": "STRING",
              "data": "123"
            }
          ],
          "condition_type": "EQUAL_TO",
          "not": false,
          "next": "NONE"
        }
      ]
    }
  ],
  "save": true
}
How the SIMPLE UPDATE Block Works:
-
Target Selection:
- The block evaluates the
targetsto determine which data objects should be updated - Each target specifies a field and conditions for selecting data objects
- The block evaluates the
-
Property Navigation:
- The
ref_propertyspecifies which property path to update within the selected objects - If empty, the entire object is considered for update
- The
-
Value Modification:
set: Directly replaces the value of the specified property
-
Persistence:
- If
saveis true, changes are immediately persisted to the database - If false, changes remain in memory for further processing
- If
CREATE Block
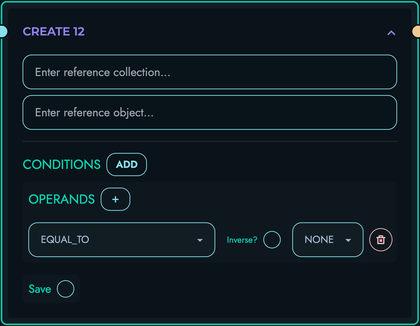
The CREATE block creates new data in a collection.
- Purpose: Insert new records into collections
- Configuration:
- Reference Collection: Collection where data will be created
- Reference Object: Object containing the data to create
- Save: Whether to save immediately
- Conditions: Optional conditions for creation
- Usage: Use to insert new records based on request data
- Example: Creating a new user
{
  "ref_col": "users",
  "ref_object": "newUser",
  "save": true,
  "conditions": []
}
EMAIL Block

The EMAIL block sends emails using predefined email templates with dynamic variable substitution.
- Purpose: Send transactional emails, notifications, or automated communications from within API routes
- Configuration:
- Email Template Name: Name of the email template to use (defined in Email Templates management)
- Subject: Optional custom subject line (can override the template’s default subject)
- Variables: Key-value pairs to substitute placeholders in the email template
- Recipients: Email addresses to send to (can be a single email, comma-separated list, or array)
- Send As: Optional custom sender email address
- Send Individually: Whether to send separate emails to each recipient or one email with all recipients
- Send Async: Whether to send emails asynchronously (non-blocking) or synchronously
- Conditions: Optional conditions to check before sending the email
- Usage: Use to send welcome emails, password reset notifications, order confirmations, or any automated communication
- Example: Sending a welcome email to a new user
{
  "email_template_name": "welcome_email",
  "subject": {
    "ref_var": false,
    "rtype": "STRING",
    "data": "Welcome to Kinesis API!"
  },
  "variables": [
    {
      "id": "user_name",
      "data": {
        "ref_var": true,
        "rtype": "STRING",
        "data": "user.name"
      }
    },
    {
      "id": "activation_link",
      "data": {
        "ref_var": true,
        "rtype": "STRING",
        "data": "activation_url"
      }
    }
  ],
  "recipients": [
    {
      "ref_var": true,
      "rtype": "STRING",
      "data": "user.email"
    }
  ],
  "send_as": {
    "ref_var": false,
    "rtype": "STRING",
    "data": "[email protected]"
  },
  "send_individually": true,
  "send_async": true,
  "conditions": []
}
Example 2: Sending a password reset email with conditions
{
  "email_template_name": "password_reset",
  "subject": null,
  "variables": [
    {
      "id": "reset_link",
      "data": {
        "ref_var": true,
        "rtype": "STRING",
        "data": "reset_token_url"
      }
    },
    {
      "id": "user_name",
      "data": {
        "ref_var": true,
        "rtype": "STRING",
        "data": "user.username"
      }
    }
  ],
  "recipients": [
    {
      "ref_var": true,
      "rtype": "STRING",
      "data": "user.email"
    }
  ],
  "send_as": null,
  "send_individually": false,
  "send_async": true,
  "conditions": [
    {
      "operands": [
        {
          "ref_var": true,
          "rtype": "STRING",
          "data": "user.email_verified"
        },
        {
          "ref_var": false,
          "rtype": "BOOLEAN",
          "data": "true"
        }
      ],
      "condition_type": "EQUAL_TO",
      "not": false,
      "next": "NONE"
    }
  ]
}
- Notes:
- Email templates must be created in the Email Templates section before they can be used
- Variables in the email template are replaced with actual values at send time
- Recipients can be specified as:
- A single email address string
- A comma-separated string of emails
- An array of email addresses
- When
send_individuallyis true, each recipient receives a separate email (useful for personalized content) - When
send_asyncis true, email sending happens in a background task without blocking route execution - Conditions are evaluated before sending; if conditions fail, the email is not sent
- SMTP settings must be configured in Config management for emails to send successfully
- The block returns
NoChangein the Definition Store (it performs an action but doesn’t store a result)
RETURN Block

The RETURN block ends processing and returns a response to the client.
- Purpose: Generate and send the API response
- Configuration:
- Pairs: Key-value pairs for the response object
- Conditions: Optional conditions for the response
- Usage: Use to complete the request and send data back to the client
- Example: Returning a success response with data
{
  "pairs": [
    {
      "id": "status",
      "data": {
        "ref_var": false,
        "rtype": "INTEGER",
        "data": "200"
      }
    },
    {
      "id": "data",
      "data": {
        "ref_var": true,
        "rtype": "OTHER",
        "data": "result"
      }
    }
  ],
  "conditions": []
}
Best Practices
- Start Simple: Begin with basic flows and add complexity as needed
- Use Descriptive Names: Choose clear variable names for readability
- Handle Errors: Include appropriate condition blocks to validate inputs and handle errors
- Test Thoroughly: Test your routes with various inputs to ensure they work as expected
- Document Your Logic: Add comments to your flows to explain complex logic
Related Documentation
- Routes - Managing routes in Kinesis API
- Collections - Working with data collections
- Data - Working with data in Kinesis API
Route Templates
Route Templates in Kinesis API allow you to define reusable, parameterized route blueprints that can be quickly applied when creating new routes. Instead of rebuilding the same flow logic from scratch for each route, you create a template once and supply variable values at apply-time to generate fully configured routes.
Understanding Route Templates
Each route template encapsulates a complete route definition:
- Name: A unique identifier for the template (e.g.,
fetch_collection_by_id) - Description: A human-readable explanation of what the template does
- HTTP Method: The method the resulting route will use (GET, POST, PUT, PATCH, DELETE, etc.)
- Authentication Settings: Optional JWT authentication configuration, pre-configured in the template
- URL Parameters: Parameter definitions that the resulting route will accept
- Body Structure: Expected request body fields for the resulting route
- Flow: A complete X Engine flow that defines the route’s logic, with
{variable_key}placeholders in any string field - Variables: Declarations of each
{variable_key}placeholder, with a description and optional default value
Route templates can be scoped to a specific project or kept in the global scope (no project), making them available to all projects.
Understanding Template Variables
The most powerful feature of route templates is the ability to parameterize any string field in the flow using {variable_key} placeholders. When a template is applied to create a new route, the user fills in the value for each variable and the system performs a find-and-replace across every matching string field in the entire flow.
Where Variables Can Be Used
Variables can be placed in any string-type field across the route configuration and all block types, for example:
- Route ID and Route Path of the resulting route
- JWT authentication — the payload field (
field) and reference collection (ref_col) in the auth block - Body field keys and URL parameter keys (and the parameter delimiter)
local_nameandref_colin a FETCH block:{collection_name},{result_var}templatestring in a TEMPLATE blockkeyin a VAULT blockref_colandref_objectin a CREATE blockref_col,ref_property, and target fields in UPDATE / SIMPLE_UPDATE blocks- Literal operand
datavalues inside conditions, operations, filters, and loop bounds - Pair keys and literal pair values in OBJECT and RETURN blocks
- The
messagefield of a CONDITION block’s fail response - Email template name, recipients, and variable values in an EMAIL block
Variable Declaration
For each placeholder used in the flow, a corresponding variable declaration should be added to the template. Each variable has:
- Key: The placeholder name used in the flow (without braces), e.g.,
collection_name - Description: An explanation that guides the user when filling in the value (e.g., “The name of the collection to fetch data from”)
- Default Value: An optional pre-filled value shown when the template is applied
Accessing Route Templates
Navigate to /web/routes/templates to manage templates in the global scope, or /web/routes/templates?id=project_id for project-scoped templates.
The interface shows:
- A filterable, paginated list of route templates
- Template cards with name, description, and HTTP method badge
- Action buttons for viewing, editing, and deleting templates
- A “Create New” button for users with sufficient permissions
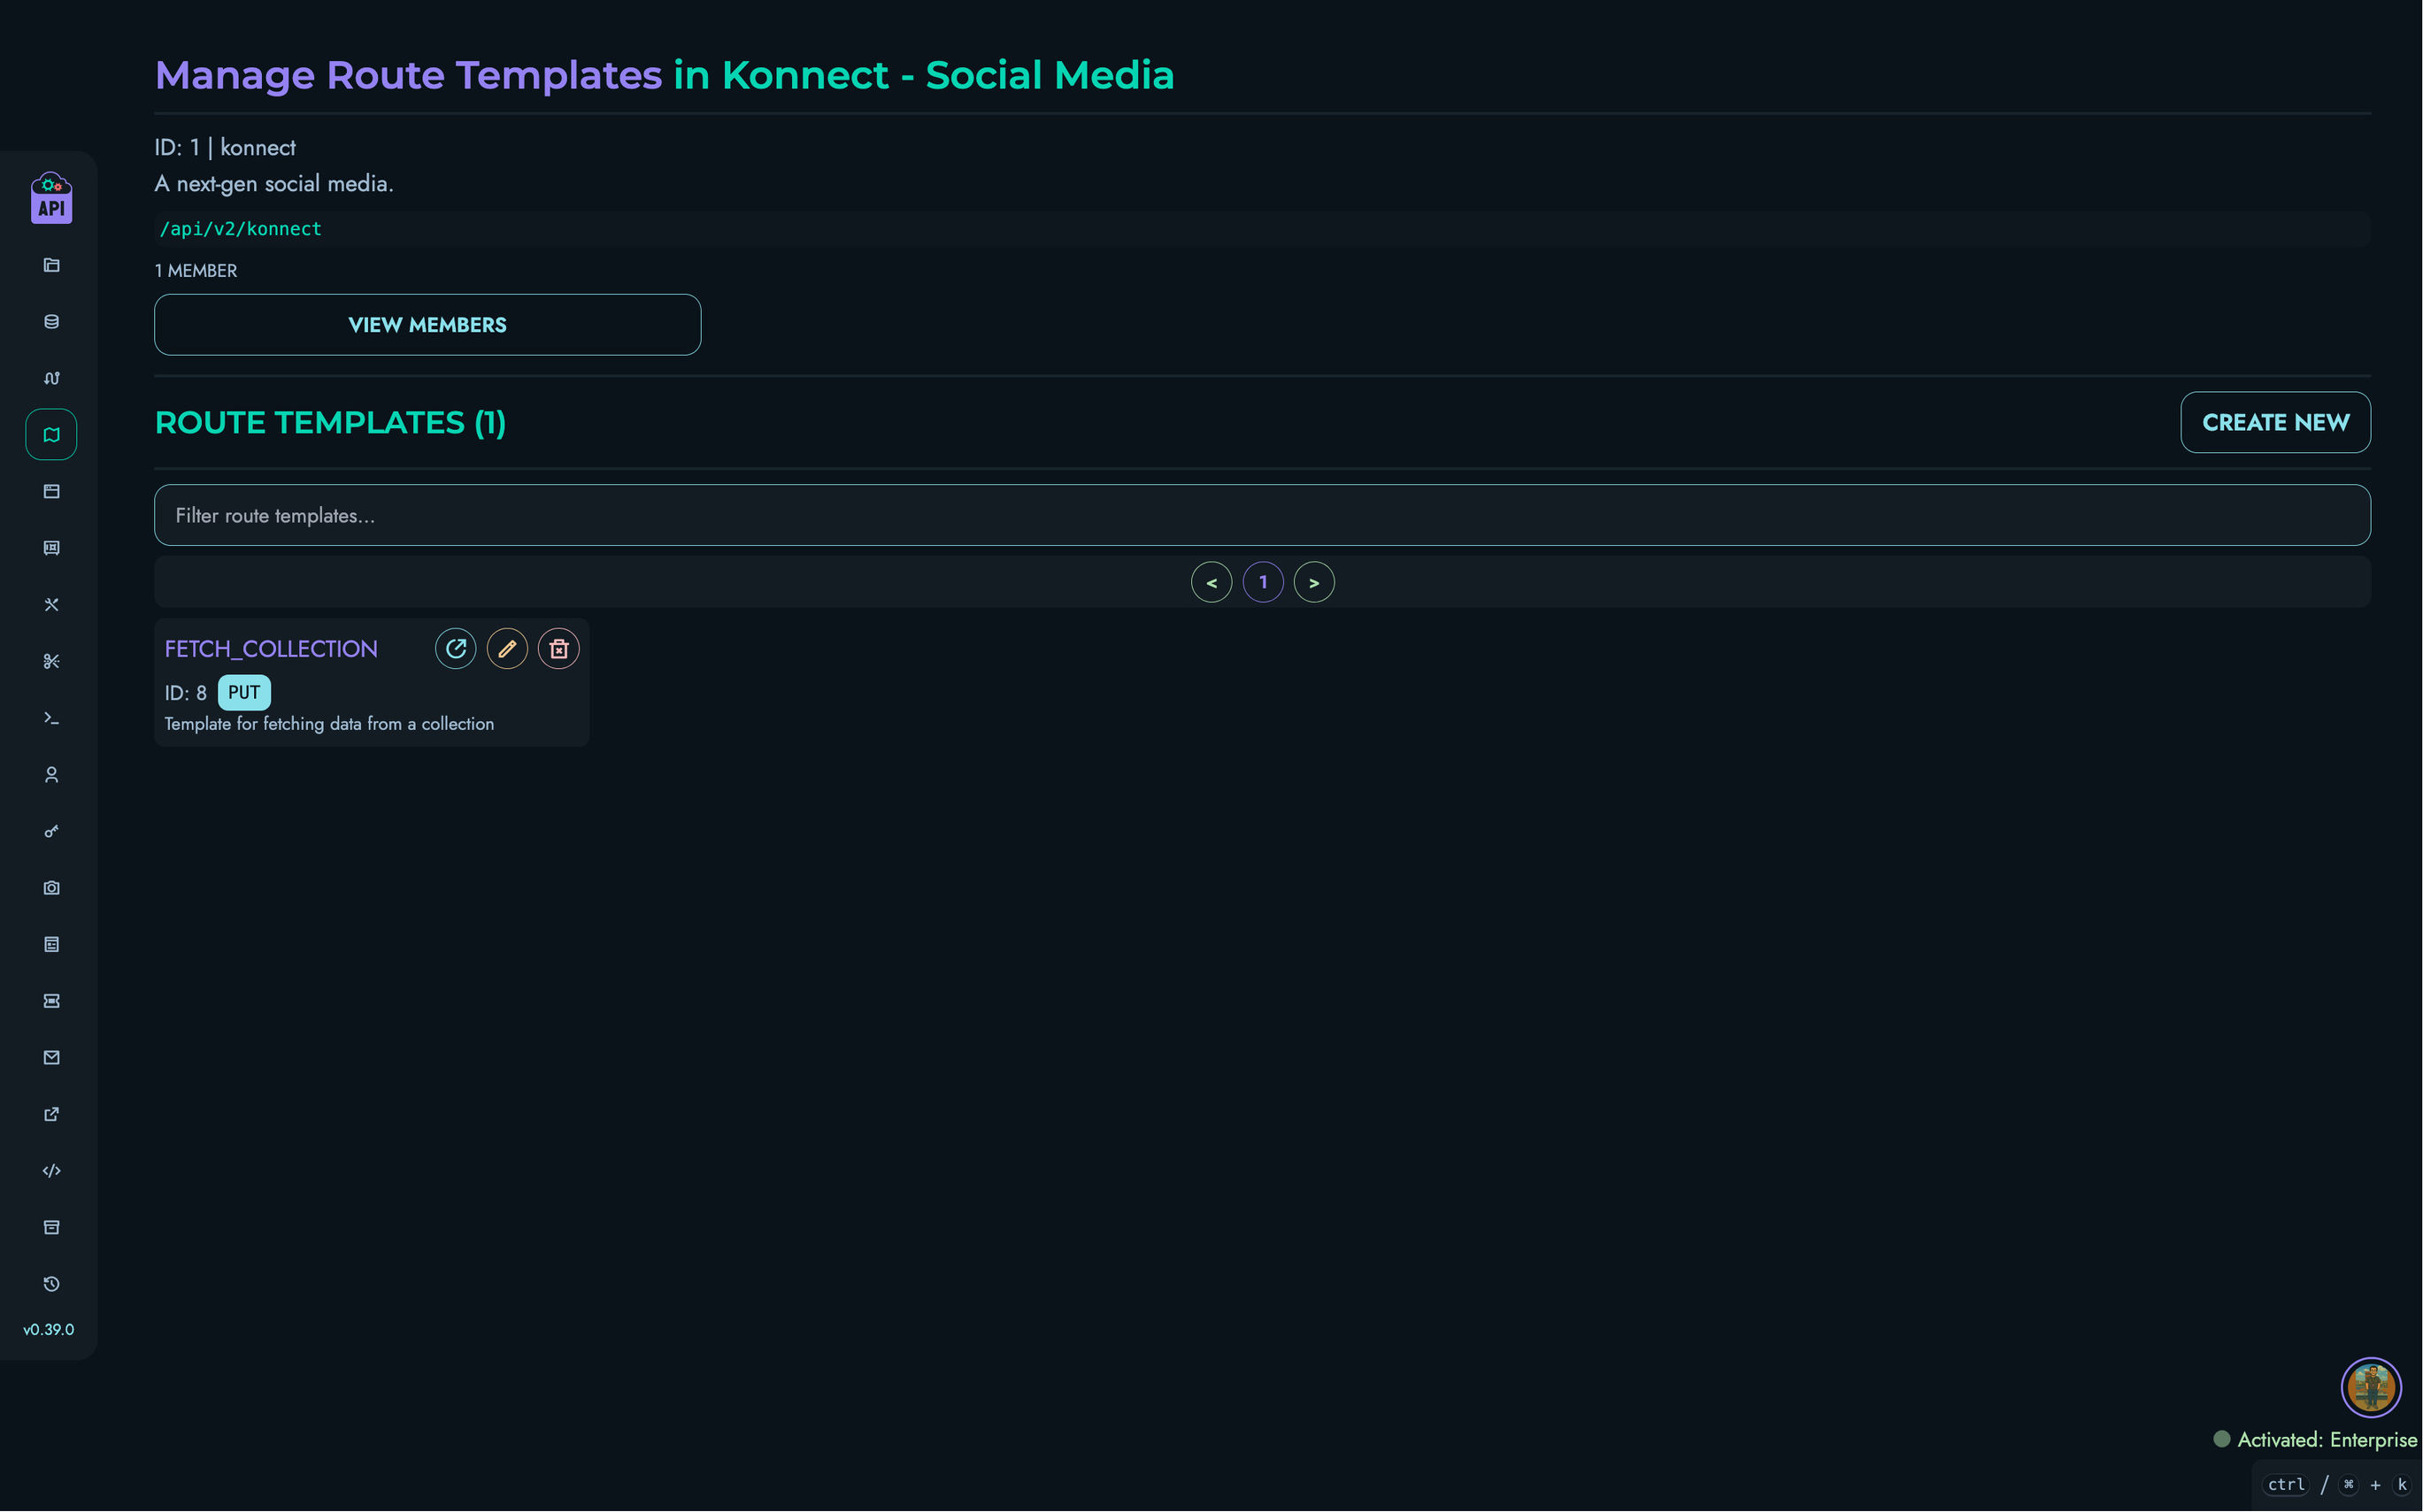
Creating a Route Template
Users with ROOT, ADMIN, or AUTHOR roles can create route templates:
- Navigate to the Route Templates page
- Click the “Create New” button
- You will be taken to the creation page at
/web/routes/templates/create
Template Configuration
The creation page is divided into several sections:
Route Template Configuration
- Unique Name: A unique identifier for the template (e.g.,
auth_fetch_user_by_id) - Description: A clear explanation of what the template provides (e.g., “JWT-authenticated route that fetches a single record from a collection by ID”)
- HTTP Method: The HTTP method the resulting route will use
JWT Authentication
Pre-configure JWT authentication settings that will be applied when the template is used:
- Require JWT validation: Toggle to enable JWT protection for routes created from this template
- Field to use: The JWT payload field extracted for authentication (e.g.,
uid) - Reference Collection: The collection used to validate the extracted field (e.g.,
users)
URL Parameters
Define the URL parameter structure expected by the resulting route:
- Delimiter / Separator: The character separating query parameters (default:
&) - Parameter Definitions: Each parameter’s name and expected data type
Body Parameters
For POST, PUT, and PATCH templates, define the expected request body structure. Each body field has a name and a data type.
Variables
Declare all {variable_key} placeholders used in the flow. For each variable:
- Key: The placeholder identifier (must match exactly what appears in
{...}in the flow) - Description: Guidance text shown to the user when applying the template
- Default Value: An optional value pre-filled when the template is applied
It is good practice to add a variable declaration for every placeholder in the flow, even if a default value makes it optional to change.
Flow Editor
Build the route logic using the same X Engine Flow Editor available for regular routes. Use {variable_key} syntax anywhere you want the value to be substituted at apply-time.
Example — FETCH block with variables:
| Field | Value |
|---|---|
| Local Name | {result_var} |
| Reference Collection | {collection_name} |
When a user applies this template and sets result_var = "post" and collection_name = "posts", the resulting FETCH block will have local_name: "post" and ref_col: "posts".
Saving the Template
Click the “Create” button to save the template. The system validates all required fields and stores the template with its full flow and variable declarations.
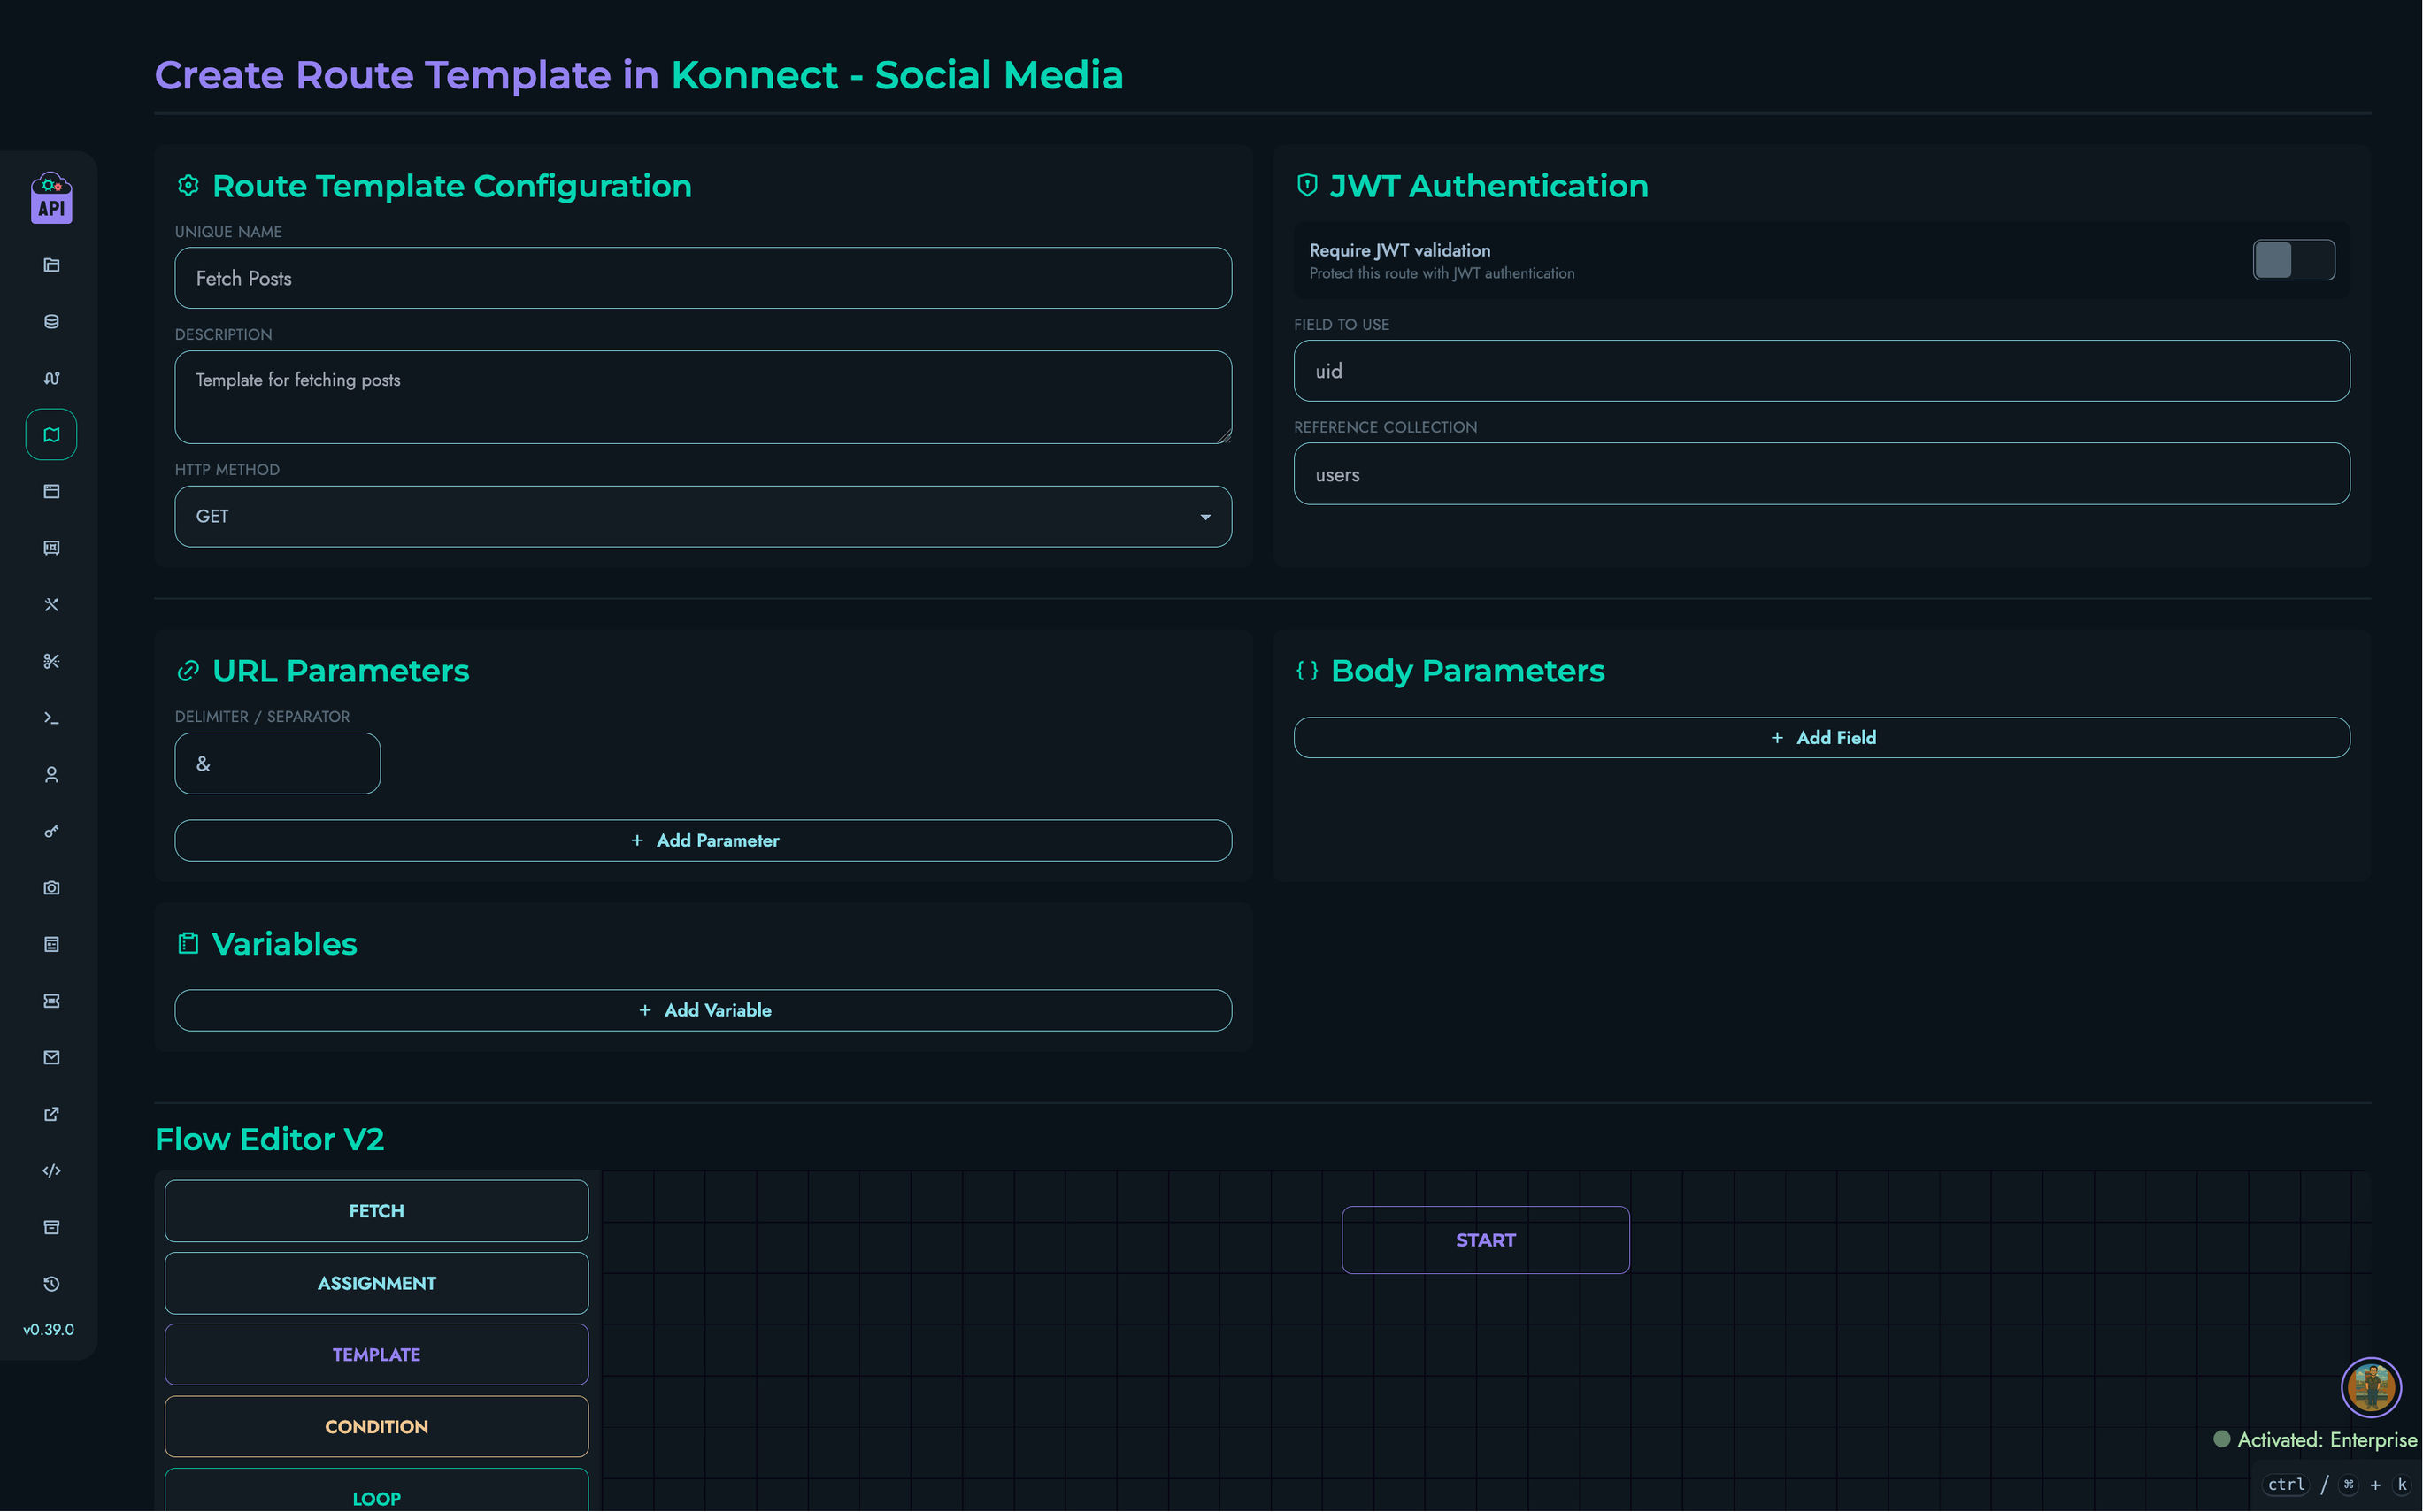
Viewing a Route Template
To view the details of a route template:
- Click the “View” button (eye icon) on a template card, or navigate to
/web/routes/templates/view?id=[template_id] - The view page shows all template information in read-only mode:
- Configuration (name, description, method)
- JWT authentication settings
- URL parameter definitions
- Body parameter definitions
- Variable declarations with keys, descriptions, and defaults
- The complete flow in a read-only version of the Flow Editor
From the view page, authorized users can navigate directly to the Edit page.
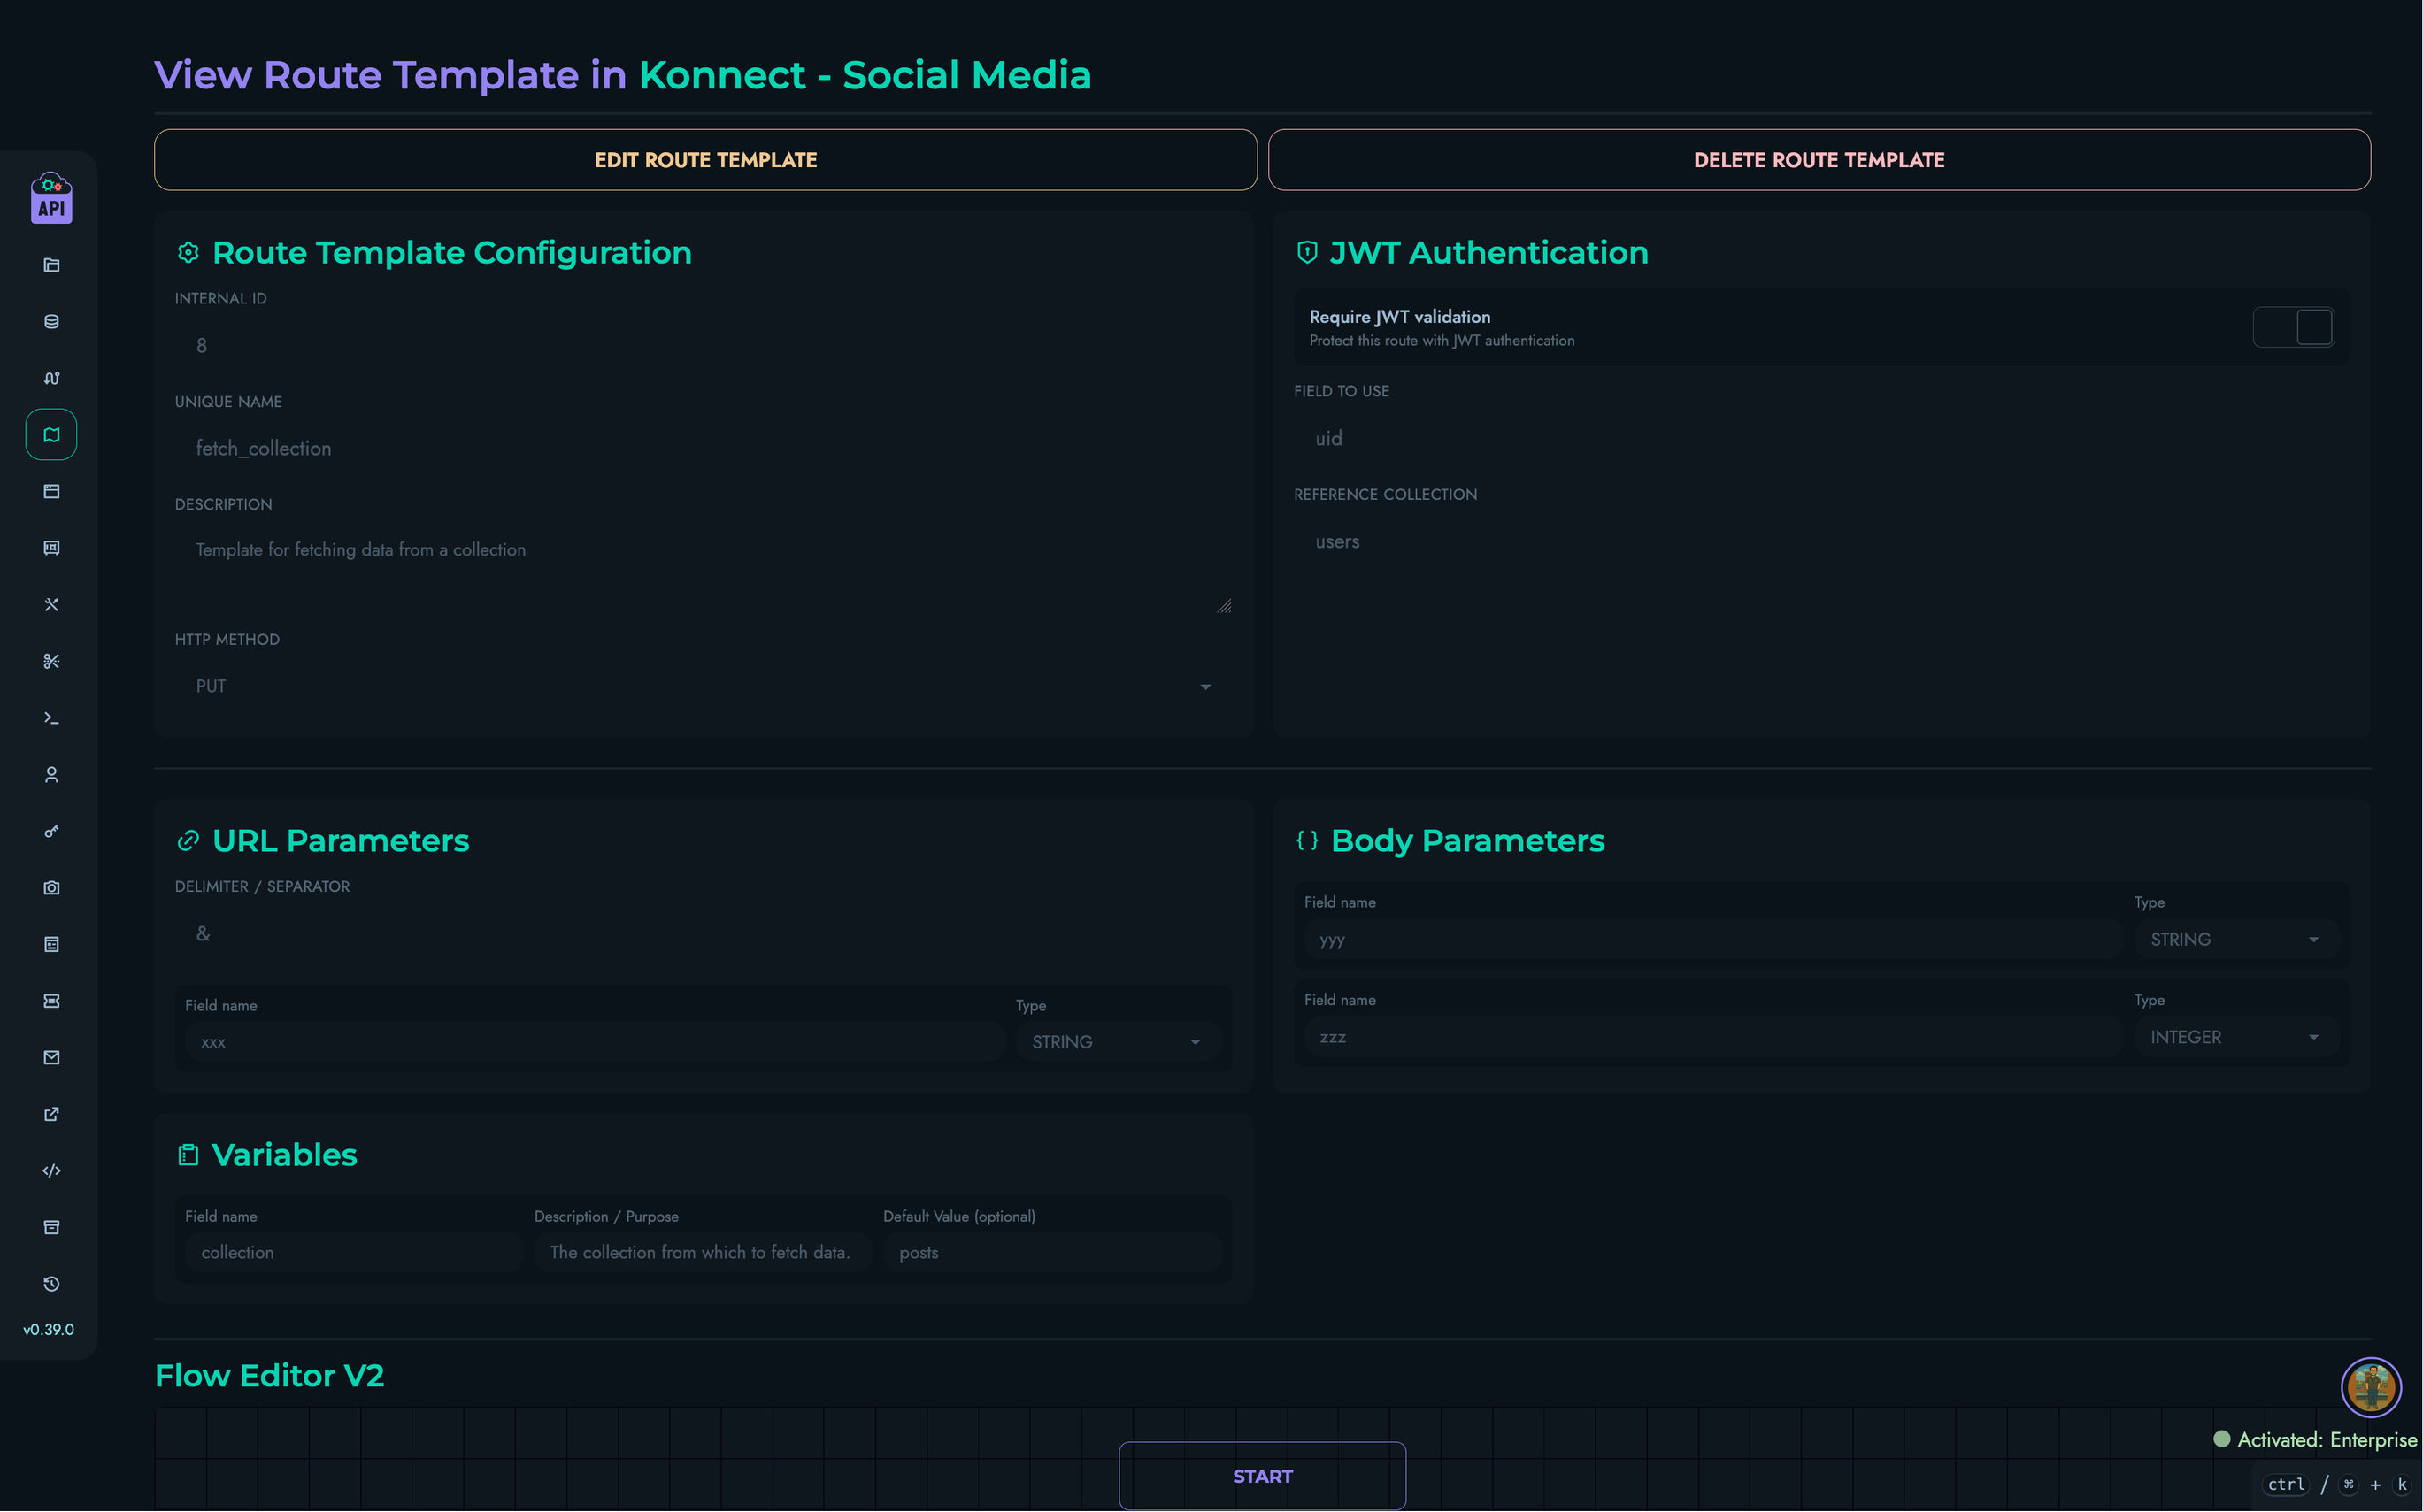
Editing a Route Template
Users with ROOT, ADMIN, or AUTHOR roles can edit existing route templates:
- Click the “Edit” button (pencil icon) on a template card, or use the “Edit Route Template” button on the view page
- You will be taken to the edit page at
/web/routes/templates/edit?id=[template_id] - Modify any aspect of the template: configuration, authentication, parameters, variables, or flow
- Click “Update” to save your changes
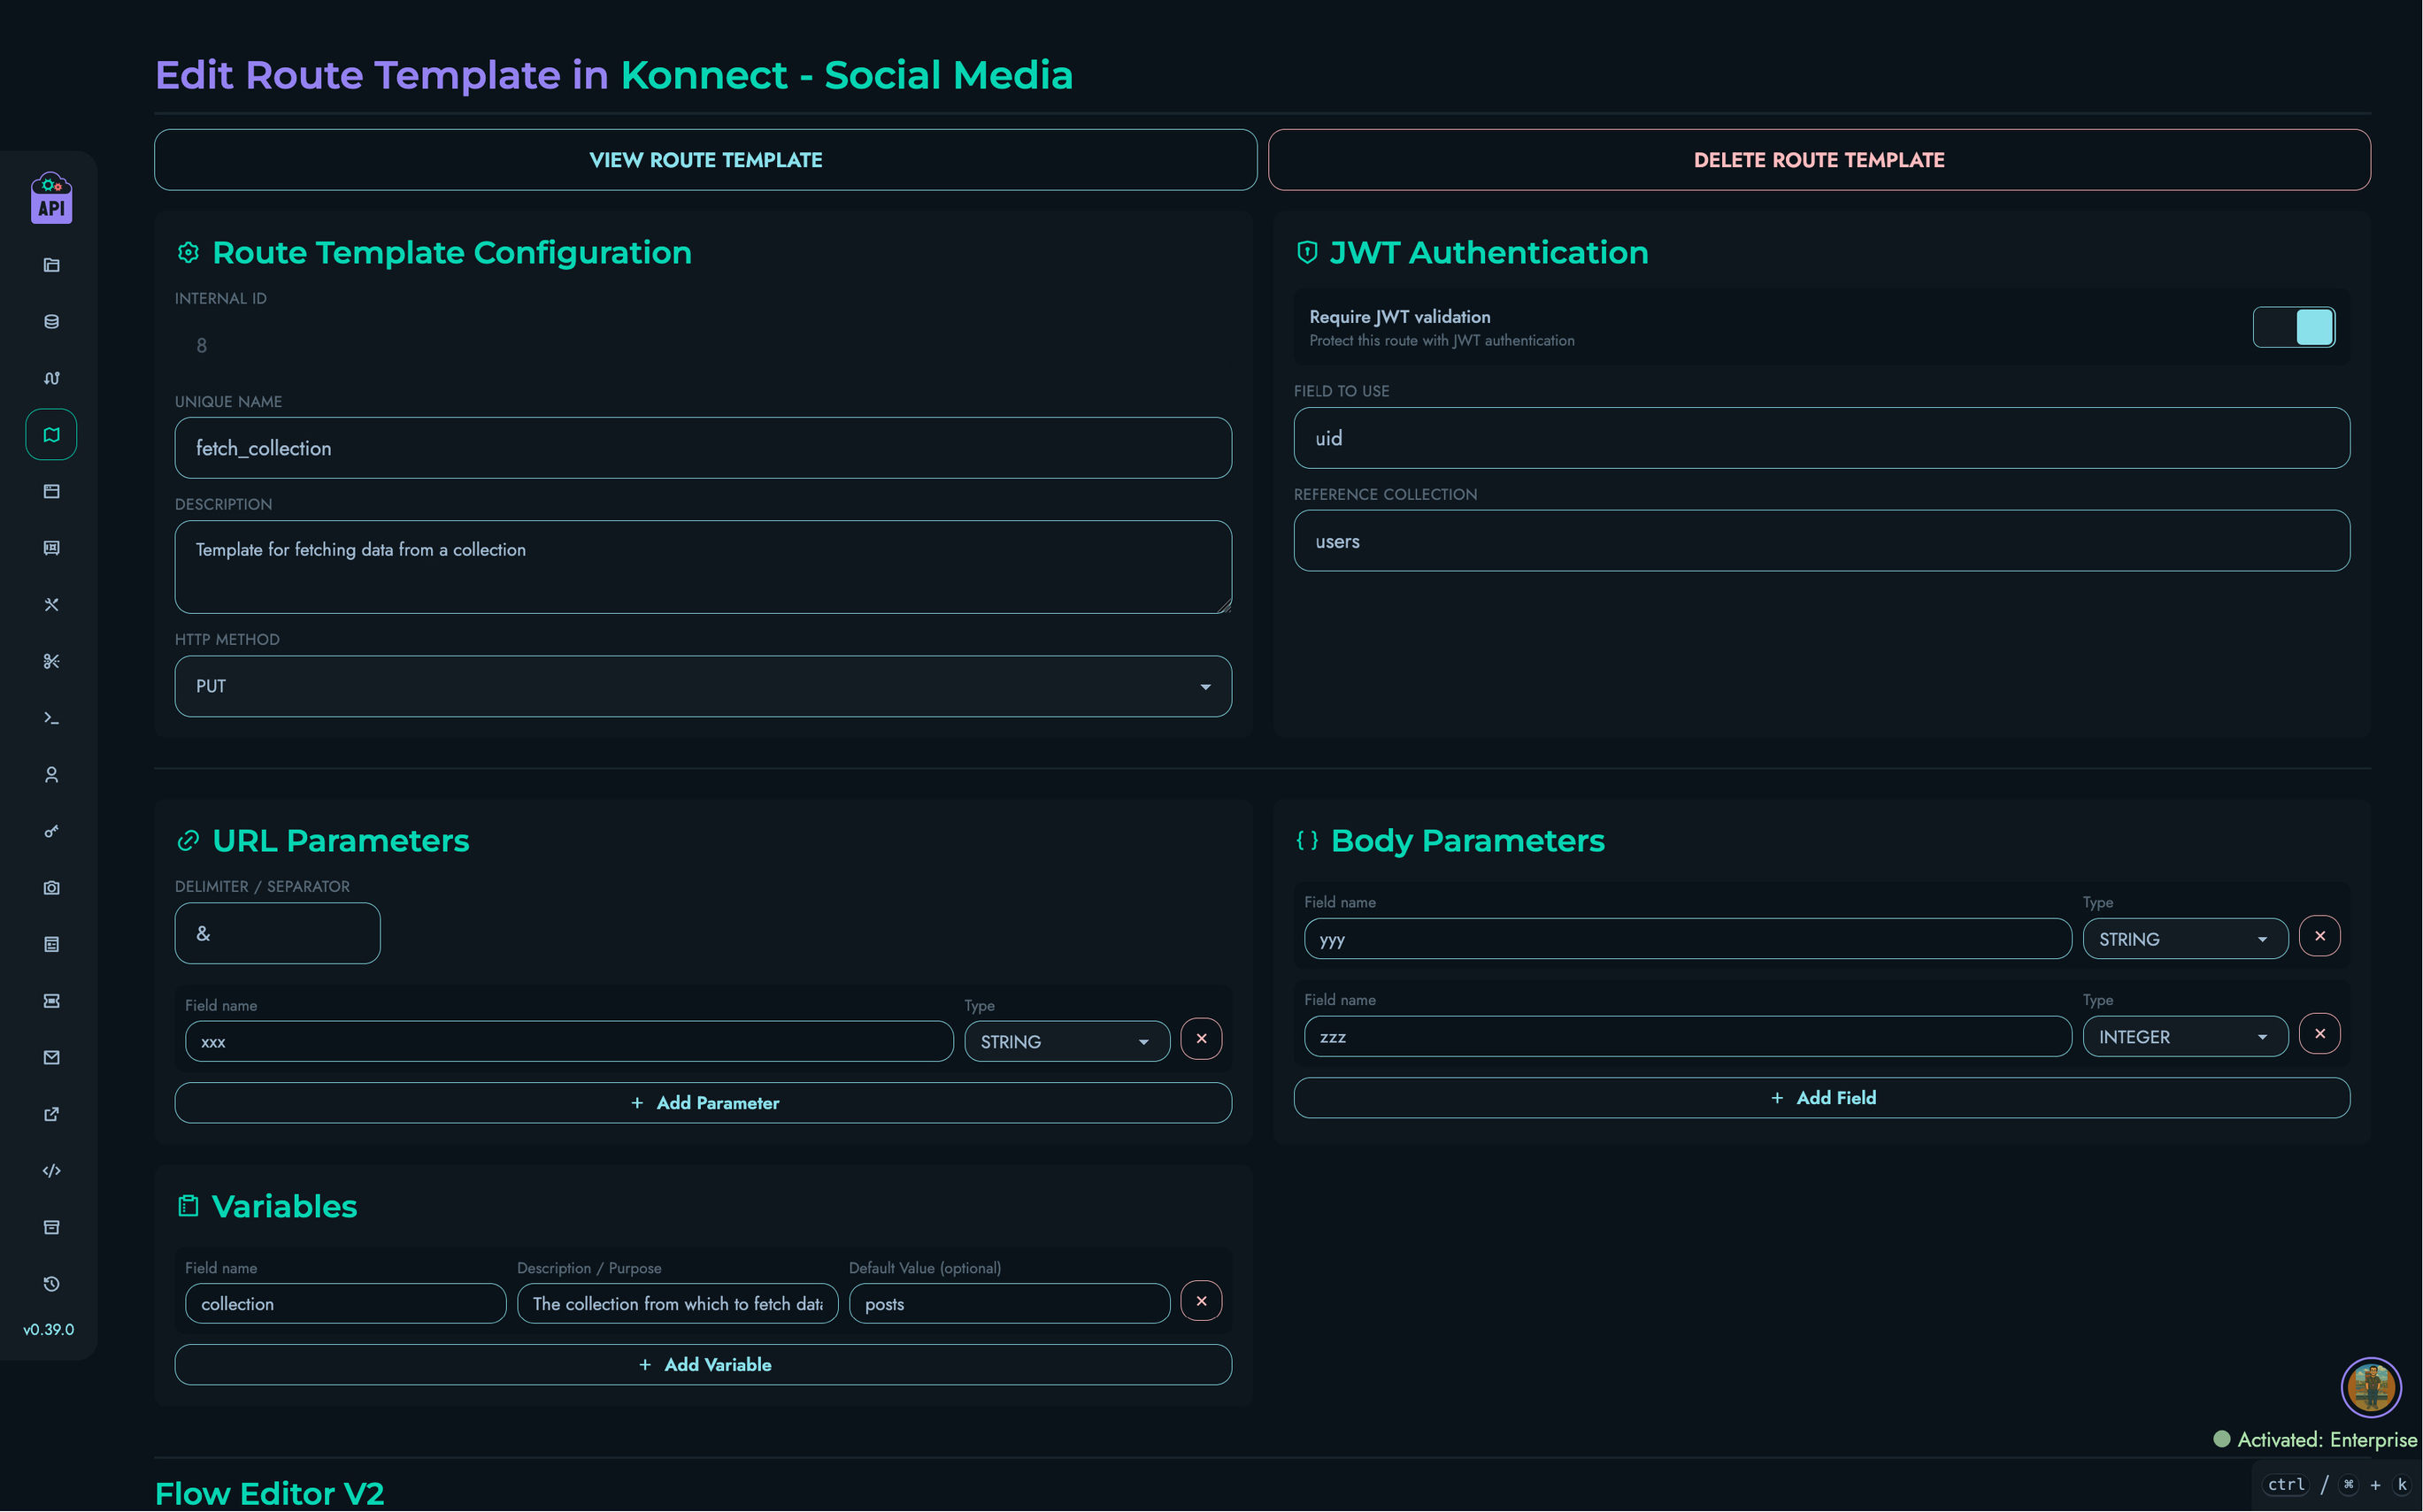
Note: Editing a template does not automatically update routes that were previously created from it. Each application of a template is a one-time snapshot.
Deleting a Route Template
Users with ROOT, ADMIN, or AUTHOR roles can delete route templates:
- From the templates list, locate the template to remove
- Use the “Delete” button on the template card or the “Delete Route Template” button on the edit page
- Confirm the deletion in the modal that appears
⚠️ Warning: Deleting a route template permanently removes it. Any routes already created from it are unaffected, but the template will no longer be available for future use.
Applying a Route Template
Route templates are applied when creating a new route within a project. The apply workflow:
- From the route creation page (
/web/routes/create?id=project_id), click “Create from Template” - A modal appears listing all available route templates filtered for the current project
- Browse and select the template you want to use
- If the template has variables, a second modal appears listing each variable with:
- The variable key
- A description of what value to provide
- An input pre-filled with the default value (if set)
- Fill in values for all variables
- Click “Apply Template” to populate the route creation form with the template’s configuration and substituted flow
After applying, you can review and further customize the populated form before clicking “Create” to finalize the route.
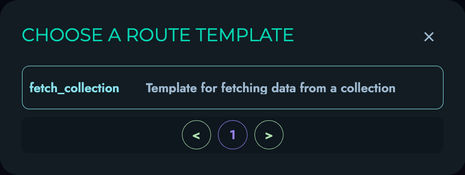
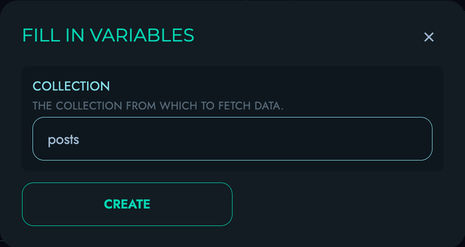
Variable Substitution
When the template is applied, the system replaces every {variable_key} occurrence in all applicable string fields throughout the entire flow with the value you provided. This substitution covers:
- Route ID and Route Path of the resulting route
- JWT authentication — the payload field name and reference collection
- Body field keys and URL parameter keys (and the parameter delimiter)
- All block name and collection reference fields
- Template strings and literal operand values inside conditions and operations
- Filter operands, loop bounds, and step values
- Object pair keys and values
- Vault key references
- Conditional fail messages
- Email template names, recipient addresses, and variable pairs
Substitution only modifies literal (non-variable-reference) string fields — fields that reference other runtime variables (using the ref_var flag) are left unchanged.
Project Scope vs. Global Scope
Route templates can be either project-scoped or global:
| Scope | Description | Access |
|---|---|---|
| Global | No project assigned; available across all projects | All users |
| Project | Assigned to a specific project | Project members only |
When browsing templates for a project, the interface shows both templates assigned to that project and all unassigned global templates, giving you the full set of templates relevant to that project.
User Permissions
Access to route template management is role-based:
| Role | View Templates | Create Templates | Edit Templates | Delete Templates |
|---|---|---|---|---|
| ROOT | ✓ | ✓ | ✓ | ✓ |
| ADMIN | ✓ | ✓ | ✓ | ✓ |
| AUTHOR | ✓ | ✓ | ✓ | ✓ |
| VIEWER | ✓ | ✗ | ✗ | ✗ |
Additionally, users can only access project-scoped templates from within projects they are members of.
API Endpoints
Route template operations can also be performed via the API:
- Create / Update:
POST /route/template/create— Create a new template or update an existing one - Fetch All:
GET /route/template/fetch— Retrieve all route templates (optionally filtered by project) - Fetch One:
GET /route/template/fetch/one— Retrieve a specific route template by ID or name - Delete:
DELETE /route/template/delete— Delete a route template
All route template API endpoints require:
- Valid authentication (the authenticated user’s
uid) - Appropriate user role (AUTHOR or above for write operations)
Related Documentation
- Routes — Route management and the X Engine flow editor
- Blocks — Detailed reference for all X Engine block types and their fields
- Projects — Project organization and membership
- Vaults — Secure secret storage that can be referenced in route flows
Playground
The Playground is an interactive testing environment built into Kinesis API that allows you to explore, test, and debug your API endpoints. It provides a convenient way to experiment with your API routes without needing external tools.
Overview
The Playground consists of three main components:
- Main Playground Page: Lists projects and previously saved requests
- Routes Page: Shows all routes within a selected project
- Request Page: Allows you to test individual routes with custom parameters and bodies
All requests and responses are saved locally in your browser, allowing you to replay them later.
Note: The Playground is designed for testing and development purposes. While powerful for quick testing, it isn’t intended to replace specialized API testing tools for comprehensive testing scenarios.
Main Playground Page
To access the Playground:
- Log in to your Kinesis API account
- Navigate to
/web/playgroundin your browser or select “Playground” from the navigation menu

The main page displays:
Projects Section
This section shows all projects you are a member of. For each project, you’ll see:
- Project name
- API path
- Member count
- View buttons for routes and members
Use the filter input to quickly find specific projects.
Replay Previous Requests Section
This section displays requests you’ve previously made using the Playground:
- Request date/time
- API endpoint URL
- Options to view or delete the saved request
These requests are stored locally in your browser and are not visible to other users.
Project Routes Page
When you click on a project in the main Playground, you’ll be taken to the routes page for that project:
/web/playground/routes?id=[project_id]
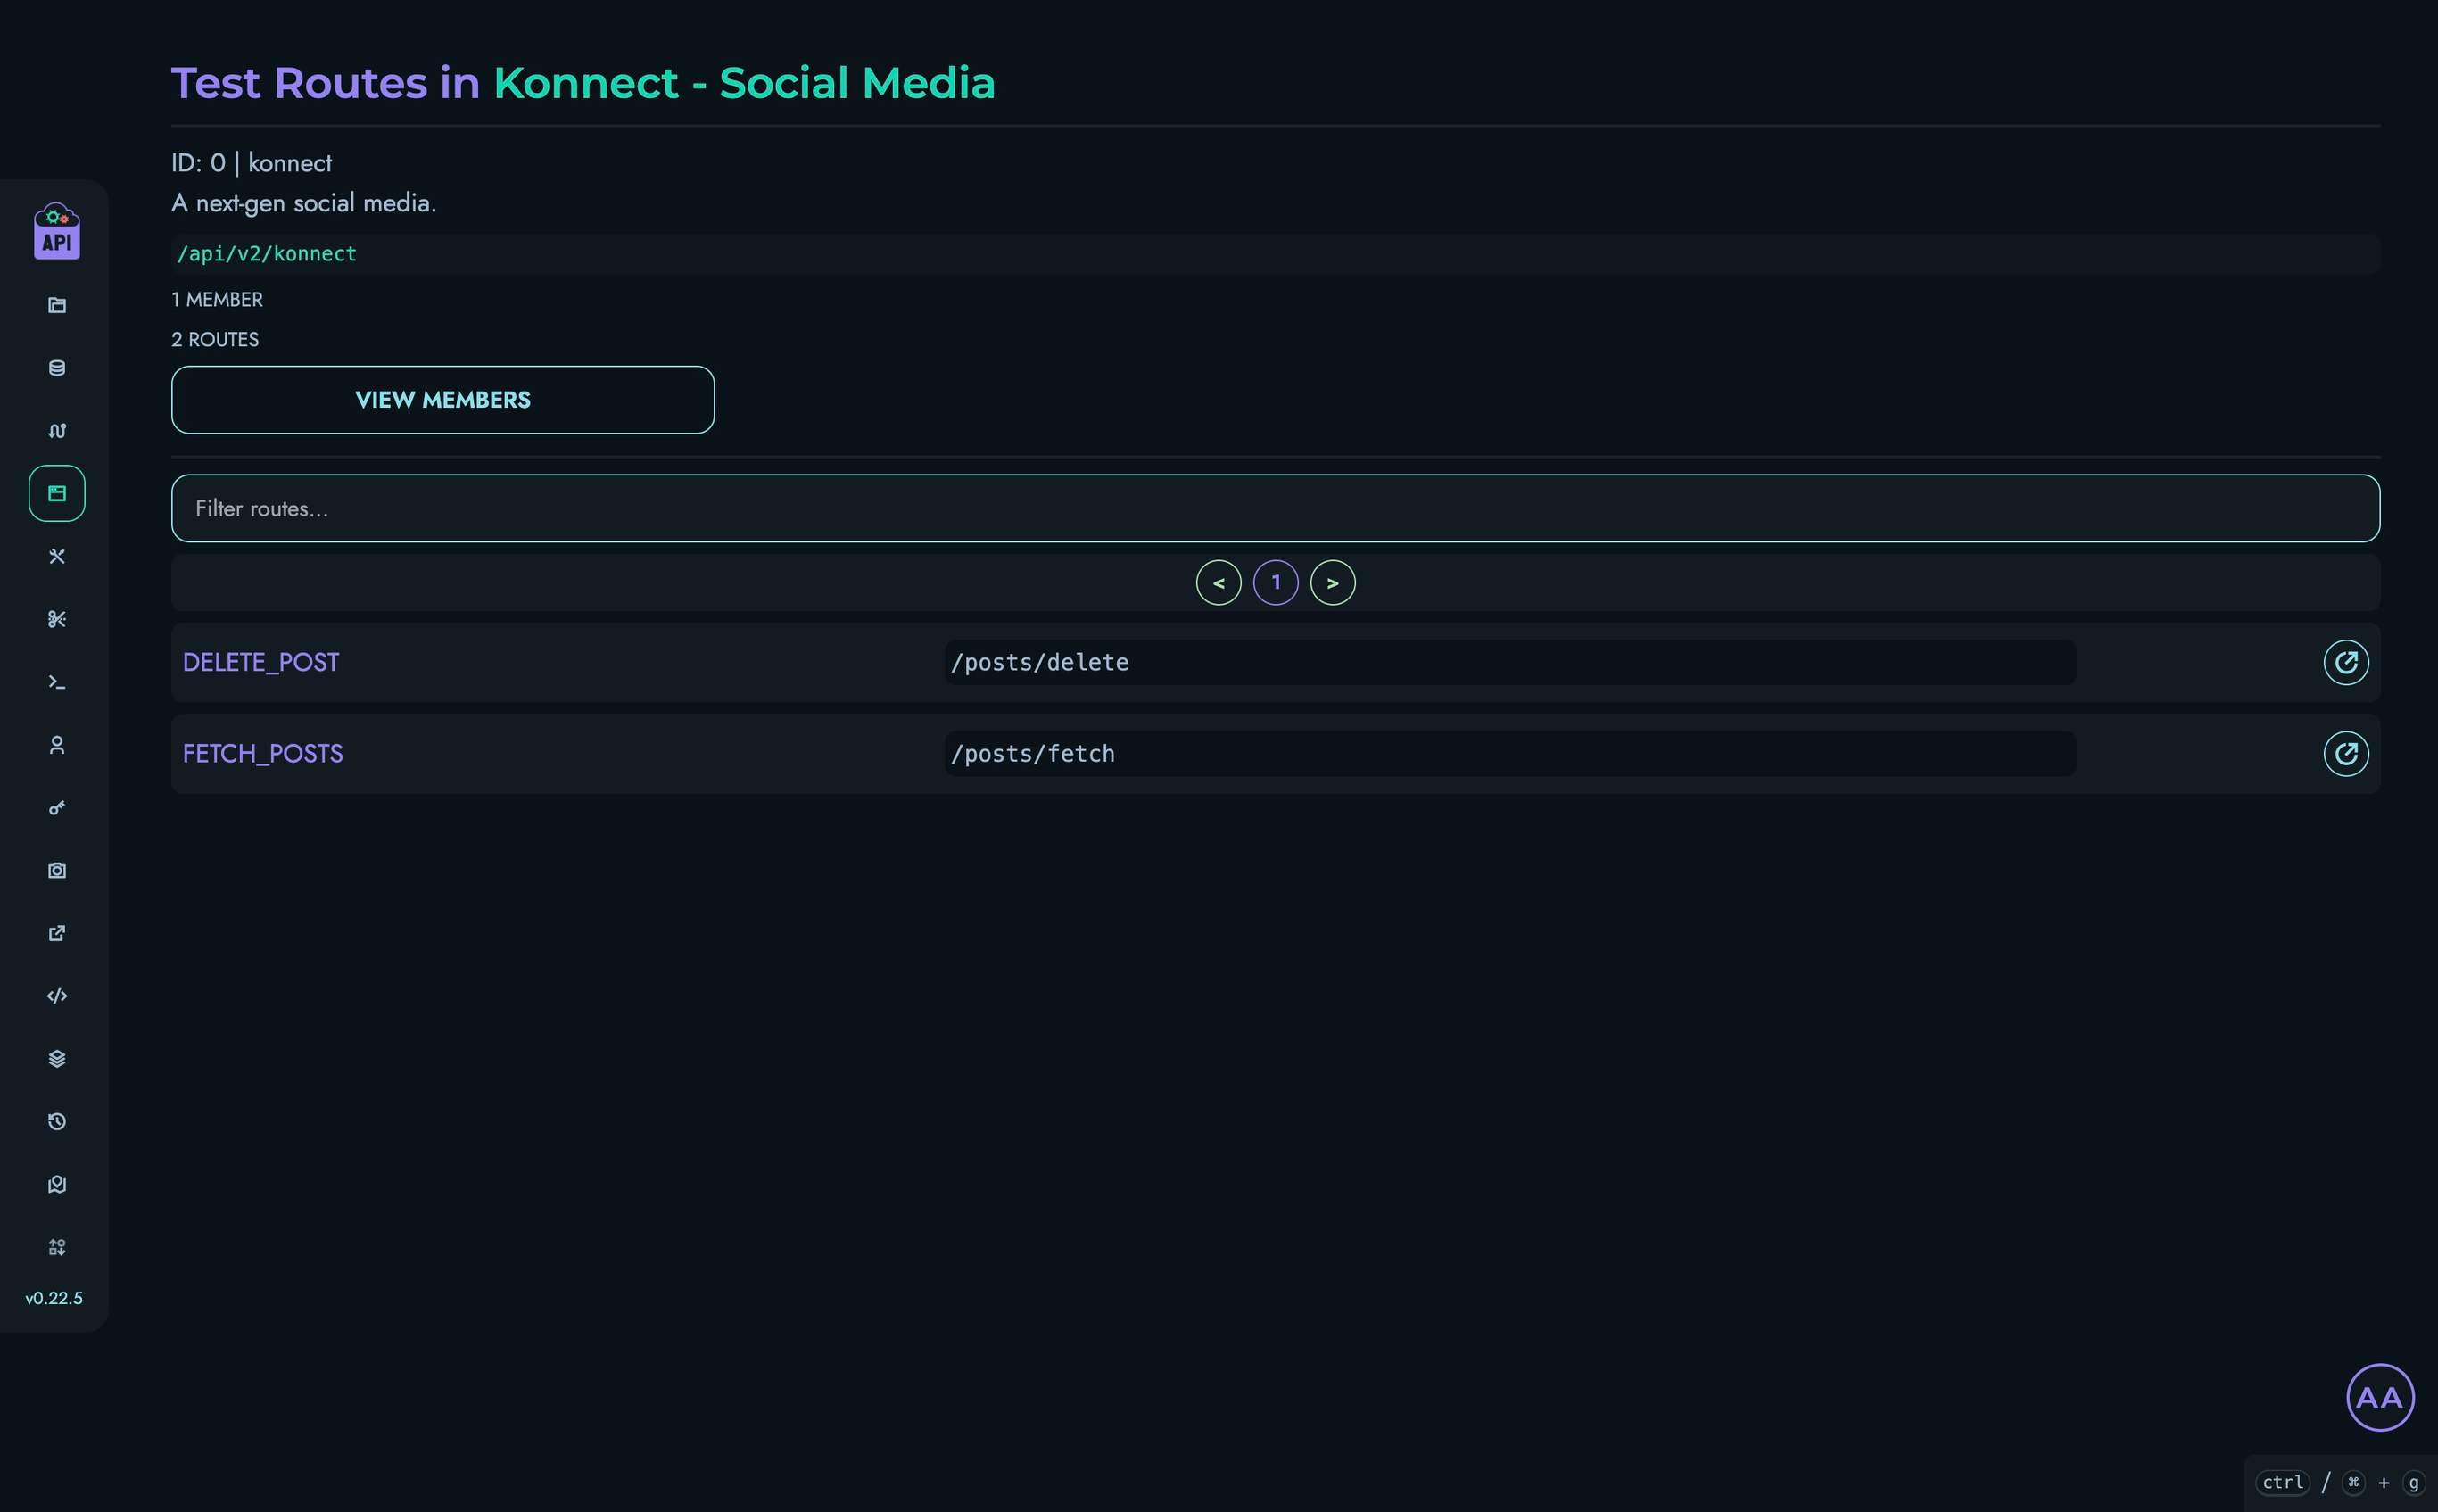
This page displays:
- Project information (name, ID, description, API path)
- A list of all routes in the project
- Each route shows its ID and API path
- A button to test each route
Use the filter input to quickly find specific routes.
Request Testing Page
This is where you actually test API routes. Access this page by:
- Clicking on a route in the Project Routes page
- Clicking on a saved request in the Replay section of the main Playground
- Creating a new request via the “New Request” button on the main Playground
URL pattern: /web/playground/request?project_id=[project_id]&id=[route_id]
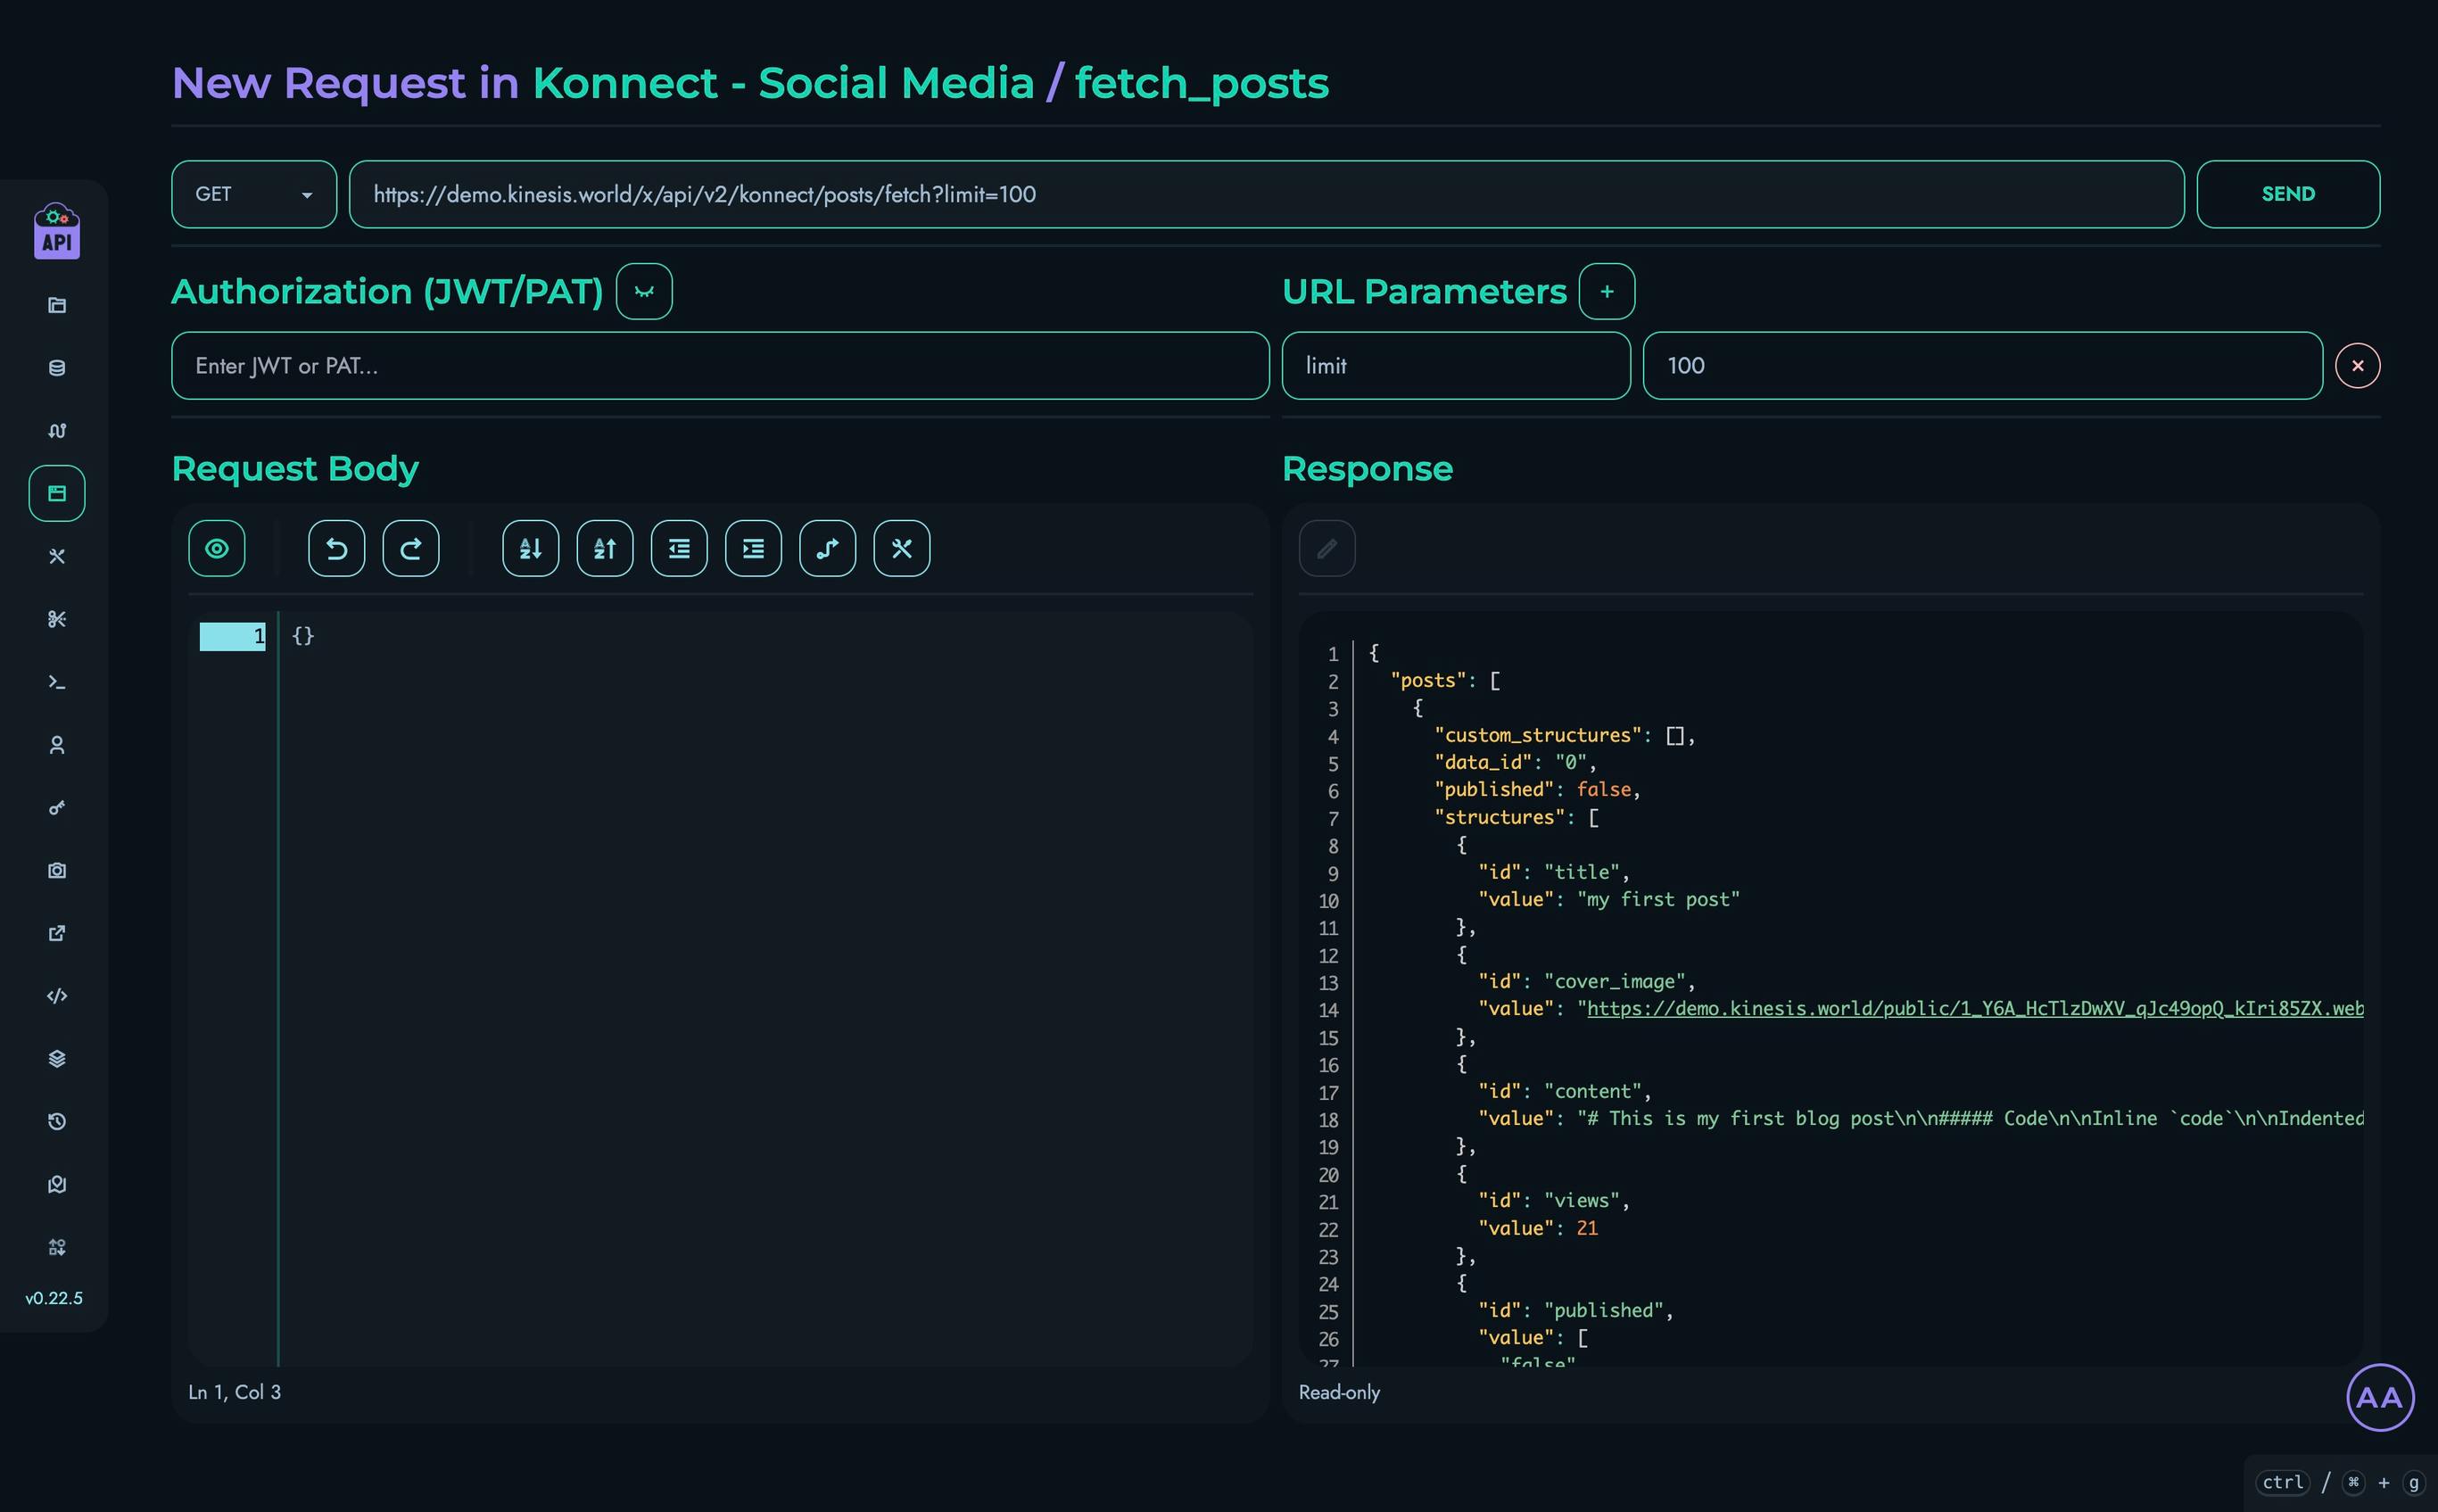
The request testing interface includes:
HTTP Method and URL
The top section shows:
- HTTP method selector (GET, POST, PUT, etc.)
- URL input field showing the full API path
- Send button to execute the request
Authorization
Add JWT tokens or Personal Access Tokens (PATs) for authenticated requests:
- Input field for token value
- Show/hide toggle for security
- Automatically populates for routes requiring authentication
URL Parameters
For routes with URL parameters:
- Add parameter button to include additional parameters
- Key-value pairs for each parameter
- Parameters are automatically added to the URL
- Parameter changes update the URL field in real-time
Request Body
For POST, PUT, and PATCH requests:
- JSON editor for the request body
- Syntax highlighting and validation
- Auto-populated with the expected structure based on route configuration
Response
After sending a request:
- Response is displayed in a JSON editor
- Syntax highlighting for easy reading
- Status code and timing information
Saving and Replaying Requests
The Playground automatically saves your requests locally in your browser. When you send a request:
- The request method, URL, authentication token, parameters, and body are saved
- The response is also saved
- A unique identifier is generated for the request
To replay a saved request:
- Go to the main Playground page
- Find your request in the Replay section
- Click the view button to load the request
- Optionally modify any parameters
- Click “Send” to execute the request again
Security Considerations
- Authentication tokens are stored locally in your browser
- Tokens are never sent to other users or systems beyond the API itself
- Consider using test accounts or temporary tokens when testing in shared environments
- Clear your browser data regularly to remove sensitive information
Using Playground in Development Workflow
The Playground can be particularly helpful in these scenarios:
- Initial API Testing: Quickly verify a new route works as expected
- Debugging Issues: Isolate and test problematic API calls
- Exploring APIs: Learn how existing endpoints work and what they return
- Sharing Examples: Create sample requests that can be recreated by team members
- Iterative Development: Test changes to routes as you develop them
Related Documentation
For more comprehensive examples of using the Playground in real-world scenarios, refer to our tutorials:
- Building a Simple Counter App - Uses the Playground to test API endpoints
- Implementing JWT Authentication - Demonstrates authentication testing
Events
The Events page in Kinesis API provides a comprehensive audit trail of all significant actions that occur within your system. This powerful monitoring tool helps administrators track changes, troubleshoot issues, and maintain accountability across the platform.
Access Control
Important: The Events page is only accessible to users with ROOT or ADMIN roles. Other users attempting to access this page will be redirected to the dashboard.
Accessing the Events Page
To access the Events page:
- Log in with a ROOT or ADMIN account
- Navigate to
/web/eventsin your browser or use the navigation menu
Understanding Events
Events in Kinesis API represent significant actions that have occurred within the system. Each event captures:
- Event Type: The category and specific action (e.g.,
user_create,data_update) - Timestamp: When the action occurred
- Description: Details about what happened, often including references to specific users, projects, or collections
- Redirect Link: A direct link to the relevant page in the system
Events serve as an audit trail, allowing administrators to track who made changes, what was changed, and when those changes occurred.
Events Interface
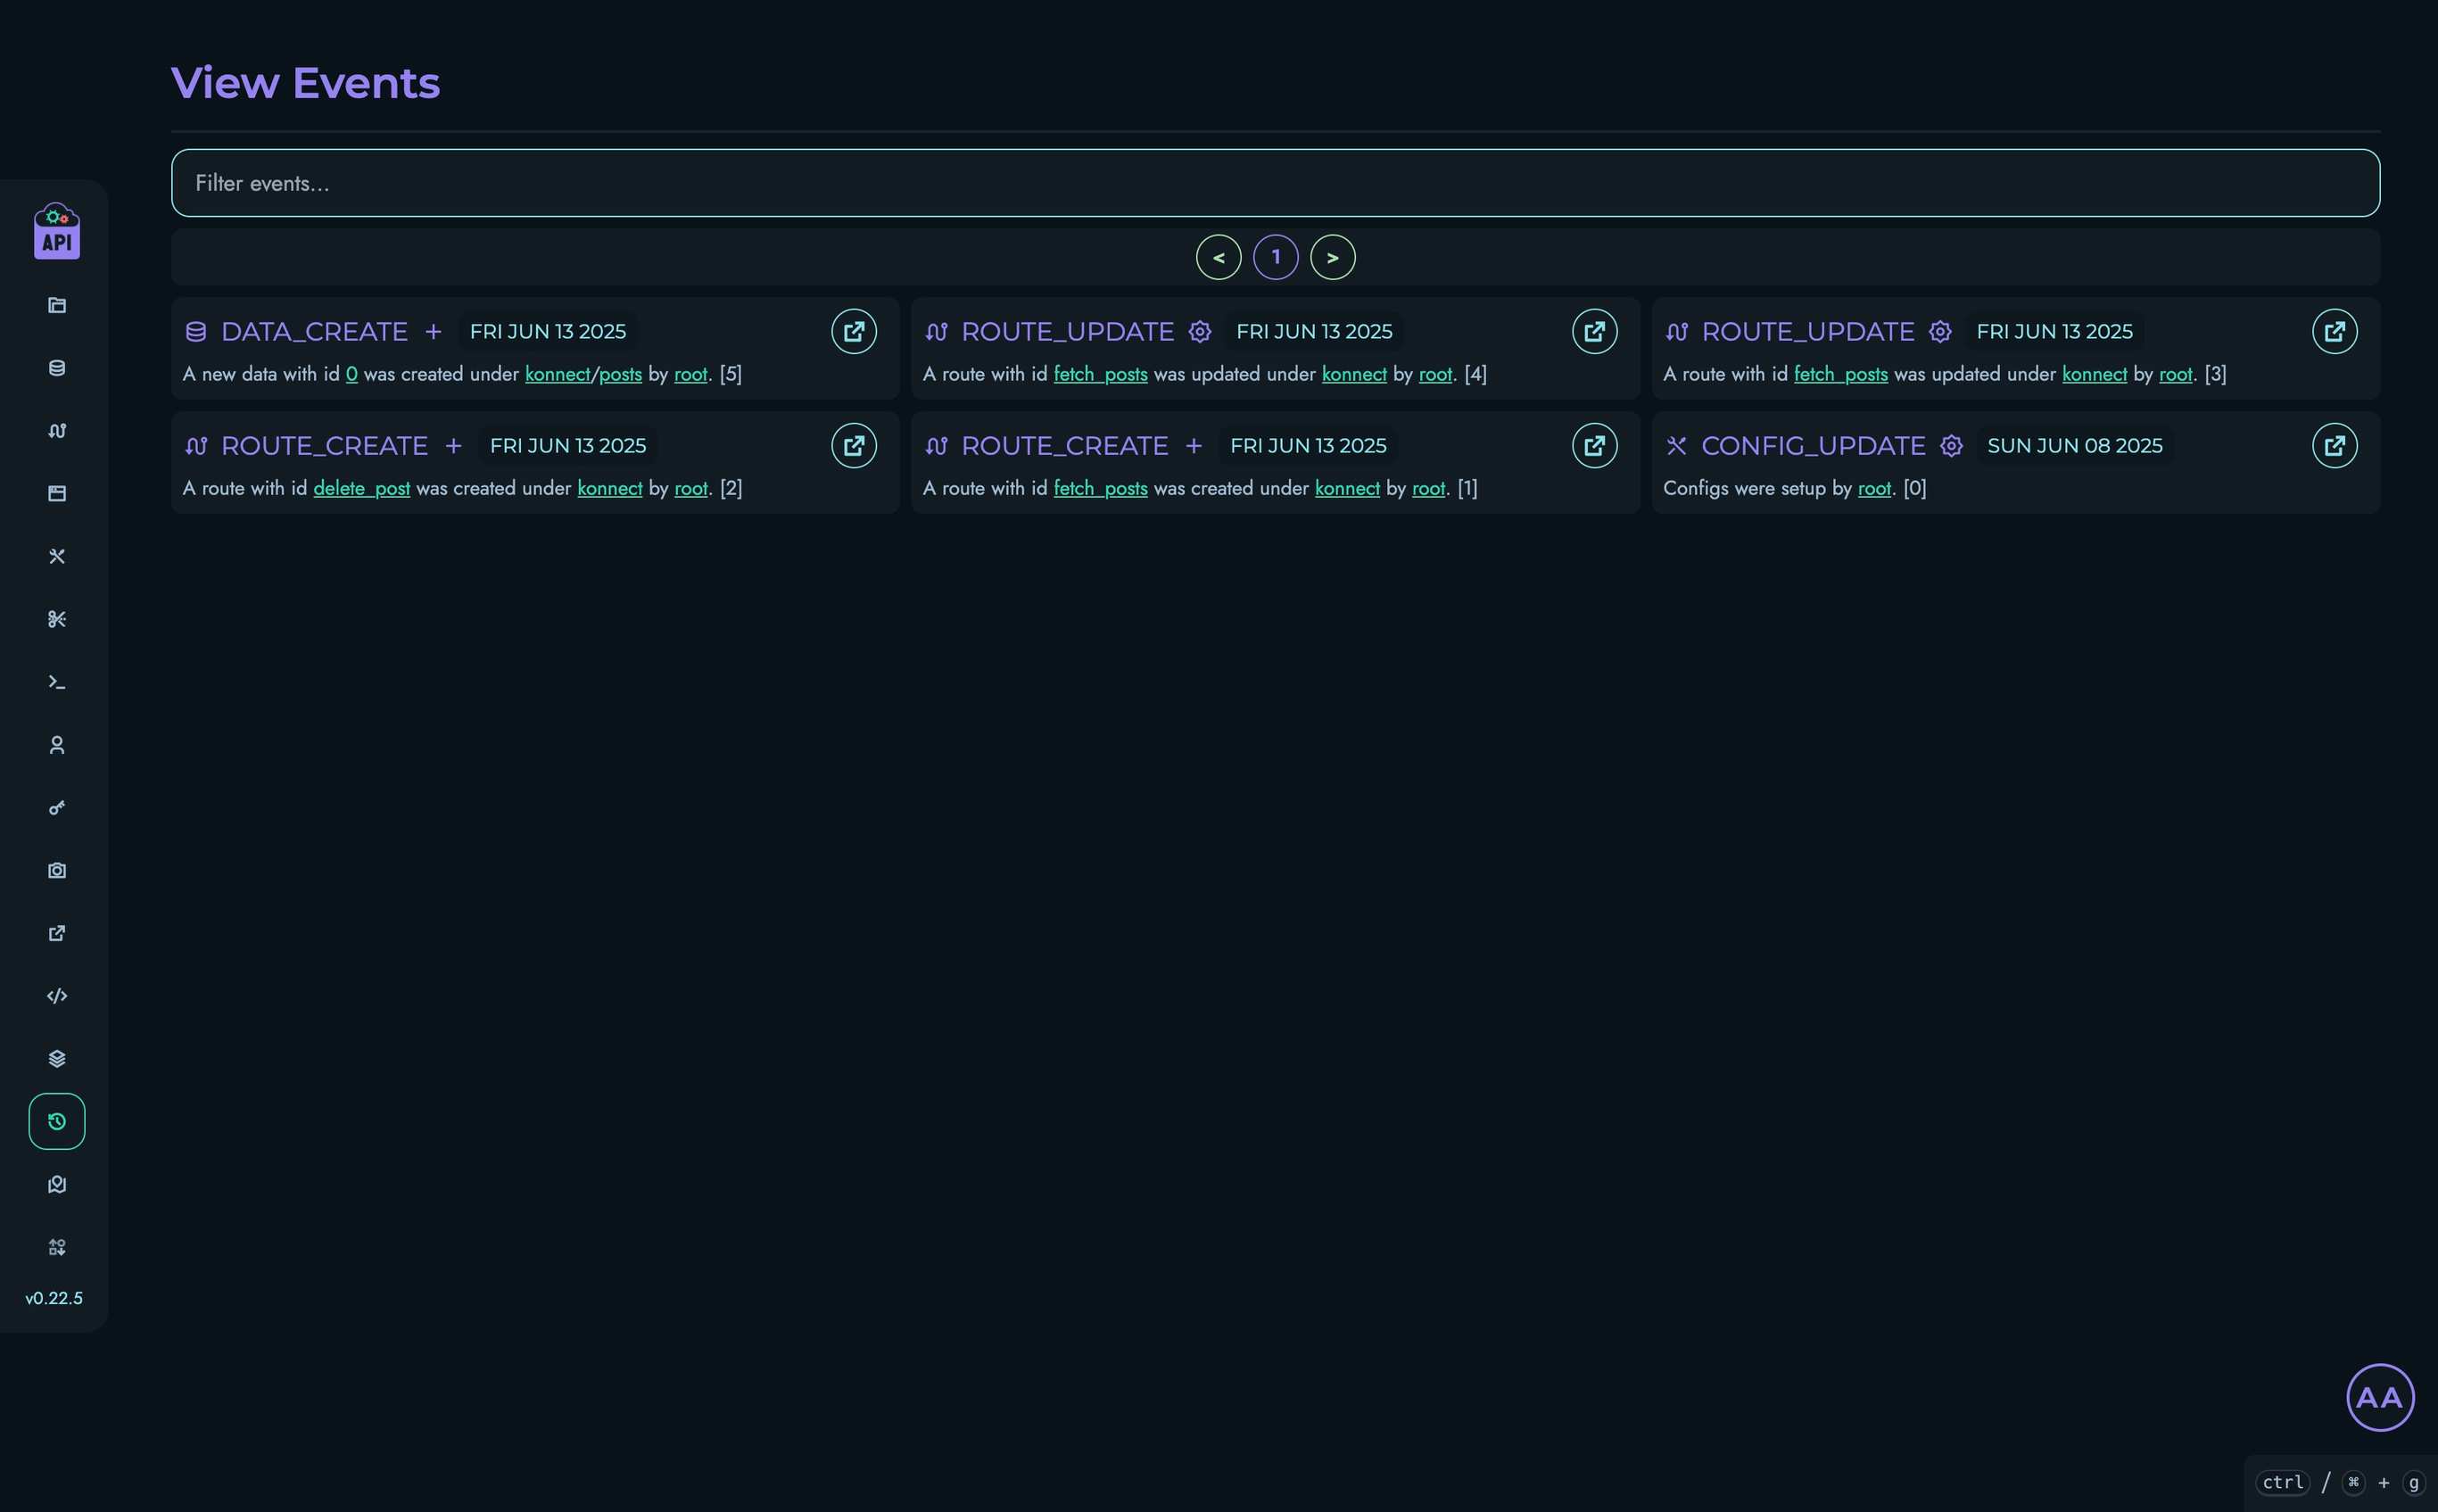
The Events interface includes:
- A filterable, paginated list of events
- Events displayed in reverse chronological order (newest first)
- Visual icons representing different event types
- Links to related pages for further investigation
Types of Events Tracked
Kinesis API tracks events across all major system components:
User Events
- Account creation and registration
- Role changes
- Account deletion
- Password reset requests
Configuration Events
- Configuration creation
- Configuration updates
- Configuration deletion
Project Events
- Project creation
- Project updates (name, description, API path)
- Project deletion
- Member addition/removal
Collection & Structure Events
- Collection creation/deletion
- Structure creation/deletion
- Custom structure operations
Data Events
- Data creation
- Data updates
- Data deletion
- Publishing status changes
API Routes Events
- Route creation
- Route modifications
- Route deletion
System Events
- Constraint modifications
- Personal Access Token management
- Redirects management
- Code snippet management
Filtering and Navigating Events
Event Filtering
To find specific events:
- Use the search box at the top of the events list
- Type any part of the event description, event type, or redirect path
- The list will automatically filter to show matching events
Pagination
For systems with many events:
- Navigate between pages using the pagination controls
- The page displays up to 42 events at a time
Understanding Event Information
Each event entry contains several key pieces of information:
- Event Type Icon: Visual representation of the event category
- Event Type: The specific action that occurred
- Timestamp: When the action took place
- Description: Details about the event, including:
- User references (highlighted with username)
- Project references (highlighted with project ID)
- Collection references (highlighted with collection ID)
- Navigation Link: Button to go directly to the relevant page
Event Retention
Events are stored permanently in the system database to maintain a complete audit history. The events page implements pagination to handle large numbers of events efficiently.
Common Use Cases
The Events page is particularly useful for:
- Security Monitoring: Track user creation, role changes, and password resets
- Troubleshooting: Identify when and how changes were made that might have caused issues
- User Activity Tracking: Monitor which users are making changes to the system
- Audit Compliance: Maintain records of all system changes for compliance requirements
- Change Management: Verify that planned changes were implemented correctly
Media
The Media management system in Kinesis API provides a centralized location to upload, manage, and utilize media files across your API and web interface. This page explains how to use the Media functionality to handle images, videos, documents, and other file types.
Accessing Media Management
To access the Media management interface:
- Log in to your Kinesis API account
- Navigate to
/web/mediain your browser or click “Media” in the navigation menu
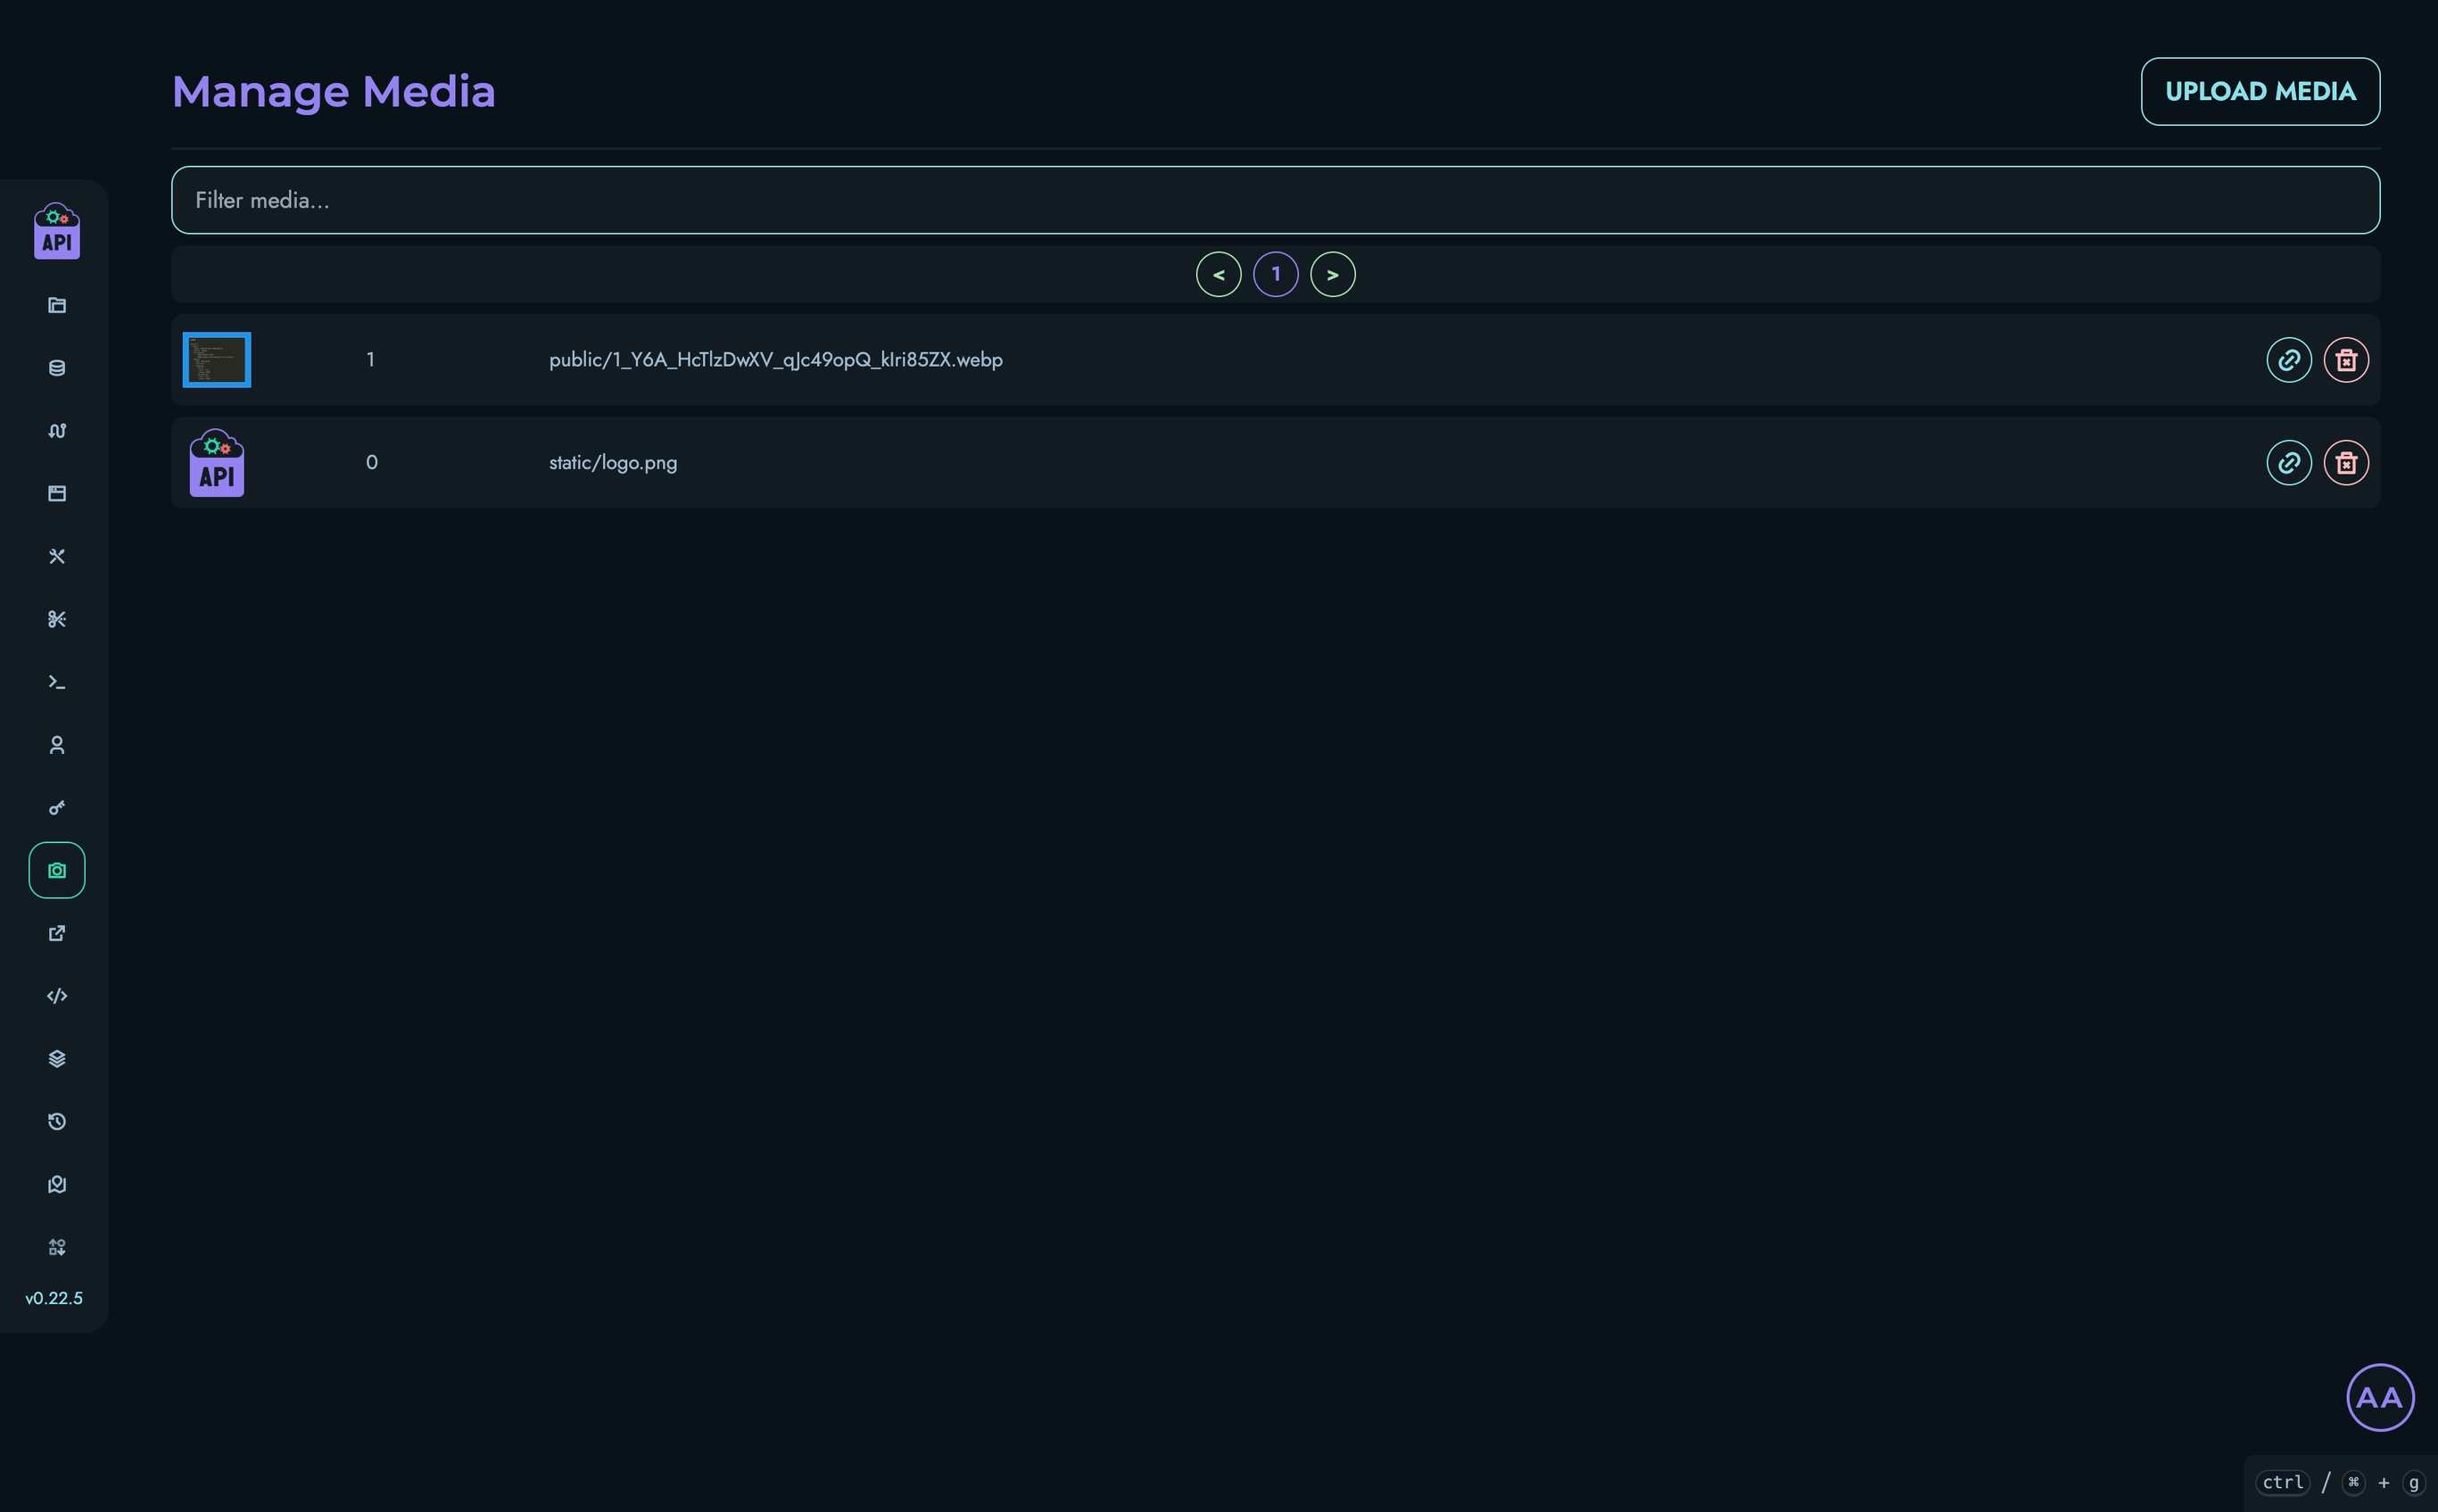
Media Interface Overview
The Media management interface includes:
- A searchable list of all media files in the system
- Pagination controls for navigating through large media collections
- Tools for uploading new media
- Preview functionality for existing media
- File type badges for easy identification
- Copy link buttons for easy sharing
- Delete options for administrators
Uploading Media
All authenticated users can upload media files:
- Click the “Upload Media” button at the top of the page
- A modal will appear prompting you to select a file
- Choose a file from your device
- The file will be uploaded and added to your media library
Supported File Types
Kinesis API supports various file types, categorized as follows:
| Category | Description | Examples |
|---|---|---|
| IMAGE | Image files | JPG, PNG, GIF, WebP, SVG |
| VIDEO | Video files | MP4, WebM, OGG |
| DOCUMENT | Document files | PDF, DOC, DOCX, XLS, XLSX, PPT, PPTX, TXT, CSV, RTF |
| OTHER | Any other file type | ZIP, JSON, XML, etc. |
The file type is automatically determined based on the file’s content type during upload. The file size is automatically captured from disk after upload and stored with each media record. File sizes are displayed in a human-readable format (B, KB, MB, GB) in the media management UI.
The maximum file size is determined by your system configuration (default: 2MB).
Viewing Media
The main page displays a list of all media files with:
- A thumbnail preview (for images) or file type icon
- The media ID
- The filename
- A file type badge (IMAGE, VIDEO, DOCUMENT, OTHER)
- The file size (automatically captured on upload)
- Action buttons
Previewing Media
To preview a media file:
- Click on the file thumbnail or name
- A modal will open showing a larger preview:
- Images are displayed inline
- Videos are shown with playback controls
- Documents and other files show a link to open/download
- Click outside the modal or the X button to close it
Managing Media Files
Filtering Media
To find specific media files:
- Use the filter box at the top of the media list
- Type any part of the filename or ID
- The list will automatically filter to show matching files
The media fetch API also supports filtering by file type using the file_type query parameter:
GET /media/fetch?uid=0&file_type=IMAGE&limit=10&offset=0
Accepted values: IMAGE, VIDEO, DOCUMENT, OTHER. Omit the parameter to fetch all media regardless of type.
Pagination
For systems with many media files:
- Navigate between pages using the pagination controls
- The page displays up to 10 media files at a time
Deleting Media
Users with ROOT or ADMIN roles can delete media files:
- Click the delete button (trash icon) next to the media file
- A confirmation modal will appear showing a preview of the file
- Confirm the deletion
⚠️ Warning: Deleting a media file is permanent and will remove it from all places where it’s being used. Ensure the file is no longer needed before deletion.
Access Control
Media management follows these permission rules:
| Role | View Media | Upload Media | Delete Media |
|---|---|---|---|
| ROOT | ✓ | ✓ | ✓ |
| ADMIN | ✓ | ✓ | ✓ |
| AUTHOR | ✓ | ✓ | ✗ |
| VIEWER | ✓ | ✓ | ✗ |
Public Access to Media
Media files uploaded to Kinesis API are publicly accessible via their direct URLs. This allows you to:
- Use media in public-facing API responses
- Embed images in web pages
- Link to downloadable files
Keep this in mind when uploading sensitive content—if a file shouldn’t be publicly accessible, consider encrypting it or storing it elsewhere.
Best Practices
- Use Descriptive Filenames: Clear filenames make media easier to find and manage
- Optimize Before Upload: Compress images and optimize files before uploading to save space
- Regular Cleanup: Periodically remove unused media to keep your library organized
- Secure Sensitive Content: Remember that uploaded media is publicly accessible
- Backup Important Files: Keep backups of critical media files outside the system
Workflow
The Workflow system in Kinesis API provides a comprehensive Trello-like project management solution built directly into the platform. It enables teams to organize work using Kanban-style boards with lists, cards, checklists, attachments, comments, and more — all managed through an intuitive drag-and-drop interface.
Overview
The Workflow system is organized around a hierarchy of components:
- Boards — Top-level workspaces (like Trello boards)
- Lists — Columns within a board
- Cards — Work items within a list
- Checklists — Task lists attached to cards
- Checklist Items — Individual tasks within a checklist
- Attachments — Files and links attached to cards
- Comments — Discussion threads on cards
- Checklists — Task lists attached to cards
- Cards — Work items within a list
- Lists — Columns within a board
Supporting components include:
- Members — Users assigned to a board with roles and capabilities
- Watches — Notification subscriptions on boards, lists, or cards
- Activities — Audit trail of all board actions
- Notifications — Real-time alerts for board events
- Labels — Color-coded tags for cards
- Custom Fields — User-defined fields with per-card values
Accessing Workflow
To access the Workflow interface:
- Log in to your Kinesis API account
- Navigate to
/workflowin your browser or click “Workflow” in the navigation menu
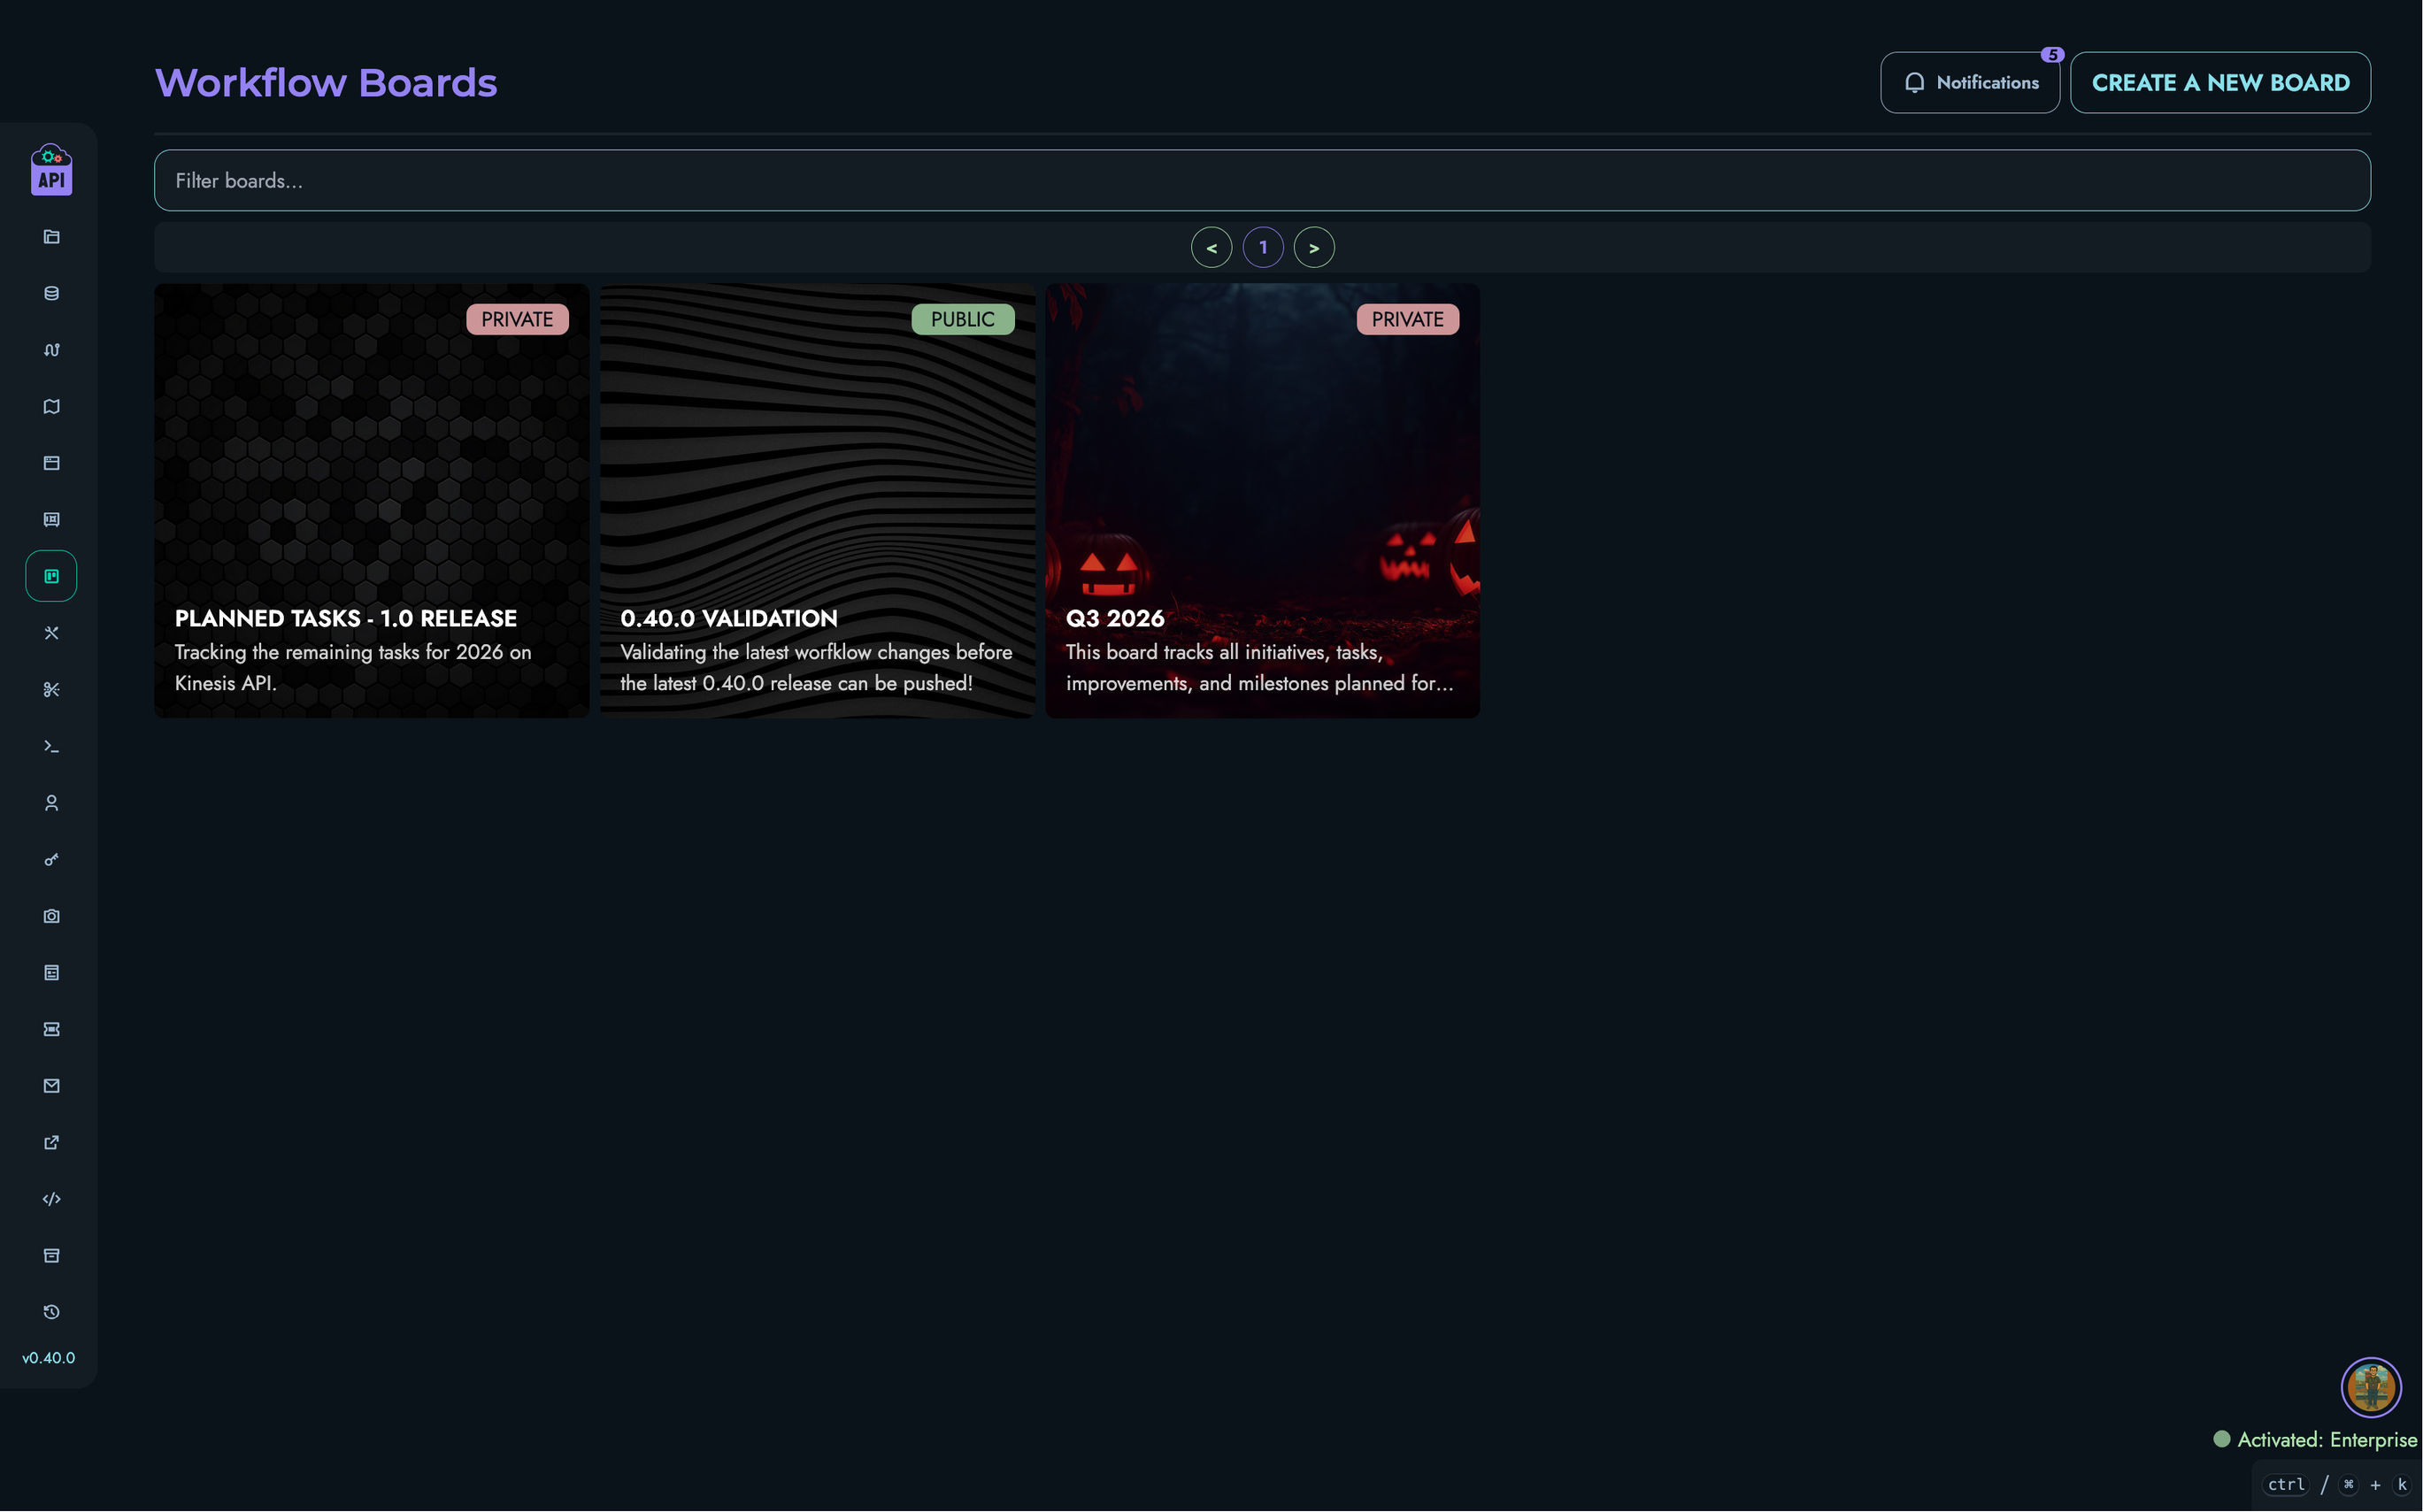
Boards
Boards are the top-level organizational unit in the Workflow system. Each board represents a project, team workspace, or any collection of work you want to track.

Board Features
- Name & Description — Identifying information for the board
- Background — Custom background image (URL or uploaded) or solid color
- Visibility — PUBLIC (visible to all authenticated users) or PRIVATE (visible only to members)
- Archiving — Boards can be archived to hide them without deleting data
- Labels — Color-coded labels that can be applied to cards
- Custom Fields — User-defined fields (TEXT, NUMBER, DROPDOWN, CHECKBOX, DATE) with per-card values
Board Settings
The Settings dropdown on the board page provides access to:
- Edit Name / Description
- Edit Background Image / Color
- Edit Visibility
- Manage Labels
- Manage Custom Fields
- Archive / Unarchive Board
- Delete Board (ROOT or OWNER only, not available when archived)
Board API Endpoints
| Method | Path | Description |
|---|---|---|
| GET | /workflow/board/fetch | Fetch all boards (paginated) |
| GET | /workflow/board/fetch/one | Fetch a single board by ID |
| POST | /workflow/board/create | Create a new board |
| PATCH | /workflow/board/update | Update a board property |
| DELETE | /workflow/board/delete | Delete a board |
| PATCH | /workflow/board/update/labels | Update board labels |
| PATCH | /workflow/board/update/custom/fields | Update board custom fields |
Lists
Lists are columns within a board that organize cards into categories (e.g., “To Do”, “In Progress”, “Done”).
List Features
- Name — The column header
- Custom Color — Optional background color for the list
- Collapsible — Lists can be collapsed to a narrow vertical bar to save space
- Archiving — Lists can be archived independently
- Drag-and-Drop — Lists can be reordered by dragging horizontally
List API Endpoints
| Method | Path | Description |
|---|---|---|
| GET | /workflow/list/fetch | Fetch all lists for a board |
| POST | /workflow/list/create | Create a new list |
| PATCH | /workflow/list/update | Update a list property |
| DELETE | /workflow/list/delete | Delete a list |
Cards
Cards are the primary work units within lists. They represent tasks, features, bugs, or any item of work.
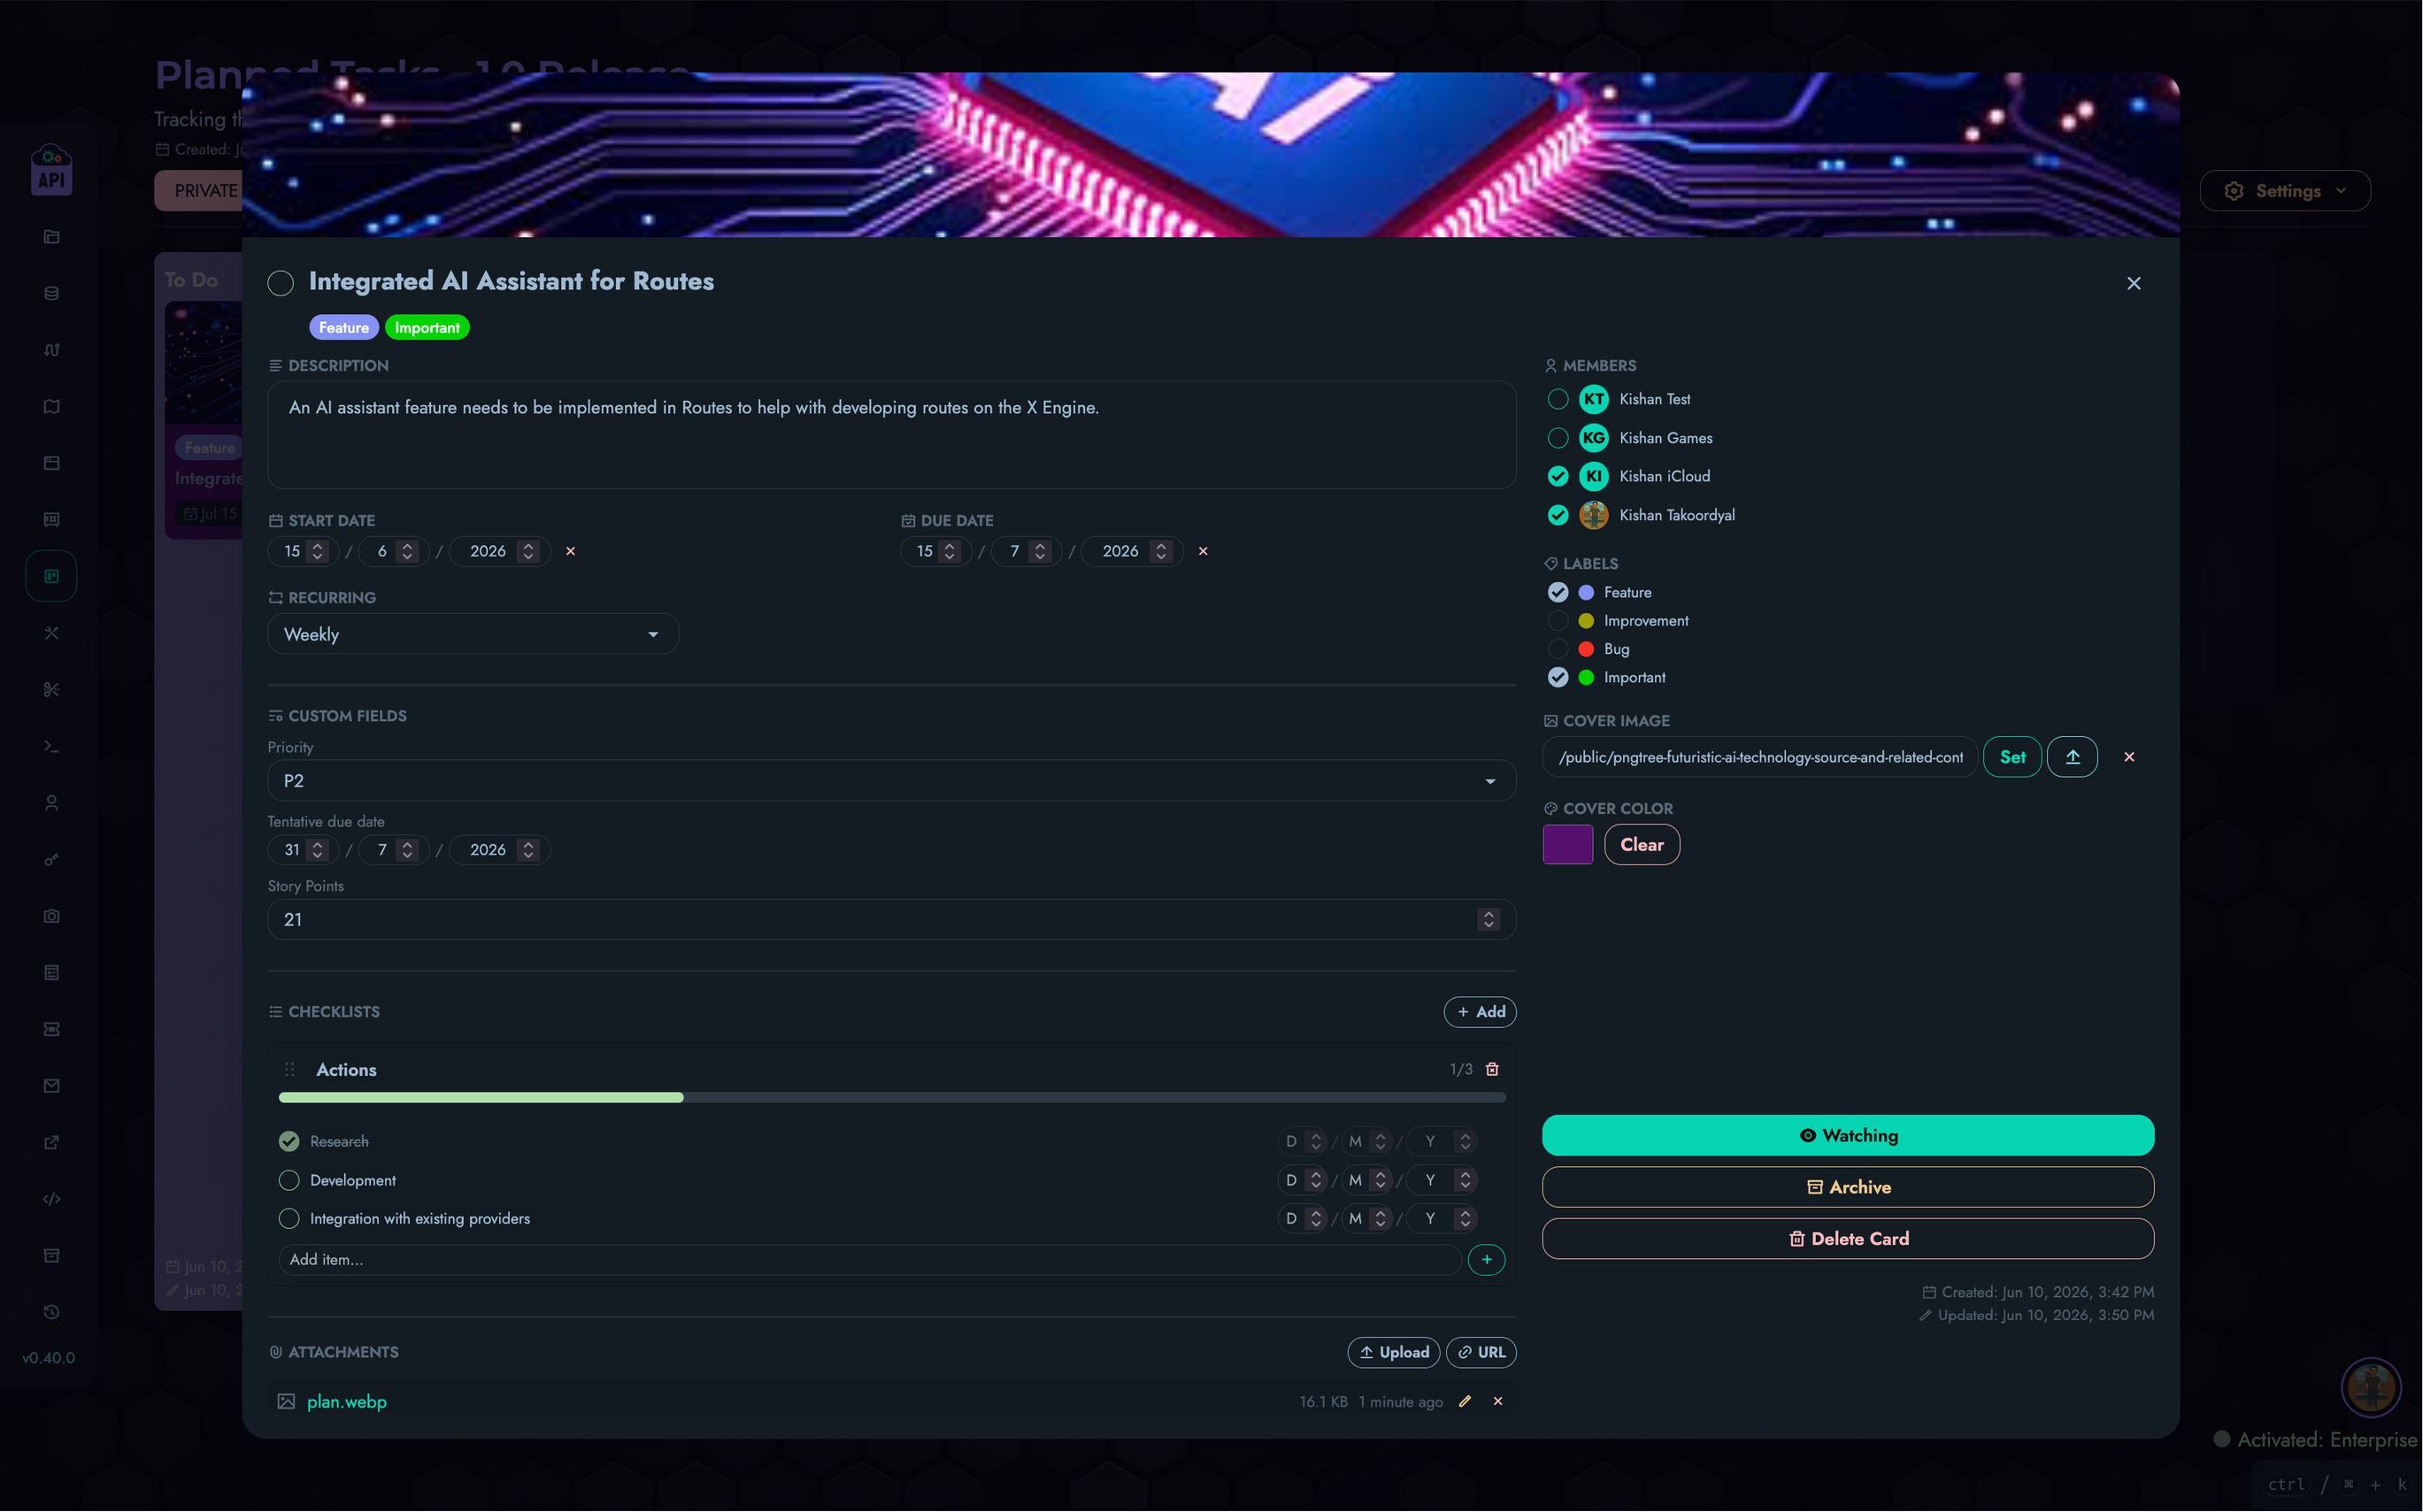
Card Features
- Title — Inline-editable card name
- Description — Rich text area for detailed information
- Cover Image — Optional image displayed at the top of the card
- Cover Color — Optional color strip or full-card background color
- Start Date / Due Date — DD/MM/YYYY date inputs with overdue highlighting
- Recurring — Schedule recurrence (DAILY, WEEKDAYS, WEEKLY, MONTHLY, YEARLY)
- Labels — Apply board-defined color-coded labels
- Custom Fields — Fill in board-defined custom field values
- Members — Assign board members to the card
- Completed — Toggle card completion status
- Archiving — Cards can be archived independently
- Drag-and-Drop — Cards can be reordered within a list or moved between lists
Card Detail Modal
Clicking a card opens a detailed modal with a two-column layout:
- Left column: Description, dates, recurring, custom fields, checklists, attachments, comments
- Right column: Members, labels, cover image/color, watch toggle, archive/delete actions, timestamps
Card API Endpoints
| Method | Path | Description |
|---|---|---|
| GET | /workflow/card/fetch | Fetch all cards for a board |
| POST | /workflow/card/create | Create a new card |
| PATCH | /workflow/card/update | Update a card property |
| PATCH | /workflow/card/move | Move a card to a different list/position |
| DELETE | /workflow/card/delete | Delete a card |
| PATCH | /workflow/card/update/members | Update card member assignments |
| PATCH | /workflow/card/update/labels | Update card label assignments |
| PATCH | /workflow/card/update/custom/fields | Update card custom field values |
Checklists
Checklists allow you to break down card work into smaller, trackable tasks.
Checklist Features
- Multiple Checklists — Each card can have multiple checklists
- Progress Tracking — Visual progress bar showing completed/total items
- Drag-and-Drop — Checklists can be reordered by dragging
- Inline Title Editing — Rename checklists directly in the UI
Checklist Items
Each checklist contains items representing individual tasks:
- Content — Inline-editable task description
- Completion — Checkbox to mark items as done
- Due Date — Optional DD/MM/YYYY due date with overdue highlighting
- Assignee — Optional assignment to a board member
- Removal — Items can be removed individually
Checklist API Endpoints
| Method | Path | Description |
|---|---|---|
| GET | /workflow/card/checklist/fetch | Fetch all checklists for a card |
| POST | /workflow/card/checklist/create | Create a new checklist |
| PATCH | /workflow/card/checklist/update | Update a checklist property |
| DELETE | /workflow/card/checklist/delete | Delete a checklist |
Checklist Item API Endpoints
| Method | Path | Description |
|---|---|---|
| GET | /workflow/card/checklist/item/fetch | Fetch all items for a checklist |
| POST | /workflow/card/checklist/item/add | Add a new item |
| PATCH | /workflow/card/checklist/item/update | Update an item property |
| DELETE | /workflow/card/checklist/item/remove | Remove an item |
Attachments
Attachments allow you to associate files and links with cards.
Attachment Features
- File Upload — Upload any file type through the platform’s upload system
- URL Links — Add external links as attachments
- File Type Detection — Automatic categorization as IMAGE, VIDEO, DOCUMENT, WEB_LINK, or OTHER
- Display Name — Editable display name for each attachment
- File Size — Automatically tracked for uploaded files
- Preview — File type icons for visual identification
Attachment API Endpoints
| Method | Path | Description |
|---|---|---|
| GET | /workflow/card/attachment/fetch | Fetch all attachments for a card |
| POST | /workflow/card/attachment/create | Create a new attachment |
| PATCH | /workflow/card/attachment/update | Update an attachment property |
| DELETE | /workflow/card/attachment/delete | Delete an attachment |
Comments
Comments enable discussion and collaboration on cards.
Comment Features
- Rich Content — Multi-line text with whitespace preservation
- Inline Editing — Edit your own comments directly in the UI
- Emoji Reactions — React with LIKE (👍), LOVE (❤️), LAUGH (😂), SAD (😢), or ANGRY (😠)
- Reaction Summaries — See who reacted and with what emoji
- Multiple Reactions — Users can add multiple different reaction types to a single comment
- Author Attribution — Comments show the author’s avatar and name
- Edit History — Edited comments display an “(edited)” indicator
Comment API Endpoints
| Method | Path | Description |
|---|---|---|
| GET | /workflow/card/comment/fetch | Fetch all comments for a card |
| POST | /workflow/card/comment/add | Add a new comment |
| PATCH | /workflow/card/comment/update | Update a comment |
| DELETE | /workflow/card/comment/remove | Remove a comment |
| PATCH | /workflow/card/comment/react/add | Add a reaction to a comment |
| PATCH | /workflow/card/comment/react/remove | Remove a reaction from a comment |
Members
Board members are users who have been granted access to a board with specific roles and capabilities.
Member Roles
| Role | Description |
|---|---|
| OWNER | Full unrestricted access to the board. Cannot be removed or demoted. |
| ADMIN | Broad access controlled by capability flags. Cannot delete the board. |
| MEMBER | Standard access controlled by capability flags. Cannot manage board-level settings. |
| GUEST | View-only access. Cannot perform any write operations. |
Member Capabilities
For ADMIN and MEMBER roles, the following capabilities can be toggled individually:
| Capability | Description |
|---|---|
| can_edit | Allows creating/updating lists and cards, managing attachments, checklists, and watches |
| can_comment | Allows posting and editing comments |
| can_invite | Allows managing board members (adding, removing, changing roles) |
| can_delete | Allows deleting lists and cards |
Permission Matrix
The following table shows which actions each role can perform:
| Action | OWNER | ADMIN | MEMBER | GUEST |
|---|---|---|---|---|
| VIEW | ✓ | ✓ | ✓ | ✓ |
| UPDATE_BOARD | ✓ | can_edit | ✗ | ✗ |
| DELETE_BOARD | ✓ | ✗ | ✗ | ✗ |
| MANAGE_MEMBERS | ✓ | can_invite | ✗ | ✗ |
| CREATE_LIST | ✓ | can_edit | can_edit | ✗ |
| UPDATE_LIST | ✓ | can_edit | can_edit | ✗ |
| DELETE_LIST | ✓ | can_delete | can_delete | ✗ |
| CREATE_CARD | ✓ | can_edit | can_edit | ✗ |
| UPDATE_CARD | ✓ | can_edit | can_edit | ✗ |
| DELETE_CARD | ✓ | can_delete | can_delete | ✗ |
| COMMENT | ✓ | can_comment | can_comment | ✗ |
| MANAGE_WATCHES | ✓ | can_edit | can_edit | ✗ |
| MANAGE_ATTACHMENTS | ✓ | can_edit | can_edit | ✗ |
| MANAGE_CHECKLISTS | ✓ | can_edit | can_edit | ✗ |
Note: For public boards, VIEW access is granted to any authenticated user, even non-members.
Member API Endpoints
| Method | Path | Description |
|---|---|---|
| GET | /workflow/member/fetch | Fetch all members for a board |
| POST | /workflow/member/add | Add a member to a board |
| PATCH | /workflow/member/update | Update a member’s role or capability |
| DELETE | /workflow/member/remove | Remove a member from a board |
Watches
Watches allow users to subscribe to notifications for specific targets.
Watch Targets
| Target | Description |
|---|---|
| BOARD | Receive notifications for all activity on the board |
| LIST | Receive notifications for activity within a specific list |
| CARD | Receive notifications for activity on a specific card |
Watch API Endpoints
| Method | Path | Description |
|---|---|---|
| GET | /workflow/watch/fetch | Fetch watches for a user/board |
| POST | /workflow/watch/add | Add a watch |
| DELETE | /workflow/watch/remove | Remove a watch |
Activities
The Activity system provides a complete audit trail of all actions performed on a board.
Tracked Actions
Activities are recorded for all significant board operations including:
- Board creation, updates, archiving, and label/custom field changes
- List creation, updates, moves, archiving, and deletion
- Card creation, updates, moves, archiving, completion, and deletion
- Card label, member, custom field, and date changes
- Comment creation, updates, and deletion
- Checklist creation, updates, and deletion
- Checklist item creation, updates, completion toggling, and deletion
- Attachment creation and deletion
- Member additions, updates, and removals
Activity API Endpoints
| Method | Path | Description |
|---|---|---|
| GET | /workflow/activity/fetch | Fetch activities for a board (paginated) |
Notifications
The Notification system delivers real-time alerts to users about board events they are watching.
Notification Types
| Type | Description |
|---|---|
| MENTIONED | User was mentioned in a comment |
| CARD_ASSIGNED | User was assigned to a card |
| CARD_DUE_SOON | A watched card’s due date is approaching |
| CARD_MOVED | A watched card was moved to a different list |
| CARD_ARCHIVED | A watched card was archived |
| CARD_COMPLETED | A watched card was marked as completed |
| CARD_COMMENTED | A new comment was added to a watched card |
| ADDED_TO_BOARD | User was added as a board member |
| REMOVED_FROM_BOARD | User was removed from a board |
Notification API Endpoints
| Method | Path | Description |
|---|---|---|
| GET | /workflow/notification/fetch | Fetch notifications (paginated) |
| PATCH | /workflow/notification/update | Update notification (mark read/unread) |
Drag-and-Drop
The Workflow UI supports HTML5 drag-and-drop for three types of reordering:
- List Reordering — Drag lists horizontally to change their column order
- Card Movement — Drag cards within a list to reorder, or across lists to move them. Visual drop zones appear between cards during drag.
- Checklist Reordering — Drag checklists vertically to change their order within a card
All drag operations update positions via the API and persist immediately.
Access Control
Workflow access follows these general rules:
| Role | Create Boards | Manage Own Boards |
|---|---|---|
| ROOT | ✓ | ✓ (unrestricted) |
| ADMIN | ✓ | ✓ |
| AUTHOR | ✓ | ✓ |
| VIEWER | ✓ (public only) | View only |
Board-level access is controlled by the member system described above. Non-members can only view public boards.
Best Practices
- Use Descriptive Card Titles: Clear titles make cards easier to find and understand at a glance
- Leverage Labels: Use color-coded labels consistently across your board for quick visual categorization
- Break Work into Checklists: Use checklists to decompose complex tasks into trackable subtasks
- Set Due Dates: Keep work on track by assigning due dates to cards and checklist items
- Assign Members: Make ownership clear by assigning members to cards
- Archive Instead of Delete: Archive completed lists and cards to preserve history while keeping the board clean
- Use Custom Fields: Define custom fields for structured data that applies to all cards (e.g., story points, priority scores)
- Watch What Matters: Subscribe to watches on boards, lists, or cards you need to stay informed about
REPL
The REPL (Read-Eval-Print Loop) is a powerful interface that allows ROOT users to interact directly with the underlying database system in Kinesis API. This advanced feature provides a command-line style interface for executing database operations, testing queries, and managing data structures without leaving the web interface.
Access Control
⚠️ Important: The REPL interface is only accessible to users with the ROOT role. This restriction is in place because the REPL provides direct access to the database, bypassing the standard API permissions and validations.
⚠️ Database Backend Limitation: The REPL interface currently only works with Kinesis DB. If you are using a different database backend (
DB_BACKEND=sqlite,DB_BACKEND=mysql, orDB_BACKEND=postgresql), the REPL will not function properly. To use the REPL, you must be running Kinesis API with Kinesis DB as the active database backend. For SQLite databases, use standard SQL tools or database management applications. For MySQL or PostgreSQL, use their respective client tools or database management interfaces.
Accessing the REPL
To access the REPL interface:
- Log in with a ROOT user account
- Navigate to
/web/replin your browser or select “REPL” from the navigation menu

REPL Interface
The REPL interface consists of:
- Command Input Area: A textarea where you can enter database commands
- Output Format Selector: Choose between Table, JSON, and Standard output formats
- Execute Button: Run the entered command
- Output Display: Shows the results of executed commands
Available Commands
The REPL supports a comprehensive set of commands for interacting with the database:
Table Management
| Command | Description | Example |
|---|---|---|
| CREATE_TABLE | Create a new table with optional schema | CREATE_TABLE users name STRING --required age INTEGER |
| DROP_TABLE | Delete a table | DROP_TABLE users |
| GET_TABLE | Show table schema | GET_TABLE users |
| GET_TABLES | List all tables | GET_TABLES |
| UPDATE_SCHEMA | Update table schema | UPDATE_SCHEMA users --version=2 active BOOLEAN |
Record Management
| Command | Description | Example |
|---|---|---|
| INSERT | Insert a new record | INSERT INTO users ID 1 SET name = "John" age = 30 |
| UPDATE | Update an existing record | UPDATE users ID 1 SET age = 31 |
| DELETE | Delete a record | DELETE FROM users 1 |
| GET_RECORD | Retrieve a single record | GET_RECORD FROM users 1 |
| GET_RECORDS | Retrieve all records from a table | GET_RECORDS FROM users |
| SEARCH_RECORDS | Search for records | SEARCH_RECORDS FROM users MATCH "John" |
Help
| Command | Description | Example |
|---|---|---|
| HELP | Show general help | HELP |
| HELP [command] | Show help for a specific command | HELP CREATE_TABLE |
Output Formats
The REPL supports three output formats:
- Table: Formats results as ASCII tables for easy reading
- JSON: Returns results in JSON format for programmatic analysis
- Standard: Simple text output with minimal formatting
Using the REPL
Basic Usage
- Enter a command in the input area
- Select your preferred output format
- Click “Execute” to run the command
- View the results in the output display
Schema Definition
When creating or updating tables, you can define schema fields with various constraints:
CREATE_TABLE users
  name STRING --required --min=2 --max=50
  email STRING --required --unique --pattern="^[a-zA-Z0-9._%+-]+@[a-zA-Z0-9.-]+\.[a-zA-Z]{2,}$"
  age INTEGER --min=0 --max=120
Available field types:
- STRING: Text data
- INTEGER: Whole numbers
- FLOAT: Decimal numbers
- BOOLEAN: True/false values
Available field constraints:
--required: Field must have a value--unique: Field values must be unique within the table--min=<value>: Minimum value (for numbers) or length (for strings)--max=<value>: Maximum value (for numbers) or length (for strings)--pattern=<regex>: Regular expression pattern for string validation--default=<value>: Default value if none is provided
Security Considerations
The REPL provides direct access to the database, which comes with significant power and responsibility:
- Limited Access: Only ROOT users can access the REPL
- Audit Trail: All REPL commands are logged in the system events
- No Undo: Most operations cannot be undone, especially schema changes and deletions
- Performance Impact: Complex queries on large tables may impact system performance
Best Practices
- Test in Development: Use the REPL in development environments before running commands in production
- Back Up First: Create backups before making significant schema changes
- Use Transactions: For complex operations, consider using transactions to ensure data integrity
- Document Changes: Keep records of schema changes made through the REPL
- Prefer API: For routine operations, use the standard API endpoints rather than direct REPL access
Example Use Cases
The REPL is particularly useful for:
- Prototyping: Quickly create and test database structures
- Data Cleanup: Fix or remove problematic records
- Schema Evolution: Add or modify fields in existing tables
- Troubleshooting: Inspect database contents for debugging
- Data Migration: Bulk operations during system updates
Related Documentation
- Kinesis DB - Learn about the underlying database system
Extended Components
While Kinesis API’s core components provide the essential functionality needed for API development and management, the platform also offers a set of extended components that enhance your experience and provide additional capabilities. These components aren’t required for basic operation but can significantly improve your workflow and expand what’s possible with the platform.
What Are Extended Components?
Extended components are supplementary features that:
- Add convenience and efficiency to your workflow
- Enable specialized functionality for specific use cases
- Provide quality-of-life improvements
- Extend the platform’s capabilities beyond core API management
These components can be used as needed, depending on your specific requirements and preferences.
Available Extended Components
Content Management
Blog
A comprehensive blogging system built into Kinesis API:
- Create and publish blog posts with rich content
- Support for tags, categories, and featured images
- Built-in commenting system for reader engagement
- SEO-friendly URLs and metadata management
- Content scheduling and draft management
The blog system is perfect for documentation, announcements, tutorials, and building community around your API.
Snippets
Code snippets provide a way to store and reuse common code patterns:
- Create a library of reusable code fragments
- Share implementation examples across your team
- Include language-specific samples for API consumers
- Document common usage patterns
Snippets improve consistency and save time when implementing similar functionality across different parts of your API.
Data Management & Operations
Backups
Comprehensive backup and restore functionality to protect your data:
- Create point-in-time snapshots of your entire database
- Schedule automatic backups with custom retention policies
- Restore your system to any previous backup state
- Manage backup storage and expiration dates
Backups ensure your data is protected and recoverable, providing peace of mind for production deployments.
Content History
Track and restore previous versions of your content:
- Automatic versioning of data changes
- View complete change history for any record
- Restore content to any previous version
- Compare different versions to see what changed
Content history provides an audit trail and safety net for content modifications.
Search & Discovery
Search
Advanced search capabilities across your API data:
- Full-text search across multiple data types
- Configurable search indexes for better performance
- Support for complex queries and filtering
- Search result ranking and relevance scoring
The search system makes it easy for users to find the information they need quickly and efficiently.
Internationalization
Localization
Multi-language support and content translation:
- Manage translations for multiple languages
- Dynamic language switching in the web interface
- Translation management tools for content creators
- Support for right-to-left languages and regional formats
Localization enables your API to serve global audiences with content in their preferred languages.
Utility Components
Redirects
The redirects system allows you to create and manage URL redirects within your Kinesis API instance:
- Define source and destination URLs
- Set up permanent (301) redirects
- Create vanity URLs for easier sharing
- Redirect legacy endpoints to new API paths
Redirects are particularly useful when restructuring your API or creating shortened URLs for documentation and sharing.
Tickets
The tickets system provides a comprehensive issue tracking solution:
- Report bugs and technical issues
- Request new features or improvements
- Ask questions about functionality
- Track tasks and assignments
- Collect user feedback
Tickets facilitate communication between users and developers, helping maintain quality and responsiveness in your API ecosystem.
Misc
The Misc section contains miscellaneous utilities that don’t fit neatly into other categories:
- Global Navigate: A system-wide navigation tool for quickly accessing different parts of the platform
- Utility functions and helpers for common tasks
- System status indicators and tools
These miscellaneous components provide convenience features that enhance your overall experience with Kinesis API.
When to Use Extended Components
Consider using extended components when:
- You need a content management system alongside your API (Blog)
- You want to maintain backward compatibility while evolving your API (Redirects)
- Your team is implementing similar patterns across multiple routes (Snippets)
- You want to track issues, improvements, and user feedback (Tickets)
- You need to protect your data with automated backups (Backups)
- You want to track changes and maintain content history (Content History)
- Your API serves international users requiring multiple languages (Localization)
- Users need to search and discover content efficiently (Search)
- You want to optimize your workflow and navigation (Global Navigate)
While not essential for core functionality, these components can significantly improve productivity and user experience when used appropriately.
Getting Started with Extended Components
To begin using extended components:
- Familiarize yourself with the core components first
- Identify areas where extended components could improve your workflow
- Explore the specific documentation for each extended component
- Start with simple implementations and expand as needed
Extended components are designed to be approachable and incrementally adoptable, allowing you to incorporate them into your workflow at your own pace.
Best Practices
When working with extended components:
- Use redirects sparingly and monitor their performance impact
- Maintain a well-organized snippet library with clear naming conventions
- Set up regular backups and test your restore procedures
- Keep content history clean by archiving old versions when appropriate
- Configure search indexes based on your actual usage patterns
- Plan your localization strategy before implementing multi-language support
- Document how and where extended components are being used in your API
- Regularly review and update your extended component configurations
Following these practices will help you get the most benefit from Kinesis API’s extended capabilities.
Related Documentation
- Core Components - Essential building blocks of Kinesis API
- Blog - Content management and publishing system
- Backups - Data protection and recovery
- Content History - Version tracking and restoration
- Search - Advanced search capabilities
- Localization - Multi-language support
- Redirects - URL redirection management
- Snippets - Code fragment library
- Tickets - Issue tracking and feedback system
- Misc - Miscellaneous utilities and tools
Tickets
The Tickets system in Kinesis API provides a robust issue tracking solution that allows users to report bugs, request features, ask questions, and provide feedback. It’s designed to facilitate collaboration between users and developers while maintaining a transparent record of reported issues and their resolutions.
Overview
The ticketing system serves as a central hub for:
- Bug reporting and tracking
- Feature requests and suggestions
- User questions and support inquiries
- Task management and assignment
- General feedback collection
All tickets are categorized, prioritized, and tracked through their lifecycle, providing clear visibility into the status of each issue.
Key Features
Ticket Management
- Create Tickets: Anyone can create tickets with a title, description, type, and priority
- Ticket Types: Categorize as BUG, FEATURE, IMPROVEMENT, QUESTION, TASK, or FEEDBACK
- Priority Levels: Assign LOW, MEDIUM, HIGH, CRITICAL, or URGENT priority
- Status Tracking: Monitor progress through OPEN, ACTIVE, RESOLVED, CLOSED, or WONTDO statuses
- Tags: Add custom tags for better organization and searchability
- Public/Private: Control visibility of tickets to other users
User Interactions
- Comments: Add discussions, updates, and additional information to tickets
- Assignments: Assign tickets to specific users for resolution
- Subscriptions: Subscribe to tickets to receive updates
- Anonymous Submissions: Create tickets without requiring user registration
Organization and Discovery
- Filtering: Filter tickets by type, status, and content
- Sorting: Sort by title, priority, creation date, or last update
- Pagination: Navigate through large numbers of tickets efficiently
- Search: Find tickets by keywords in title, description, or tags
User Permissions
Different user roles have different capabilities within the ticketing system:
All Users (Including Anonymous)
- Create new tickets
- View public tickets
- Comment on public tickets
- Subscribe to ticket updates (with email)
Ticket Owners
- Update title, description, and ticket type of their own tickets
- Modify tags on their own tickets
- Toggle public/private status of their own tickets
- Delete their own tickets
Ticket Assignees
- Update ticket status
- Update ticket priority
- Modify tags on assigned tickets
Administrators (ROOT/ADMIN)
- Full control over all tickets
- Assign/unassign users to tickets
- Archive tickets
- Delete any ticket or comment
- Access both public and private tickets
Using the Tickets List Page
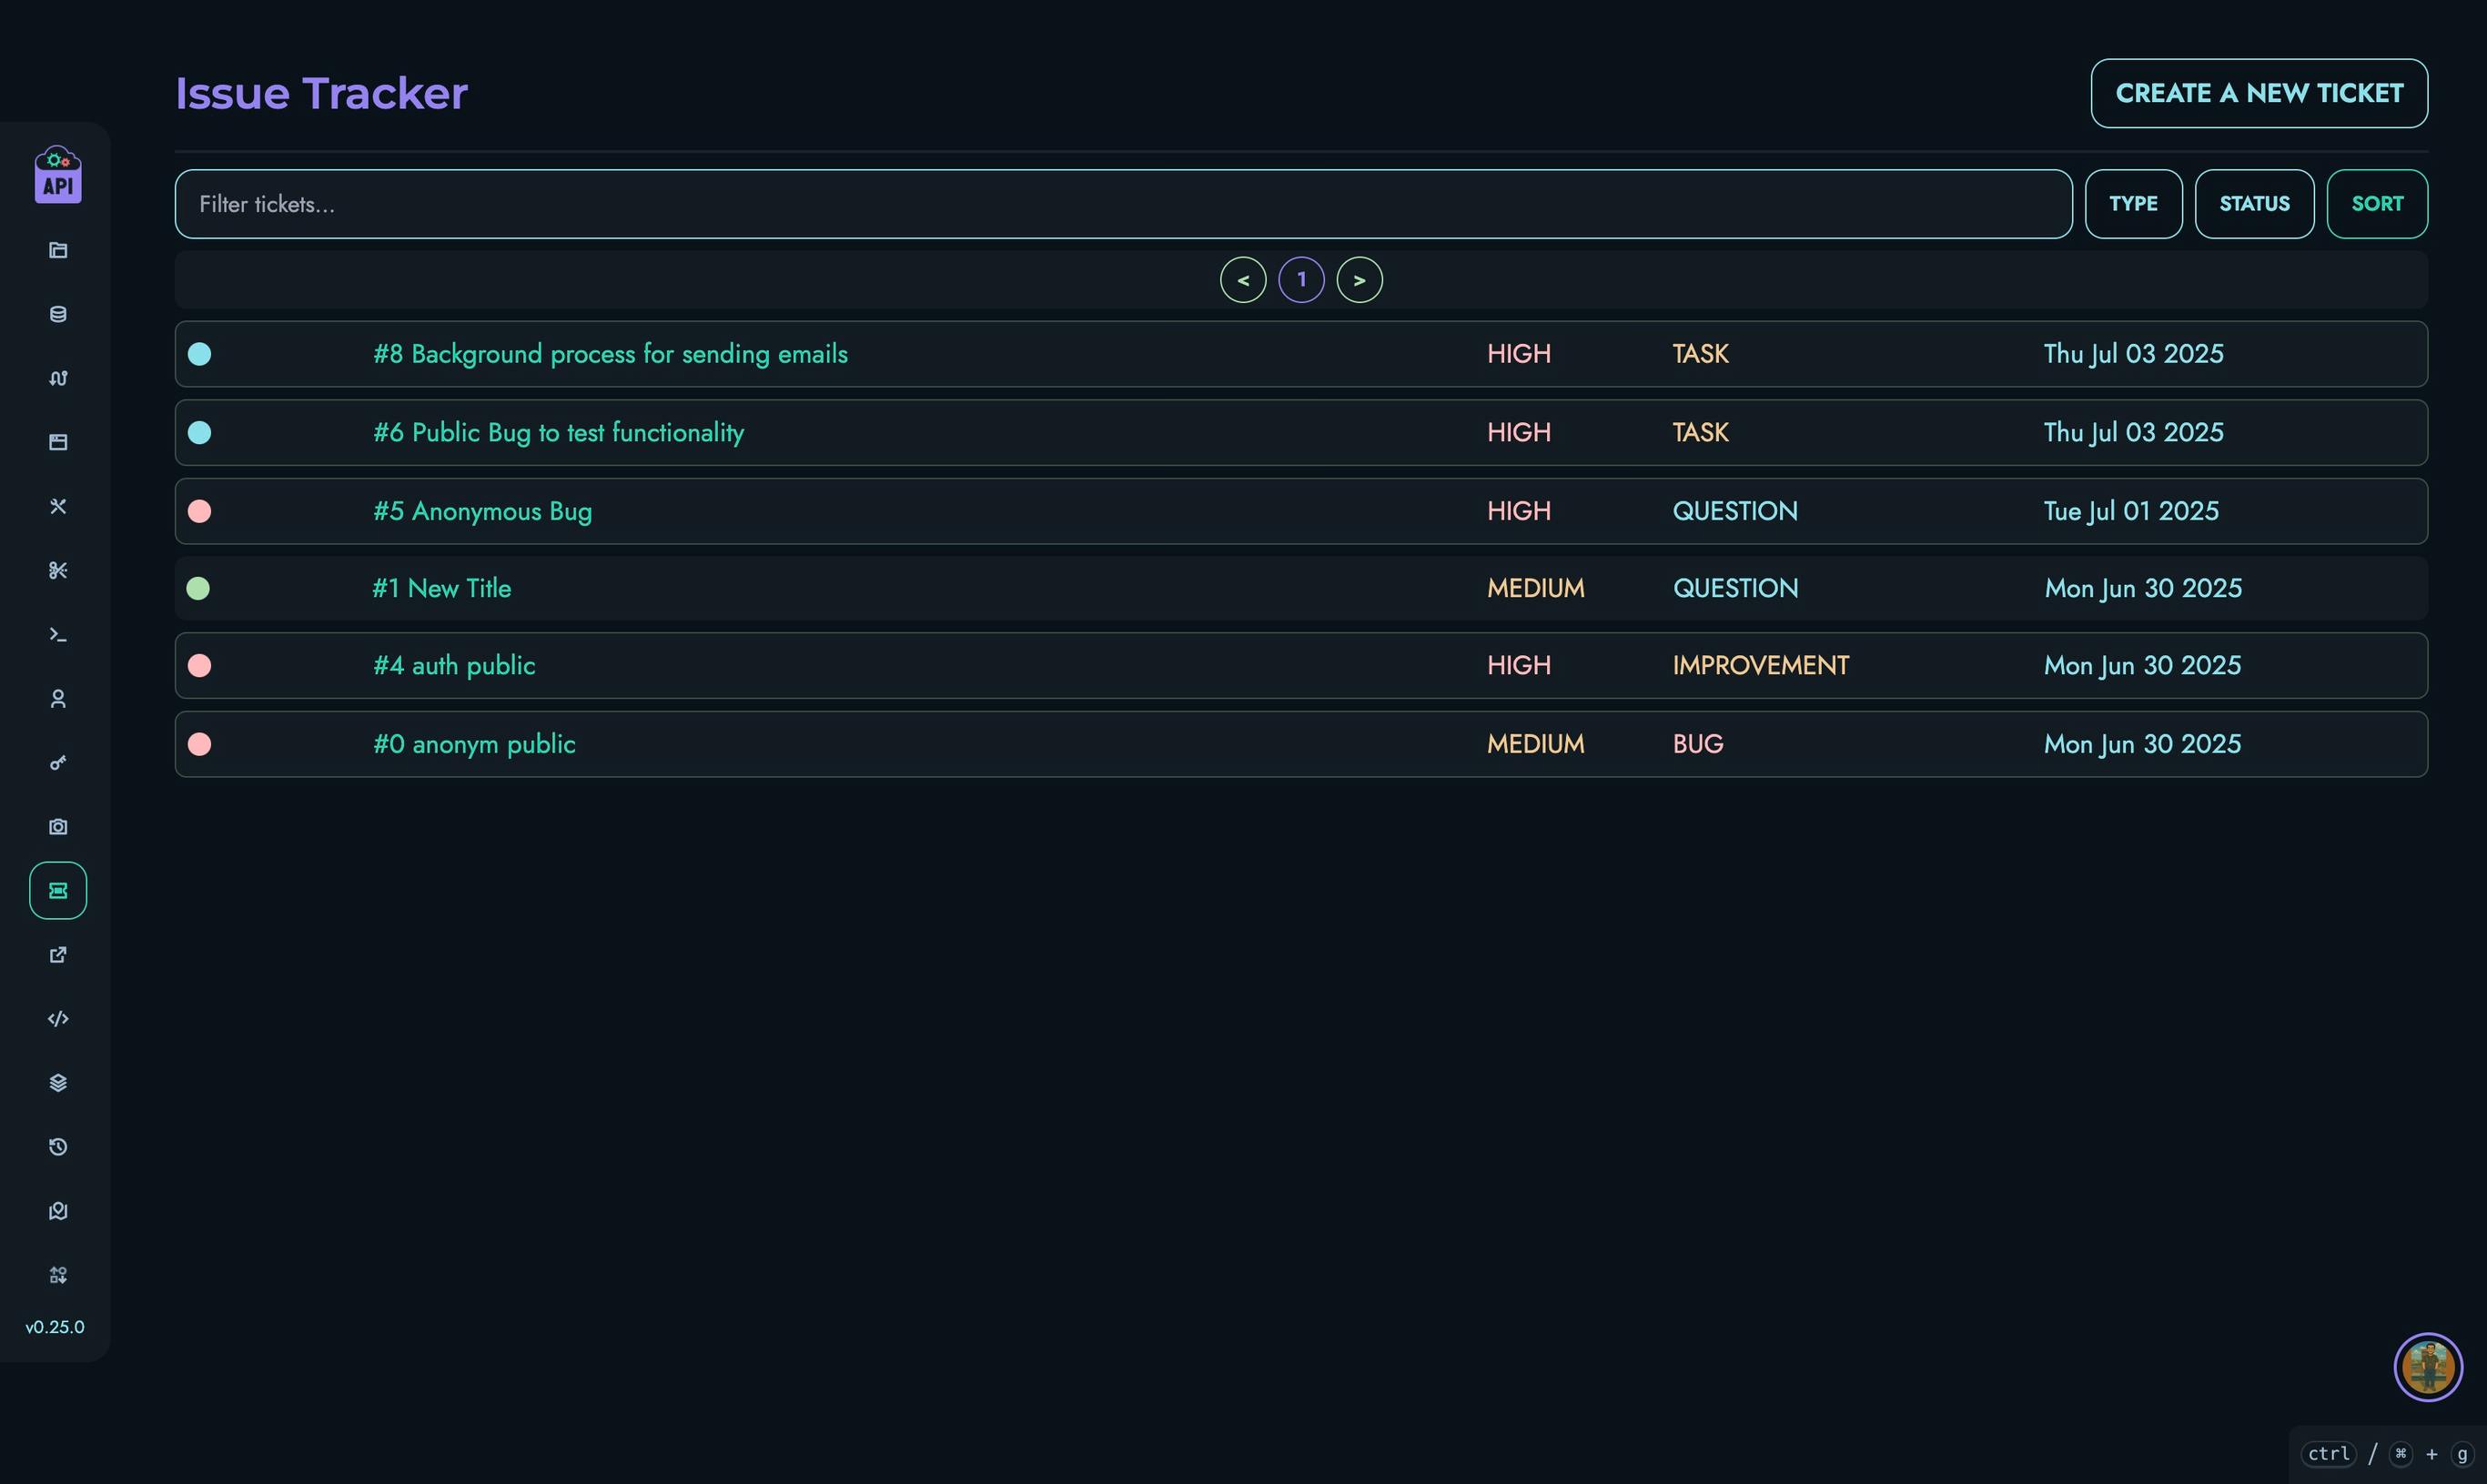
The tickets list page provides a comprehensive view of all accessible tickets with powerful organization tools:
Filtering and Sorting
- Use the search bar to filter tickets by content
- Filter by ticket type (BUG, FEATURE, etc.)
- Filter by status (OPEN, ACTIVE, etc.)
- Sort by various criteria:
- Title (ascending/descending)
- Priority (highest/lowest)
- Creation date (newest/oldest)
- Last update
Creating Tickets
- Click the “Create a new Ticket” button
- Enter a descriptive title
- Provide a detailed description using the Markdown editor
- Select the appropriate ticket type and priority
- Add relevant tags (optional)
- Choose whether the ticket should be public
- Submit your contact information (if not logged in)
- Click “Create”
Using the Individual Ticket Page
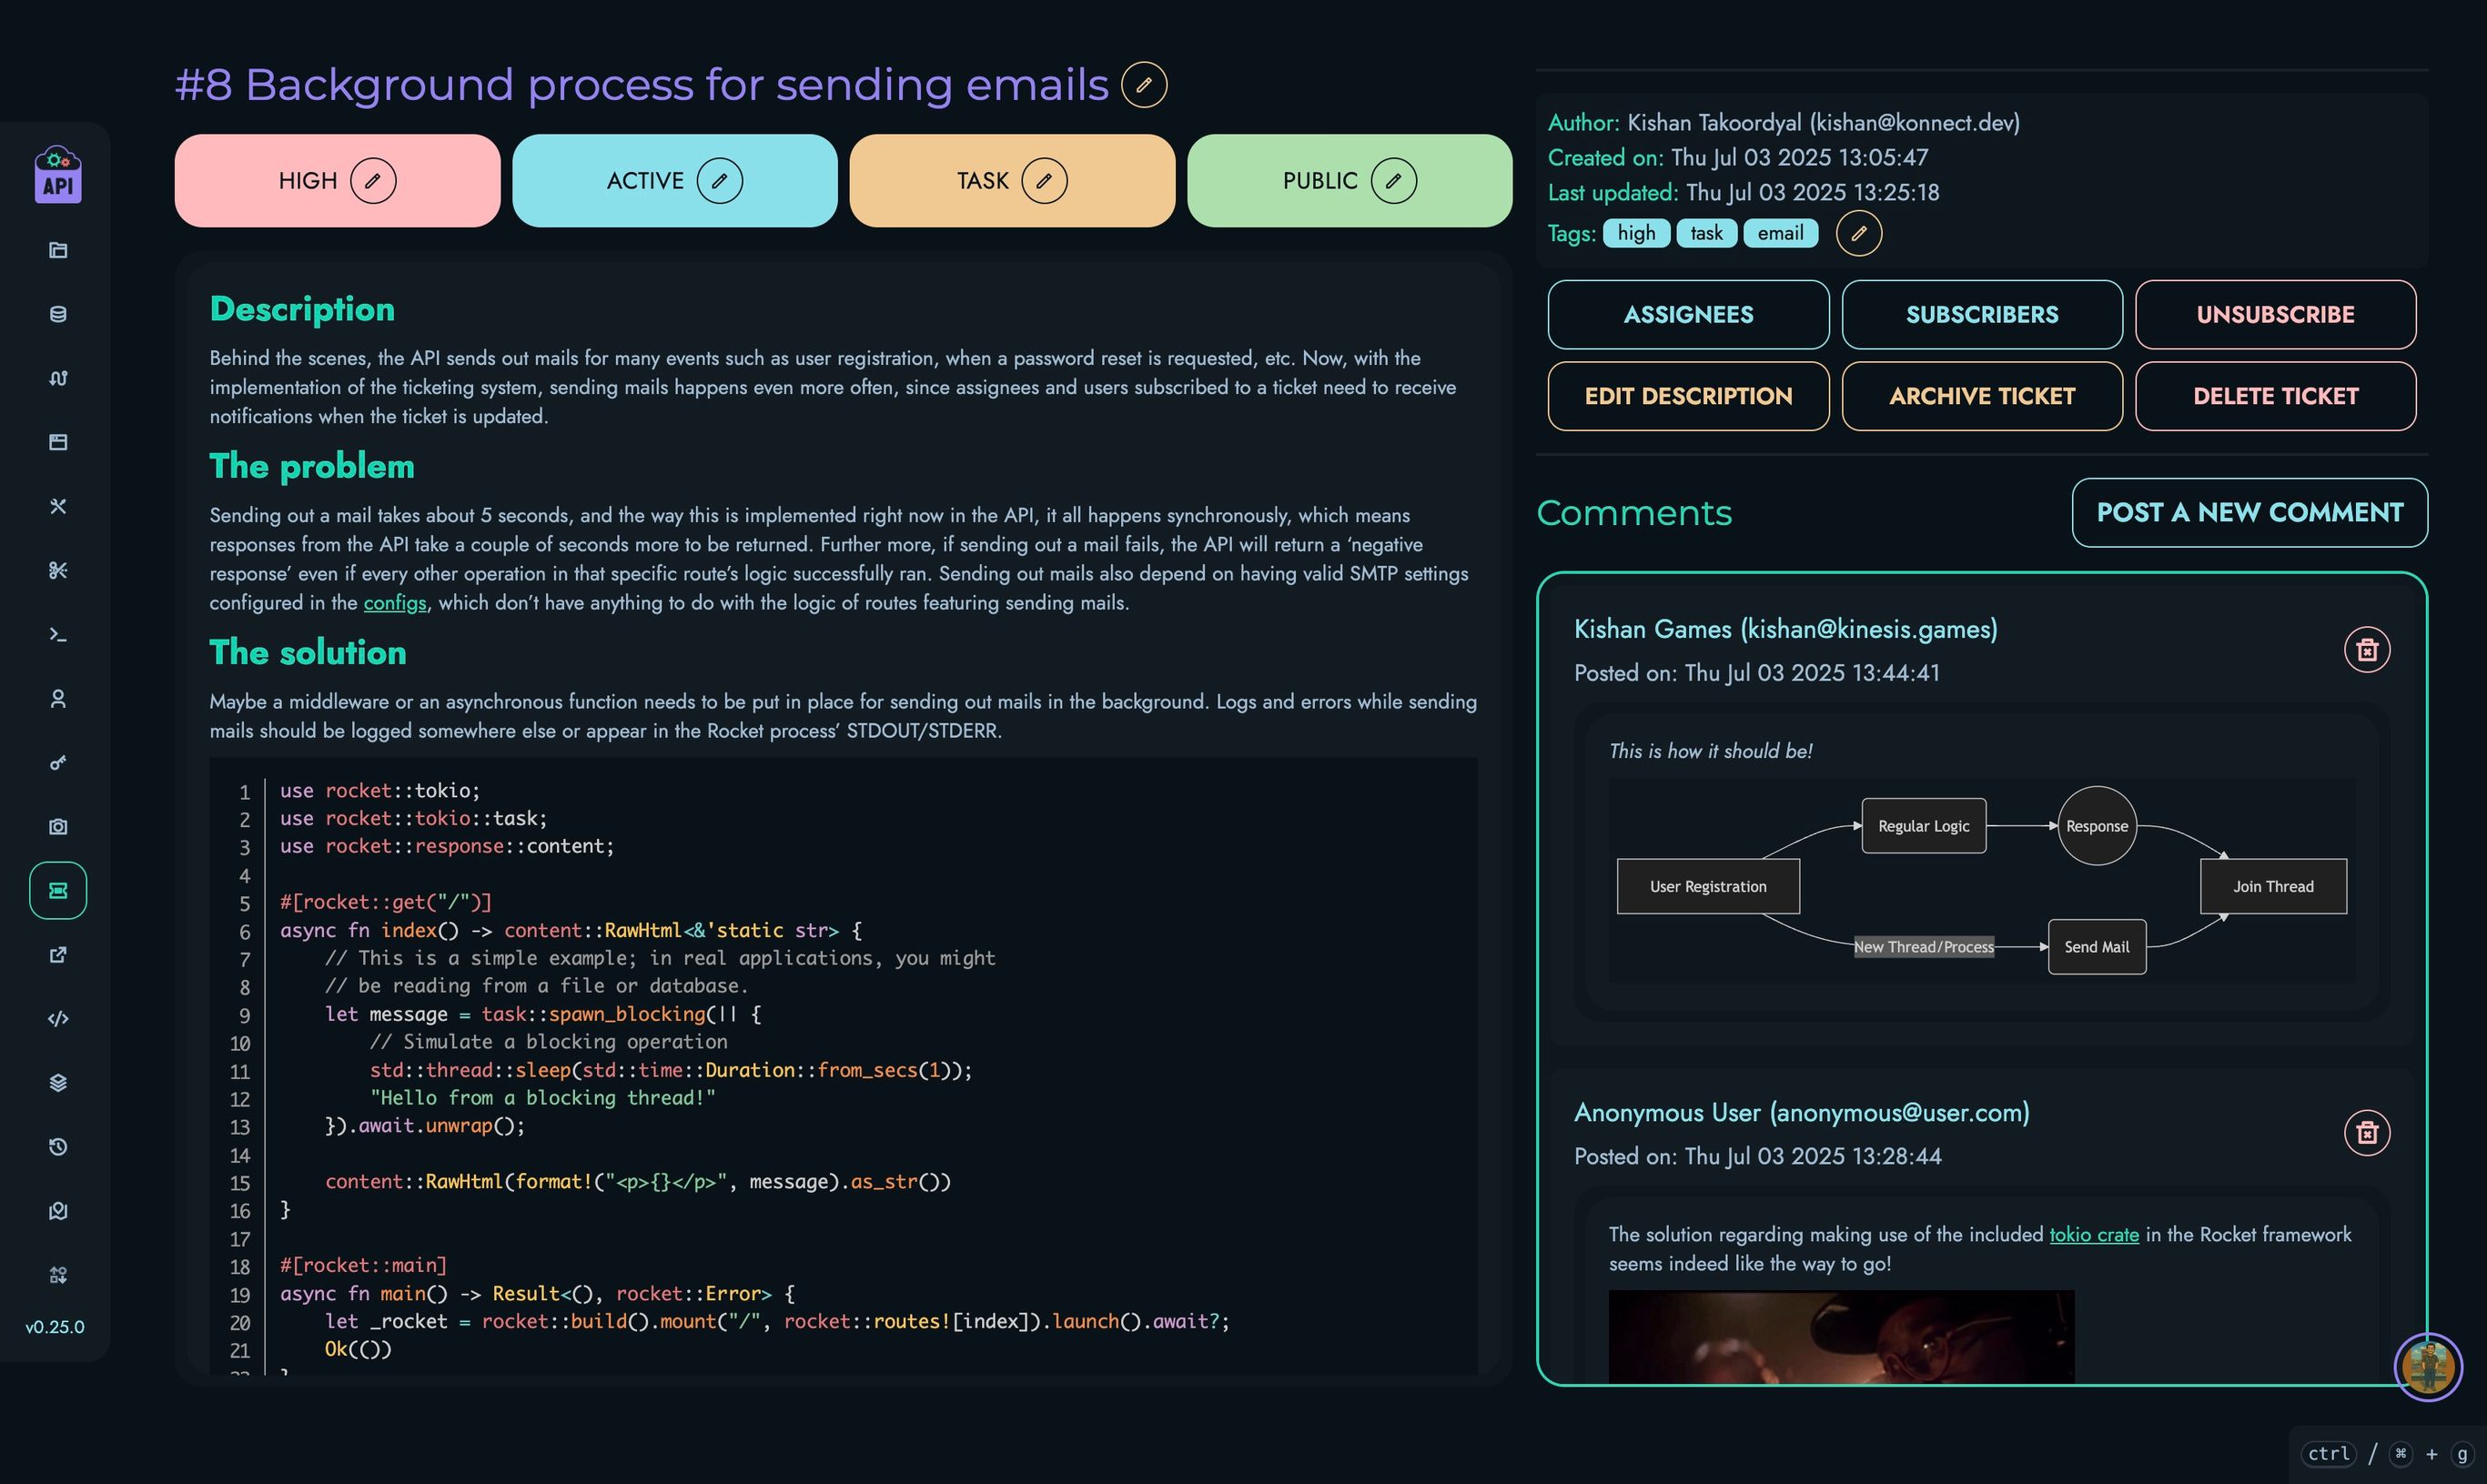
Each ticket has its own dedicated page that shows all details and allows for interactions:
Viewing Ticket Information
- Ticket ID and title
- Current status, priority, and type
- Creation and last update timestamps
- Full description
- Tags and visibility status
Interacting with Tickets
- Adding Comments: Use the “Post a new Comment” button to add information or ask questions
- Updating Fields: Authorized users can edit various fields through the corresponding buttons
- Managing Assignees: View and modify who is assigned to resolve the ticket
- Subscribing: Get notified of updates by subscribing to the ticket
Comment Management
- Add formatted comments with the Markdown editor
- Edit your own comments if needed
- View all discussions chronologically
Best Practices
For effective use of the ticketing system:
- Be Specific: Provide clear titles and detailed descriptions
- Use Appropriate Types: Correctly categorize your ticket (BUG, FEATURE, etc.)
- Set Realistic Priorities: Reserve HIGH/CRITICAL/URGENT for genuinely urgent issues
- Check for Duplicates: Before creating a new ticket, search for similar existing ones
- Stay Engaged: Respond to questions and provide additional information when requested
- Update Status: Keep ticket status current to reflect actual progress
Related Documentation
Blog
The Blog system in Kinesis API provides a powerful publishing platform that allows users to create, manage, and share content. It’s designed to facilitate content creation with rich formatting while supporting interactive features like comments and likes.
Overview
The blog system serves as a content hub for:
- Publishing articles and announcements
- Sharing technical documentation
- Engaging users through comments
- Organizing content with tags and categories
All blog posts can be formatted with Markdown, allowing for rich content including code snippets, images, links, and formatting.
Key Features
Blog Post Management
- Create Posts: Authors can create blog posts with titles, content, and metadata
- Rich Formatting: Full Markdown support with preview
- Drafts: Save posts as unpublished drafts before making them public
- Image Support: Add preview images and carousel galleries
- Public/Private: Control visibility of posts to other users
- Tags: Add custom tags for better organization and searchability
- Slugs: Custom URL-friendly identifiers for SEO
User Interactions
- Comments: Add discussions and feedback to blog posts
- Likes: Express appreciation for posts and comments
- View Tracking: Monitor post popularity through view counts
- Anonymous Comments: Allow feedback without requiring user registration
Organization and Discovery
- Filtering: Filter posts by public/private status, publication status, and content
- Sorting: Sort by title, creation date, or last update
- Pagination: Navigate through large numbers of posts efficiently
- Search: Find posts by keywords in title, subtitle, content, or tags
User Permissions
Different user roles have different capabilities within the blog system:
All Users (Including Anonymous)
- View public blog posts
- Comment on public blog posts (anonymously if not logged in)
- Like posts and comments (if logged in)
Authors
- Create new blog posts
- Edit and delete their own posts
- Toggle public/private status of their own posts
- Publish/unpublish their own posts
- Edit and delete their own comments
Administrators (ROOT/ADMIN)
- Full control over all blog posts
- Edit and delete any post or comment
- Access both public and private posts
- Publish/unpublish any post
Using the Blog List Page

The blog list page provides a comprehensive view of all accessible blog posts with powerful organization tools:
Filtering and Sorting
- Use the search bar to filter posts by content
- Filter by post status (Public/Private, Published/Unpublished)
- Sort by various criteria:
- Title (ascending/descending)
- Creation date (newest/oldest)
- Last update
Creating Blog Posts
- Click the “Create a new blog post” button
- Enter a title (a slug will be automatically generated)
- Provide a subtitle that summarizes the post
- Write your content using the Markdown editor
- Add a preview image (optional)
- Add carousel images (optional)
- Add relevant tags (comma-separated)
- Set visibility (public/private)
- Set publication status (published/unpublished)
- Click “Create”
Using the Individual Blog Post Page

Each blog post has its own dedicated page that shows all details and allows for interactions:
Viewing Blog Post Information
- Post title and subtitle
- Author information and publication date
- Full content with Markdown rendering
- Preview image and carousel gallery (if added)
- Tags and visibility status
- View count and like count
Interacting with Blog Posts
- Liking: Click the like button to show appreciation for the post
- Sharing: Copy the post URL to share with others
- Editing: Authors and admins can edit the post
- Deleting: Authors and admins can delete the post
Comment Management
- Add formatted comments with the Markdown editor
- Edit your own comments if needed
- Like comments to show appreciation
- Delete your own comments or, as an admin, any comment
Reading Progress
A progress bar at the top of the post indicates how far you’ve read, helping you keep track of your position in longer articles.
Editing Blog Posts

Authors and administrators can edit existing blog posts:
- From the blog post view page, click “Edit”
- Modify any field including title, content, images, etc.
- Click “Update Blog Post” to save your changes
Managing Comments
The comment system allows for rich interaction with blog posts:
Adding Comments
- Scroll to the comments section at the bottom of a blog post
- Click “Add a new Comment”
- Write your comment using the Markdown editor
- If not logged in, provide your name and email
- Submit your comment
Editing and Deleting Comments
- Locate your comment in the comments section
- Use the edit (pencil) or delete (trash) icons
- For editing, modify your comment and click “Submit”
- For deletion, confirm your choice in the confirmation dialog
Best Practices
For effective use of the blog system:
- Use Clear Titles: Create descriptive, compelling titles
- Add Subtitles: Provide a brief summary that entices readers
- Format Content Well: Use Markdown to organize content with headings, lists, and emphasis
- Include Images: Add visual interest with relevant images
- Use Tags Consistently: Develop a tagging system for better organization
- Draft First: Use the unpublished status to work on posts before making them public
- Moderate Comments: Keep discussions constructive and on-topic
Content Guidelines
When creating blog posts:
- Be Original: Avoid plagiarism and duplicate content
- Add Value: Focus on providing useful, informative content
- Stay Relevant: Keep content on-topic and aligned with your audience’s interests
- Use Clear Language: Write in a clear, concise style
- Include Links: Reference related content and sources
- Proofread: Check spelling, grammar, and formatting before publishing
Redirects
The Redirects system in Kinesis API provides a way to create and manage URL redirects within your application. This feature is useful for creating shortened URLs, handling legacy endpoints, or creating memorable links to complex resources.
Understanding Redirects
Each redirect in Kinesis API consists of:
- ID: A unique identifier for the redirect
- Locator: A short, unique code that forms part of the redirect URL
- URL: The destination where users will be redirected
When someone accesses a redirect URL (e.g., https://your-api.com/go/abc123), they are automatically forwarded to the destination URL associated with that locator.
Accessing Redirects Management
To access the Redirects management interface:
- Log in to your Kinesis API account
- Navigate to
/web/redirectsin your browser or select “Redirects” from the navigation menu
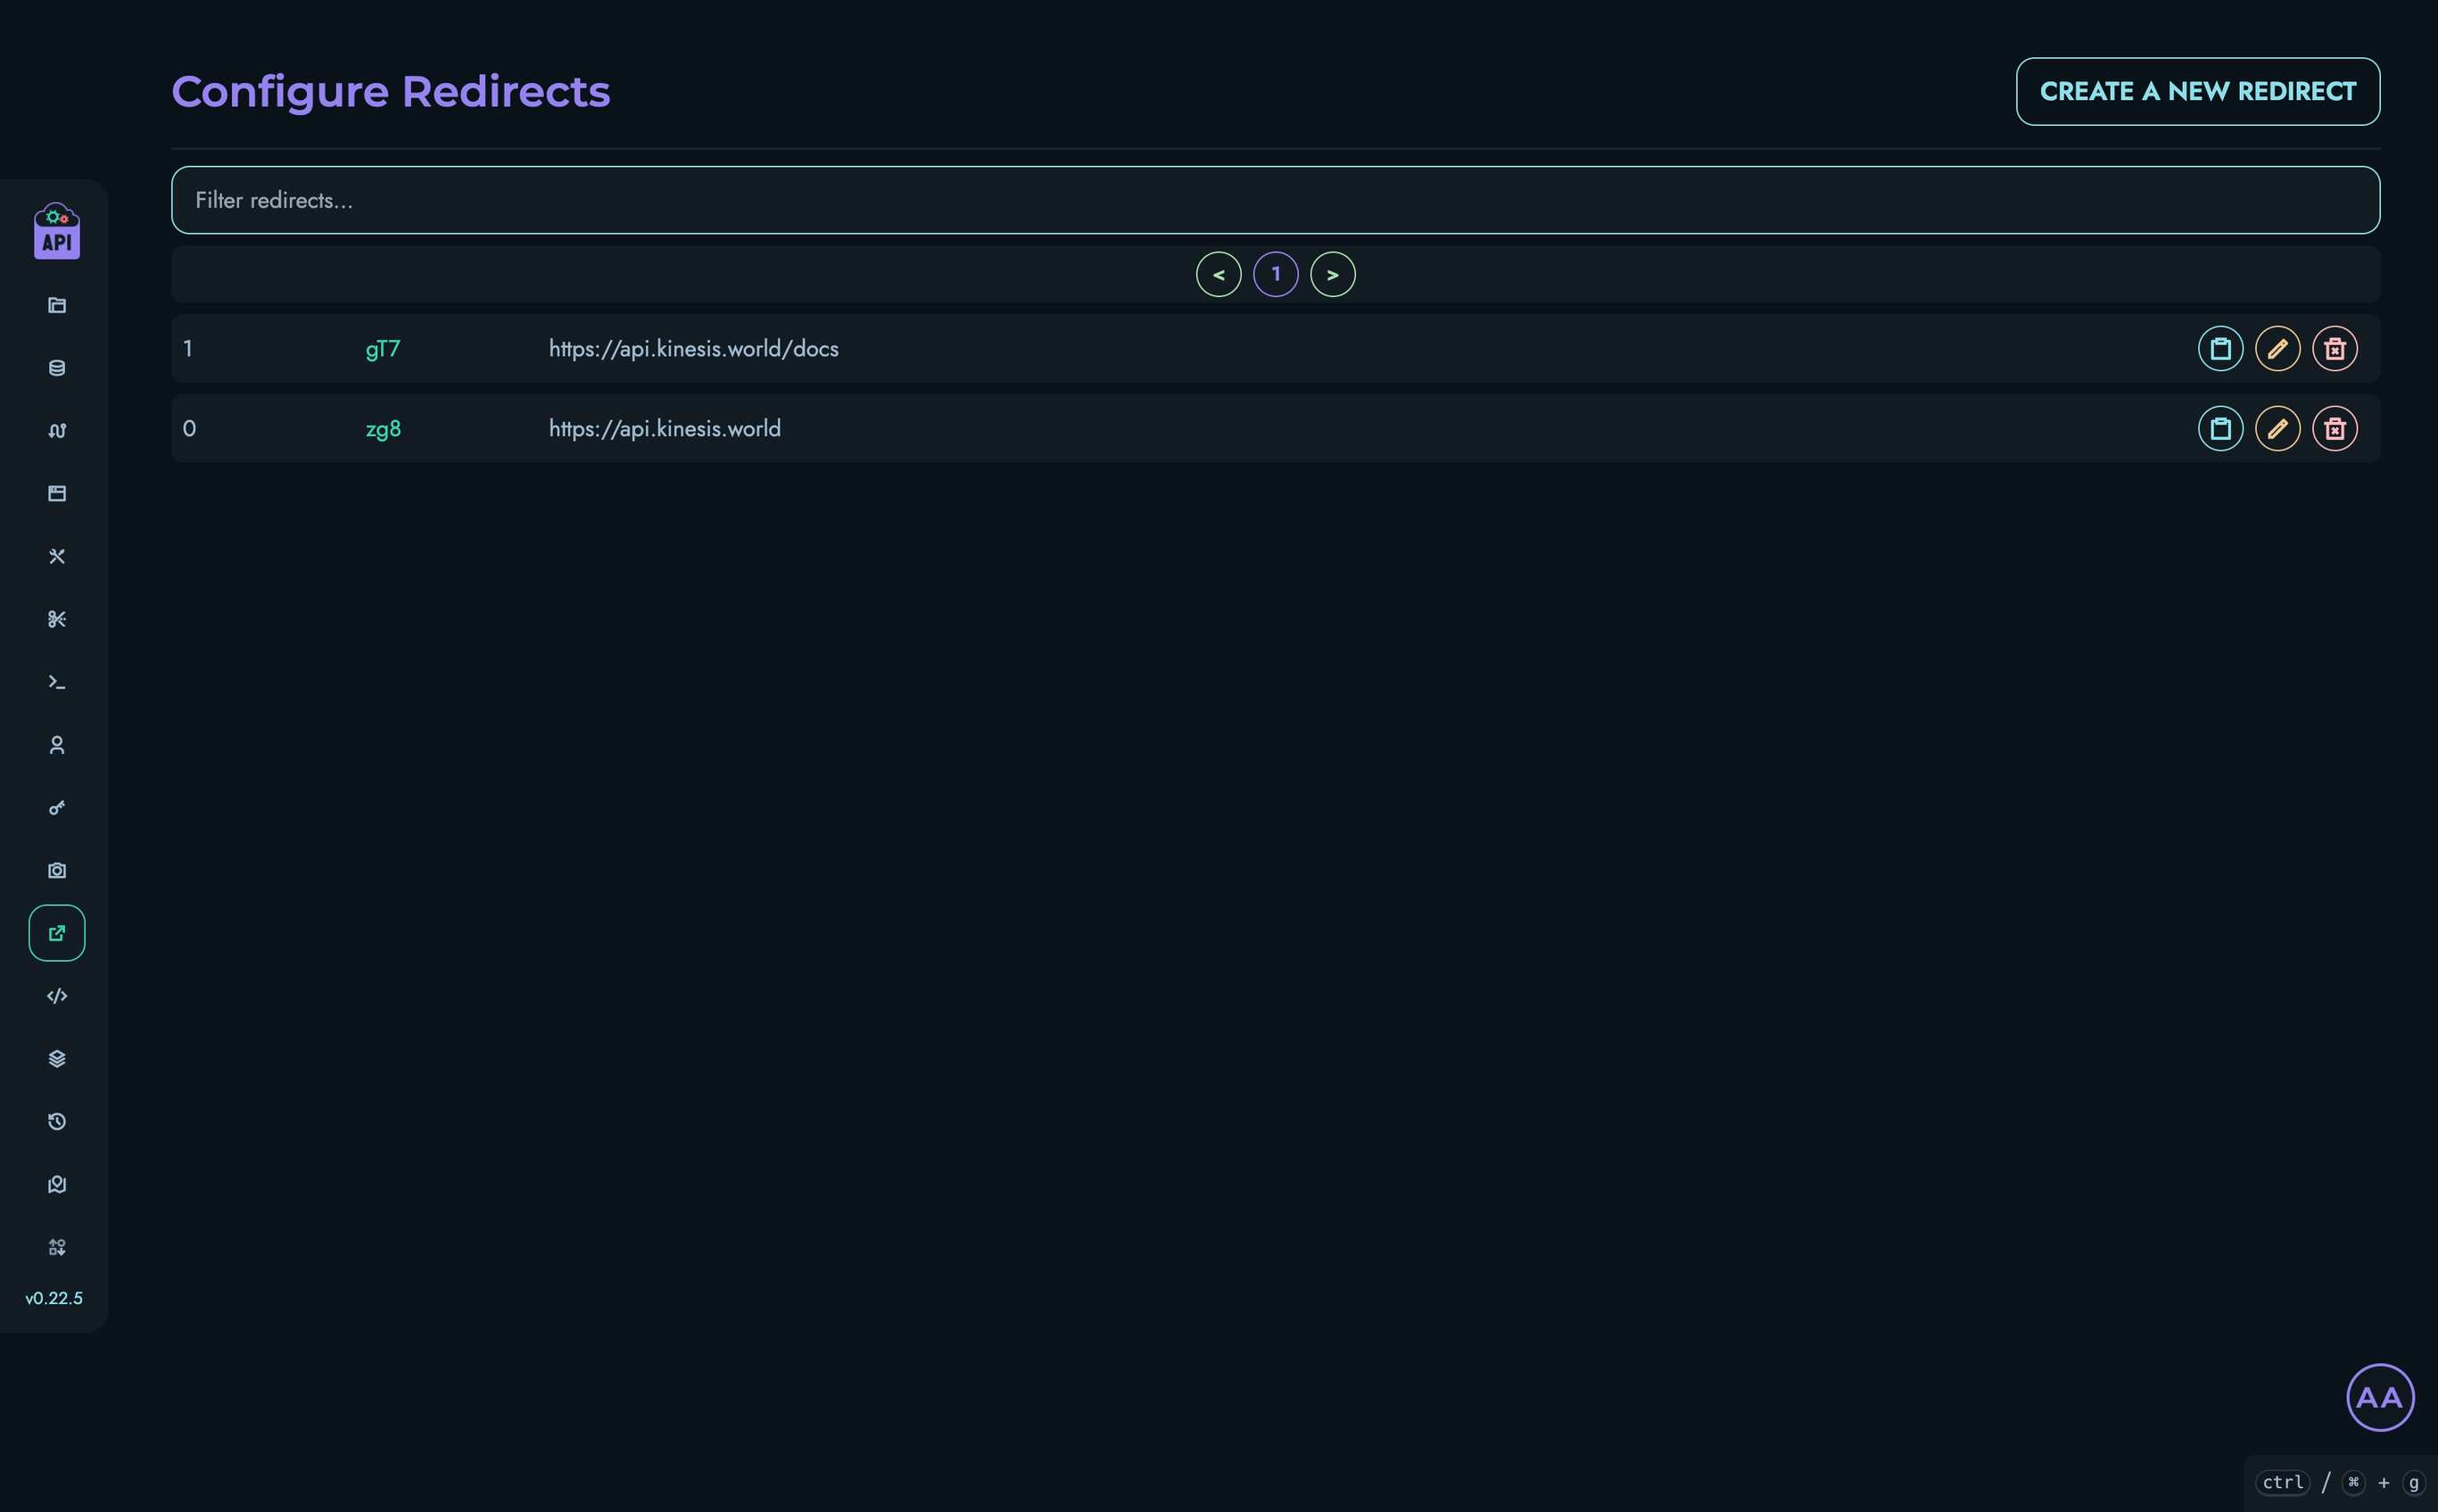
Redirects Interface
The Redirects management interface includes:
- A searchable list of all redirects in the system
- Pagination controls for navigating through large redirect collections
- Actions for creating, updating, and deleting redirects
- Tools for copying redirect URLs for sharing
Creating a Redirect
To create a new redirect:
- Click the “Create a New Redirect” button at the top of the page
- Enter the destination URL in the field provided
- (Optional) Specify a custom locator in the “Custom Locator” field
- If left empty, the system will automatically generate a unique locator
- Custom locators must be unique across the system
- Click “Create” to generate the redirect
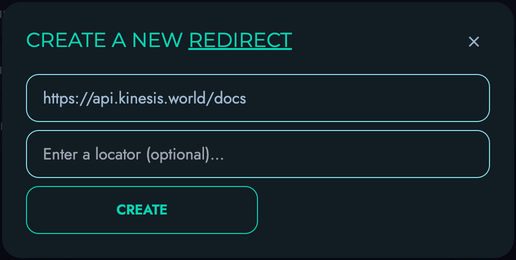
The system will use your custom locator if provided, or generate a unique locator code if none is specified. This locator forms part of the shortened URL, ensuring uniqueness and consistency across all redirects.
Using Redirects
After creating a redirect, you can use it by:
- Copying the redirect URL by clicking the clipboard icon next to the redirect
- Sharing this URL with others or using it in your applications
The redirect URL will be in the format:
https://your-api-domain.com/go/locator-code
When users access this URL, they will be automatically redirected to the destination URL you specified.
Managing Redirects
Filtering Redirects
To find specific redirects:
- Use the search box at the top of the redirects list
- Type any part of the locator code or destination URL
- The list will automatically filter to show matching redirects
Pagination
For systems with many redirects:
- Navigate between pages using the pagination controls
- The page displays up to 15 redirects at a time
Updating Redirects
To change a redirect’s destination URL:
- Find the redirect in the list
- Click the edit button (pencil icon)
- Enter the new destination URL in the modal that appears
- Click “Submit” to save the changes
Note that only the destination URL can be updated. The locator code is set when the redirect is created and cannot be modified at any point. If you need a different URL pattern, you’ll need to create a new redirect and delete the old one.
Deleting Redirects
To remove a redirect:
- Find the redirect in the list
- Click the delete button (trash icon)
- Confirm the deletion in the modal that appears

Once deleted, the redirect URL will no longer work, and users attempting to access it will receive an error.
Common Use Cases
Redirects in Kinesis API can be used for:
URL Shortening
Create more manageable, shorter URLs for sharing complex links:
https://your-api.com/go/product1 → https://your-api.com/products/catalog/electronics/smartphones/model-x-256gb-black
API Version Management
Provide stable URLs that can be updated when API endpoints change:
https://your-api.com/go/user-api → https://your-api.com/api/v2/users
Later, when you update to v3, you can simply update the redirect without changing the URL clients use.
Marketing Campaigns
Create memorable URLs for marketing campaigns:
https://your-api.com/go/summer-sale → https://your-api.com/shop/promotions/summer-2023?discount=25&campaign=email
Temporary Resources
Link to resources that might change location:
https://your-api.com/go/docs → https://docs.google.com/document/d/1abc123def456
Best Practices
For effective redirect management:
- Monitor Usage: Periodically review your redirects to identify and remove unused ones
- Avoid Redirect Chains: Try not to redirect to URLs that themselves redirect to other locations
- Security Awareness: Be cautious about redirecting to external sites that could pose security risks
- Regular Cleanup: Delete redirects that are no longer needed to keep your system organized
Snippets
Snippets in Kinesis API provide a powerful way to store, share, and reuse code fragments, documentation, and other text-based content. They serve as a central repository for commonly used patterns, examples, and templates that can be easily referenced across your projects.
Understanding Snippets
Each snippet in Kinesis API has:
- Name: A descriptive title for the snippet
- Description: A brief explanation of the snippet’s purpose
- Content: The actual text content, which supports Markdown formatting
- Visibility Setting: Public or private access control
- Optional Expiry Date: A time when the snippet will automatically expire
Snippets support Markdown with additional features like syntax highlighting for code blocks, diagrams via Mermaid.js, and emoji support, making them versatile for various documentation and code sharing needs.
Accessing Snippets Management
To access the Snippets management interface:
- Log in to your Kinesis API account
- Navigate to
/web/snippetsin your browser or select “Snippets” from the navigation menu
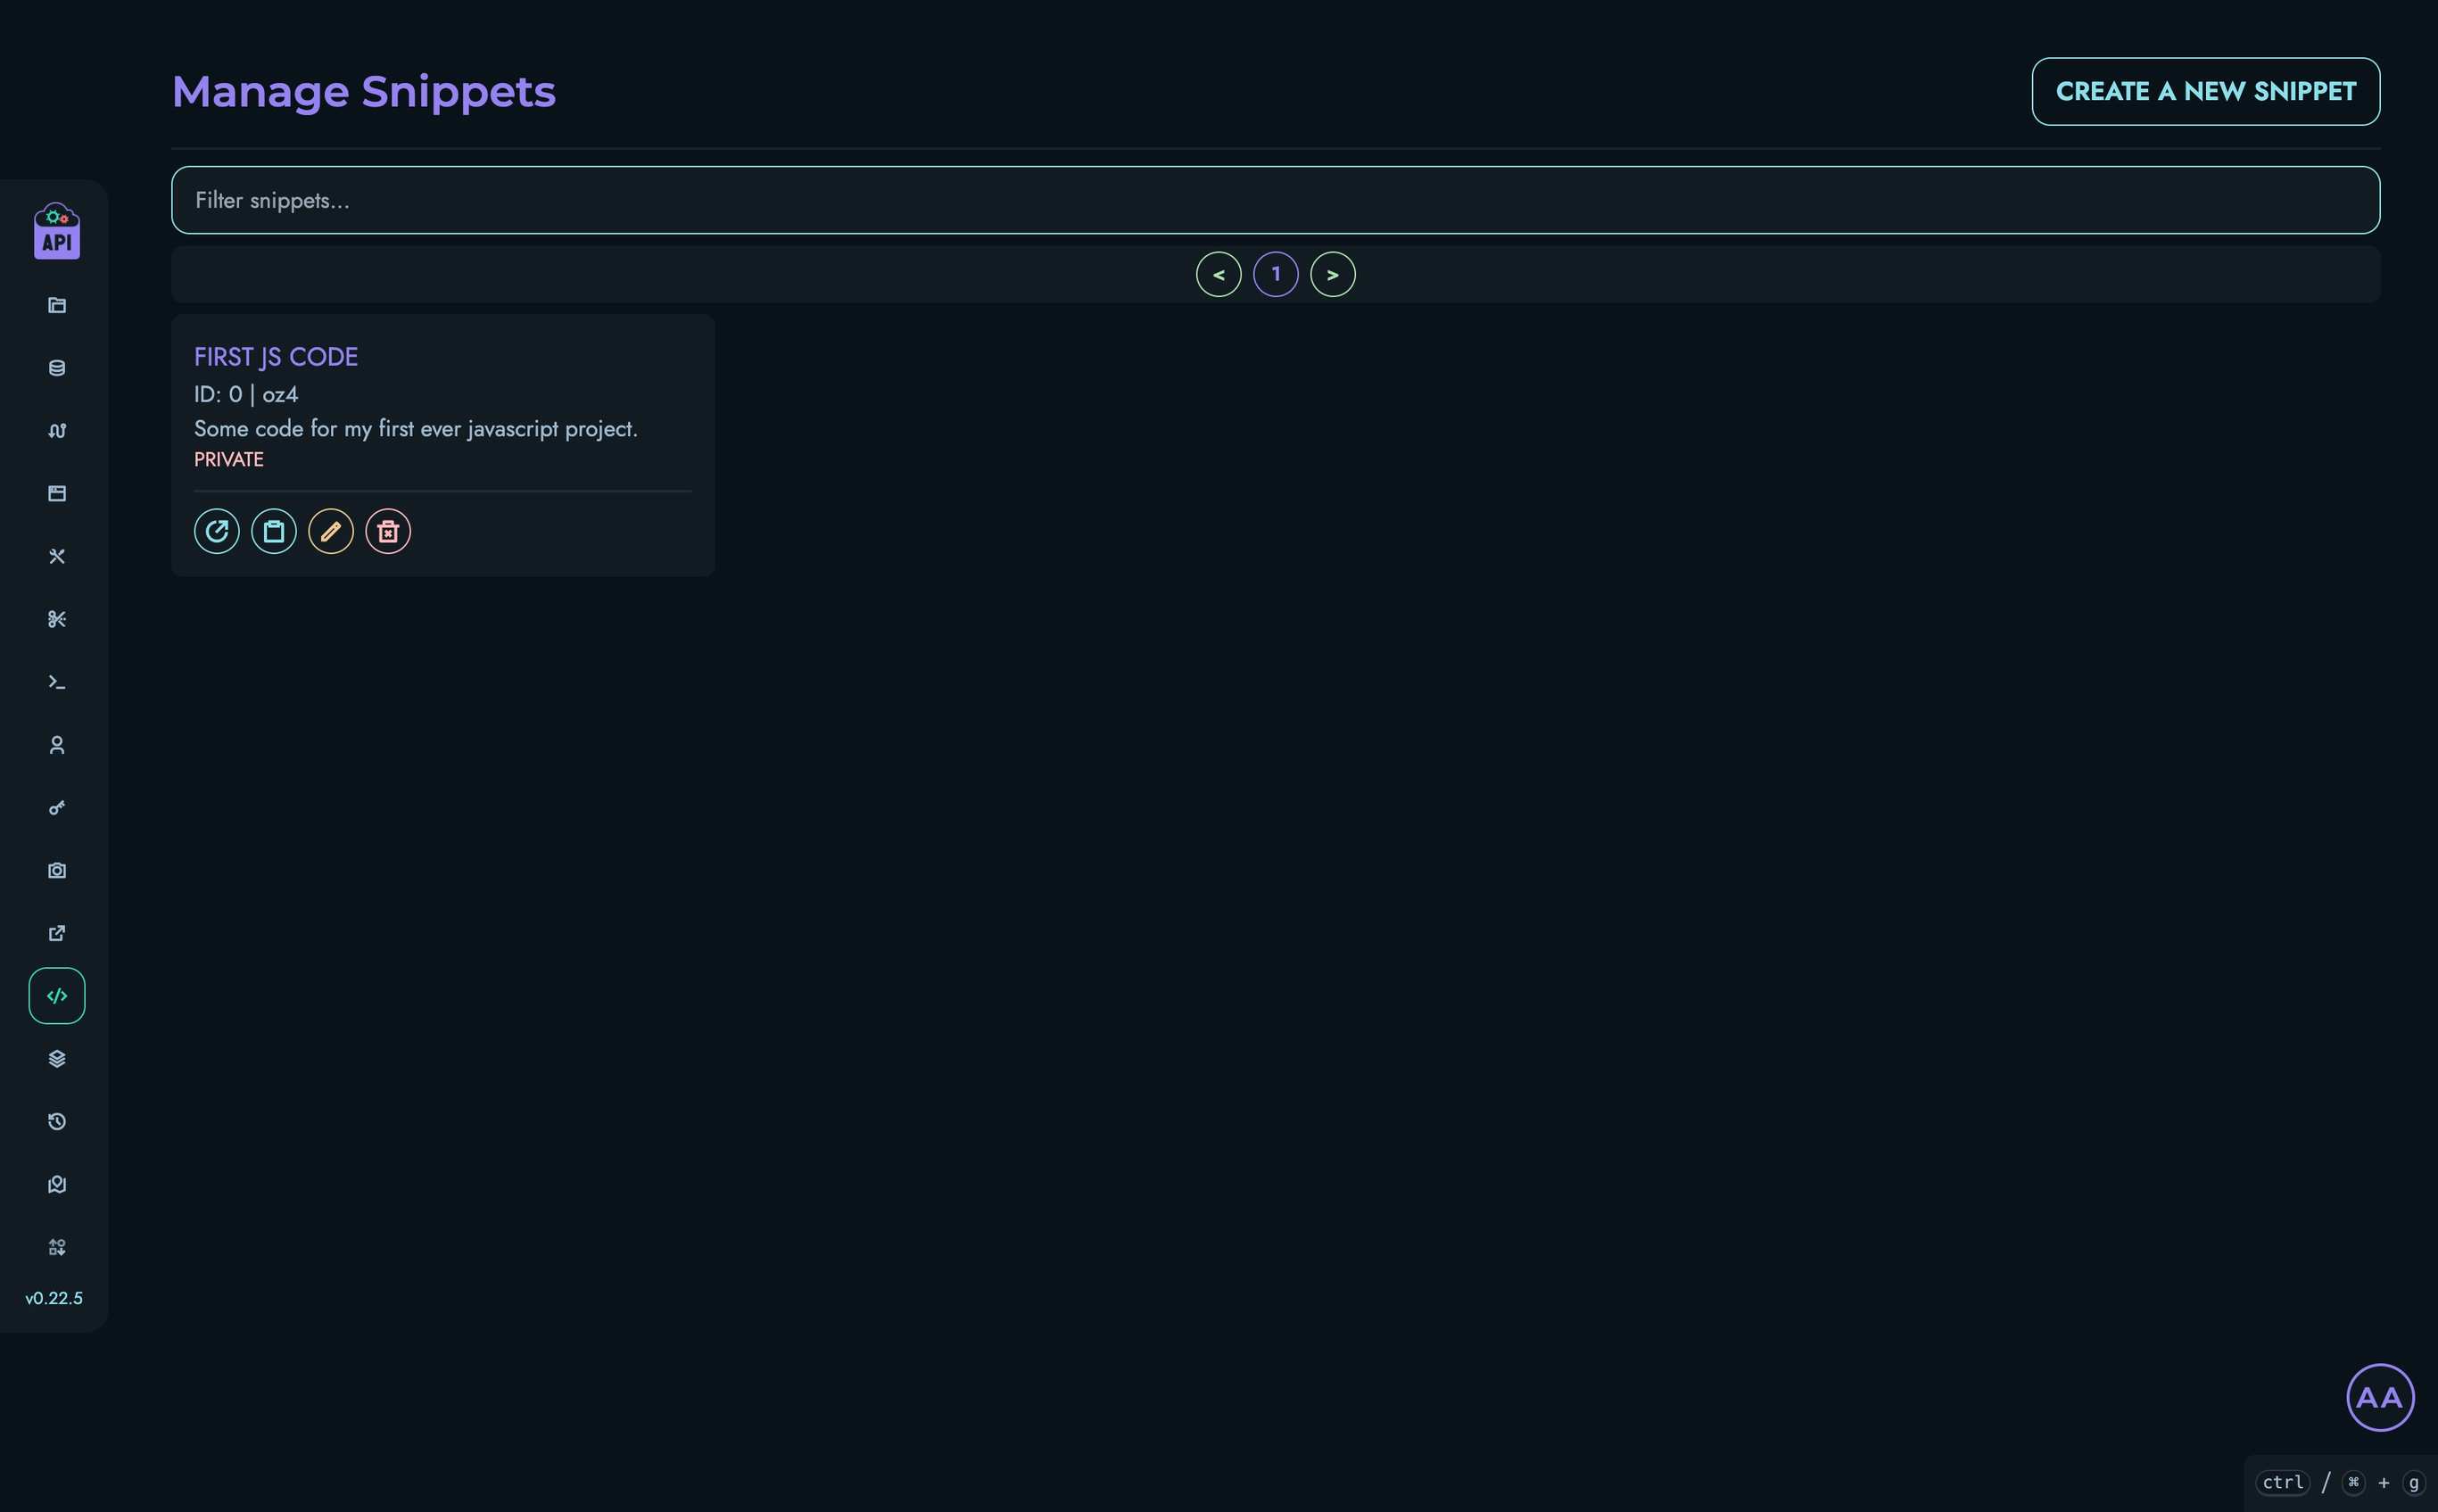
Snippets Interface
The Snippets management interface includes:
- A searchable list of all your snippets
- Pagination controls for navigating through large snippet collections
- Actions for creating, viewing, editing, and deleting snippets
- Tools for copying snippet links for sharing
Creating a Snippet
To create a new snippet:
-
Click the “Create a New Snippet” button at the top of the Snippets page
-
Fill in the required information:
- Name: A title for your snippet
- Description: A brief explanation of the snippet’s purpose
- Content: The main text of your snippet, with support for Markdown
- Expiry (optional): A date when the snippet should expire
- Visibility: Toggle between public and private
-
Click “Create” to save your snippet
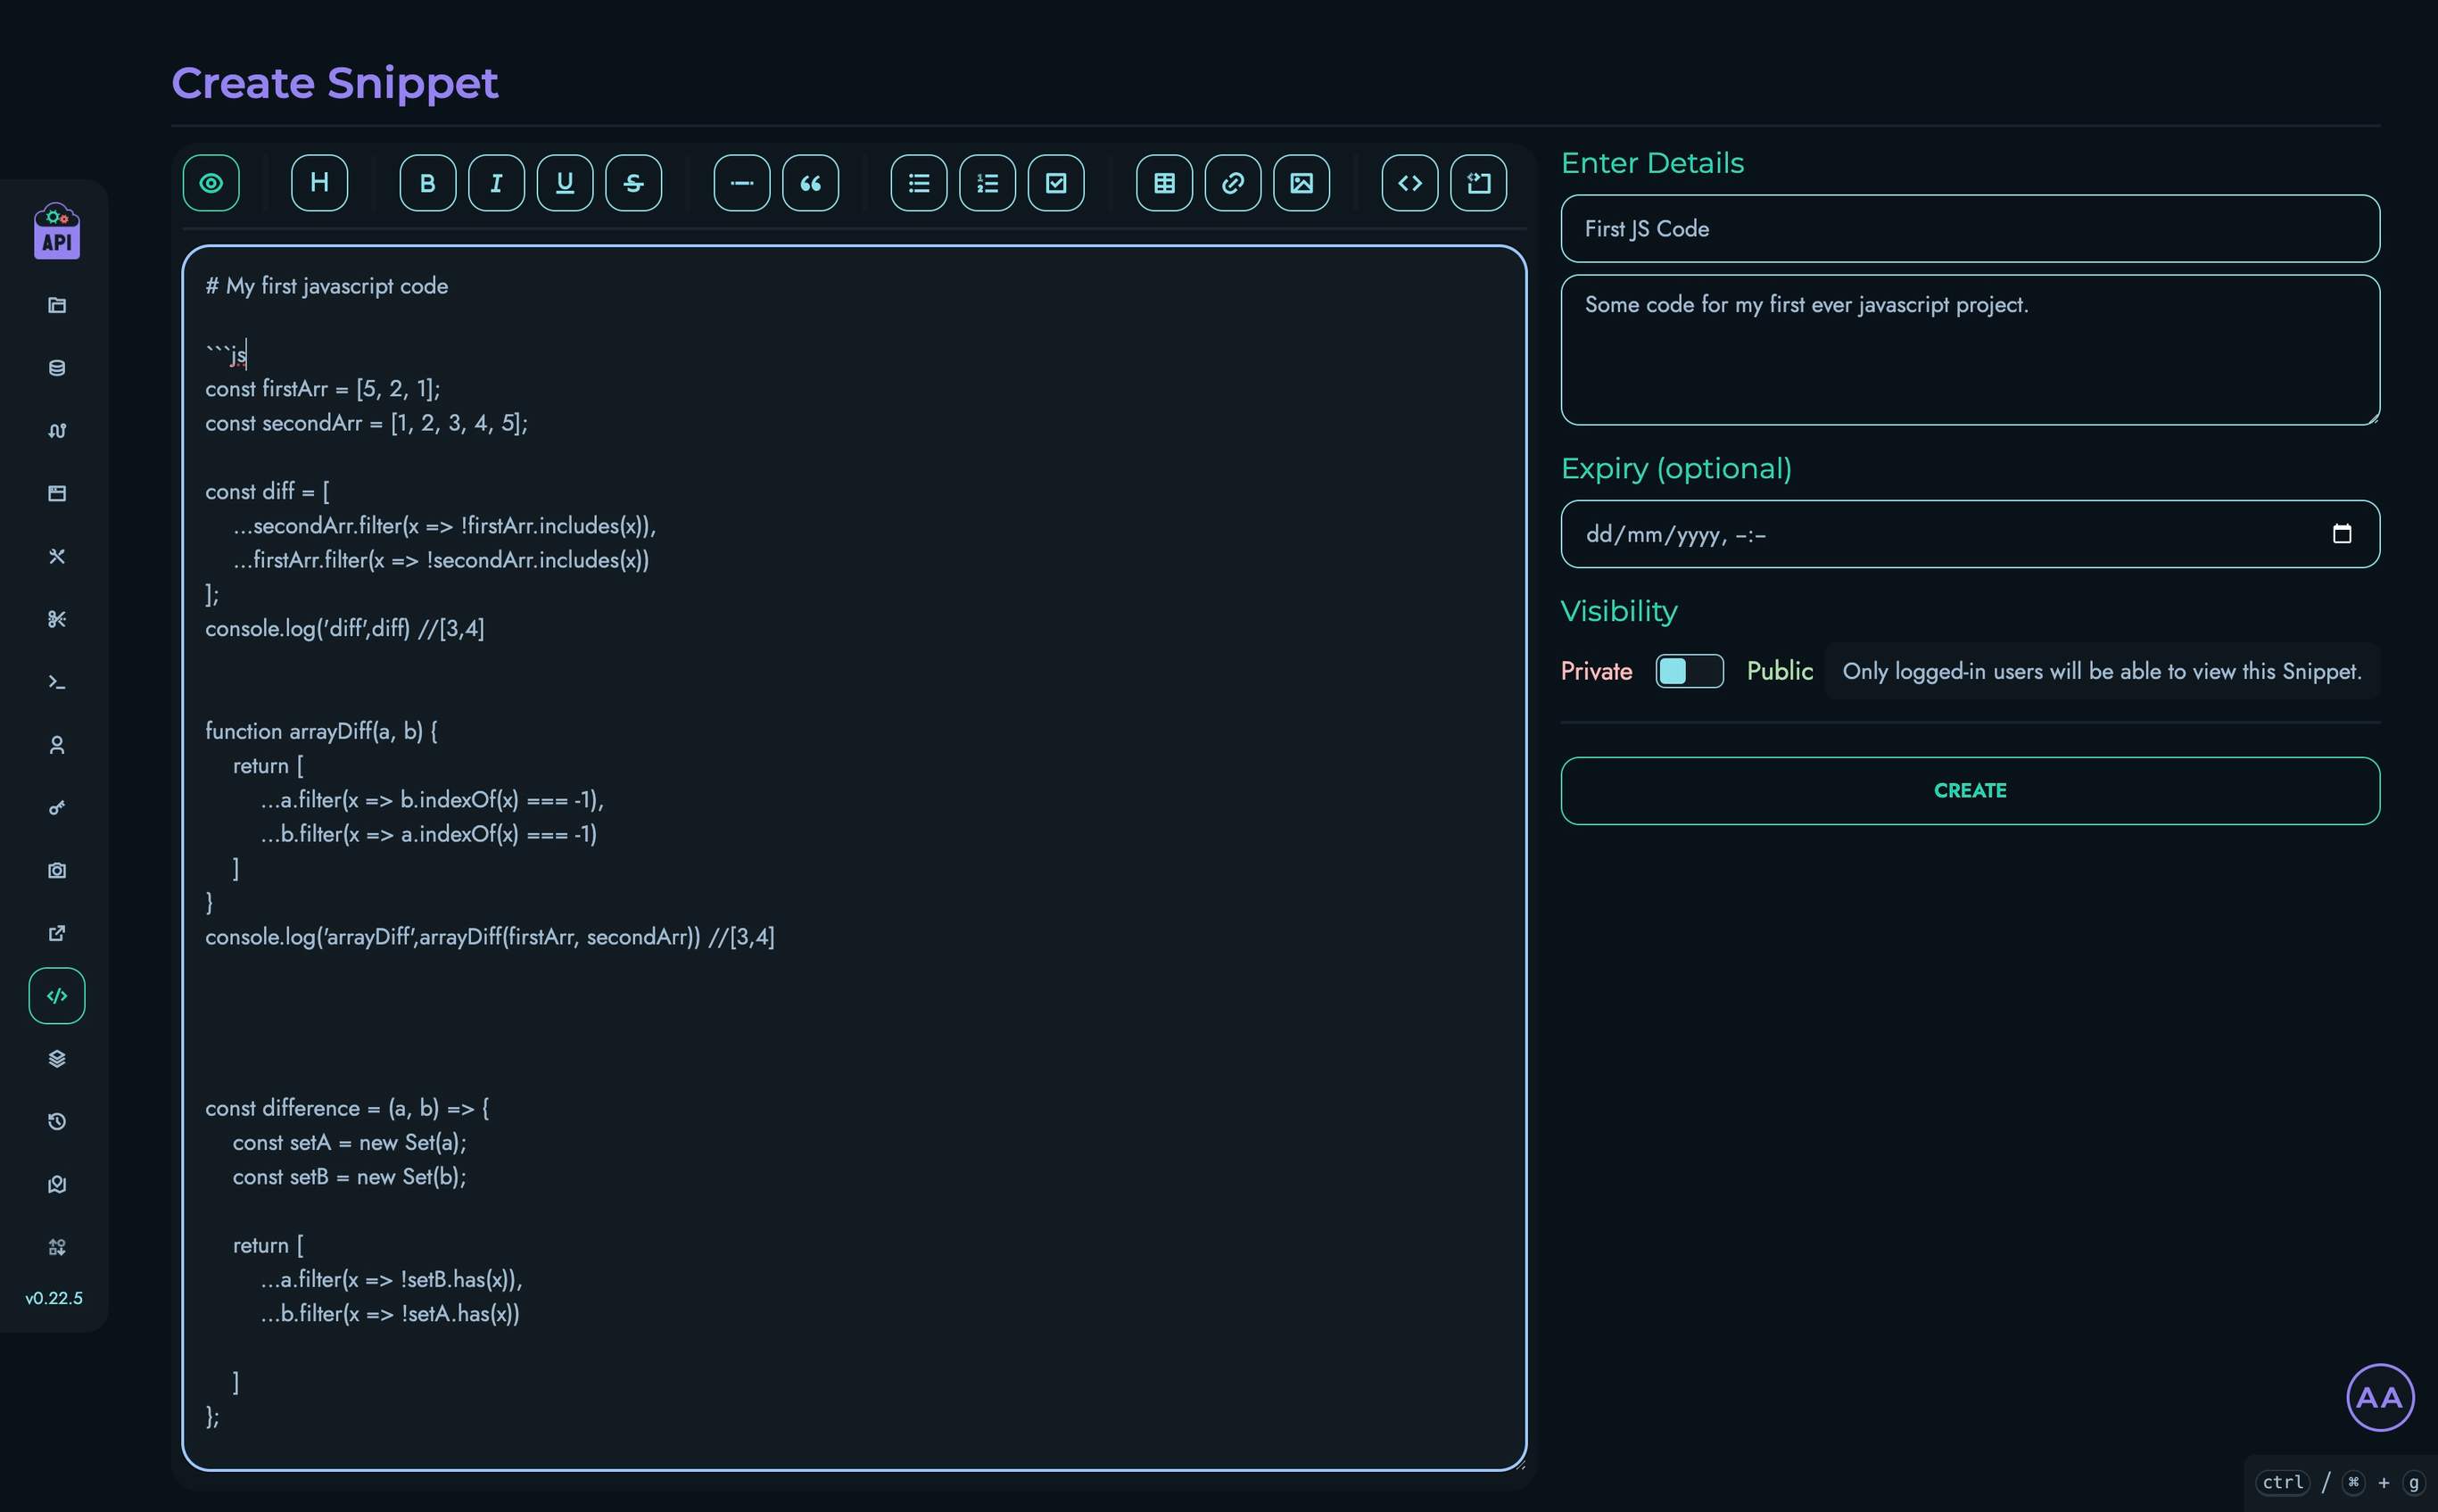
Markdown Support
When creating or editing snippets, you can use Markdown formatting:
- Basic formatting: Headings, lists, links, bold, italic, etc.
- Code blocks: Syntax highlighting for various programming languages
- Diagrams: Create flowcharts and diagrams using Mermaid.js syntax
- Tables: Organize data in tabular format
- Emoji: Add emoji using standard Markdown emoji codes
Viewing Snippets
To view a snippet:
- Click on a snippet name or use the “View Snippet” button (open link icon) from the list
- The snippet content will be displayed with all formatting applied
- Additional details like ID, description, visibility, and expiry date are shown
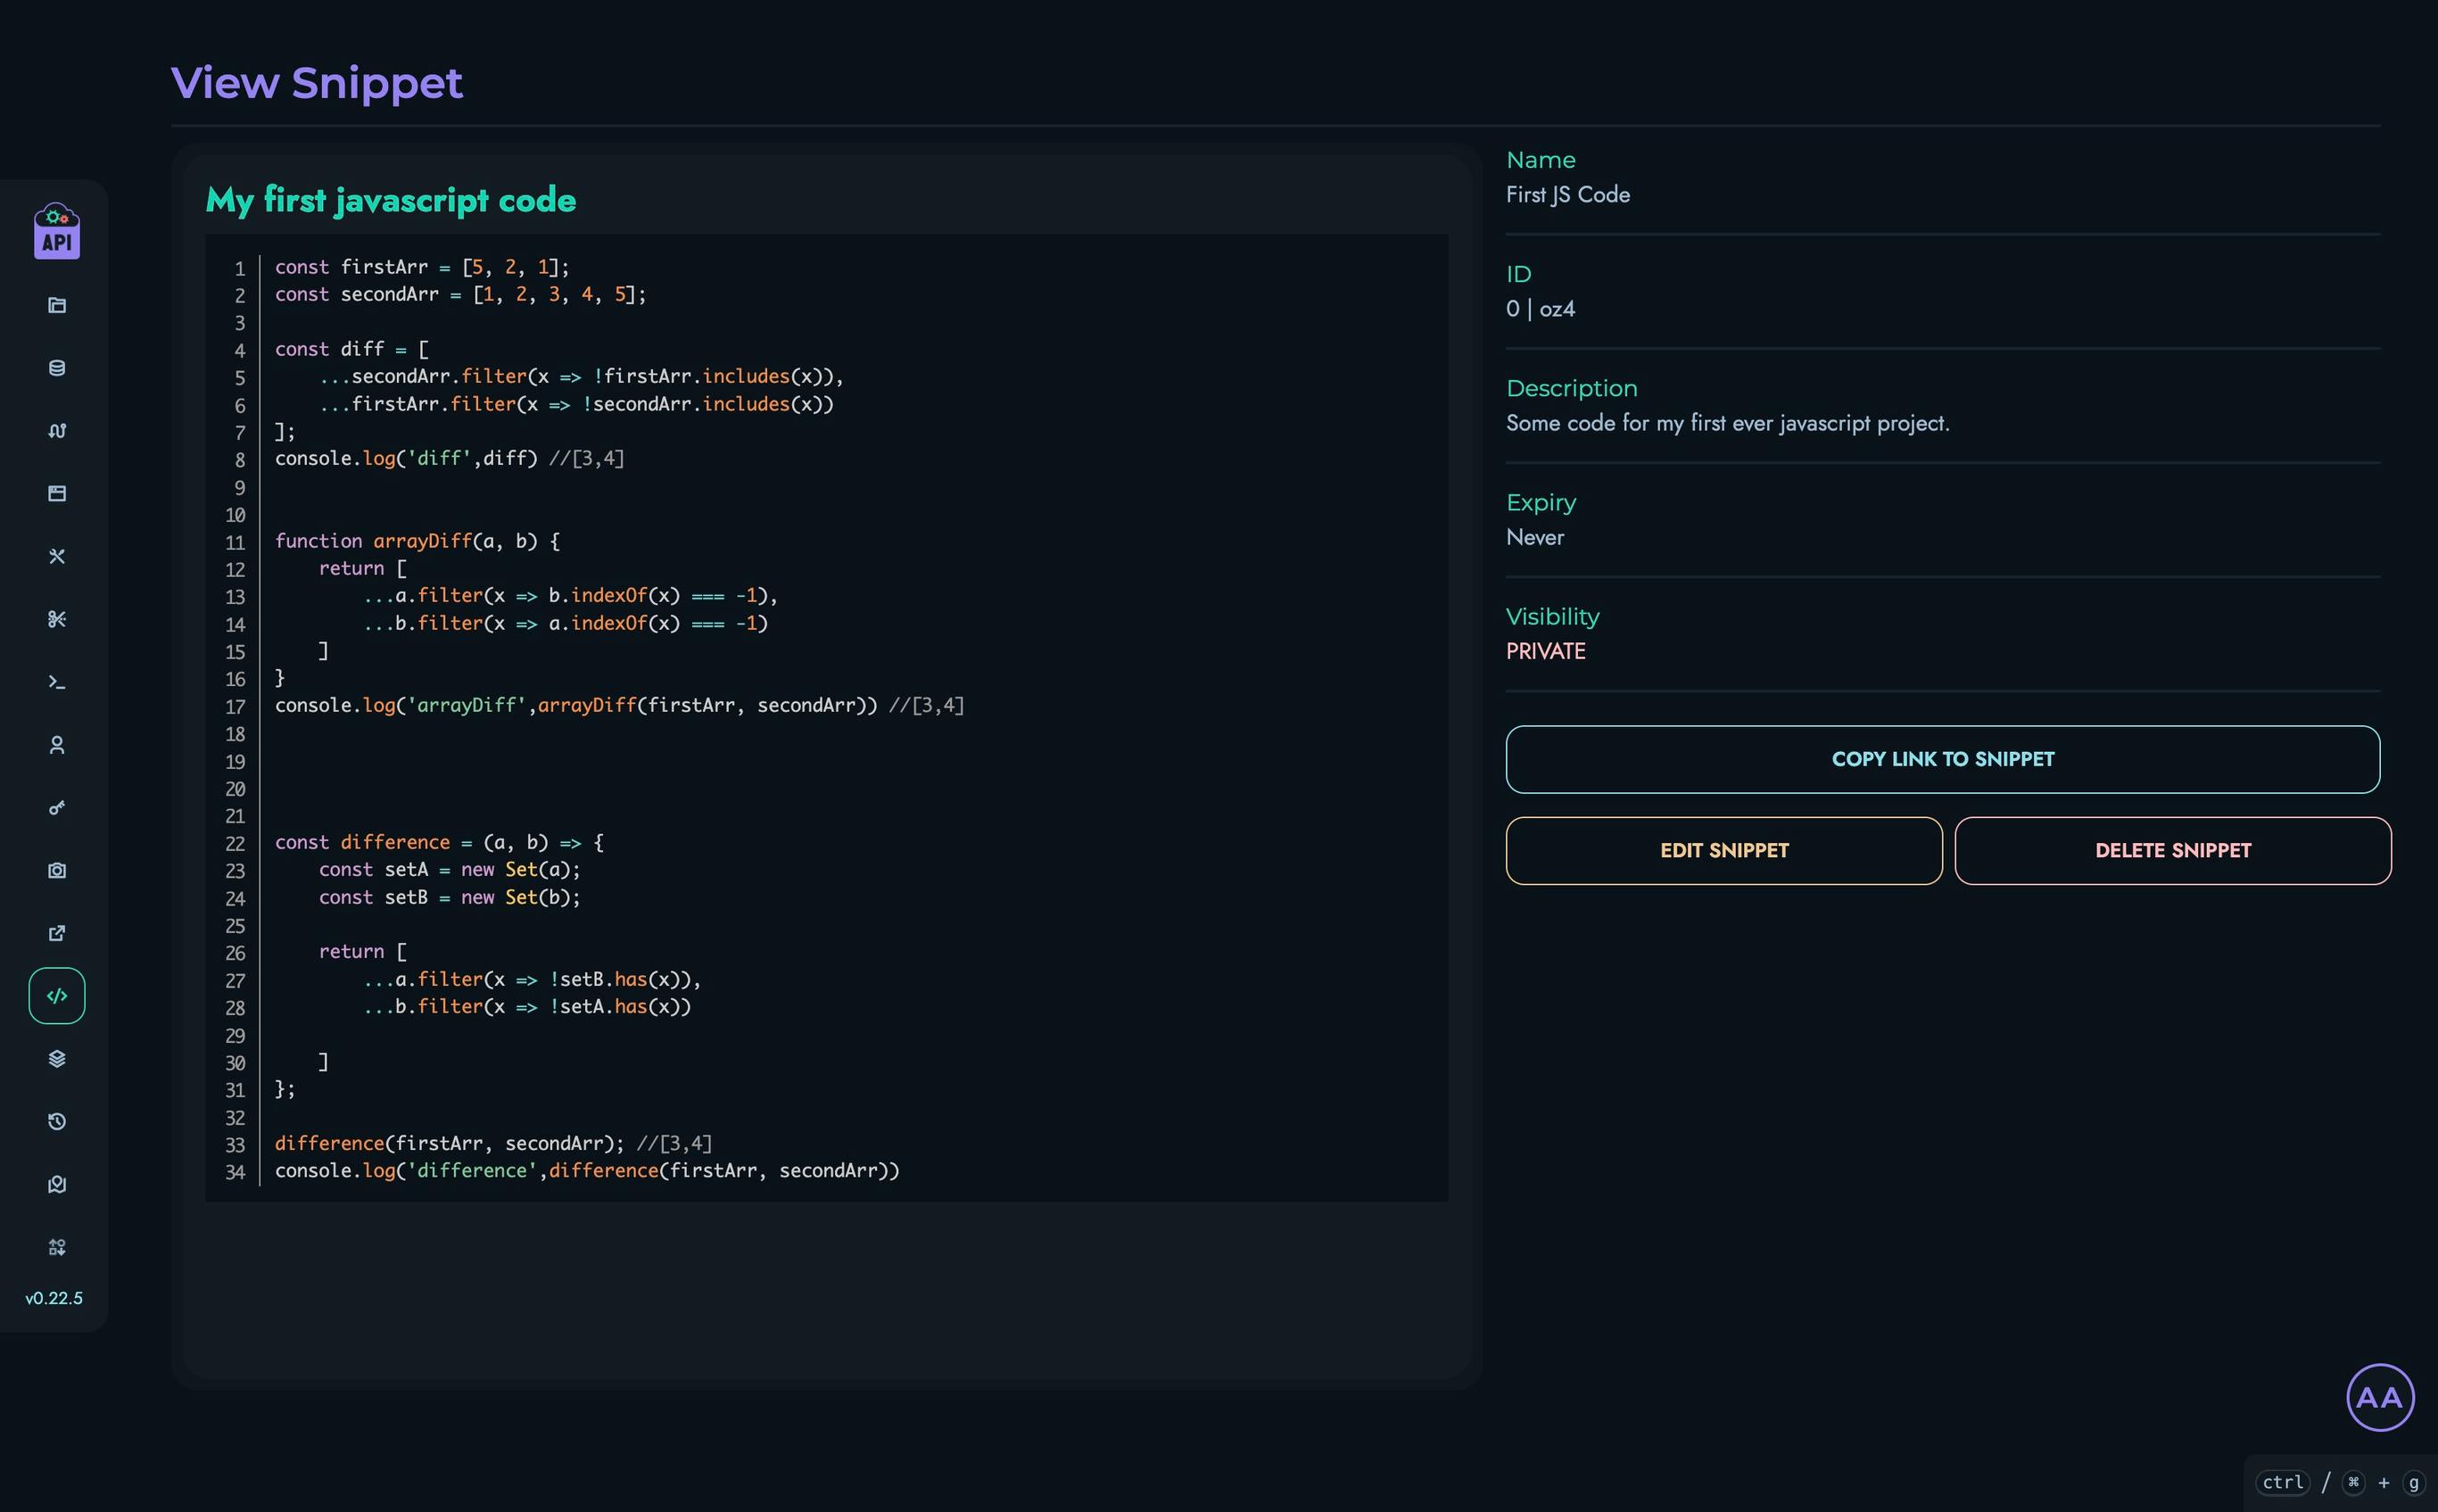
Managing Snippets
Filtering Snippets
To find specific snippets:
- Use the search box at the top of the snippets list
- Type any part of the snippet name, ID, locator, or description
- The list will automatically filter to show matching snippets
Editing Snippets
To edit an existing snippet:
- Click the edit button (pencil icon) next to the snippet in the list or on the view page
- Modify any of the snippet details
- Click “Update Snippet” to save your changes
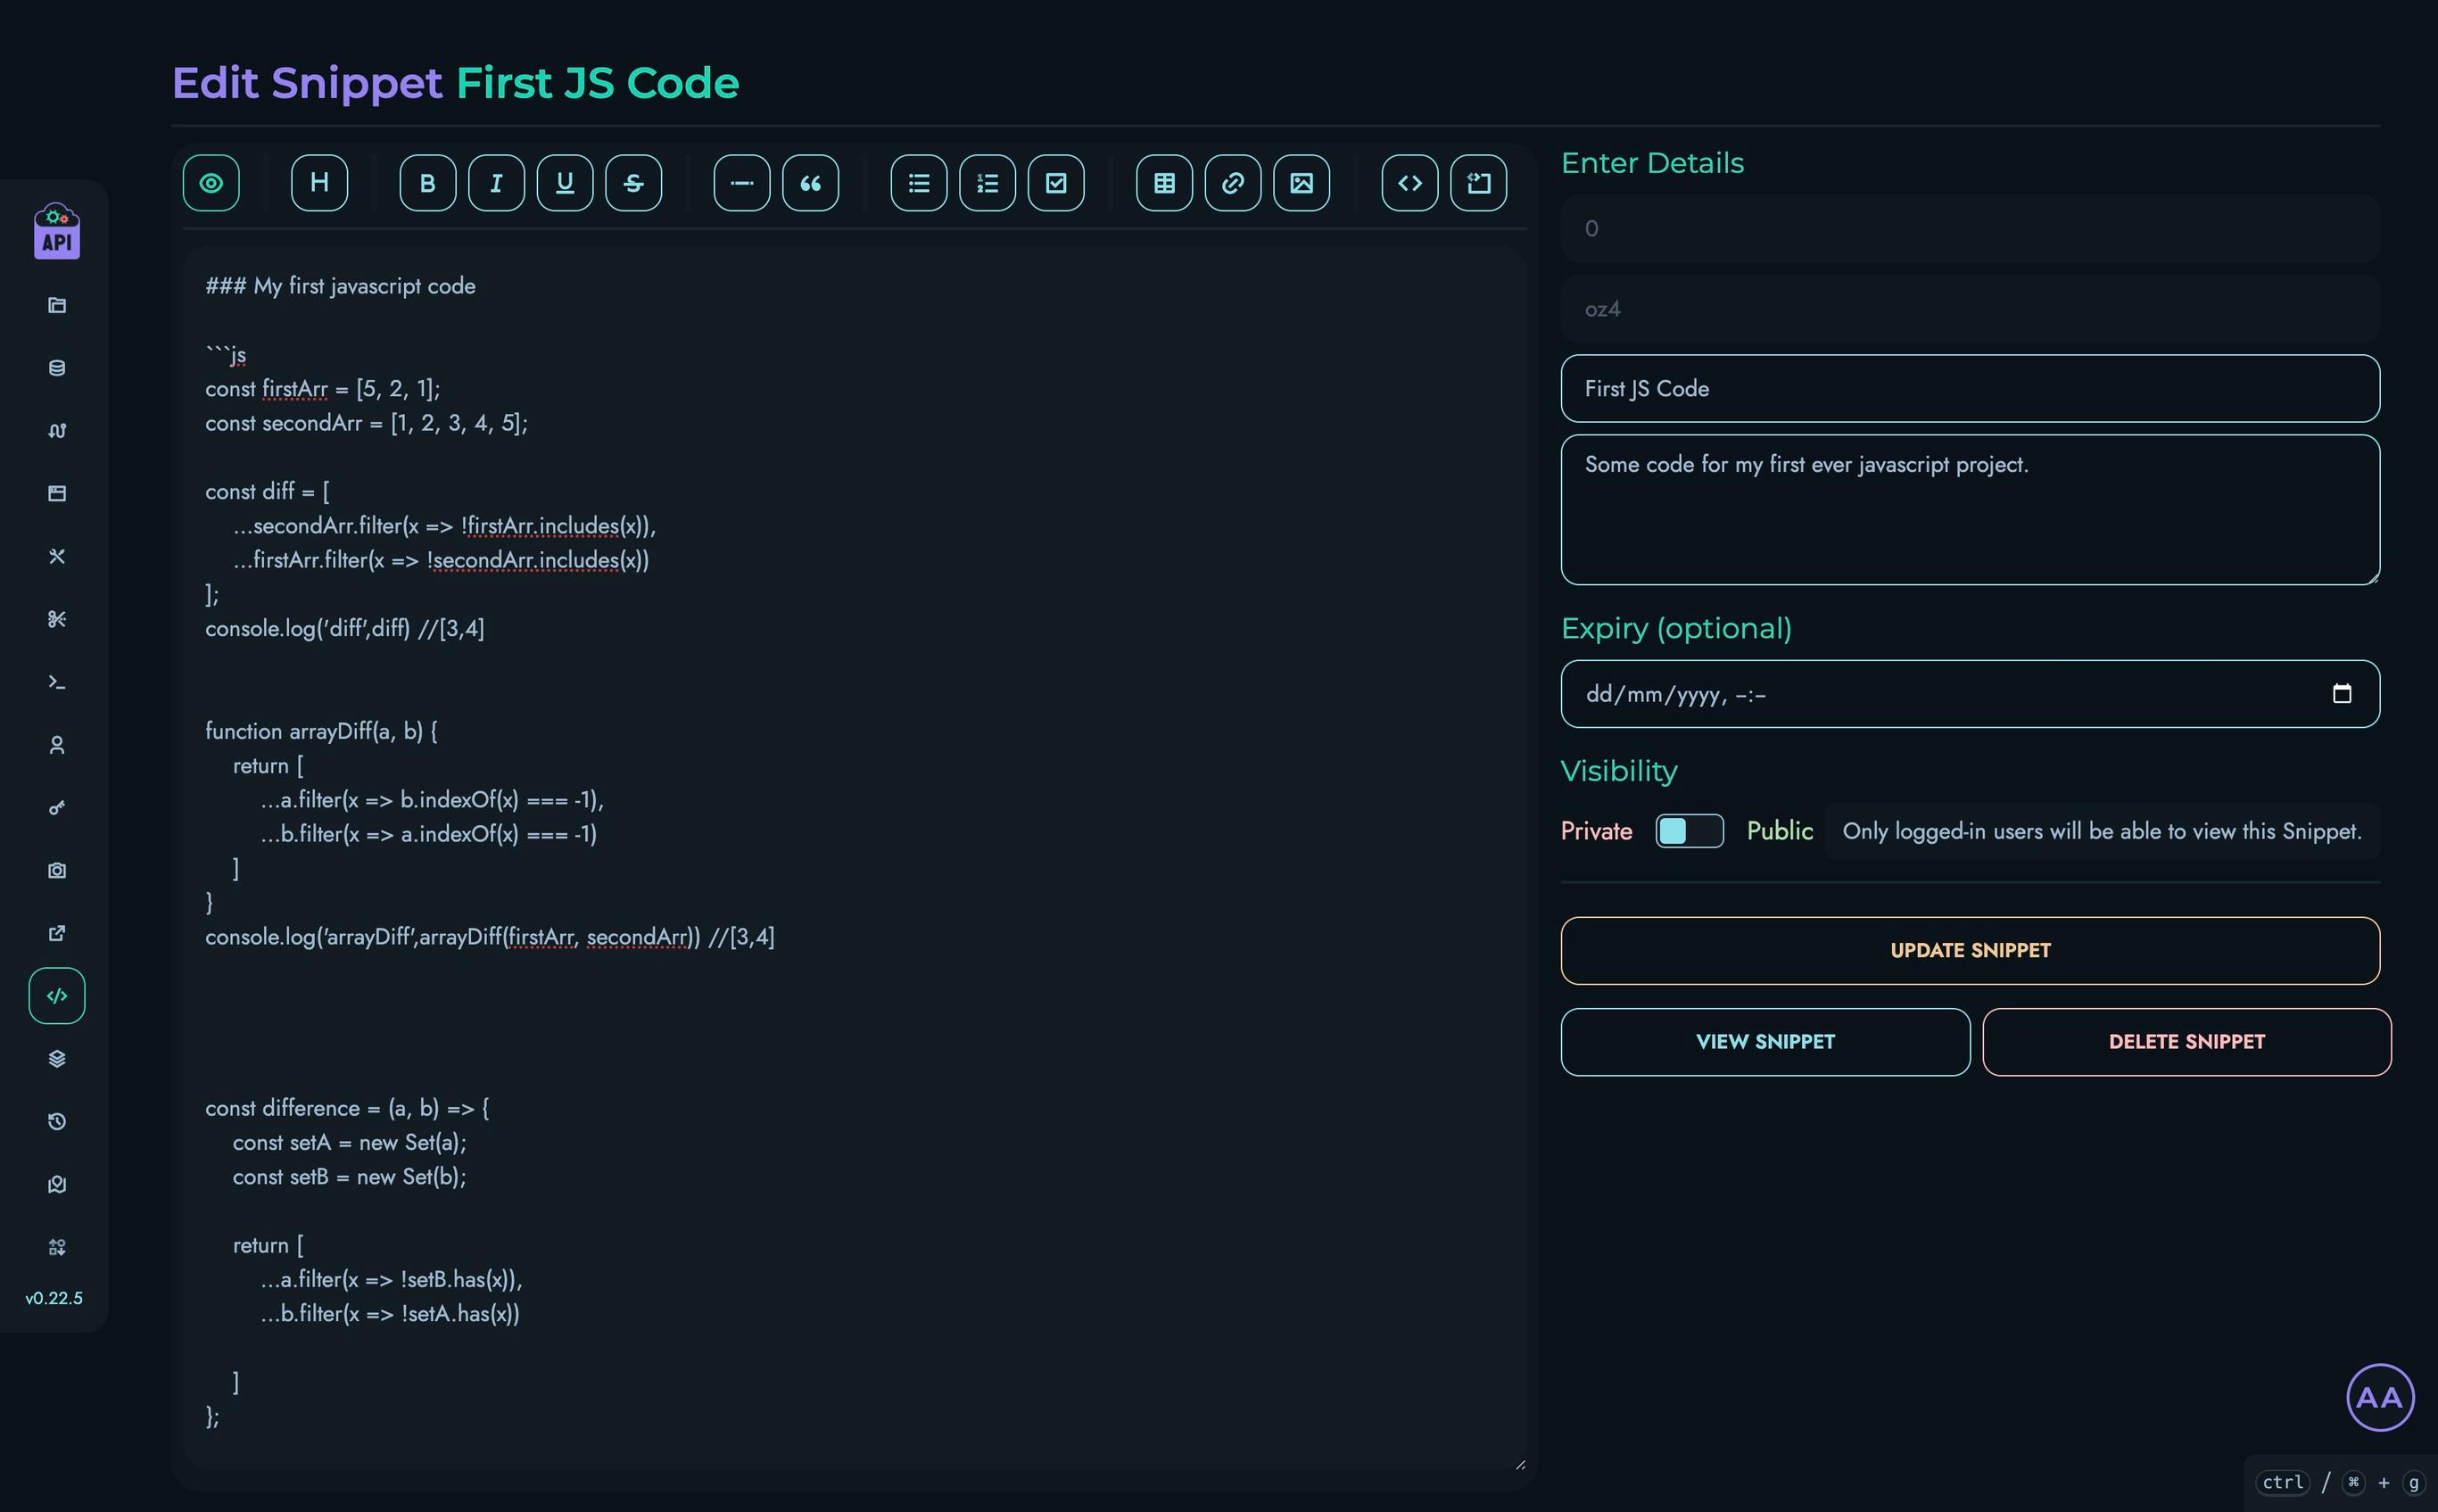
Deleting Snippets
To remove a snippet:
- Click the delete button (trash icon) next to the snippet
- Confirm the deletion in the modal that appears
- The snippet will be permanently removed
Sharing Snippets
Snippets can be easily shared:
- For any snippet, click the “Copy link to Snippet” button (clipboard icon)
- The URL will be copied to your clipboard
- Share this URL with others
The URL will be in the format:
https://your-api-domain.com/go/[snippet-locator]
Visibility Controls
Snippets have two visibility settings:
- Private: Only visible to authenticated users of your Kinesis API instance
- Public: Accessible to anyone with the link, even without authentication
Choose the appropriate visibility based on the sensitivity of the content and your sharing needs.
Snippet Expiration
When creating or editing a snippet, you can set an optional expiry date:
- Select a date and time in the Expiry field
- After this time, the snippet will no longer be accessible
- Expired snippets are automatically removed from the system
This feature is useful for temporary content that shouldn’t persist indefinitely.
Best Practices
For effective snippet management:
- Descriptive Names: Use clear, searchable names that indicate the snippet’s purpose
- Complete Descriptions: Add context in the description to help others understand when and how to use the snippet
- Proper Formatting: Use Markdown features to make content more readable and organized
- Set Appropriate Visibility: Make snippets public only when the content is suitable for wider access
- Use Expiration Dates: For temporary information, set an expiry date to keep your snippet library clean
- Organize by Purpose: Create separate snippets for different purposes rather than combining unrelated content
Common Use Cases
Snippets are particularly useful for:
Code Reuse
Store frequently used code patterns for easy reference:
- API call templates
- Common functions or utilities
- Configuration examples
Documentation
Create and share documentation fragments:
- Setup instructions
- Troubleshooting guides
- API usage examples
Knowledge Sharing
Share knowledge across your team:
- Best practices
- Architecture decisions
- Design patterns
Quick Reference
Build a personal reference library:
- Command line examples
- Frequent queries
- Common workflows
Search Engine
The search engine in Kinesis API provides powerful and flexible data filtering capabilities through an intuitive query language. It allows you to search through records in any table with sophisticated matching operations and complex filter conditions.
⚠️ Database Backend Limitation: The search engine currently only works with Kinesis DB. If you are using a different database backend (
DB_BACKEND=sqlite,DB_BACKEND=mysql, orDB_BACKEND=postgresql), the search functionality will not be available. To use the search engine, you must be running Kinesis API with Kinesis DB as the active database backend.
Query Language
The search engine implements a custom query language that supports:
- String operations: contains, equals, startsWith, endsWith, fuzzy matching
- Numeric operations: greater than, less than, equals, between ranges
- Boolean operations: equals, not equals
- Logical operators: AND, OR, NOT
- Grouping with parentheses for complex expressions
Using the Search API
REST API Endpoints
There are two main endpoints for using the search feature:
1. Search with structured filter (POST)
POST /search/
Content-Type: application/json
Authorization: Bearer <token>

{
  "uid": 0,
  "search": {
    "table_name": "users",
    "filter": {
      "String": {
        "field": "name",
        "matcher": {"Contains": ["John", false]}
      }
    },
    "top_n": 10
  }
}
2. Search with query string (GET)
GET /search/?uid=0&table_name=users&query=name contains "John"&top_n=10
Authorization: Bearer <token>
The query string approach provides a more human-readable and concise way to create search filters.
Query Syntax Examples
String Operations
name contains "John"             // Case-insensitive substring match
name equals "John Doe", true     // Case-sensitive exact match
name startswith "J"              // Prefix matching
name endswith "son"              // Suffix matching
name fuzzy "Jon", 2, true        // Fuzzy matching with edit distance 2 and substring enabled
Numeric Operations
age > 30                         // Greater than
age < 20                         // Less than
age = 25                         // Equals
age between 20 and 30            // Range (inclusive)
Boolean Operations
active equals true               // Boolean equality
active equals false              // Boolean equality
Logical Operators
name contains "John" AND age > 30                  // Logical AND
name contains "John" OR name contains "Jane"       // Logical OR
NOT name contains "Admin"                          // Logical NOT
Complex Expressions
name contains "John" AND (age > 30 OR role equals "admin")    // Nested conditions
(name contains "John" OR name contains "Jane") AND age > 30    // Multiple groupings
How It Works
The search engine processes queries through three main steps:
- Parsing: Converts string queries into a structured filter representation
- Evaluation: Applies the filter to records, calculating match scores
- Ranking: Orders results by relevance score and returns the top N results
The engine uses indexes where available for better performance, falling back to full table scans when necessary.
Performance Considerations
- Use indexed fields in your queries when possible
- Prefer exact matches over fuzzy searches for better performance
- Limit results with the
top_nparameter for large tables - Complex queries with multiple conditions may take longer to process
Localization
The Kinesis API includes a powerful localization system that makes it easy to translate your application into multiple languages. It supports features like variable interpolation, pluralization, and fallback locales.
Features
- Multiple Locale Support: Manage translations for any number of languages
- Fallback Chain: Automatically fallback to parent locales (e.g., “en” for “en-US”)
- Variable Interpolation: Insert dynamic values into translations
- Pluralization Rules: Language-specific plural forms for accurate translations
- Hot Reloading: Automatically detect and reload modified translation files
- REST API: Manage translations through a RESTful API
Translation File Format
Translations are stored in JSON files, one per locale:
{
  "common": {
    "welcome": "Welcome to Kinesis API",
    "error": "An error occurred",
    "buttons": {
      "save": "Save",
      "cancel": "Cancel"
    }
  },
  "auth": {
    "login": "Log in",
    "logout": "Log out",
    "register": "Sign up"
  },
  "notifications": {
    "message_count": {
      "one": "You have {count} new message",
      "other": "You have {count} new messages"
    }
  }
}
These are accessed using dot notation (e.g., common.welcome, auth.login, notifications.message_count).
Managing Translations via Web UI
Kinesis API provides a user-friendly web interface for managing translations without needing to work directly with JSON files or API calls.
Accessing the Translation Manager
- Log in to your Kinesis API instance
- Navigate to
/web/localesin your browser - You’ll see a list of all available locales and their translations

Working with Locales
The top of the page displays available locales as buttons. Click any locale to view and manage its translations. The active locale is highlighted.
Creating Translations
- Click the “Create a new translation” button at the top of the page
- Enter the locale code (e.g., “en”, “fr”), or use the pre-filled active locale
- Enter the key (using dot notation, e.g., “common.buttons.save”)
- Enter the translation value
- Click “Create” to add the translation
If you enter a locale that doesn’t exist yet, it will be created automatically.
Filtering Translations
Use the filter box to quickly find translations by key or value. This is especially useful for locales with many translations.
Updating Translations
- Find the translation you want to modify
- Click the edit (pencil) icon
- Enter the new translation value
- Click “Submit” to save your changes
Deleting Translations
- Find the translation you want to remove
- Click the delete (trash) icon
- Confirm the deletion when prompted
Permissions
Only users with ADMIN or ROOT roles can create, update, or delete translations. All users can view translations.
API Endpoints
Fetch All Locales
Get a list of all available locales and their translation counts.
GET /locale/fetch?uid=0
Authorization: Bearer <token>
Response:
{
  "status": 200,
  "message": "Locales successfully fetched!",
  "locales": [
    { "code": "en", "translation_count": 42 },
    { "code": "fr", "translation_count": 36 }
  ],
  "amount": 2
}
Fetch One Locale
Get all translations for a specific locale.
GET /locale/fetch/one?uid=0&locale=en
Authorization: Bearer <token>
Response:
{
  "status": 200,
  "message": "Locale successfully fetched!",
  "translations": {
    "common.welcome": "Welcome to Kinesis API",
    "common.error": "An error occurred",
    "common.buttons.save": "Save"
    // ... other translations
  }
}
Translate Text
Translate a specific key with optional variables and count for pluralization.
POST /locale/translate
Content-Type: application/json

{
  "locale": "en",
  "key": "notifications.message_count",
  "variables": {
    "user": "John"
  },
  "count": 5
}
Response:
{
  "status": 200,
  "message": "Translation successful!",
  "translation": "You have 5 new messages",
  "key": "notifications.message_count",
  "locale": "en"
}
Create Translation
Add a new translation key-value pair to a locale.
POST /locale/create
Content-Type: application/json
Authorization: Bearer <token>

{
  "uid": 0,
  "locale": "en",
  "key": "common.buttons.submit",
  "value": "Submit"
}
Response:
{
  "status": 200,
  "message": "Translation successfully added!",
  "locale": "en",
  "key": "common.buttons.submit"
}
Update Translation
Update an existing translation.
PATCH /locale/update
Content-Type: application/json
Authorization: Bearer <token>

{
  "uid": 0,
  "locale": "en",
  "key": "common.buttons.save",
  "value": "Save Changes"
}
Response:
{
  "status": 200,
  "message": "Translation successfully added!",
  "locale": "en",
  "key": "common.buttons.save"
}
Delete Translation
Delete a translation key from a locale.
DELETE /locale/delete?uid=0&locale=en&key=common.buttons.cancel
Authorization: Bearer <token>
Response:
{
  "status": 200,
  "message": "Translation successfully deleted!",
  "locale": "en",
  "key": "common.buttons.cancel"
}
Pluralization
The localization system supports proper pluralization rules for different languages. For example:
{
  "items_count": {
    "one": "You have {count} item",
    "other": "You have {count} items"
  }
}
For languages with more complex plural forms (like Slavic languages), additional forms are supported:
{
  "items_count": {
    "one": "У вас {count} элемент",
    "few": "У вас {count} элемента",
    "many": "У вас {count} элементов",
    "other": "У вас {count} элементов"
  }
}
The system automatically selects the correct plural form based on the count parameter and the language’s pluralization rules.
Variable Interpolation
You can insert dynamic values into translations using curly braces:
{
  "welcome_user": "Welcome, {{name}}!"
}
Then provide the variables when translating:
{
  "locale": "en",
  "key": "welcome_user",
  "variables": {
    "name": "John"
  }
}
This will produce: “Welcome, John!”
Setup and Configuration
Translations are stored in JSON files in the /translations directory, with the filename matching the locale code (e.g., en.json, fr.json).
The localization system is initialized with all translations when Kinesis API is started.
Permissions
The following permissions are required for various localization operations:
LOCALE_FETCH: Required to fetch locales and translationsLOCALE_CREATE_UPDATE: Required to create or update translationsLOCALE_DELETE: Required to delete translations
Best Practices
- Structured Keys: Organize keys in a logical hierarchy (e.g.,
feature.component.text) - Complete Translations: Ensure all keys have translations in all supported locales
- Reuse Common Phrases: Use the same key for identical text across different features
- Avoid Variable Concatenation: Use variable interpolation instead of string concatenation
- Test All Locales: Regularly test your application with all supported locales
Backups
The Backup system in Kinesis API provides automated backup and restore functionality for your database and configuration files. This built-in feature allows you to create, manage, and restore backups directly through the web interface or API, ensuring your data is protected and recoverable.
Database Backend Compatibility
⚠️ Important: Kinesis API’s built-in backup system is designed for Kinesis DB and SQLite backends only.
Supported Backends:
- Kinesis DB (
DB_BACKEND=kinesis_dbor unset): Full support for automated backups and restores - SQLite (
DB_BACKEND=sqlite): Full support for automated backups and restores
External Database Backends:
- MySQL (
DB_BACKEND=mysql): You must use MySQL’s native backup tools (e.g.,mysqldump, MySQL Workbench) - PostgreSQL (
DB_BACKEND=postgresql): You must use PostgreSQL’s native backup tools (e.g.,pg_dump,pg_restore)
If you’re using MySQL or PostgreSQL, the Kinesis API backup system will only backup your configuration files (.env, public/, translations/), but not the database data. See the Database Backends documentation for more information about choosing and configuring database backends.
Backing Up MySQL Databases
For MySQL backends, use mysqldump to create database backups:
# Basic backup
mysqldump -u username -p database_name > backup.sql

# Backup with compression
mysqldump -u username -p database_name | gzip > backup.sql.gz

# Restore from backup
mysql -u username -p database_name < backup.sql
For more information, see MySQL Backup Documentation.
Backing Up PostgreSQL Databases
For PostgreSQL backends, use pg_dump to create database backups:
# Basic backup
pg_dump -U username database_name > backup.sql

# Backup with compression
pg_dump -U username database_name | gzip > backup.sql.gz

# Backup in custom format (recommended)
pg_dump -U username -Fc database_name > backup.dump

# Restore from backup
psql -U username database_name < backup.sql
# or for custom format:
pg_restore -U username -d database_name backup.dump
For more information, see PostgreSQL Backup Documentation.
Overview
The backup system serves as a comprehensive data protection solution for:
- Creating point-in-time snapshots of your entire database
- Scheduling automatic backups with expiration dates
- Restoring your system to a previous state
- Managing backup storage and retention policies
All backups are stored as compressed archives containing your database files, ensuring efficient storage while maintaining data integrity.
Key Features
Automated Backup Creation
- One-Click Backups: Create full system backups instantly through the web interface
- Compressed Storage: Backups are automatically compressed to save storage space
- Complete Coverage: Includes all database files (for Kinesis DB/SQLite), configuration, media, and translations
- Smart Backup: Only backs up files that actually exist (e.g., SQLite files won’t be backed up if using Kinesis DB)
- Metadata Tracking: Each backup includes creation time, description, and expiry information
Backup Management
- Descriptive Labels: Add custom descriptions to identify backup purposes
- Expiration Dates: Set automatic expiration to manage storage space
- Filtering and Search: Find specific backups quickly through search functionality
- Bulk Operations: Manage multiple backups efficiently
Restore Functionality
- Full System Restore: Restore your entire database from any backup
- Engine Reset: Automatically reloads the database engine after restoration
- Data Integrity: Maintains all relationships and constraints during restoration
Storage and Retention
- Automatic Cleanup: Expired backups are automatically removed
- Storage Optimization: TAR.GZ compression reduces backup file sizes
- Secure Storage: Backups are stored in a dedicated, protected directory
User Permissions
Backup functionality requires ROOT privileges:
ROOT Users
- Create new backups
- View all existing backups
- Restore from any backup
- Delete backup files
- Manage backup descriptions and expiry dates
Other User Roles
- No access to backup functionality (security restriction)
Using the Backup Management Interface

The backup management interface provides comprehensive control over your backup operations:
Accessing Backup Management
- Log in with a ROOT account
- Navigate to
/web/backupsin your browser or select “Backups” from the sidebar menu
Creating a New Backup
To create a backup:
- Click the “Create a new backup” button
- Add an optional description to identify the backup purpose
- Set an optional expiry date for automatic cleanup
- Click “Create” to start the backup process
The system will:
- Create a compressed archive of all database files
- Store the backup with a timestamp-based filename
- Add the backup record to the management interface
Viewing Backup Information
Each backup in the list displays:
- Backup Name: Auto-generated filename with timestamp and ID
- Creation Date: When the backup was created
- Description: Custom description (if provided)
- Expiry Date: When the backup will automatically expire (if set)
Managing Existing Backups
For each backup, you can:
Update Description
- Click the “Description” link next to any backup
- Edit the description text
- Click “Submit” to save changes
Update Expiry Date
- Click the “Expiry” link next to any backup
- Set a new expiry date/time or clear to remove expiration
- Click “Submit” to save changes
Restore from Backup
- Click the restore button (refresh icon) next to any backup
- Confirm the restoration in the warning dialog
- The system will restore all data and restart the database engine
⚠️ Warning: Restoring a backup will replace all current data with the backup data. This action cannot be undone.
Delete Backup
- Click the delete button (trash icon) next to any backup
- Confirm the deletion in the warning dialog
- The backup file and record will be permanently removed
Filtering and Searching
To find specific backups:
- Use the search bar to filter by backup name or description
- The list will automatically update to show matching backups
- Pagination controls help navigate through large backup collections
Backup File Structure
Note: The contents of backups depend on your database backend configuration.
For Kinesis DB and SQLite Backends
Backups are stored as TAR.GZ archives containing:
- Configuration Files (
.env): System configuration and environment variables - Database Files (only files that exist are backed up):
- Kinesis DB:
data/{db_name}.pages,data/{db_name}.blobs,data/{db_name}.blobs.idx - SQLite: Database file at
DATABASE_URLpath (default:data/db.sqlite), plus SQLite WAL files (-shm,-wal) if they exist
- Kinesis DB:
- License and Instance Files:
data/license.json,data/instance.json(if they exist) - Public Directory (
public/): Complete directory with all user-uploaded media files and assets - Translations Directory (
translations/): Complete directory with all localization files and language packs
For MySQL and PostgreSQL Backends
The built-in backup system will only include:
- Configuration Files (
.env): System configuration and environment variables - License and Instance Files:
data/license.json,data/instance.json(if they exist) - Public Directory (
public/): Complete directory with all user-uploaded media files and assets - Translations Directory (
translations/): Complete directory with all localization files and language packs
Database data is NOT included. You must use MySQL or PostgreSQL native backup tools separately to backup the actual database content.
The backup filename format is:
backup-[YYYYMMDD_HHMM]_[backup_id].tar.gz
For example: backup-20250804_1430_15.tar.gz
Automatic Cleanup
The backup system includes automatic maintenance:
Expiry Processing
- Expired backups are automatically identified and removed
- This happens whenever backup operations are performed
- Both the database record and the physical file are cleaned up
Storage Management
- Only necessary database files are included in backups
- TAR.GZ compression reduces storage requirements
- Automatic cleanup prevents unlimited storage growth
API Integration
The backup system can also be accessed programmatically through the REST API:
Create Backup
POST /backup/create
Authorization: Bearer [token]
Content-Type: application/json

{
  "uid": 1,
  "backup": {
    "description": "Pre-deployment backup",
    "expiry": "2025-12-31T23:59:59+00:00"
  }
}
Restore Backup
GET /backup/restore?uid=1&id=15
Authorization: Bearer [token]
List Backups
GET /backup/fetch?uid=1&limit=50&offset=0
Authorization: Bearer [token]
Best Practices
For effective backup management:
Regular Backup Schedule
- Create backups before major system changes
- Establish a regular backup routine (daily/weekly)
- Use descriptive names to identify backup purposes
Retention Strategy
- Set appropriate expiry dates to manage storage
- Keep recent backups for quick recovery
- Archive important milestones for longer-term retention
Testing and Verification
- Periodically test restore procedures
- Verify backup integrity by checking file sizes and dates
- Document your backup and restore procedures
Security Considerations
- Limit backup access to ROOT users only
- Monitor backup creation and restoration activities
- Consider backing up the backup directory to external storage
Restoration Process
When restoring from a backup:
- System Shutdown: Current database operations are suspended
- File Replacement: Database files are replaced with backup versions
- Engine Restart: The database engine is reloaded with restored data
- Validation: System verifies the restoration was successful
This process ensures complete data consistency and system integrity after restoration.
Backup Scheduling

Kinesis API’s scheduling feature allows you to automate the backup process with precise timing control using cron-style expressions.
Understanding Backup Schedules
Backup schedules provide:
- Automated Creation: Backups run automatically on your defined schedule
- Flexible Timing: From hourly to monthly schedules using cron expressions
- Expiration Control: Set how long scheduled backups should be retained
- Resource Optimization: Only create backups when needed
Accessing Backup Scheduling
- Log in with a ROOT account
- Navigate to
/web/backups/schedulesor select “Backup Schedules” from the Backups submenu
Creating a Backup Schedule
To create a schedule:
- Click the “Create a new backup schedule” button
- Fill in the schedule details:
- Name: A descriptive name (e.g., “Daily Midnight Backup”)
- Schedule: Configure the cron expression components
- Expiry Hours: How long (in hours) to keep backups created by this schedule
- Enabled: Toggle to activate/deactivate the schedule
- Click “Create” to save and activate the schedule
Understanding Cron Expressions
Backup schedules use standard cron expressions with five fields:
* * * * *  command to be executed
- - - - -
| | | | |
| | | | +----- Day of the week (0 - 6) (Sunday is 0)
| | | +------- Month (1 - 12)
| | +--------- Day of the month (1 - 31)
| +----------- Hour (0 - 23)
+------------- Min (0 - 59)
Examples
0 * * * *: At minute 0 past every hour30 1 * * *: At 01:30 AM every day0 0 * * 0: At midnight on Sundays15 14 1 * *: At 14:15 on the first day of every month
Managing Backup Schedules
For each schedule, you can:
Update Schedule
- Click the “Edit” button next to any schedule
- Modify the schedule details
- Click “Save” to apply changes
Delete Schedule
- Click the delete button (trash icon) next to any schedule
- Confirm the deletion in the warning dialog
- The schedule will be permanently removed
Monitoring Scheduled Backups
Scheduled backups are listed with:
- Schedule Name: Descriptive name of the schedule
- Next Run: When the backup will next run
- Expiry: How long backups are retained
- Status: Enabled or disabled state
Troubleshooting
Common Issues
Backup Creation Failed
- Check available disk space
- Verify database file permissions
- Ensure the backups directory exists and is writable
Restoration Failed
- Verify the backup file exists and isn’t corrupted
- Check that the backup contains all required database files
- Ensure sufficient disk space for restoration
Missing Backups
- Check if backups have expired and been automatically cleaned up
- Verify backup directory location and permissions
- Look for backup files in the correct directory
Scheduled Backup Not Running
- Check if the schedule is enabled
- Verify the cron expression is correct
- Ensure the system time is correct
Backup Files Not Expiring
- Check the expiry hours setting for the schedule
- Verify that the cleanup process is running
- Ensure there are no permission issues with the backup files
Content History
The Content History system in Kinesis API provides version tracking and restoration capabilities for key content types. This feature automatically preserves previous versions of content, allowing administrators to recover from accidental changes, track content evolution, or restore content to a known-good state when needed.
Overview
Content History serves as a version control system for:
- Data objects (structured content)
- Routes (API definitions)
- Blog posts (published articles)
The system automatically captures snapshots of content whenever changes are made, storing these versions in a chronological history that can be browsed and restored when needed.
Key Features
Automatic Version Tracking
- Seamless Capture: Every update to supported content types automatically creates a history entry
- Comprehensive Metadata: Each version includes creation timestamp and complete content state
- Zero Configuration: Works out-of-the-box with no setup required
- Storage Optimization: Only the last 15 versions are retained to conserve storage space
Version Management
- Historical Timeline: Browse all previous versions of content by date
- One-Click Restoration: Restore any previous version with a simple confirmation
- Safe Restoration: Current version remains available in history if restoration is needed
- Metadata Retention: All associated data is preserved during restoration
Security and Access Control
- Root-Only Access: Content history management is restricted to ROOT users
- Audit Trail: Changes are tracked with timestamps for accountability
- Non-Destructive: Restoration adds to history rather than erasing it
Supported Content Types
The Content History system currently supports three primary content types:
Data Objects
Complete version history is maintained for data objects, including:
- All structure values
- Custom structure values
- Metadata and configuration
Routes
API route definitions are tracked, preserving:
- Route configurations
- Authentication settings
- Parameters and body definitions
- Full visual flow definitions
Blog Posts
Blog post versions include:
- Content body
- Title, subtitle, and slug
- Tags and metadata
- Media references
- Visibility and publication status
User Permissions
Content History functionality is currently limited to ROOT users only for security reasons:
ROOT Users
- View content history for all content types
- Restore any content to previous versions
- Access the history management interface
Other User Roles
- No access to content history functionality
- Cannot view or restore previous versions
Using Content History
The Content History interface is integrated into the edit screens for supported content types:

Accessing Version History
For ROOT users, a “Restore Previous Version” button appears in the edit interface for:
- Data Objects: On the data edit page
- Routes: On the route edit page
- Blog Posts: On the blog post edit page
Clicking this button opens a modal with a chronological list of previous versions.
Viewing Available Versions
The version history modal displays:
- Version ID
- Creation date and time
- Sorted with newest versions at the top
Restoring a Previous Version
To restore content to a previous version:
- Click the “Restore Previous Version” button
- Select the desired version from the list
- Confirm the restoration in the confirmation dialog
- The content will be restored to the selected version
- A success message confirms the restoration
The restoration process:
- Replaces the current content with the selected version
- Preserves the history, including the version you just replaced
- Maintains all relationships and references
- Automatically applies any structure changes
Technical Implementation
Content History leverages several key components:
Storage Mechanism
- History entries are stored in a dedicated
content_historytable - Each entry contains a snapshot of the entire content state
- Large content is automatically handled via the blob storage system
- Content is serialized using a standardized format for consistency
Tracking Algorithm
When content is updated:
- The system captures a complete snapshot before changes are applied
- The snapshot is stored with metadata including timestamp and content type
- Older entries beyond the retention limit are automatically pruned
- References to blob storage are properly maintained
Restoration Process
During restoration:
- The selected version is deserialized from storage
- Current content is completely replaced with the historical version
- Any necessary data transformations are applied
- The database transaction ensures atomicity
- A new history entry is created for the current state (pre-restoration)
Best Practices
For effective use of Content History:
Regular Reviews
- Periodically review content history for important assets
- Consider restoration for recovering accidentally deleted content
- Use history to understand content evolution over time
Before Major Changes
- Note the timestamp before making significant content changes
- This helps identify the correct version for restoration if needed
- Consider creating descriptive commit messages in future versions
When to Restore
Restoration is particularly valuable when:
- Content was accidentally deleted or corrupted
- Previous content needs to be referenced or reused
- Comparing current content with historical versions
- Undoing changes that didn’t meet expectations
Storage Considerations
- Be aware that only the last 15 versions are retained
- Plan important content updates accordingly
- Export critical content before major changes
Future Enhancements
The Content History system will be expanded in future releases:
- Access for additional user roles with appropriate permissions
- Descriptive labels for important versions
- Side-by-side comparison of versions
- More granular control over retention policies
- Additional content types support
Troubleshooting
Common Issues
History Not Appearing
- Verify you have ROOT privileges
- Check that the content type is supported
- Ensure content has been modified at least once
Restoration Failed
- Check that the content still exists
- Verify database connectivity
- Ensure sufficient storage space is available
Missing Versions
- Older versions beyond the 15-version limit are automatically pruned
- Check if the content has undergone many revisions
Component User Metrics
The Component User Metrics system in Kinesis API provides detailed analytics about user interactions with your content. This powerful feature tracks and visualizes visitor behavior for blog posts, snippets, and redirects, giving you insights into how your content is being accessed and by whom.
Overview
Component User Metrics automatically capture detailed information about each visitor who accesses your content, including:
- Device Information: Browser, operating system, and device type
- Geographic Data: Location details including continent, country, region, and city
- Technical Details: Rendering engine, architecture, and version information
- Access Patterns: When and how often content is accessed
This data is collected transparently and stored securely, allowing you to understand your audience better and make data-driven decisions about your content strategy.
Understanding Metrics Data
Each metric entry captures comprehensive information about a single visit:
User Agent Information
- Product: The browser or client application (e.g., Firefox, Chrome, Safari)
- Product Version: Specific version of the browser
- Engine: Rendering engine used (e.g., Gecko, Blink, WebKit)
- Engine Version: Version of the rendering engine
- Architecture: CPU architecture (e.g., x86_64, ARM)
Device Information
- Device Type: Classification of the device (Desktop, Mobile, Tablet)
- Brand: Manufacturer of the device (e.g., Apple, Samsung, Google)
- Model: Specific device model
Operating System
- OS Name: Operating system (e.g., macOS, Windows, Linux, Android, iOS)
- OS Version: Specific version of the operating system
Geographic Information
- Continent: Continental region of the visitor
- Country: Country of origin
- Subdivisions: State, province, or region within the country
- City: City or locality
- IP Address: Visitor’s IP address (stored for reference)
Temporal Information
- Timestamp: Exact date and time of the access in RFC3339 format
Accessing Metrics
Metrics are available for three types of content:
Blog Post Metrics
To view metrics for a blog post:
- Navigate to the blog post edit page (
/web/blog/edit?id=POST_ID) - Click the “View Metrics” button below the form
- The metrics dashboard will display all visitor data for that post
Alternatively, from the blog posts list page:
- Navigate to
/web/blog - Click the dashboard icon (chart icon) next to the blog post you want to analyze
- The metrics dashboard will display all visitor data for that post
Snippet Metrics
To view metrics for a snippet:
- Navigate to the snippet view page (
/web/snippets/view?id=SNIPPET_LOCATOR) - Click the “View metrics” button in the snippet controls
- The metrics dashboard will display all visitor data for that snippet
Alternatively, from the snippet edit page:
- Navigate to
/web/snippets/edit?id=SNIPPET_LOCATOR - Click the “View Metrics” button below the form
- The metrics dashboard will display all visitor data for that snippet
You can also access metrics from the snippets list page:
- Navigate to
/web/snippets - Click the dashboard icon (chart icon) next to the snippet you want to analyze
- The metrics dashboard will display all visitor data for that snippet
Redirect Metrics
To view metrics for a redirect:
- Navigate to the redirects management page (
/web/redirects) - Click the dashboard icon (chart icon) next to the redirect you want to analyze
- The metrics dashboard will display all visitor data for that redirect
Metrics Dashboard

The metrics dashboard provides a comprehensive view of visitor analytics through various visualizations and data tables:
Overview Statistics
At the top of the dashboard, you’ll find summary cards showing:
- Total Visits: Overall number of times the content has been accessed
- Unique Visitors: Estimated count of distinct visitors (based on IP addresses)
- Geographic Reach: Number of different countries visitors came from
- Device Types: Breakdown of desktop, mobile, and tablet access percentages
Time Period Filtering
Use the dropdown at the top of the dashboard to filter metrics by time period:
- Last 5 minutes, 15 minutes, 30 minutes
- Last 1 hour, 6 hours, 12 hours
- Last 24 hours (default), 2 days, 7 days
- Last 30 days, 90 days, 6 months, 12 months
- All time
Visualizations
The dashboard includes several interactive charts:
Geographic Distribution

- Interactive World Map: Visual representation of visitor locations with color-coded countries based on visit counts
- Hover over countries to see detailed visit counts
- Click on countries on mobile devices to view information
- Darker colors indicate higher visit counts
- Top Countries Chart: Pie chart showing the top 12 countries by visit count
- Top Cities Chart: Pie chart displaying the top 12 cities with the most visits
Device Analytics
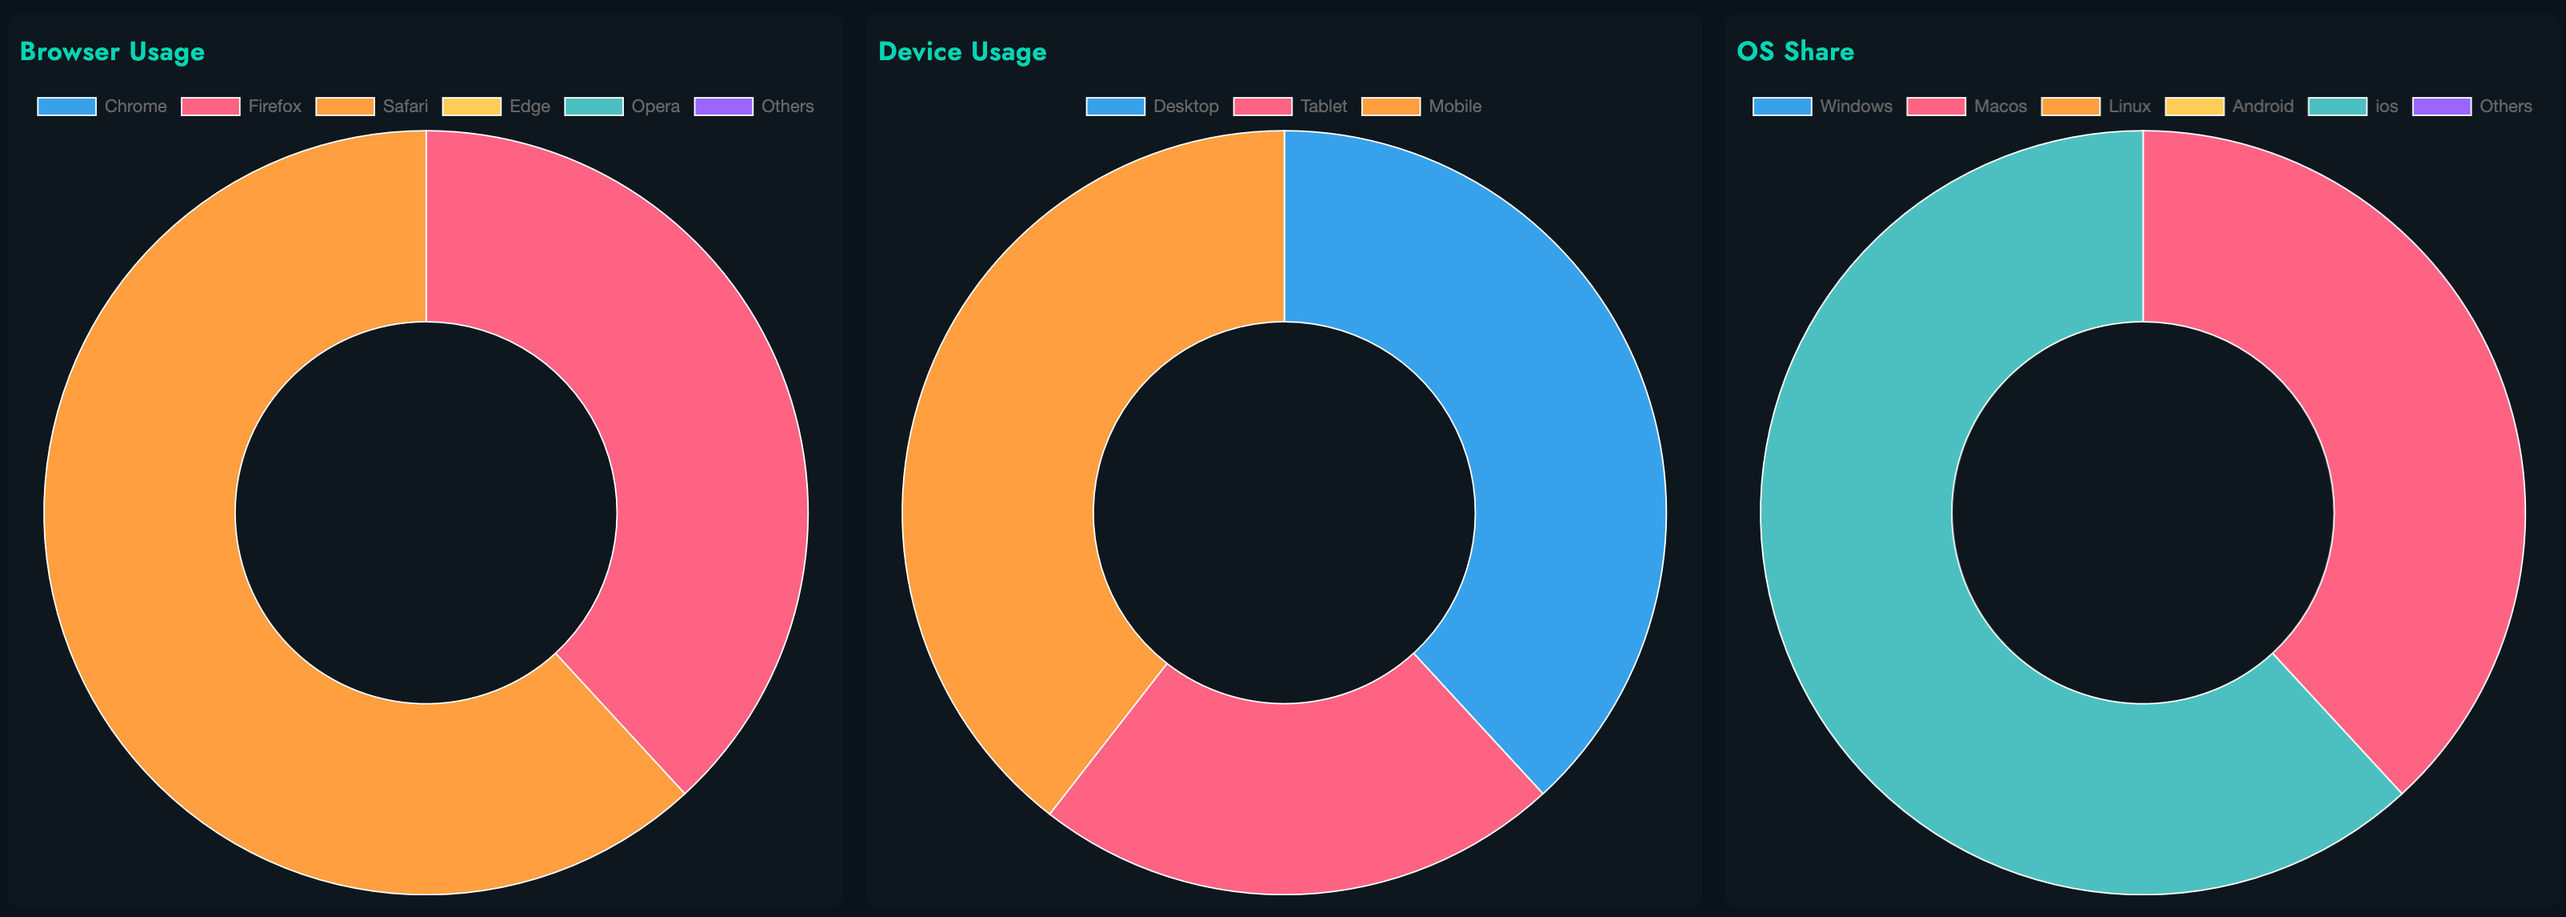
- Browser Distribution: Doughnut chart showing browser usage (Chrome, Firefox, Safari, Edge, Opera, Others)
- Device Type Breakdown: Doughnut chart visualizing Desktop vs. Mobile vs. Tablet usage
- Operating System Share: Doughnut chart displaying distribution of operating systems (Windows, macOS, Linux, Android, iOS, Others)
Temporal Patterns
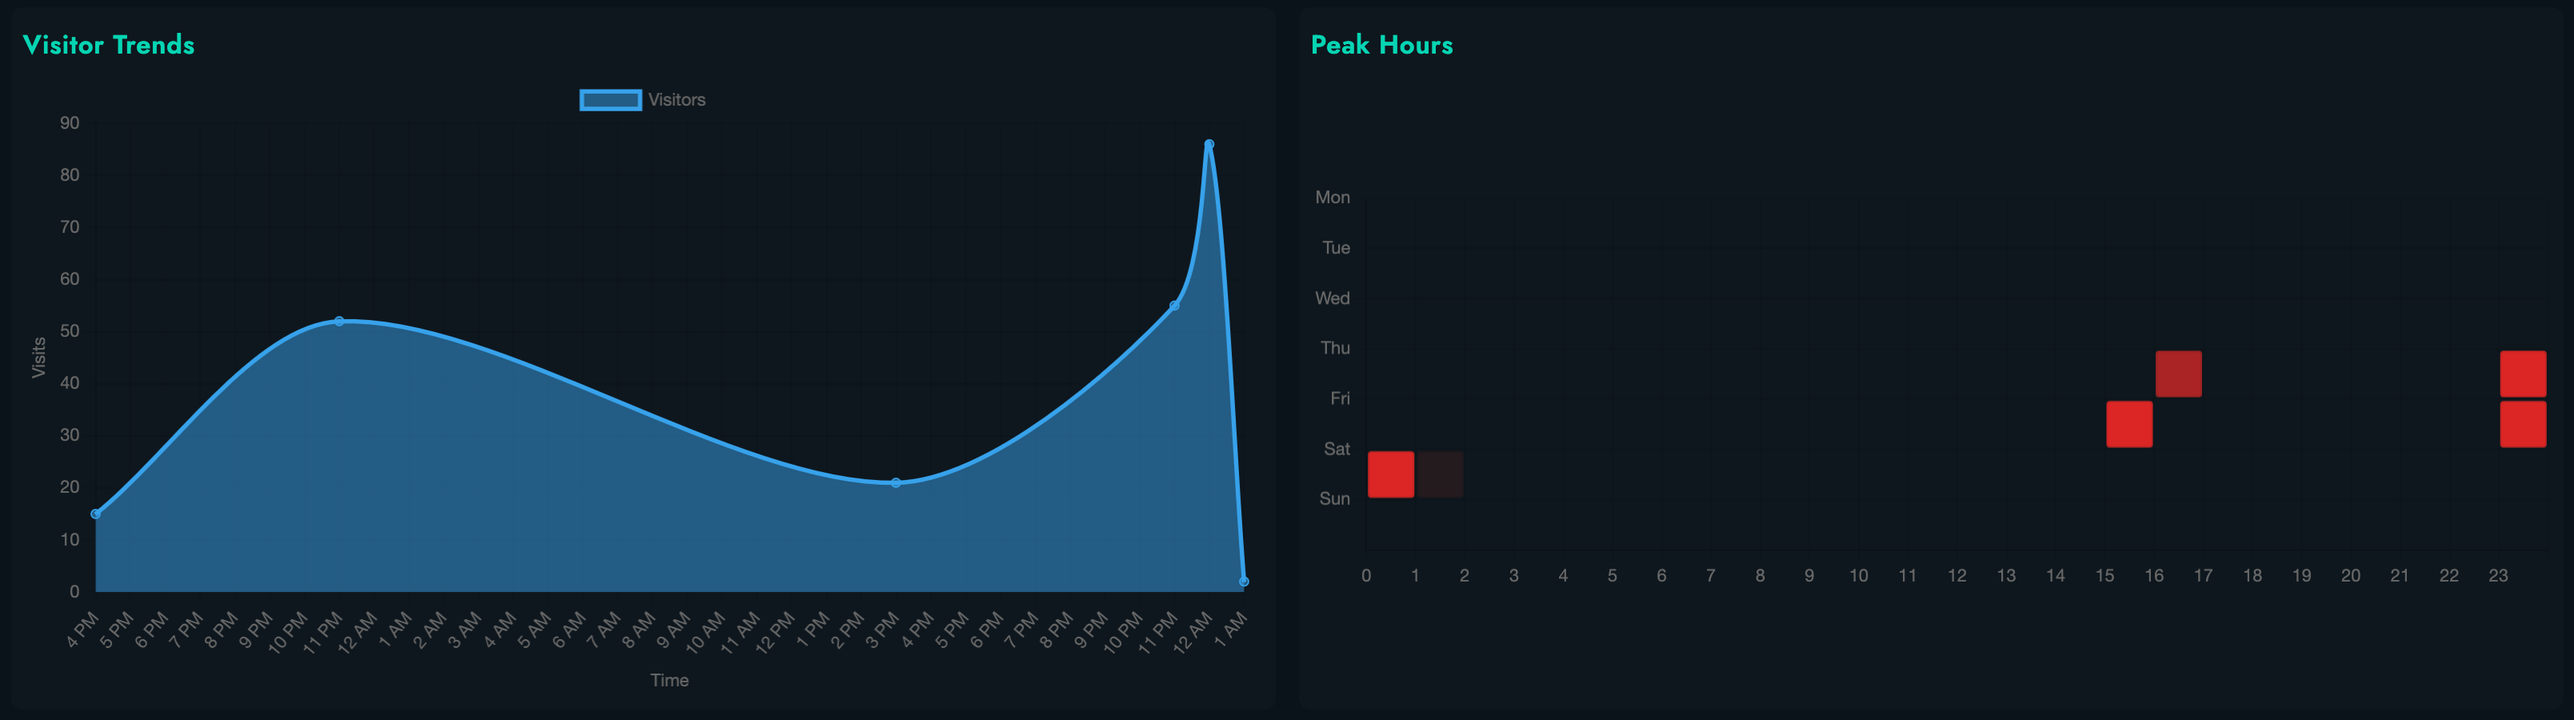
- Visit Timeline: Line graph showing visits over time, with automatic granularity adjustment based on selected time period
- Minutes for periods less than 6 hours
- Hours for 6 hours to 2 days
- Days for 2 days to 3 months
- Weeks for 3 to 6 months
- Months for periods longer than 6 months
- Peak Hours Heatmap: Interactive matrix visualization showing the most active access times by day of week and hour of day
- Darker cells indicate higher activity
- Hover to see exact visit counts for each time slot
Detailed Data Table
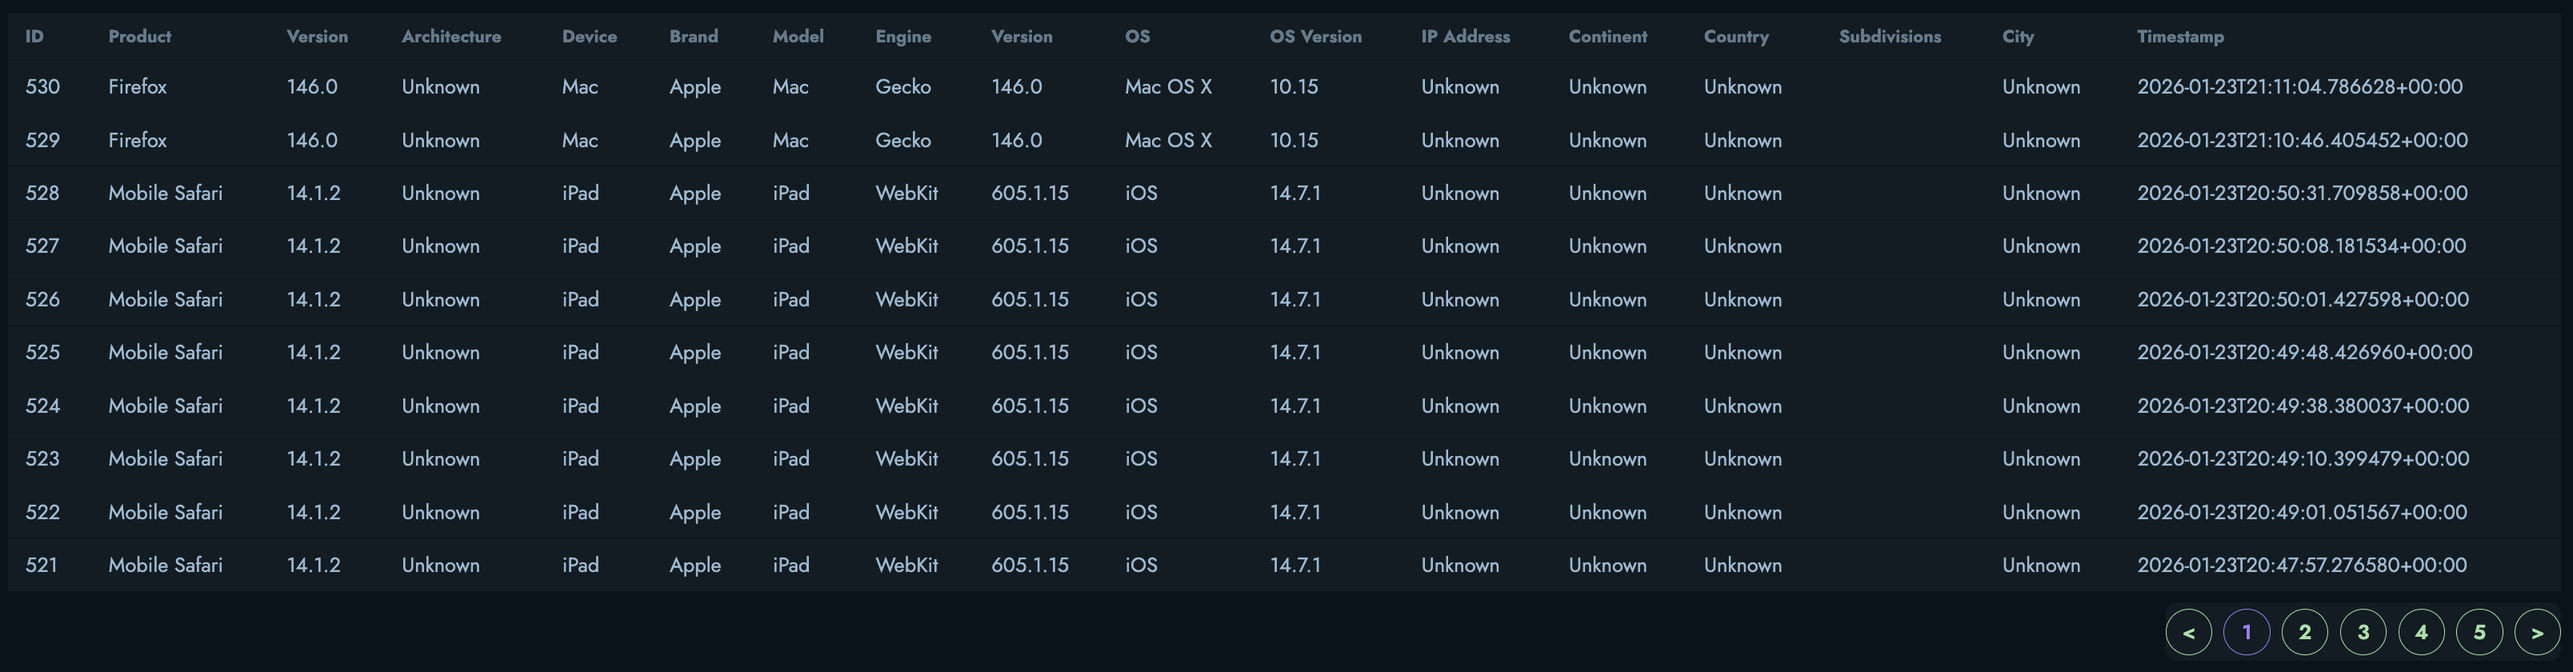
Below the visualizations, a detailed table lists individual metric entries with:
- Unique metric ID
- Browser product name and version
- CPU architecture
- Device type, brand, and model
- Rendering engine and version
- Operating system and version
- IP address
- Geographic location (continent, country, subdivisions, city)
- Timestamp of access
The table supports:
- Pagination: Navigate through large datasets with 10 entries per page
- Responsive Display: Horizontal scrolling on smaller screens to show all columns
Privacy and Permissions
Access Control
Metrics viewing is restricted based on user roles:
- Content Owners: Can view metrics for their own content
- Administrators: Can view metrics for all content
- Regular Users: Cannot view metrics for others’ content
This ensures that sensitive visitor information is only accessible to authorized users.
Data Privacy
The metrics system is designed with privacy in mind:
- IP addresses are stored but only displayed to administrators
- Geographic data is derived from IP addresses using the GeoIP2 database
- No personally identifiable information beyond IP addresses is collected
- All data collection is passive and transparent to visitors
Filtering and Analyzing Metrics
Time-Based Filtering
To analyze metrics for specific time periods:
- Use the time period selector at the top of the dashboard
- Choose from presets ranging from 5 minutes to all time
- The dashboard will automatically update all visualizations and statistics
The filtering is client-side, providing instant updates without requiring new data fetches.
Use Cases
Content Optimization
Use metrics to understand:
- Best Performing Content: Which posts or snippets get the most engagement
- Audience Geography: Where your audience is located
- Device Preferences: How users access your content
- Peak Times: When your content is most accessed
Technical Decisions
Make informed decisions about:
- Browser Compatibility: Prioritize support for browsers your audience uses
- Responsive Design: Understand the balance between mobile and desktop users
- Performance Optimization: Focus on devices and connections your users have
Marketing and Outreach
Leverage insights for:
- Geographic Targeting: Focus marketing efforts on regions with high engagement
- Content Timing: Publish content when your audience is most active
- Platform Strategy: Prioritize platforms used by your audience
Security and Monitoring
Identify potential issues:
- Unusual Access Patterns: Detect potential automated or malicious access
- Geographic Anomalies: Notice unexpected traffic from certain regions
- Traffic Spikes: Monitor sudden increases in access
Best Practices
For effective use of metrics:
- Regular Review: Check metrics weekly to understand trends
- Comparative Analysis: Compare metrics across different content pieces
- Action on Insights: Use data to inform content and technical decisions
- Privacy Respect: Be mindful of visitor privacy when using metrics data
- Data Retention: Regularly export and archive historical metrics
- Pattern Recognition: Look for patterns over time rather than focusing on individual visits
Limitations and Considerations
Be aware of these limitations:
- Ad Blockers: Some visitors may block tracking
- VPN Usage: Geographic data may be inaccurate for VPN users
- Browser Privacy: Privacy-focused browsers may limit user agent information
- Unique Visitors: Estimation based on IP addresses is not perfectly accurate
- Bot Traffic: Some automated traffic may be included in metrics
Future Enhancements
Planned improvements to the metrics system include:
- Real-time Analytics: Live updating of metrics as visitors access content
- Automated Reports: Scheduled email reports with key insights
- Advanced Filtering: More sophisticated query and filter options
- Custom Dashboards: Ability to create personalized metric views
- API Access: Programmatic access to metrics data
- Integration: Connect metrics with other analytics platforms
Vaults
Vaults in Kinesis API are secure storage containers for sensitive configuration data and secrets within a project. They provide encrypted storage for API keys, database credentials, tokens, and other sensitive information that your application needs to access securely.
Understanding Vaults
Vaults in Kinesis API work as key-value stores with built-in encryption. Each vault entry:
- Belongs to a specific project
- Contains a unique key identifier and an encrypted value
- Is encrypted at rest using the vault’s encryption system
- Can be accessed only by authorized project members
- Is isolated per project for security boundaries
Vaults serve as a centralized, secure location for managing sensitive configuration data used across your project’s collections and routes.
Accessing Vaults
Vaults can be accessed in two ways:
- Via the Web Interface: Navigate to
/web/vaultsto view all projects with vault access, then select a project to manage its vault entries - Via the API: Use the vault endpoints with appropriate authentication and project membership
Vault Management Interface

The vault management interface (/web/vaults) provides access to all projects you have permission to manage:
- A filterable, paginated list of projects
- Quick access to project vault entries
- View and management of project members
- Ability to navigate to individual project vaults
Accessing Project Vaults

To access vaults for a specific project:
- Navigate to
/web/vaultsin your browser - Filter or locate the project you want to manage
- Click on the project name or the “View Vaults” button
- You’ll be taken to the project vault page (
/web/vault?project_id=[project_id])
The project vault page displays all vault entries for that project, allowing you to create, update, or delete entries.
Creating a Vault Entry

To create a new vault entry:
- Navigate to the project vault page
- Click the “Create New” button or the “+” icon
- Fill in the required information:
- Key: A unique identifier for the secret (e.g.,
API_KEY,DATABASE_PASSWORD) - Value: The sensitive data to store (e.g., the actual API key or password)
- Key: A unique identifier for the secret (e.g.,
- Click “Create” to save the vault entry
The value is automatically encrypted and stored securely in the database.
Vault Key Requirements
Vault keys must:
- Be unique within a project
- Contain only uppercase letters, numbers, and underscores
- Start with a letter
- Be between 1 and 255 characters
- Follow environment variable naming conventions for consistency
Example valid keys: API_KEY, DATABASE_URL, JWT_SECRET, STRIPE_API_KEY
Value Encryption
Vault values are encrypted using the configured encryption key. This means:
- Values are never stored in plain text
- Only authorized users with proper access can decrypt and view values
- The encryption key is managed by the system administrator
- Encryption is transparent to authorized users
Viewing Vault Entries
When viewing vault entries in the project vault page, you can:
- See all vault entries in a list view with their keys
- Toggle visibility of values (displayed as password fields by default)
- Filter entries by key name using the search box
- Use pagination to navigate through large numbers of entries
Value Security
By default, vault values are hidden and displayed as masked password fields. To view a value:
- Click the “Show/Hide” button next to the vault entry
- The value will be decrypted and displayed
- Click the button again to hide the value
Updating Vault Values
To update an existing vault entry’s value:
- Navigate to the project vault page
- Click the “Edit” button (pencil icon) on the vault entry you want to modify
- A modal will appear with the current value
- Modify the value in the text field
- Click “Update” to save the changes
Note that you can only update the value of an entry, not its key. If you need to change the key, you must delete the entry and create a new one.
Deleting Vault Entries
To delete a vault entry:
- Navigate to the project vault page
- Click the “Delete” button (trash icon) on the vault entry
- Confirm the deletion in the modal that appears
⚠️ Warning: Deleting a vault entry permanently removes the stored secret. Make sure you have another copy or have already rotated the secret elsewhere before deleting it.
Filtering and Pagination
The vault page includes helpful filtering and navigation features:
Filtering Vault Entries
To find specific vault entries:
- Use the search box labeled “Filter vaults…”
- Type any part of the vault key name
- The list automatically filters to show matching entries
Pagination
For projects with many vault entries:
- Use the pagination controls to navigate between pages
- The page displays up to 10 entries at a time by default
- Click the page number buttons to jump to a specific page
- Use arrow buttons to move sequentially through pages
User Permissions
Access to vault management is controlled by user roles and project membership:
| Role | View Vaults | Create Entries | Update Entries | Delete Entries |
|---|---|---|---|---|
| ROOT | ✓ | ✓ | ✓ | ✓ |
| ADMIN | ✓ | ✓ | ✓ | ✓ |
| AUTHOR | ✗ | ✗ | ✗ | ✗ |
| VIEWER | ✗ | ✗ | ✗ | ✗ |
Additionally, users can only access vaults for projects they are members of.
Vault Security Best Practices
For optimal vault security and management:
- Descriptive Keys: Use clear, descriptive key names that indicate the secret’s purpose
- Rotate Regularly: Periodically rotate sensitive values like API keys and passwords
- Minimal Exposure: Only expose vault values to routes and services that absolutely need them
- Access Control: Use project membership to limit who can view and manage vaults
- Audit: Keep track of who accesses vault entries (if audit logging is available)
- Naming Conventions: Follow environment variable naming conventions for consistency (UPPERCASE_WITH_UNDERSCORES)
- No Plain Text: Never store plain text passwords or unencrypted secrets elsewhere
- Secure Deletion: Delete vault entries when they are no longer needed
- Version Control: Never commit secrets to version control; use vaults instead
- Backup: Ensure sensitive credentials are properly backed up outside the vault system
Using Vault Values in Routes
While vault entries are managed through the web interface, they can be accessed programmatically within your routes:
- Vault values are encrypted at rest but decrypted when accessed by authorized users
- Routes can reference vault entries to retrieve sensitive configuration
- Access is controlled by project membership and user role
- All vault access is logged for security auditing
API Endpoints
Vault operations can also be performed via the APIs:
- Create:
POST /vault/create- Create a new vault entry - Fetch All:
GET /vault/fetch- Retrieve all vault entries for a project - Fetch One:
GET /vault/fetch/one- Retrieve a specific vault entry - Update:
PATCH /vault/update- Update a vault entry’s value - Delete:
DELETE /vault/delete- Delete a vault entry
All vault API endpoints require:
- Valid JWT authentication (the authenticated user’s uid from the token)
- Project membership (user must be a member of the project)
- Appropriate user role (ADMIN or ROOT)
Related Documentation
- Projects - Project management and organization
- Collections - Data collection management
- Routes - Creating API endpoints that can use vault values
Email Templates
Email Templates in Kinesis API provide a powerful system for creating, managing, and version-controlling reusable email content. They allow you to define HTML email templates with dynamic variables, preview them in real-time, and maintain a complete history of changes.
Understanding Email Templates
Email templates in Kinesis API are sophisticated structures that include:
- Template Content: HTML-based email body with full formatting support
- Metadata: Name, purpose, and subject line for organizational clarity
- Default Variables: Predefined placeholders that can be dynamically replaced when sending emails
- Preview System: Real-time rendering with light/dark mode support
- Content History: Full versioning and restoration capabilities for change tracking
- Access Control: Role-based permissions to ensure only authorized users can modify templates
Email templates serve as centralized, reusable email content that can be integrated into your application’s communication workflows, ensuring consistency and allowing non-technical team members to manage email content.
Accessing Email Templates
The Email Templates page can be accessed by navigating to /web/email in your browser after logging in.

All users can view email templates, but only ROOT and ADMIN users can create, edit, or delete them.
Email Templates List Interface
The Email Templates interface includes:
- A filterable, paginated list of all email templates
- Template cards showing key information
- Action buttons for various operations
- A creation button for ROOT and ADMIN users
Each email template card displays:
- Template name
- Purpose/description
- Subject line
- Preview of the email body (truncated)
- Action buttons (view, edit, delete)
Filtering Email Templates
To find specific email templates:
- Use the filter input at the top of the template list
- Type any part of the template name, purpose, subject, or body
- The list will automatically filter to show matching templates
Pagination
For systems with many email templates:
- Navigate between pages using the pagination controls
- The page displays up to 20 templates at a time by default
- Click page number buttons to jump to a specific page
- Use arrow buttons to move sequentially through pages
Creating a New Email Template
ROOT and ADMIN users can create new email templates:
- Click the “Create New Email Template” button on the email templates page
- You’ll be taken to the creation page (
/web/email/create)

Template Creation Interface
The creation page is divided into several sections:
1. Email Body (HTML) Editor
A full-featured HTML editor where you can write your email content:
- Plain text input with syntax highlighting support
- Real-time preview of rendered HTML
- Direct HTML markup input for advanced formatting
- Support for inline styles and semantic HTML
Tips for writing email HTML:
- Use inline styles rather than external CSS for better email client compatibility
- Keep layouts simple and table-based for maximum compatibility
- Test across different email clients when possible
- Use absolute URLs for images and links
2. Rendered Email Body (Preview)
A live preview pane that shows how your email will look:
- Real-time rendering as you type
- Toggle between light and dark modes using the theme button
- Preview updates automatically with each change
- Isolated iframe rendering for accurate display
This preview helps you see exactly how your email will appear to recipients, allowing you to catch formatting issues before deployment.
3. Properties
Essential metadata for organizing and identifying your template:
-
Name: A unique identifier for the template (e.g.,
welcome_email,password_reset)- Must be unique across all email templates
- Use descriptive, lowercase names with underscores
- No spaces or special characters
-
Purpose: A human-readable description of what the email is for (e.g., “Welcome new users to the platform”)
- Helps team members understand the template’s use case
- Searchable in the filter interface
-
Subject: The email subject line that recipients will see
- Can include variable placeholders (e.g., “Welcome, {user_name}!”)
- Should be concise and descriptive
- Can be dynamically populated when sending
-
Deletable: Checkbox indicating whether this template can be deleted
- Check this box for templates that may become obsolete
- Uncheck for critical system templates that should be preserved
- Only affects whether the delete button is available in the UI
4. Default Variables
Dynamic placeholders that can be replaced with actual values when sending emails:
-
Click the “+” button to add a new variable
-
Each variable has:
- Name: The placeholder identifier (e.g.,
user_name,reset_link) - Value: Default/example value shown in preview (e.g., “John Doe”, “https://example.com/reset”)
- Name: The placeholder identifier (e.g.,
-
Variables can be referenced in the email body and subject using your chosen templating syntax
-
Default values help you preview how the email will look with actual data
-
Remove variables by clicking the red × button on each variable row
Example Usage:
<h1>Hello, {user_name}!</h1>
<p>Click here to reset your password:</p>
<a href="{reset_link}">Reset Password</a>
Creating the Template
- Fill in all required fields (name, purpose, subject, body)
- Add any default variables needed for your template
- Preview the rendered output to ensure it looks correct
- Toggle the theme to check both light and dark mode rendering
- Click the “Create” button to save the template
The system will:
- Create the email template record
- Associate all default variables with the template
- Redirect you to the template view page upon success
Viewing Email Templates
To view the details of an email template:
- Click on the template name or the “View” button on the template card
- You’ll be taken to the template view page (
/web/email/view?id=[template_id])

The view page displays:
- All template metadata (name, purpose, subject)
- The complete HTML body with live preview
- All default variables with their names and values
- Theme toggle for preview (light/dark mode)
- Deletable status
- Action buttons (edit, delete) for authorized users
Read-Only Display
All users can view email templates, but the interface is read-only for non-admin users:
- Input fields are disabled or hidden
- Edit and delete buttons are not shown
- Preview is still functional for reviewing the template appearance
Editing Email Templates
ROOT and ADMIN users can edit existing email templates:
- From the template view page, click “Edit Email Template”
- Or click the “Edit” button (pencil icon) on the template card
- You’ll be taken to the edit page (
/web/email/edit?id=[template_id])

Editing Interface
The edit page includes all the same sections as the create page:
- HTML editor with the current email body
- Live preview pane
- Editable properties (name, purpose, subject, deletable)
- Default variables management (add, edit, remove)
- Additional content history section (see below)
Making Changes
- Modify any fields you want to update
- Add, edit, or remove default variables as needed
- Preview your changes in real-time
- Click “Update” to save your changes
The system will:
- Validate all fields against constraints
- Create a content history entry for audit purposes
- Update the template with new values
- Update all associated default variables
Content History
Email templates include a built-in versioning system that tracks all changes. The Content History section shows:
- Timestamp: When each change was made
- User: Who made the change (based on user ID)
- Snapshot: The complete state of the template at that point in time
- Restore Button: Ability to revert to any previous version
Restoring from History
To restore a previous version:
- Navigate to the edit page
- Scroll to the Content History section
- Click “Restore” on the version you want to revert to
- Confirm the restoration in the modal
- The template will be updated to match that historical state
📝 Note: Restoring from history creates a new content history entry, so you never lose the ability to undo changes.
Deleting Email Templates
ROOT and ADMIN users can delete email templates that are marked as deletable:
- Click the “Delete” button (trash icon) on the template card or view page
- Confirm the deletion in the modal that appears
⚠️ Warning: Deleting an email template permanently removes it and all associated default variables and content history. This action cannot be undone. Only templates marked as “deletable” can be removed.
System Templates
Templates marked as not deletable (checkbox unchecked during creation):
- Cannot be deleted through the UI
- Are considered critical system templates
- Should be used for essential communication workflows
- Can still be edited by ROOT and ADMIN users
This protection ensures that critical email templates (like password resets, account verification, etc.) are not accidentally removed.
Default Variables Management
Default variables allow email templates to be dynamic and reusable across different contexts.
Variable Structure
Each variable consists of:
- Name: The identifier used in the template (e.g.,
{user_name}) - Value: Default or example value (e.g., “John Doe”)
Adding Variables
- Click the “+” button in the Default Variables section
- Enter the variable name (typically lowercase with underscores)
- Enter a default/example value for preview purposes
- The variable can now be referenced in your email body or subject
Editing Variables
- Click in the name or value field of an existing variable
- Modify the text
- Click “Update” to save changes
Removing Variables
- Click the red × button next to the variable you want to remove
- The variable will be removed from the list
- Click “Update” to save changes
💡 Tip: Keep variable names descriptive and consistent across templates. Use a naming convention like
user_name,account_email,reset_linkfor clarity.
Using Email Templates in Your Application
While the web interface provides management capabilities, email templates are designed to be used programmatically via the API:
- Fetch Template: Retrieve the template by ID or name
- Populate Variables: Replace placeholders with actual values
- Send Email: Use your email service to deliver the rendered content
The default variables serve as documentation for what data your application needs to provide when using each template.
User Permissions
Access to email template management is controlled by user roles:
| Role | View Templates | Create Templates | Edit Templates | Delete Templates |
|---|---|---|---|---|
| ROOT | ✓ | ✓ | ✓ | ✓ |
| ADMIN | ✓ | ✓ | ✓ | ✓ |
| AUTHOR | ✓ | ✗ | ✗ | ✗ |
| VIEWER | ✓ | ✗ | ✗ | ✗ |
🔒 Security Note: Only ROOT and ADMIN users can create, edit, or delete email templates. This ensures that communication workflows remain under the control of system administrators while allowing all team members to view templates for reference.
Email Template Lifecycle
Email templates typically follow this lifecycle:
- Creation: A ROOT or ADMIN user creates the template with initial content
- Testing: The template is tested with various variable values and in different email clients
- Production: The template is used in the application’s email workflows
- Maintenance: Updates are made over time, tracked in content history
- Deprecation: If no longer needed and marked deletable, the template can be removed
Best Practices
HTML Email Design
- Keep it simple: Complex layouts may not render consistently across email clients
- Use tables: Table-based layouts have the best email client compatibility
- Inline styles: External stylesheets often don’t work in emails
- Test thoroughly: Different email clients render HTML differently
- Mobile-first: Many users read emails on mobile devices
Variable Management
- Document variables: Use the purpose field to explain what variables are needed
- Provide examples: Default values help developers understand expected data format
- Be consistent: Use the same variable names across similar templates
- Validate in code: Ensure your application validates required variables before sending
Content Management
- Use descriptive names: Template names should clearly indicate their purpose
- Keep purpose updated: Document any changes to the template’s use case
- Review regularly: Periodically audit templates to remove unused ones
- Test after changes: Always preview templates after editing
- Leverage history: Use content history to track changes and revert if needed
Troubleshooting
Template Not Rendering Correctly
- Check the HTML for syntax errors
- Ensure all tags are properly closed
- Use inline styles instead of CSS classes
- Test the preview in both light and dark modes
Variables Not Showing in Preview
- Verify the variable syntax matches your templating engine
- Check that default values are set for all variables
- Ensure variables are properly referenced in the HTML body
Cannot Delete Template
- Verify the template is marked as “deletable”
- Confirm you have ROOT or ADMIN role permissions
- Check if the template is being used in active workflows
Related Documentation
- Content History - Versioning and change tracking system
Misc
The Misc page in Kinesis API provides a collection of utility tools and functions that can be helpful during development, testing, and general platform management. These tools don’t fit into other categories but offer valuable functionality for various tasks.
Accessing the Misc Page
To access the Misc utilities:
- Log in to your Kinesis API account
- Navigate to
/web/miscin your browser or select “Misc” from the navigation menu
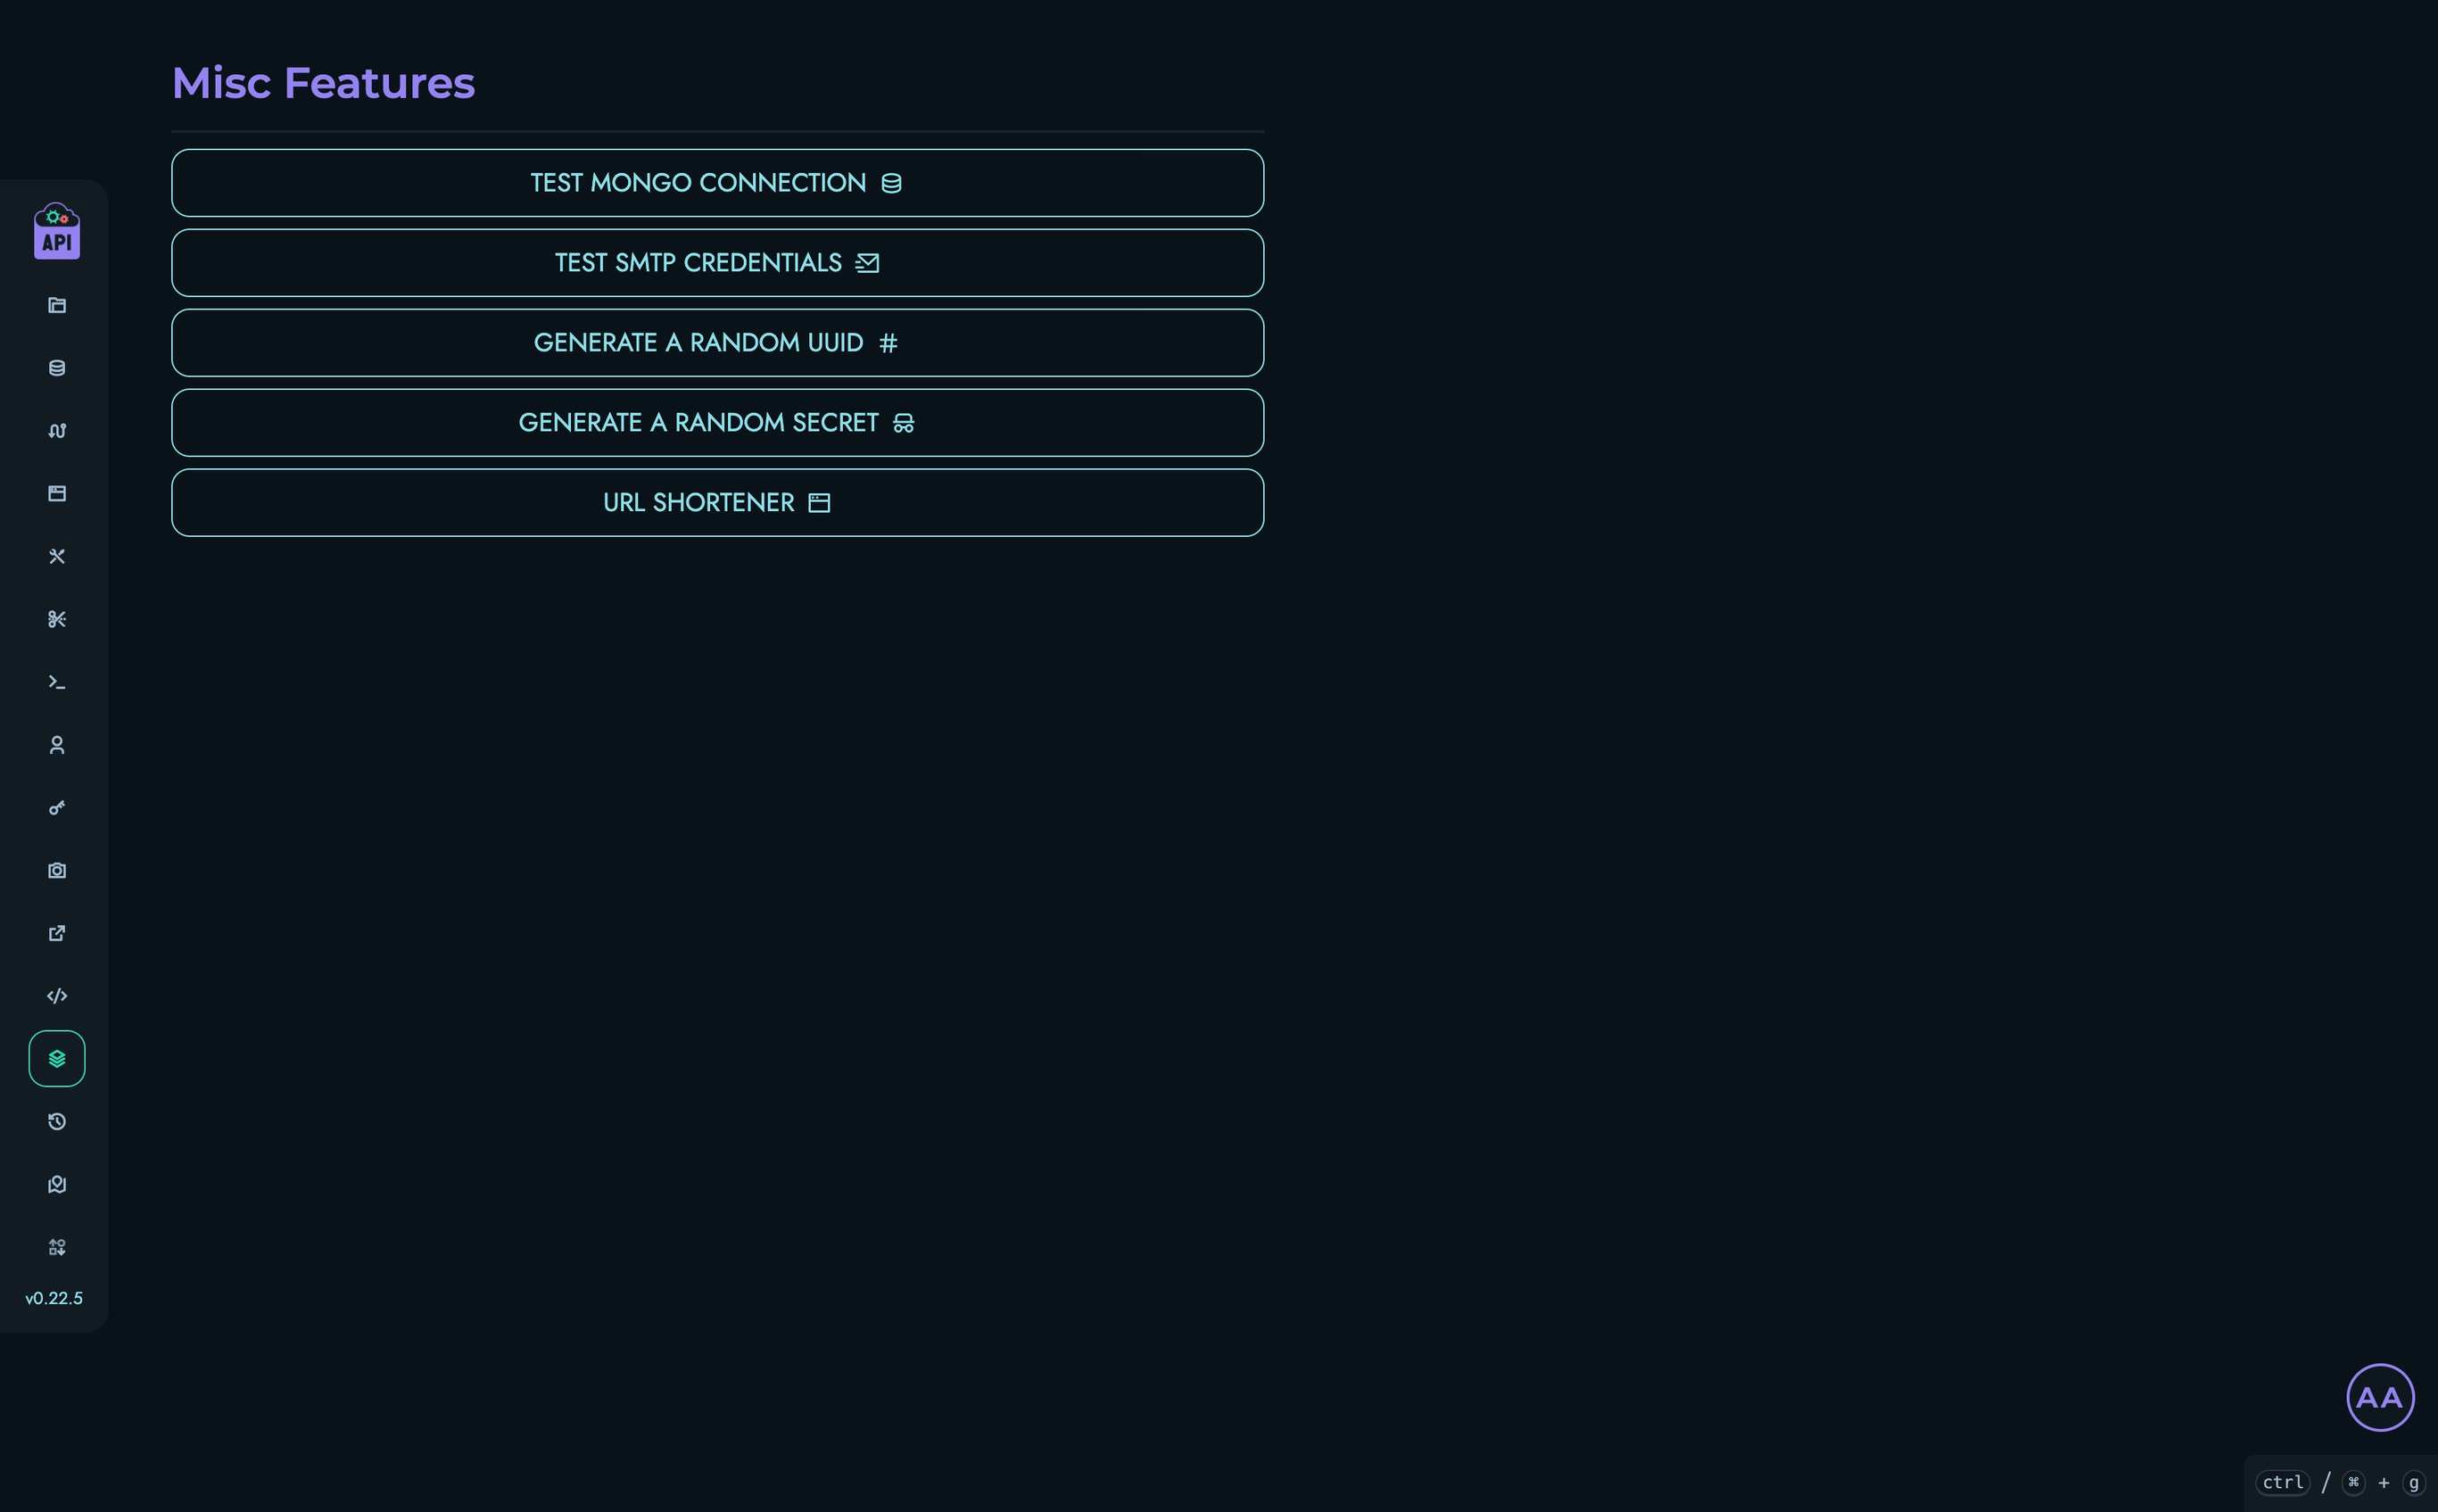
Available Utilities
The Misc page offers several utility tools:
Test MongoDB Connection
Note: This feature is only available to users with ROOT or ADMIN roles.
This utility allows you to test the connection to a MongoDB database:
- Click the “Test Mongo Connection” button
- Enter the MongoDB URI (in the format
mongodb://username:password@host:port/database) - Enter the database name
- Click “Test” to verify the connection
This is particularly useful when setting up external data sources or verifying database configurations.
Test SMTP Credentials
Note: This feature is only available to users with ROOT or ADMIN roles.
This tool validates SMTP email server credentials:
- Click the “Test SMTP Credentials” button
- Enter the required information:
- Username
- From Username (optional)
- Password
- Host address
- Port number
- Login mechanism (PLAIN, LOGIN, or XOAUTH2)
- StartTLS setting
- Click “Test” to verify the credentials
A successful test indicates that Kinesis API can use these credentials to send emails, which is critical for features like user registration and password reset.
Generate a Random UUID
This utility generates random unique identifiers with customizable formatting:
- Click the “Generate a Random UUID” button
- Configure the UUID format:
- Length: The number of characters in each group
- Groups: The number of groups to include
- Include an additional number block: Option to add a numeric suffix
- Click “Generate” to create the UUID
- Copy the generated UUID using the “Copy UUID” button
UUIDs are useful for creating unique identifiers for resources, temporary tokens, or any scenario where uniqueness is required.
Generate a Random Secret
This tool creates secure random strings for use as secrets, passwords, or tokens:
- Click the “Generate a Random Secret” button
- Configure the secret:
- Length: The number of characters in the secret
- Include special characters: Whether to include symbols in addition to letters and numbers
- Click “Generate” to create the secret
- Copy the generated secret using the “Copy Secret” button
This is particularly useful for generating secure API keys, passwords, or other sensitive credentials.
URL Shortener
This utility creates shortened URLs for any link:
- Click the “URL Shortener” button
- Enter the long URL you want to shorten
- Click “Shorten” to create a shortened link
- Copy the shortened URL using the “Copy URL” button
The shortened URLs are in the format [api_url]/go/[locator]. These links can be shared with others to provide more manageable URLs for long addresses.
Use Cases
These utility tools are valuable in various scenarios:
- During Setup: Testing MongoDB and SMTP configurations
- Development: Generating UUIDs and secrets for testing or implementation
- Content Sharing: Creating shortened URLs for easier sharing
- Security: Generating strong, random secrets for sensitive operations
- Troubleshooting: Verifying connectivity to external services
Global Navigate
Global Navigate is a powerful keyboard-driven navigation system built into Kinesis API that allows you to quickly jump to any part of the application without using the mouse. This feature significantly speeds up your workflow by providing shortcuts to navigate between projects, collections, data, and other components.
Accessing Global Navigate
There are two ways to open the Global Navigate modal:
- Keyboard Shortcut: Press
Ctrl+K(Windows/Linux) or⌘+K(Mac) - UI Button: Click the keyboard shortcut hint in the bottom-right corner of the screen
Basic Navigation
The Global Navigate system accepts various commands in a simple, intuitive syntax:
- Enter a base command (e.g.,
pfor projects) - Optionally add IDs to navigate to specific resources (e.g.,
p/project_id) - Press Enter to navigate
Base Commands
Global Navigate supports numerous shorthand commands:
| Command | Aliases | Destination |
|---|---|---|
p, pr, pro | project, projects | Projects page |
c, col | collection | Collection page |
cs | custom, customstructure, custom_structure | Custom Structure page |
d | data | Data management |
r | route, routes | Routes page |
rt | route_template, route_templates | Route Templates page |
pg, play | playground | Playground |
u, us | user, users | Users management |
pat | pats | Personal Access Tokens |
m | media | Media management |
red, rs | redirects | Redirects |
snp, snip | snippet, snippets | Snippets |
mc | misc | Miscellaneous utilities |
e, es | events | Events log |
conf | config, configs | Configuration settings |
const | constraint, constraints | Constraints |
s | settings | User settings |
h, dash | home, dashboard | Dashboard |
a | about | About page |
ch, change | changelog | Changelog |
road | roadmap | Roadmap |
repl, shell | REPL shell | |
logout, end | Log out | |
b, blo | blog | Blog posts |
l, loc | locale, locales | Localization |
t, tic, tick | ticket, tickets | Ticketing system |
bkp, back, backup | backups | Backups |
met | metrics | Component Metrics |
v, vault, vaults | vaults | Project Vaults |
em, email | email | Email Templates |
sh, short, shortcut, shortcuts | shortcuts | Shortcuts Page |
w, work | workflow | Workflow Page |
Advanced Navigation Patterns
For hierarchical resources, you can navigate directly to specific items by adding IDs to your command with forward slashes:
Projects Navigation
p- Go to projects listp/project_id- Go directly to a specific project
Collections Navigation
c- Go to projects listc/project_id- Go to a specific projectc/project_id/collection_id- Go directly to a specific collection
Custom Structures Navigation
cs- Go to projects listcs/project_id- Go to a specific projectcs/project_id/collection_id- Go to a specific collectioncs/project_id/collection_id/custom_structure_id- Go directly to a specific custom structure
Data Navigation
d- Go to data projects listd/project_id- Go to a project’s collections for datad/project_id/collection_id- Go to data objects in a collectiond/project_id/collection_id/data_id- Go directly to a specific data object
Routes Navigation
r- Go to routes projects listr/project_id- Go to routes in a projectr/project_id/route_id- Go directly to a specific route
Route Templates Navigation
rt- Go to route templates listrt/project_id- Go to route templates in a projectrt/project_id/route_template_id- Go directly to a specific route template
Playground Navigation
pg- Go to playground projects listpg/project_id- Go to routes in a project’s playgroundpg/project_id/route_id- Go directly to testing a specific route
Snippets Navigation
snp- Go to snippets listsnp/snippet_id- Go directly to a specific snippet
Users Navigation
u- Go to users listu/username- Go directly to a specific user’s profile
Blog Navigation
b- Go to blog posts listb/post_id- Go directly to a specific blog post
Tickets Navigation
t- Go to tickets listt/ticket_id- Go directly to a specific ticket
Metrics Navigation
met- Go to metrics page (requires query parameters)met/b/post_id- Go to metrics for a blog post (b = blog_post)met/s/snippet_id- Go to metrics for a snippet (s = snippet)met/r/redirect_id- Go to metrics for a redirect (r = redirect)
Vaults Navigation
v- Go to vaults projects listv/project_id- Go to vaults in a project
Email Templates Navigation
em- Go to email templates listem/email_template_id- Go directly to a specified email template
Note: The second parameter is a shorthand for the component type:
b= blog_posts= snippetr= redirect
Usage Examples
| Command | Result |
|---|---|
p | Navigate to the projects list |
p/inventory | Navigate to the inventory project |
c/inventory/products | Navigate to the products collection within the inventory project |
d/blog/posts/post123 | Navigate to the post123 data object in the posts collection |
r/api/auth | Navigate to the auth route in the api project |
pg/shop/checkout | Test the checkout route in the playground |
u/admin | View the admin user’s profile |
settings | Go to your user settings page |
logout | Log out of the system |
b/welcome-post | View the welcome-post blog article |
t/support-request | View the support-request ticket |
met/b/123 | View metrics for blog post with ID 123 |
met/s/abc | View metrics for snippet with ID or locator abc |
met/r/xyz | View metrics for redirect with ID or locator xyz |
sh | Go to the quick access shortcuts page |
Benefits of Global Navigate
Global Navigate offers several advantages for power users:
- Speed: Navigate anywhere in the application with just a few keystrokes
- Efficiency: Reduce dependency on mouse movements and menu navigation
- Directness: Jump directly to deeply nested resources without navigating through multiple pages
- Accessibility: Provide keyboard-focused navigation options
- Productivity: Streamline repetitive navigation tasks
Tips for Effective Use
- Learn the Shortcuts: Memorize the base commands for sections you frequently visit
- Use Tab Completion: In the future, Global Navigate may support tab completion
- Bookmark Common Paths: Keep a note of full paths for resources you access regularly
- Direct Navigation: Instead of navigating through multiple pages, use the full path pattern
Backups
Regular backups are a critical component of maintaining a reliable Kinesis API installation. This guide covers how to properly back up your Kinesis API data and configuration, ensuring you can recover from unexpected failures or data corruption.
Database Backend Considerations
⚠️ Important: Backup strategies differ depending on your database backend configuration.
Kinesis DB and SQLite:
- Kinesis API’s built-in backup system fully supports these backends
- Database files are included in automated backups
- One-click restore functionality available
- All manual backup methods apply
MySQL and PostgreSQL:
- Kinesis API’s built-in backup system does NOT backup database data for these backends
- Only configuration files (
.env), media (public/), and translations are backed up by the built-in system - You must use MySQL/PostgreSQL native backup tools for database backups
- See the Database Backend Compatibility section below for details
Database Backend Compatibility
For MySQL Databases
If you’re using MySQL (DB_BACKEND=mysql), you must use MySQL’s native backup tools:
Creating MySQL Backups:
# Full database backup
mysqldump -u username -p database_name > kinesis_backup_$(date +%Y%m%d).sql

# Compressed backup (recommended)
mysqldump -u username -p database_name | gzip > kinesis_backup_$(date +%Y%m%d).sql.gz

# All databases
mysqldump -u username -p --all-databases > all_databases_backup.sql
Restoring MySQL Backups:
# Restore from SQL file
mysql -u username -p database_name < kinesis_backup.sql

# Restore from compressed backup
gunzip < kinesis_backup.sql.gz | mysql -u username -p database_name
Automated MySQL Backup Script:
#!/bin/bash
# MySQL Backup Script for Kinesis API

DB_USER="your_username"
DB_PASS="your_password"
DB_NAME="kinesis_db"
BACKUP_DIR="/path/to/mysql-backups"
BACKUP_FILE="$BACKUP_DIR/kinesis-mysql-$(date +%Y%m%d-%H%M%S).sql.gz"

# Create backup directory if it doesn't exist
mkdir -p "$BACKUP_DIR"

# Create compressed backup
mysqldump -u"$DB_USER" -p"$DB_PASS" "$DB_NAME" | gzip > "$BACKUP_FILE"

# Optional: Keep only last 7 days of backups
find "$BACKUP_DIR" -name "kinesis-mysql-*.sql.gz" -type f -mtime +7 -delete

echo "MySQL backup completed: $BACKUP_FILE"
For more information, see MySQL Backup and Recovery.
For PostgreSQL Databases
If you’re using PostgreSQL (DB_BACKEND=postgresql), you must use PostgreSQL’s native backup tools:
Creating PostgreSQL Backups:
# Plain SQL backup
pg_dump -U username -d database_name > kinesis_backup_$(date +%Y%m%d).sql

# Compressed backup
pg_dump -U username -d database_name | gzip > kinesis_backup_$(date +%Y%m%d).sql.gz

# Custom format (recommended - faster restore, compression, selective restore)
pg_dump -U username -Fc -d database_name > kinesis_backup_$(date +%Y%m%d).dump

# Directory format (parallel backup/restore)
pg_dump -U username -Fd -d database_name -f kinesis_backup_$(date +%Y%m%d)
Restoring PostgreSQL Backups:
# Restore from SQL file
psql -U username -d database_name < kinesis_backup.sql

# Restore from compressed SQL
gunzip < kinesis_backup.sql.gz | psql -U username -d database_name

# Restore from custom format
pg_restore -U username -d database_name kinesis_backup.dump

# Restore with clean (drop existing objects first)
pg_restore -U username -d database_name --clean kinesis_backup.dump
Automated PostgreSQL Backup Script:
#!/bin/bash
# PostgreSQL Backup Script for Kinesis API

DB_USER="your_username"
DB_NAME="kinesis_db"
BACKUP_DIR="/path/to/pg-backups"
BACKUP_FILE="$BACKUP_DIR/kinesis-pg-$(date +%Y%m%d-%H%M%S).dump"

# Create backup directory if it doesn't exist
mkdir -p "$BACKUP_DIR"

# Create custom format backup (includes compression)
pg_dump -U "$DB_USER" -Fc -d "$DB_NAME" > "$BACKUP_FILE"

# Optional: Keep only last 7 days of backups
find "$BACKUP_DIR" -name "kinesis-pg-*.dump" -type f -mtime +7 -delete

echo "PostgreSQL backup completed: $BACKUP_FILE"
For more information, see PostgreSQL Backup and Restore.
Backup Methods
Kinesis API offers multiple backup approaches to suit different needs and technical preferences:
1. Built-in Backup System (Recommended)
New in version 0.31.0: Kinesis API now includes a comprehensive backup system accessible through the web interface and API.
⚠️ Database Backend Support: The built-in backup system provides full database backup support for Kinesis DB and SQLite only. For MySQL and PostgreSQL backends, it backs up configuration and media files but not database data.
For Kinesis DB and SQLite Users:
This is the recommended method as it provides:
- Automated backup creation and management
- Complete database backup including all data
- Built-in compression and storage optimization
- Integrated restore functionality
- Expiration and retention management
- User-friendly web interface
For MySQL and PostgreSQL Users:
The built-in system will backup:
- Configuration files (
.env) - Media files (
public/) - Translations (
translations/)
But you must separately backup your database using native tools (see Database Backend Compatibility).
Getting Started:
- Log in to your Kinesis API web interface as a ROOT user
- Navigate to the “Backups” section in the sidebar
- Click “Create a new backup” to generate your first backup
For detailed instructions on using the built-in backup system, see the Backup Management page.
Benefits:
- No manual file handling required
- Automatic compression reduces storage space
- Built-in validation ensures backup integrity
- Simple restore process with automatic engine restart (Kinesis DB/SQLite)
- Integrated with the permission system for security
2. Manual File-Based Backup
For users who prefer direct file system control or need custom backup procedures:
Understanding Kinesis API’s Data Storage
Before discussing backup strategies, it’s important to understand where Kinesis API stores its data:
- Database Files: Located in the
data/directory- Kinesis DB:
{db_name}.pages,{db_name}.blobs,{db_name}.blobs.idx(where{db_name}defaults tomain_dbor the value ofDB_NAMEenvironment variable) - SQLite: Database file at the path specified in
DATABASE_URL(default:data/db.sqlite), plus WAL files (-shm,-wal) if they exist - MySQL/PostgreSQL: Data stored on external database server (not in
data/)
- Kinesis DB:
- License and Instance Files:
data/license.json,data/instance.json(if they exist) - Configuration: Stored in the
.envfile - Media Files: Stored in the
public/directory (entire directory) - Translations: Stored in the
translations/directory (entire directory)
A complete backup strategy must account for your database backend:
- Kinesis DB/SQLite: Back up all five components
- MySQL/PostgreSQL: Back up components 2-5 plus separate database dumps
Note: The backup system only backs up files that actually exist. For example, if you’re using SQLite, the Kinesis DB files won’t exist and vice versa.
Manual Backup Methods
Docker Installation Backup:
If you’re running Kinesis API via Docker (the recommended method), follow these steps:
-
Stop the container (optional but recommended for consistency):
docker stop kinesis-api -
Create the backup directory:
mkdir backup/ -
Back up the data directory:
cp -r data/ backup/data/ -
Back up the environment file:
cp .env backup/.env -
Back up the public directory (if you’ve uploaded media):
cp -r public/ backup/public/ -
Back up the translations directory (if you’re making use of the localization engine):
cp -r translations/ backup/translations/ -
Restart the container (if you stopped it):
docker start kinesis-api
Native Installation Backup:
If you’re running Kinesis API directly on your host:
-
Stop the Kinesis API service:
# If using systemd sudo systemctl stop kinesis-api # Or if running directly kill $(pgrep kinesis-api) -
Back up the required directories and files:
cp -r /path/to/kinesis-api/data/ /path/to/backup/data/ cp /path/to/kinesis-api/.env /path/to/backup/.env cp -r /path/to/kinesis-api/public/ /path/to/backup/public/ cp -r /path/to/kinesis-api/translations/ /path/to/backup/translations/ -
Restart the service:
# If using systemd
sudo systemctl start kinesis-api

# Or if running directly
cd /path/to/kinesis-api && ./target/release/kinesis-api &
Automated Backup Scripts
Simple Daily Backup Script
Create a file called backup-kinesis-api.sh:
#!/bin/bash
# Kinesis API Backup Script

# Configuration
KINESIS_DIR="/path/to/kinesis-api"
BACKUP_DIR="/path/to/backups"
BACKUP_NAME="kinesis-api-backup-$(date +%Y%m%d-%H%M%S)"

# Create backup directory
mkdir -p "$BACKUP_DIR/$BACKUP_NAME"

# Optional: Stop the container for consistent backups
docker stop kinesis-api

# Copy the data
cp -r "$KINESIS_DIR/data" "$BACKUP_DIR/$BACKUP_NAME/"
cp "$KINESIS_DIR/.env" "$BACKUP_DIR/$BACKUP_NAME/"
cp -r "$KINESIS_DIR/public" "$BACKUP_DIR/$BACKUP_NAME/"
cp -r "$KINESIS_DIR/translations" "$BACKUP_DIR/$BACKUP_NAME/"

# Restart the container
docker start kinesis-api

# Compress the backup
cd "$BACKUP_DIR"
tar -czf "$BACKUP_NAME.tar.gz" "$BACKUP_NAME"
rm -rf "$BACKUP_NAME"

# Optional: Rotate backups (keep last 7 days)
find "$BACKUP_DIR" -name "kinesis-api-backup-*.tar.gz" -type f -mtime +7 -delete

echo "Backup completed: $BACKUP_DIR/$BACKUP_NAME.tar.gz"
Make the script executable and schedule it with cron:
chmod +x backup-kinesis-api.sh
crontab -e
Add a line to run it daily at 2 AM:
0 2 * * * /path/to/backup-kinesis-api.sh
Restoring from Backup
Kinesis API provides multiple restoration methods depending on how your backup was created:
1. Built-in System Restoration (Recommended)
The built-in backup system provides the simplest restoration process:
Through Web Interface:
- Access the Backups Page: Log in as a ROOT user and navigate to
/web/backups - Select Backup: Find the backup you want to restore from the list
- Click Restore: Click the restore button (refresh icon) next to your chosen backup
- Confirm Action: Confirm the restoration in the warning dialog
- Automatic Process: The system will:
- Replace all current data with backup data
- Restart the database engine automatically
- Verify the restoration was successful
Through API:
# Replace with your actual values
curl -X GET "http://your-api-url/backup/restore?uid=1&id=backup_id" \
  -H "Authorization: Bearer your-jwt-token"
Important Notes:
- ⚠️ Warning: Restoring a backup will replace ALL current data with the backup data
- This action cannot be undone
- The system automatically handles database engine restart
- No manual file manipulation is required
Choosing the Right Backup:
When selecting a backup for restoration:
- Check Creation Time: Ensure you’re selecting the backup from the correct time period
- Read Description: Use backup descriptions to identify the purpose (e.g., “Before major update”)
- Consider Data Loss: Any data created after the backup timestamp will be lost
- Verify Backup Age: Check that the backup hasn’t expired and been automatically cleaned up
2. Manual File-Based Restoration
For backups created using manual file methods:
Docker Installation Restoration:
-
Stop the running instance:
docker stop kinesis-api -
Replace the data with the backup:
# If your backup is compressed tar -xzf kinesis-backup.tar.gz # Replace the current data rm -rf data/ .env public/ translations/ cp -r backup/data/ . cp backup/.env . cp -r backup/public/ . cp -r backup/translations/ . -
Restart the service:
docker start kinesis-api
Native Installation Restoration:
-
Stop the Kinesis API service:
# If using systemd sudo systemctl stop kinesis-api # Or if running directly kill $(pgrep kinesis-api) -
Replace the files:
# Backup current state (optional safety measure) cp -r /path/to/kinesis-api/data/ /path/to/kinesis-api/data.backup/ # Restore from backup rm -rf /path/to/kinesis-api/data/ cp -r /path/to/backup/data/ /path/to/kinesis-api/ cp /path/to/backup/.env /path/to/kinesis-api/ cp -r /path/to/backup/public/ /path/to/kinesis-api/ cp -r /path/to/backup/translations/ /path/to/kinesis-api/ -
Restart the service:
# If using systemd
sudo systemctl start kinesis-api

# Or if running directly
cd /path/to/kinesis-api && ./target/release/kinesis-api &
3. Hybrid Restoration Approach
You can also combine methods for maximum flexibility:
Scenario: Restore Built-in Backup to External Environment
- Download Backup: Use the built-in system to create a backup
- Export Data: Access the backup files from the system
- Manual Transfer: Copy to your target environment
- Manual Restoration: Use file-based restoration on the target
Scenario: Import Manual Backup into Built-in System
- Create Manual Backup: Using your existing file-based process
- Import to System: Manually copy files to Kinesis API directory
- Create Built-in Backup: Use the web interface to create a new backup for future use
- Built-in Restoration: Use the integrated system for future restorations
Restoration Best Practices
Before Restoration:
- Create Current Backup: Always backup your current state before restoring
- Verify Backup Integrity: Ensure the backup you’re restoring from is not corrupted
- Check Dependencies: Verify that environment configurations match
- Plan Downtime: Coordinate restoration during maintenance windows
During Restoration:
- Follow Exact Steps: Don’t skip steps or modify the process
- Monitor Logs: Watch for error messages during the restoration
- Verify Completeness: Ensure all files are restored properly
After Restoration:
- Test Functionality: Verify that all features work as expected
- Check Data Integrity: Confirm that data is accessible and correct
- Update Documentation: Record the restoration in your maintenance logs
- User Communication: Notify users of any changes or data loss
Troubleshooting Restoration Issues:
Built-in System Issues:
- Backup Not Found: Check that the backup hasn’t expired
- Permission Errors: Ensure you’re logged in as a ROOT user
- Restoration Fails: Check system logs for specific error messages
Manual Restoration Issues:
- File Permission Errors: Ensure proper ownership and permissions
- Database Corruption: Try using an earlier backup
- Configuration Mismatches: Verify environment variables match
Recovery from Failed Restoration:
If a restoration fails:
- Stop the Service: Prevent further damage
- Restore Previous State: Use your pre-restoration backup
- Investigate Cause: Check logs and file integrity
- Try Alternative Method: Consider using the other restoration approach
- Seek Support: Contact support if issues persist
Restoration Testing
Regular Testing Schedule:
- Test restoration procedures monthly in a non-production environment
- Document the complete process and timing
- Verify that all data types and features work correctly after restoration
Testing Environment Setup:
- Isolated Environment: Use a separate test environment
- Production-like Configuration: Mirror your production setup
- Test Data: Use anonymized production data for realistic testing
Upgrading
This guide provides instructions for upgrading your Kinesis API installation to newer versions. Because Kinesis API is actively developed, new releases may include important security updates, bug fixes, and new features.
Before You Begin
Before upgrading your Kinesis API installation, it’s important to take some precautionary steps:
-
Create a backup: Always back up your data before upgrading. See the Backups guide for detailed instructions.
-
Review the changelog and roadmap:
-
Test in a non-production environment: If possible, test the upgrade process in a development or staging environment before applying it to production.
Upgrading Docker Installations
If you’re running Kinesis API via Docker (the recommended method), follow these steps:
Step 1: Pull the Latest Image
# Pull the latest version
docker pull edgeking8100/kinesis-api:latest

# Or pull a specific version
docker pull edgeking8100/kinesis-api:x.y.z
Step 2: Stop the Current Container
docker stop kinesis-api
Step 3: Remove the Current Container (preserving volumes)
docker rm kinesis-api
Step 4: Start a New Container with the Updated Image
docker run --name kinesis-api \
  -v $(pwd)/.env:/app/.env \
  -v $(pwd)/data:/app/data \
  -v $(pwd)/public:/app/public \
  -v $(pwd)/translations:/app/translations \
  -p 8080:8080 -d \
  --restart unless-stopped \
  edgeking8100/kinesis-api:latest
Step 5: Verify the Upgrade
- Check the container logs for any errors:
docker logs kinesis-api
- Access the web interface to confirm it’s working correctly.
Using Beta Releases (Docker)
Before a new version is officially released (e.g., v0.33.0), beta releases are made available for testing and early access. These experimental versions help identify issues before the final release.
Important Notes About Beta Releases
- Beta releases may contain bugs and instability
- They may not include all features planned for the final release
- They are intended for testing and experimentation, not production use
- Breaking changes may occur between beta versions
Beta Release Naming
Beta releases follow this format: x.y.z-beta.n
For example, if version 0.33.0 is upcoming:
0.33.0-beta.1(first beta)0.33.0-beta.2(second beta)0.33.0-beta.3(third beta)- etc.
Pulling Beta Releases
You can pull beta releases in two ways:
Using a specific beta version tag:
docker pull edgeking8100/kinesis-api:0.33.0-beta.1
Using the beta tag (always points to the latest beta):
docker pull edgeking8100/kinesis-api:beta
Running a Beta Release
docker run --name kinesis-api-beta \
  -v $(pwd)/.env:/app/.env \
  -v $(pwd)/data:/app/data \
  -v $(pwd)/public:/app/public \
  -v $(pwd)/translations:/app/translations \
  -p 8080:8080 -d \
  --restart unless-stopped \
  edgeking8100/kinesis-api:beta
Switching from Beta to Stable
When the stable version is released, you can upgrade from a beta to the stable release using the standard upgrade process. Simply pull the stable version and restart your container:
docker pull edgeking8100/kinesis-api:0.33.0
docker stop kinesis-api-beta
docker rm kinesis-api-beta
# Run with the stable version tag
Upgrading Rust Installations
If you’re running Kinesis API directly from the Rust source:
Step 1: Backup Your Data and Environment
cp -r data/ data_backup/
cp .env .env.backup
Step 2: Update the Source Code
git pull origin master
Step 3: Build the Updated Version
cargo build --release
Step 4: Restart the Service
# If running as a systemd service
sudo systemctl restart kinesis-api

# Or if running directly
./target/release/kinesis-api
Post-Upgrade Steps
After upgrading, perform these checks:
- Verify all projects and collections are accessible
- Test API endpoints to ensure they’re functioning correctly
- Review logs for any errors or warnings
- Check database integrity if you’ve upgraded across major versions
Handling Breaking Changes
Kinesis API follows semantic versioning (SemVer):
- Patch updates (e.g., 1.0.0 to 1.0.1): Safe to upgrade, contains bug fixes
- Minor updates (e.g., 1.0.0 to 1.1.0): Generally safe, adds new features in a backward-compatible way
- Major updates (e.g., 1.0.0 to 2.0.0): May contain breaking changes
For major version upgrades, read the release notes carefully as they will include:
- List of breaking changes
- Required manual steps
- Migration guides
Rollback Procedures
If you encounter issues after upgrading, you can roll back to the previous version:
Docker Rollback
# Stop the current container
docker stop kinesis-api
docker rm kinesis-api

# Start a new container with the previous version
docker run --name kinesis-api \
  -v $(pwd)/.env:/app/.env \
  -v $(pwd)/data:/app/data \
  -v $(pwd)/public:/app/public \
  -v $(pwd)/translations:/app/translations \
  -p 8080:8080 -d \
  --restart unless-stopped \
  edgeking8100/kinesis-api:previous-version-tag
Rust Rollback
# Checkout the previous version
git checkout v1.x.x

# Rebuild
cargo build --release

# Restart
sudo systemctl restart kinesis-api  # or start manually
Troubleshooting Common Upgrade Issues
Database Connection Errors
If you see database connection errors after upgrading:
- Check that your data directory permissions are correct
- Verify the database connection settings in your
.envfile - Ensure the data format is compatible with the new version
UI Issues After Upgrade
If the web interface appears broken after upgrading:
- Clear your browser cache
- Check for JavaScript console errors
- Verify that all static assets are being served correctly
API Endpoints Not Working
If API endpoints stop working after an upgrade:
- Check the route configuration in the X Engine
- Verify that any changes to authentication methods have been accounted for
- Look for changes in parameter handling or response formats
Getting Help
If you encounter issues during the upgrade process:
- Check the official documentation
- Create a new ticket in the issue tracker
- Contact support at [email protected]
Database Backends
Kinesis API supports multiple database backend options: the bundled Kinesis DB (default), SQLite, MySQL, and PostgreSQL. This guide explains how to choose between them and migrate data when switching backends.
Overview
Kinesis DB (Default)
Kinesis DB is a custom-built, ACID-compliant embedded database written in Rust specifically for Kinesis API. It offers:
- Multiple storage engines (in-memory, on-disk, hybrid)
- Advanced transaction isolation levels
- Custom optimizations for Kinesis API workloads
- No external dependencies
For detailed information about Kinesis DB features, see the Kinesis DB documentation.
SQLite
SQLite is a widely-used, battle-tested embedded database. Using SQLite may be preferable if you:
- Need compatibility with external SQLite tools
- Want to use a well-established database engine
- Have existing SQLite expertise
- Require integration with other systems that use SQLite
- Prefer an embedded database without requiring a separate database server
MySQL
MySQL is a popular open-source relational database management system. Using MySQL may be preferable if you:
- Already have a MySQL server infrastructure
- Need to share the database with other applications
- Require advanced replication and clustering features
- Have existing MySQL expertise and tooling
- Need enterprise-grade database support
PostgreSQL
PostgreSQL is an advanced open-source relational database known for its robustness and features. Using PostgreSQL may be preferable if you:
- Need advanced SQL features and data types
- Require strong data integrity and ACID compliance
- Want extensibility and custom functions
- Have existing PostgreSQL infrastructure
- Need advanced indexing and query optimization
Configuring the Database Backend
You can choose which database backend to use by setting the DB_BACKEND environment variable in your .env file.
Using Kinesis DB (Default)
To use Kinesis DB, either omit the DB_BACKEND variable or set it to one of these values:
DB_BACKEND=kinesis_db
# or
DB_BACKEND=kinesisdb
If DB_BACKEND is not set or is empty, Kinesis DB will be used by default.
Using SQLite
To use SQLite, set the DB_BACKEND environment variable to sqlite:
DB_BACKEND=sqlite
Optionally, you can control the location of the .sqlite file using the DATABASE_URL environment variable:
DB_BACKEND=sqlite
DATABASE_URL=/app/data/my_database.sqlite
Default SQLite paths:
- Docker installations:
/app/data/db.sqlite - Local installations:
data/db.sqlite(relative to the project root)
If you don’t specify DATABASE_URL, Kinesis API will use the default path for your installation type.
Using MySQL
To use MySQL, set the DB_BACKEND environment variable to mysql and provide a connection URI via DATABASE_URL:
DB_BACKEND=mysql
DATABASE_URL=mysql://username:password@host:port/database_name
Example:
DB_BACKEND=mysql
DATABASE_URL=mysql://kinesis_user:secure_password@localhost:3306/kinesis_db
The DATABASE_URL must include:
- Username and password for authentication
- Host and port of your MySQL server
- Database name to use
Using PostgreSQL
To use PostgreSQL, set the DB_BACKEND environment variable to one of these values: postgresql, postgres, or pgsql:
DB_BACKEND=postgresql
DATABASE_URL=postgresql://username:password@host:port/database_name
Example:
DB_BACKEND=postgresql
DATABASE_URL=postgresql://kinesis_user:secure_password@localhost:5432/kinesis_db
The DATABASE_URL must include:
- Username and password for authentication
- Host and port of your PostgreSQL server
- Database name to use
Resetting Sequences After Migration
⚠️ IMPORTANT: After migrating to PostgreSQL, you MUST manually reset the auto-increment sequences for all tables. This ensures that new records use correct ID values and prevents primary key conflicts.
Connect to your PostgreSQL database and run the following SQL commands:
SELECT setval(pg_get_serial_sequence('"user"', 'id'),(SELECT COALESCE(MAX(id), 0) FROM "user") + 1,false);
SELECT setval(pg_get_serial_sequence('"user_link"', 'id'),(SELECT COALESCE(MAX(id), 0) FROM "user_link") + 1,false);
SELECT setval(pg_get_serial_sequence('"ticket"', 'id'),(SELECT COALESCE(MAX(id), 0) FROM "ticket") + 1,false);
SELECT setval(pg_get_serial_sequence('"ticket_comment"', 'id'),(SELECT COALESCE(MAX(id), 0) FROM "ticket_comment") + 1,false);
SELECT setval(pg_get_serial_sequence('"project"', 'id'),(SELECT COALESCE(MAX(id), 0) FROM "project") + 1,false);
SELECT setval(pg_get_serial_sequence('"collection"', 'id'),(SELECT COALESCE(MAX(id), 0) FROM "collection") + 1,false);
SELECT setval(pg_get_serial_sequence('"custom_structure"', 'id'),(SELECT COALESCE(MAX(id), 0) FROM "custom_structure") + 1,false);
SELECT setval(pg_get_serial_sequence('"structure"', 'id'),(SELECT COALESCE(MAX(id), 0) FROM "structure") + 1,false);
SELECT setval(pg_get_serial_sequence('"config"', 'id'),(SELECT COALESCE(MAX(id), 0) FROM "config") + 1,false);
SELECT setval(pg_get_serial_sequence('"media"', 'id'),(SELECT COALESCE(MAX(id), 0) FROM "media") + 1,false);
SELECT setval(pg_get_serial_sequence('"event"', 'id'),(SELECT COALESCE(MAX(id), 0) FROM "event") + 1,false);
SELECT setval(pg_get_serial_sequence('"constraint"', 'id'),(SELECT COALESCE(MAX(id), 0) FROM "constraint") + 1,false);
SELECT setval(pg_get_serial_sequence('"constraint_property"', 'id'),(SELECT COALESCE(MAX(id), 0) FROM "constraint_property") + 1,false);
SELECT setval(pg_get_serial_sequence('"data"', 'id'),(SELECT COALESCE(MAX(id), 0) FROM "data") + 1,false);
SELECT setval(pg_get_serial_sequence('"data_pair"', 'id'),(SELECT COALESCE(MAX(id), 0) FROM "data_pair") + 1,false);
SELECT setval(pg_get_serial_sequence('"route"', 'id'),(SELECT COALESCE(MAX(id), 0) FROM "route") + 1,false);
SELECT setval(pg_get_serial_sequence('"personal_access_token"', 'id'),(SELECT COALESCE(MAX(id), 0) FROM "personal_access_token") + 1,false);
SELECT setval(pg_get_serial_sequence('"redirect"', 'id'),(SELECT COALESCE(MAX(id), 0) FROM "redirect") + 1,false);
SELECT setval(pg_get_serial_sequence('"snippet"', 'id'),(SELECT COALESCE(MAX(id), 0) FROM "snippet") + 1,false);
SELECT setval(pg_get_serial_sequence('"blog_post"', 'id'),(SELECT COALESCE(MAX(id), 0) FROM "blog_post") + 1,false);
SELECT setval(pg_get_serial_sequence('"blog_comment"', 'id'),(SELECT COALESCE(MAX(id), 0) FROM "blog_comment") + 1,false);
SELECT setval(pg_get_serial_sequence('"backup"', 'id'),(SELECT COALESCE(MAX(id), 0) FROM "backup") + 1,false);
SELECT setval(pg_get_serial_sequence('"backup_schedule"', 'id'),(SELECT COALESCE(MAX(id), 0) FROM "backup_schedule") + 1,false);
SELECT setval(pg_get_serial_sequence('"content_history"', 'id'),(SELECT COALESCE(MAX(id), 0) FROM "content_history") + 1,false);
SELECT setval(pg_get_serial_sequence('"component_user_metrics"', 'id'),(SELECT COALESCE(MAX(id), 0) FROM "component_user_metrics") + 1,false);
SELECT setval(pg_get_serial_sequence('"vault"', 'id'),(SELECT COALESCE(MAX(id), 0) FROM "vault") + 1,false);
SELECT setval(pg_get_serial_sequence('"email_template"', 'id'),(SELECT COALESCE(MAX(id), 0) FROM "email_template") + 1,false);
SELECT setval(pg_get_serial_sequence('"email_template_variable"', 'id'),(SELECT COALESCE(MAX(id), 0) FROM "email_template_variable") + 1,false);
SELECT setval(pg_get_serial_sequence('"route_template"', 'id'),(SELECT COALESCE(MAX(id), 0) FROM "route_template") + 1,false);
SELECT setval(pg_get_serial_sequence('"board"', 'id'),(SELECT COALESCE(MAX(id), 0) FROM "board") + 1,false);
SELECT setval(pg_get_serial_sequence('"board_list"', 'id'),(SELECT COALESCE(MAX(id), 0) FROM "board_list") + 1,false);
SELECT setval(pg_get_serial_sequence('"board_card"', 'id'),(SELECT COALESCE(MAX(id), 0) FROM "board_card") + 1,false);
SELECT setval(pg_get_serial_sequence('"board_member"', 'id'),(SELECT COALESCE(MAX(id), 0) FROM "board_member") + 1,false);
SELECT setval(pg_get_serial_sequence('"board_watch"', 'id'),(SELECT COALESCE(MAX(id), 0) FROM "board_watch") + 1,false);
SELECT setval(pg_get_serial_sequence('"board_activity"', 'id'),(SELECT COALESCE(MAX(id), 0) FROM "board_activity") + 1,false);
SELECT setval(pg_get_serial_sequence('"board_notification"', 'id'),(SELECT COALESCE(MAX(id), 0) FROM "board_notification") + 1,false);
SELECT setval(pg_get_serial_sequence('"card_attachment"', 'id'),(SELECT COALESCE(MAX(id), 0) FROM "card_attachment") + 1,false);
SELECT setval(pg_get_serial_sequence('"card_checklist"', 'id'),(SELECT COALESCE(MAX(id), 0) FROM "card_checklist") + 1,false);
SELECT setval(pg_get_serial_sequence('"card_checklist_item"', 'id'),(SELECT COALESCE(MAX(id), 0) FROM "card_checklist_item") + 1,false);
SELECT setval(pg_get_serial_sequence('"card_comment"', 'id'),(SELECT COALESCE(MAX(id), 0) FROM "card_comment") + 1,false);
How to run these commands:
# Using psql command-line tool
psql -U kinesis_user -d kinesis_db -f reset_sequences.sql

# Or connect interactively and paste the commands
psql -U kinesis_user -d kinesis_db
# Then paste all the SELECT setval(...) commands
Why this is necessary:
When migrating data to PostgreSQL, the sequences that generate auto-incrementing IDs are not automatically updated to match the migrated data. Without resetting these sequences, PostgreSQL will start generating IDs from 1, which will conflict with existing records and cause insertion failures.
Switching Between Database Backends
⚠️ CRITICAL: When switching between database backends, you MUST migrate your data manually. Simply changing the
DB_BACKENDenvironment variable will result in Kinesis API using an empty database, as different backends store data in different formats and locations.
Migration Process
Kinesis API provides two methods to transfer data between database backends:
- Web UI (Recommended): Use the migration interface on the login page
- API Endpoint: Call the migration endpoint directly via HTTP request
Both methods require the same initialization code (init_code) that you configured during setup.
Method 1: Using the Web UI (Recommended)
-
Back up your current data (see the Backups guide)
-
Stop Kinesis API
-
Update your
.envfile to set the target database backend:- To migrate to SQLite: Set
DB_BACKEND=sqlite(optionally setDATABASE_URL) - To migrate to MySQL: Set
DB_BACKEND=mysqlandDATABASE_URL=mysql://... - To migrate to PostgreSQL: Set
DB_BACKEND=postgresqlandDATABASE_URL=postgresql://...
- To migrate to SQLite: Set
-
Restart Kinesis API
-
Navigate to the login page at
http://your-domain-or-ip:8080/web/login -
Scroll down to find the “Initialize” and “Migrate Database” sections
-
Click the navigation button to switch to the “Migrate Database” panel
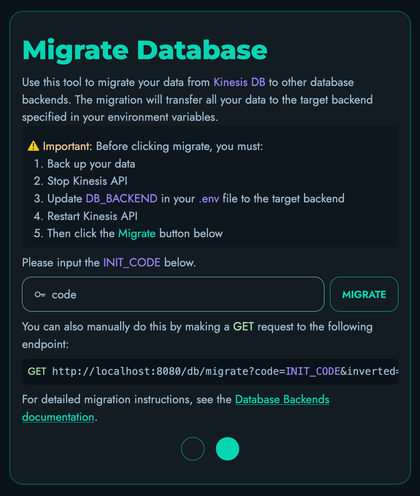
-
Enter your initialization code (default is
code) -
Click the “Migrate” button
-
Wait for the success confirmation message
-
Verify that your data is accessible in the web interface
Method 2: Using the API Endpoint
The general process for migrating via API is:
- Ensure you know what database backend you’re currently using
- Back up your current data (see the Backups guide)
- Stop Kinesis API
- Update your
.envfile to configure the target database backend - Restart Kinesis API
- Call the migration endpoint
- Verify that your data is accessible
Example: Migrating to SQLite
# 1. Stop Kinesis API
# 2. Update .env file:
DB_BACKEND=sqlite
DATABASE_URL=/app/data/db.sqlite  # Optional: specify custom path

# 3. Restart Kinesis API
# 4. Call migration endpoint:
curl "http://your-domain-or-ip:8080/db/migrate?code=your_init_code"
Example: Migrating to MySQL
# 1. Stop Kinesis API
# 2. Update .env file:
DB_BACKEND=mysql
DATABASE_URL=mysql://kinesis_user:password@localhost:3306/kinesis_db

# 3. Restart Kinesis API
# 4. Call migration endpoint:
curl "http://your-domain-or-ip:8080/db/migrate?code=your_init_code"
Example: Migrating to PostgreSQL
# 1. Stop Kinesis API
# 2. Update .env file:
DB_BACKEND=postgresql
DATABASE_URL=postgresql://kinesis_user:password@localhost:5432/kinesis_db

# 3. Restart Kinesis API
# 4. Call migration endpoint:
curl "http://your-domain-or-ip:8080/db/migrate?code=your_init_code"
Example: Migrating to Kinesis DB
# 1. Back up your current data
# 2. Stop Kinesis API
# 3. Restart Kinesis API (keep DB_BACKEND set to your current external database)
# 4. Call migration endpoint with inverted flag:
curl "http://your-domain-or-ip:8080/db/migrate?code=your_init_code&inverted=true"

# 5. After successful migration, you can optionally update .env to use Kinesis DB:
# DB_BACKEND=kinesis_db
# (or remove DB_BACKEND entirely)
# 6. Restart Kinesis API to use Kinesis DB as the active backend
Important Notes:
- Keep
DB_BACKENDset to your current external database (sqlite/mysql/postgresql) when calling the migration endpoint - The
inverted=trueparameter tells the system to read from the external database and write to Kinesis DB - Only change
DB_BACKENDtokinesis_dbAFTER the migration completes successfully - To migrate between external databases (e.g., SQLite to MySQL), you must first migrate to Kinesis DB, then migrate to the target database
Replace your_init_code with the init code configured in your setup (default is code).
Migration Endpoint Details
- Endpoint:
/db/migrate - Method: GET
- Query Parameters:
code(required) - Your initialization code (same as used for/init)inverted(optional) - Set totrueto migrate back to Kinesis DB (default:false)
- Behavior: Migrates all data between Kinesis DB and external database backends
- Normal migration (
inverted=falseor omitted): Migrates FROM Kinesis DB TO the external database specified byDB_BACKEND(SQLite, MySQL, or PostgreSQL) - Inverted migration (
inverted=true): Migrates FROM the external database specified byDB_BACKENDback TO Kinesis DB - Direct migration between external databases (e.g., SQLite to MySQL) is NOT supported - you must migrate to Kinesis DB first, then to the target external database
- Normal migration (
Important:
- The
DB_BACKENDenvironment variable should be set to the external database backend (SQLite, MySQL, or PostgreSQL) for both migration directions - For normal migration: Migrates from Kinesis DB to the external database specified in
DB_BACKEND - For inverted migration: Migrates from the external database specified in
DB_BACKENDback to Kinesis DB - The migration will delete all data from the target database
Migrating from Kinesis DB to External Database:
# Using curl
curl "http://localhost:8080/db/migrate?code=code"

# Using wget
wget -qO - "http://localhost:8080/db/migrate?code=code"
Migrating from External Database back to Kinesis DB:
# Using curl (note the inverted=true parameter)
curl "http://localhost:8080/db/migrate?code=code&inverted=true"

# Using wget
wget -qO - "http://localhost:8080/db/migrate?code=code&inverted=tru
Security Notes
The migration endpoint uses the same security code (init_code) as the initialization endpoint to prevent unauthorized access. Ensure your init_code is:
- Changed from the default value (
code) in production environments - Kept secure and not shared publicly
- Consistent with the value configured in your Configs settings
- Connection pooling is enabled for all external database backends (SQLite, MySQL, PostgreSQL) with a default pool size of 10 connections
- Network latency may affect MySQL/PostgreSQL performance compared to embedded databases (Kinesis DB, SQLite)
Best Practices
Before Switching
- Create a backup: Always back up your data before switching database backends. See the Backups guide for instructions.
- Test in a non-production environment: If possible, test the migration process in a development or staging environment first.
- Verify your init code: Ensure you know your initialization code before starting the migration.
- Stop write operations: Ensure no data is being written during the migration process to prevent data loss.
- Prepare target database: For MySQL/PostgreSQL, ensure the database exists and the connection URL is correct.
- Check permissions: Verify that Kinesis API has read/write access to the target database location or server.
- Understand migration paths: Remember that you can only migrate FROM Kinesis DB TO external databases, or FROM external databases TO Kinesis DB. Direct migration between external databases requires a two-step process through Kinesis DB.
After Switching
- Verify data integrity: Check that all your projects, collections, and data are accessible.
- Test functionality: Perform basic CRUD operations to ensure the new backend is working correctly.
- Monitor performance: Different backends may have different performance characteristics for your specific workload.
- Update backups: Ensure your backup procedures account for the new database backend.
Performance Considerations
-
Kinesis DB may offer better performance for specific Kinesis API operations due to custom optimizations
-
SQLite is well-optimized for general-purpose workloads and benefits from decades of development
-
MySQL provides good performance for multi-user environments and can scale horizontally with replication
-
PostgreSQL offers excellent performance for complex queries and large datasets with advanced indexing
-
The actual performance difference will depend on your specific use case and workload patterns
-
Consider benchmarking different options with your typical workload to make an informed decision
Troubleshooting
Migration Fails
If the migration endpoint returns an error:
- Check the Kinesis API logs for detailed error messages
- Verify that you’re using the correct initialization code
- Ensure you have sufficient disk space for the new database
- Verify the connection URI is correct and the server is running
- Ensure the database exists and the user has proper permissions (CREATE, INSERT, UPDATE, DELETE)
- Check that the MySQL/PostgreSQL server is reachable from the Kinesis API host
- Verify firewall rules allow connections on the database port
- Make sure Kinesis API has been restarted after changing environment variables
- For inverted migrations (back to Kinesis DB), verify you’re using
inverted=truein the request
Data Missing After Switch
If data appears to be missing after switching backends:
- Verify that you called the migration endpoint with the correct parameters:
- Normal migration:
inverted=false(or omitted) withDB_BACKENDset to the target external database - Inverted migration:
inverted=truewithDB_BACKENDset to the source external database
- Normal migration:
- Check that you’re looking at the correct database (file path for SQLite, database name for MySQL/PostgreSQL)
- For inverted migrations, ensure you did NOT change
DB_BACKENDtokinesis_dbbefore calling the migration endpoint - Review the migration endpoint response for any error messages
- Restore from your backup and retry the migration process with the correct parameters
- Remember: Direct migration between external databases is not supported - use Kinesis DB as an intermediary
Cannot Access Migration Endpoint
If you receive a 401 or 403 error when calling the migration endpoint:
- Double-check that your
init_codematches the value configured in Configs - Ensure you’re using the correct URL format with the
codequery parameter - Verify that the Kinesis API service is running and accessible
Getting Help
If you encounter issues during the database backend switch:
- Check the official documentation
- Create a new ticket in the issue tracker
- Contact support at [email protected]
Kinesis DB: Technical Documentation
This document provides a deep technical overview of the Kinesis database layer, focusing on its architecture, core modules, transaction management, persistence, and extensibility. It is intended for developers working on or extending the database internals.
Architecture Overview
The Kinesis database layer is designed as a modular, transactional, and persistent storage engine supporting multiple backends:
- InMemory: Purely in-memory, non-persistent.
- OnDisk: Fully persistent, disk-based.
- Hybrid: Combines in-memory caching with disk persistence for performance.
The main entry point is the DBEngine, which orchestrates all database operations, transaction management, and persistence.
Core Modules
1. database/engine.rs (DBEngine)
- Central orchestrator for all database operations.
- Manages:
- In-memory state (
Database) - Disk persistence (via
PageStore,BufferPool,BlobStore) - Transaction lifecycle (
TransactionManager) - Write-Ahead Logging (
WriteAheadLog) - Table schemas and schema migrations
- Optional secondary indexes (
IndexManager)
- In-memory state (
Key Responsibilities
- Transaction Management: Begin, commit, rollback, and validate transactions.
- Record Operations: Insert, update, delete, and search records with schema validation.
- Persistence: Save/load state to/from disk, manage page allocation, and handle large data via blobs.
- Crash Recovery: Replay WAL and restore consistent state after failures.
- Schema Evolution: Support for schema updates with migration and validation.
2. database/database.rs (Database)
- Represents the in-memory state of all tables.
- Each table is a
Tablewith its own schema, records, and next record ID.
3. database/table.rs (Table)
- Stores records as a map of record ID to
Record. - Enforces schema constraints and manages record versioning.
4. database/record.rs (Record)
- Represents a single row in a table.
- Contains:
id: Unique identifiervalues: Map of field name toValueTypeversionandtimestampfor MVCC and concurrency control
5. database/schema.rs (TableSchema, FieldConstraint)
- Defines table structure, field types, constraints (required, unique, min/max, pattern), and default values.
- Supports schema validation and migration logic.
6. database/value_type.rs (ValueType, StringValue)
- Strongly-typed representation of all supported field types (Int, Float, String, Bool, etc.).
StringValuesupports both inline and blob-referenced storage for large strings.
7. storage/page_store.rs, storage/buffer_pool.rs, storage/blob_store.rs
- PageStore: Manages allocation, reading, and writing of fixed-size pages on disk.
- BufferPool: In-memory cache for pages, with LRU eviction.
- BlobStore: Efficient storage for large binary/string data, with reference counting and garbage collection.
8. storage/wal.rs (WriteAheadLog)
- Ensures durability and crash recovery by logging all transactional changes before commit.
9. transaction/manager.rs, transaction/transaction.rs
- TransactionManager: Tracks active transactions, locks, timeouts, and deadlock detection.
- Transaction: Encapsulates all pending changes, isolation level, and MVCC snapshot.
Key Functions and Internal Workings
Loading the Database (DBEngine::load_from_disk)
- Purpose: Loads the database state from disk into memory.
- How it works:
- Reads the Table of Contents (TOC) from the first page using the buffer pool and page store.
- Deserializes table locations, schemas, and next record IDs.
- For each table, loads all records from their page chains (handling both old and new page formats, including overflow pages).
- Reconstructs in-memory
Tableobjects and inserts them into the database. - Skips loading for
InMemorydatabases.
Saving the Database (DBEngine::save_to_disk)
- Purpose: Persists the current in-memory state to disk.
- How it works:
- Iterates over all tables, serializes their records in batches.
- Writes each batch to disk using the page store, allocating new pages as needed.
- Updates the TOC with new page locations, schemas, and next IDs.
- Flushes all pages via the buffer pool and syncs the page store to ensure durability.
- Returns a checksum of the serialized state for verification.
Committing Transactions (DBEngine::commit and commit_internal)
- Purpose: Atomically applies all changes in a transaction, ensuring ACID properties.
- How it works:
- Validates the transaction for isolation level conflicts (e.g., repeatable read, serializable).
- Acquires necessary locks for all records being written.
- Applies all staged changes (inserts, updates, deletes, schema changes) to the in-memory database.
- Logs the transaction to the WAL (unless it’s a blob operation or in-memory DB).
- Persists changes to disk (if not in-memory).
- Releases locks and ends the transaction.
- On failure, rolls back all changes using the transaction’s snapshot.
Rolling Back Transactions (DBEngine::rollback)
- Purpose: Reverts all changes made by a transaction if commit fails or is aborted.
- How it works:
- Restores original state for all modified records using the transaction’s snapshot.
- Releases any acquired locks.
- Cleans up any staged blob references.
Transaction Lifecycle
- Begin:
begin_transactioncreates a new transaction, optionally with a snapshot for MVCC. - Read/Write: All record operations are staged in the transaction’s pending sets.
- Commit: See above.
- Rollback: See above.
Table and Record Operations
- Creating Tables:
create_tableorcreate_table_with_schemaadds a new table definition to the transaction’s pending creates. - Inserting Records:
insert_recordvalidates the record against the schema, handles large strings (blobs), and stages the insert. - Updating Records:
update_recordvalidates updates, manages blob references, and stages the update. - Deleting Records:
delete_recordstages the deletion and tracks any blob references for cleanup.
Blob Storage
- Large strings are stored in the
BlobStoreif they exceed a threshold. - Records store a reference to the blob key.
- On update or delete, old blob references are cleaned up.
- Blob store is synced to disk after changes.
Write-Ahead Log (WAL)
- Purpose: Ensures durability and crash recovery.
- How it works:
- All transactional changes are serialized and appended to the WAL before being applied.
- On startup, the WAL is replayed to recover any committed but not yet persisted transactions.
Crash Recovery (DBEngine::recover_from_crash)
- Purpose: Restores a consistent state after a crash.
- How it works:
- Loads the database from disk.
- Loads and replays all valid transactions from the WAL.
- Applies each transaction and persists the state after each.
Schema Management
- Schema Validation: All record operations are validated against the current table schema.
- Schema Migration:
update_table_schemastages a schema update, which is validated for compatibility and applied atomically.
Transaction Types and Isolation Levels
Kinesis supports four transaction isolation levels, each with distinct semantics and internal handling:
1. ReadUncommitted
- Behavior: Transactions can see uncommitted changes from other transactions (“dirty reads”).
- Implementation: No snapshot is taken. Reads always reflect the latest in-memory state, regardless of commit status.
- Use Case: Maximum performance, minimal isolation. Rarely recommended except for analytics or non-critical reads.
2. ReadCommitted
- Behavior: Transactions only see data that has been committed by other transactions.
- Implementation:
- No snapshot is taken.
- On each read, the engine checks the committed state of the record.
- During commit, the engine validates that records read have not changed since they were read (prevents “non-repeatable reads”).
- Use Case: Standard for many OLTP systems, balances consistency and concurrency.
3. RepeatableRead
- Behavior: All reads within a transaction see a consistent snapshot of the database as of the transaction’s start.
- Implementation:
- A full snapshot of the database is taken at transaction start.
- Reads are served from the snapshot.
- On commit, the engine validates that no records in the read set have changed since the snapshot.
- Prevents non-repeatable reads and phantom reads (to the extent possible without full serializability).
- Use Case: Applications requiring strong consistency for reads within a transaction.
4. Serializable
- Behavior: Transactions are fully isolated as if executed serially.
- Implementation:
- Like RepeatableRead, but with additional validation:
- Checks for write-write conflicts.
- Ensures no new records (phantoms) have appeared in the range of interest.
- Validates that the snapshot and current state are equivalent for all read and written data.
- May abort transactions if conflicts are detected.
- Like RepeatableRead, but with additional validation:
- Use Case: Highest level of isolation, required for financial or critical systems.
Transaction Internals
Transaction Structure
Each transaction (Transaction) tracks:
- ID: Unique identifier.
- Isolation Level: Determines snapshot and validation logic.
- Snapshot: Optional, for higher isolation levels.
- Read Set: Records read (table, id, version).
- Write Set: Records written (table, id).
- Pending Operations: Inserts, updates, deletes, schema changes.
- Metadata: For tracking blob references and other auxiliary data.
Transaction Flow
- Begin:
DBEngine::begin_transactioncreates a new transaction, possibly with a snapshot. - Read: Reads are tracked in the read set. For RepeatableRead/Serializable, reads come from the snapshot.
- Write: Writes are staged in the write set and pending operations.
- Validation: On commit, the engine validates the transaction according to its isolation level.
- Commit: If validation passes, changes are applied atomically.
- Rollback: If validation fails or an error occurs, all changes are reverted.
Locking and Deadlock Detection
- Locks: Acquired at the record level for writes. Managed by
TransactionManager. - Deadlock Detection: Periodically checks for cycles in the lock graph. If detected, aborts one or more transactions.
- Timeouts: Transactions can be configured to expire after a set duration.
Detailed Function Descriptions
DBEngine::begin_transaction
- Purpose: Starts a new transaction.
- Details: Assigns a unique ID, sets the isolation level, and optionally takes a snapshot of the database for higher isolation.
DBEngine::commit
- Purpose: Commits a transaction, applying all staged changes.
- Details:
- Validates the transaction (see above).
- Acquires all necessary locks.
- Applies inserts, updates, deletes, and schema changes.
- Logs the transaction to the WAL (unless skipped for blob ops).
- Persists changes to disk.
- Releases locks and ends the transaction.
DBEngine::rollback
- Purpose: Rolls back a transaction, reverting all staged changes.
- Details: Uses the transaction’s snapshot and pending operations to restore the previous state.
DBEngine::insert_record
- Purpose: Stages a new record for insertion.
- Details: Validates against schema, handles large strings (blobs), and adds to the transaction’s pending inserts.
DBEngine::update_record
- Purpose: Stages updates to an existing record.
- Details: Validates updates, manages blob references, and adds to pending updates.
DBEngine::delete_record
- Purpose: Stages a record for deletion.
- Details: Tracks blob references for cleanup and adds to pending deletes.
DBEngine::search_records
- Purpose: Searches for records matching a query string.
- Details: Supports case-insensitive search, uses the appropriate snapshot or committed state based on isolation level.
DBEngine::create_table_with_schema
- Purpose: Stages creation of a new table with a specified schema.
- Details: Adds to the transaction’s pending table creates.
DBEngine::update_table_schema
- Purpose: Stages a schema update for a table.
- Details: Validates that the migration is safe and adds to pending schema updates.
DBEngine::load_from_disk
- Purpose: Loads the database state from disk.
- Details: Reads the TOC, loads all tables and records, reconstructs in-memory state.
DBEngine::save_to_disk
- Purpose: Persists the current state to disk.
- Details: Serializes all tables and records, writes to page store, updates TOC, flushes and syncs.
DBEngine::recover_from_crash
- Purpose: Restores the database to a consistent state after a crash.
- Details: Loads from disk, replays WAL, applies all valid transactions, persists state.
DBEngine::compact_database
- Purpose: Compacts the database file, removing unused pages and reorganizing data.
- Details: Writes all live data to a new file, replaces the old file, and reopens the page store.
REPL Shell (REPL)
- Purpose: Interactive shell for database commands.
- Supported Commands:
CREATE_TABLE <name> ...INSERT INTO <table> ...UPDATE <table> ...DELETE FROM <table> ...SEARCH_RECORDS FROM <table> MATCH <query>GET_RECORDS FROM <table>DROP_TABLE <name>ALTER_TABLE <name> ...
- Features:
- Supports output formats: standard, table, JSON, etc.
- Handles errors and transaction boundaries per command.
- Useful for development, testing, and demos.
Error Handling & Recovery
- All disk and transactional errors are surfaced as
Result<T, String>. - On commit failure, a rollback is automatically attempted.
- On startup, the engine attempts recovery using the WAL and disk state.
Extensibility
- Indexes: Optional secondary indexes can be enabled via environment variable.
- Custom Field Types: Extend
ValueTypeand update schema validation logic. - Storage Backends: Implement new
DatabaseTypevariants and adaptDBEngineinitialization.
Testing
- Extensive test suite under
src/database/tests/covers:- Basic operations
- Transactional semantics
- Persistence and recovery
- Schema validation and migration
- Large data and overflow page handling
- Concurrency and rollback
Developer Notes
- CommitGuard: RAII pattern to ensure rollback on drop if commit fails.
- Isolation Levels: Each level has custom validation logic; review
validate_transaction. - BlobStore: Always clean up blob references on update/delete.
- Buffer Pool: Tune via
DB_BUFFER_POOL_SIZEenv variable. - Logging: Enable for debugging concurrency, persistence, or recovery issues.
- Schema Evolution: Use
can_migrate_fromto validate safe schema changes.
Advanced Topics and Additional Details
Buffer Pool and Page Management
- BufferPool: Implements an LRU cache for disk pages, reducing disk I/O and improving performance.
- Pages are pinned/unpinned as they are accessed and modified.
- Eviction policy ensures hot pages remain in memory.
- Buffer pool size is configurable via environment variable.
- PageStore: Handles allocation, reading, writing, and freeing of fixed-size pages on disk.
- Supports overflow pages for large records or batches.
- Ensures atomicity and durability of page writes.
Large Data and Blob Handling
- BlobStore: Used for storing large strings or binary data that exceed the inline threshold.
- Data is stored in separate files with reference counting.
- Blob references are cleaned up on record deletion or update.
- BlobStore is memory-mapped for efficient access and syncs to disk after changes.
- Blob index file tracks all blob keys and their locations.
Indexing (Optional)
- IndexManager: If enabled, maintains secondary indexes for fast lookups.
- Indexes are updated on insert, update, and delete.
- Can be extended to support custom index types or full-text search.
Schema Evolution and Migration
- Schema Versioning: Each table schema has a version number.
- Migration Safety:
can_migrate_fromchecks for safe migrations (e.g., prevents dropping required fields without defaults, or changing types incompatibly). - Default Values: New required fields can be added if a default is provided; existing records are backfilled.
WAL Rotation and Compaction
- WAL Rotation: WAL files are rotated after reaching a configurable threshold to prevent unbounded growth.
- Database Compaction: Periodically, the database file can be compacted to reclaim space from deleted or obsolete pages.
Error Handling and Diagnostics
- Error Propagation: All major operations return
Result<T, String>for robust error handling. - Diagnostics: Warnings and errors are logged to stderr for troubleshooting.
- Assertions and Invariants: Internal checks ensure data consistency and integrity.
Testing and Validation
- Test Coverage: Unit, integration, and property-based tests cover all major features.
- Test Utilities: Helpers for setting up test databases, cleaning up files, and simulating crash/recovery scenarios.
- Performance Testing: Benchmark modules and stress tests for buffer pool, WAL, and blob store.
Extending the Engine
- Adding New Field Types: Extend
ValueTypeand update schema validation and serialization logic. - Custom Storage Backends: Implement new
DatabaseTypevariants and adaptDBEngineinitialization. - Custom REPL Commands: Extend the REPL parser and executor for new administrative or diagnostic commands.
Security and Data Integrity
- Checksums: Data is checksummed before and after disk writes to detect corruption.
- Atomicity: All disk writes are atomic at the page level; WAL ensures atomicity at the transaction level.
- Crash Consistency: WAL and careful ordering of disk writes ensure no partial transactions are visible after a crash.
Performance Considerations
- Batching: Record serialization and disk writes are batched for efficiency.
- Parallelism: The engine is designed to allow concurrent transactions, subject to isolation and locking.
- Tuning: Buffer pool size, WAL rotation threshold, and blob threshold can be tuned for workload characteristics.
Additional Considerations
Multi-threading and Concurrency
- Thread Safety: The engine uses
Arc,Mutex, andRwLockto ensure safe concurrent access to shared data structures. - Concurrent Transactions: Multiple transactions can be processed in parallel, subject to locking and isolation constraints.
- Lock Granularity: Record-level locks minimize contention, but schema/table-level locks may be used for DDL operations.
Serialization and Deserialization
- Bincode: All on-disk data (records, schemas, TOC) is serialized using
bincodefor compactness and speed. - Version Compatibility: Care is taken to support both old and new page formats for forward/backward compatibility.
Data Integrity and Consistency
- Checksums: Used to verify data integrity after disk writes and during recovery.
- Atomic Operations: Disk writes and WAL appends are performed atomically to prevent partial updates.
- Consistency Checks: On startup and after recovery, the engine verifies that all tables and records are consistent with their schemas.
Maintenance and Operations
- Backup and Restore: The engine can be stopped and files copied for backup; restore is as simple as replacing the files.
- Monitoring: Logging can be enabled for monitoring transaction throughput, errors, and performance metrics.
- Upgrades: Schema versioning and migration logic allow for safe upgrades without data loss.
Limitations and Future Work
- Distributed Transactions: Currently, transactions are local to a single engine instance.
- Query Language: The REPL supports a simple command language; SQL compatibility is a possible future enhancement.
- Advanced Indexing: Only basic secondary indexes are supported; more advanced indexing (e.g., B-trees, full-text) can be added.
- Encryption: Data-at-rest encryption is not yet implemented.
Storage Layer Deep Dive
Page Format and Layout
Kinesis uses a structured page format for optimal storage and retrieval:
┌─────────────────────────────────────────────┬──────────────────────┐
│                Header (40B)                 │     Data (16344B)    │
├──────┬──────────┬────────┬──────────┬───────┼──────────────────────┤
│ Type │   Next   │ Length │ Checksum │ Rsrvd │    Records/Data      │
│  1B  │    8B    │   4B   │    8B    │  19B  │                      │
└──────┴──────────┴────────┴──────────┴───────┴──────────────────────┘
Page Constants:
- PAGE_SIZE: 16,384 bytes (16KB)
- PAGE_HEADER_SIZE: 40 bytes
- MAX_DATA_SIZE: 16,344 bytes (PAGE_SIZE - PAGE_HEADER_SIZE)
Header Fields:
- Type (1 byte): Page type (0=regular, 1=overflow)
- Next (8 bytes): Next page ID in chain (0 if last page)
- Length (4 bytes): Valid data length in this page
- Checksum (8 bytes): Data integrity verification hash
- Reserved (19 bytes): Future use, zero-filled
Overflow Page Chains
Large records spanning multiple pages use linked chains:
┌─────────┐    ┌──────────┐    ┌─────────┐
│ Page 1  │───▶│ Page 2   │───▶│ Page 3  │
│(Header) │    │(Overflow)│    │ (Last)  │
│ Data... │    │ Data...  │    │ Data... │
└─────────┘    └──────────┘    └─────────┘
Table of Contents (TOC) Structure
#![allow(unused)]
fn main() {
struct TOC {
    table_locations: HashMap<String, Vec<u64>>,     // Table → Page IDs
    table_schemas: HashMap<String, TableSchema>,    // Table → Schema
    table_next_ids: HashMap<String, u64>,          // Table → Next Record ID
}
}
TOC Handling:
- Small TOCs: Stored directly in page 0
- Large TOCs: Stored in overflow chain with reference in page 0
- Format:
TOC_REF:<page_id>for overflow references
Memory Management and Performance
Buffer Pool Architecture
The buffer pool implements a sophisticated caching strategy:
#![allow(unused)]
fn main() {
// Configuration based on database type
DatabaseType::InMemory  => 10,000 pages  // No disk I/O overhead
DatabaseType::Hybrid    => 2,500 pages   // Balanced performance
DatabaseType::OnDisk    => 100 pages     // Minimal memory usage
}
LRU Eviction Policy:
- Pages are ranked by access time
- Dirty pages are flushed before eviction
- Pin/unpin semantics prevent premature eviction
- Configurable via
DB_BUFFER_POOL_SIZEenvironment variable
Performance Characteristics
Operation Complexity
Operation          | Time Complexity | Notes
-------------------|-----------------|----------------------------------
Insert             | O(1) + schema   | Staging only, validation overhead
Update             | O(1) + schema   | In-place updates when possible
Delete             | O(1)            | Lazy deletion, cleanup on commit
Point Query        | O(1)            | Hash-based record lookup
Table Scan         | O(n)            | Linear scan through all records
Schema Migration   | O(n)            | All records validated/migrated
Transaction Commit | O(k)            | k = number of operations in tx
Memory Usage Patterns
- Record Storage: ~50-100 bytes overhead per record
- Transaction Tracking: ~200 bytes per active transaction
- Page Cache: 4KB per cached page
- Blob References: ~50 bytes per large string reference
Disk I/O Patterns
- Sequential Writes: WAL, batch serialization, compaction
- Random Reads: Buffer pool minimizes seeks for hot data
- Bulk Operations: Chunked to prevent memory pressure
- Checkpointing: Periodic full database sync
Advanced Configuration and Tuning
Environment Variables
# Core Performance Settings
export DB_BUFFER_POOL_SIZE=5000           # Pages in memory cache (default: varies by DB type)

# Database Engine Configuration
export DB_NAME=main_db                    # Database filename (default: main_db)
export DB_STORAGE_ENGINE=hybrid           # Storage type: memory, disk, hybrid (default: hybrid)
export DB_ISOLATION_LEVEL=serializable    # Transaction isolation level (default: serializable)
export DB_AUTO_COMPACT=true               # Automatic database compaction (default: true)
export DB_RESTORE_POLICY=recover_pending  # WAL recovery policy (default: recover_pending)

# Feature Toggles
export DB_INDEXING=true                   # Enable secondary indexes (if supported)

# Logging and Debugging
export RUST_LOG=kinesis_db=debug          # Enable debug logging
Database Storage Engines:
memory: Purely in-memory, non-persistentdisk: Fully persistent, disk-basedhybrid: In-memory caching with disk persistence (recommended)
Isolation Levels:
read_uncommitted: No isolation, maximum performanceread_committed: Prevents dirty readsrepeatable_read: Consistent snapshot within transactionserializable: Full isolation with conflict detection
Restore Policies:
discard: Ignore WAL on startuprecover_pending: Recover only uncommitted transactions (default)recover_all: Recover all transactions from WAL
Performance Tuning Guidelines
For High-Throughput Workloads
# Optimize for write performance
export DB_STORAGE_ENGINE=hybrid
export DB_BUFFER_POOL_SIZE=10000
export DB_ISOLATION_LEVEL=read_committed  # Lower isolation for better concurrency
export DB_AUTO_COMPACT=false              # Manual compaction only
For Memory-Constrained Environments
# Minimize memory usage
export DB_STORAGE_ENGINE=disk
export DB_BUFFER_POOL_SIZE=500
export DB_AUTO_COMPACT=true
For Read-Heavy Workloads
# Optimize for read performance
export DB_STORAGE_ENGINE=hybrid
export DB_BUFFER_POOL_SIZE=20000
export DB_INDEXING=true                   # If available
export DB_ISOLATION_LEVEL=repeatable_read # Good balance of consistency and performance
For Development and Testing
# Fast, non-persistent setup
export DB_STORAGE_ENGINE=memory
export DB_BUFFER_POOL_SIZE=1000
export DB_ISOLATION_LEVEL=read_uncommitted
export RUST_LOG=kinesis_db=trace
Debugging and Diagnostics
Logging and Monitoring
Enable comprehensive logging for troubleshooting:
# Full debug logging
export RUST_LOG=kinesis_db=trace,kinesis_db::storage=debug

# Component-specific logging
export RUST_LOG=kinesis_db::transaction=debug,kinesis_db::wal=info
Log Categories:
kinesis_db::transaction: Transaction lifecycle eventskinesis_db::storage: Page I/O and buffer pool activitykinesis_db::wal: Write-ahead log operationskinesis_db::blob: Large data storage operations
Common Issues and Solutions
Transaction Timeouts
Symptoms: Transaction timeout errors during commit
Causes: Long-running transactions, deadlocks, excessive lock contention
Solutions:
#![allow(unused)]
fn main() {
// Increase timeout in transaction config
let tx_config = TransactionConfig {
    timeout_secs: 300,     // 5 minutes
    max_retries: 10,
    deadlock_detection_interval_ms: 100,
};
}
Memory Pressure
Symptoms: Slow performance, frequent page evictions, OOM errors Causes: Insufficient buffer pool, large transactions, memory leaks Solutions:
- Increase
DB_BUFFER_POOL_SIZE - Batch large operations
- Use streaming for bulk imports
- Monitor RSS with
psor system monitoring
Disk Space Issues
Symptoms: No space left on device, WAL growth
Causes: WAL accumulation, blob storage growth, failed compaction
Solutions:
# Manual WAL cleanup (when safe)
find /path/to/wal -name "*.log.*" -delete

# Force database compaction
echo "COMPACT DATABASE;" | your_repl_tool

# Monitor disk usage
du -sh /path/to/database/
Data Corruption
Symptoms: Checksum mismatch warnings, deserialization errors Causes: Hardware issues, incomplete writes, software bugs Solutions:
- Restore from backup
- Check hardware (disk, memory)
- Enable more frequent syncing
- Verify file permissions
Diagnostic Tools and Commands
Built-in REPL Diagnostics
-- Check database statistics
GET_TABLES;

-- Verify table schema
GET_TABLE users;

-- Examine specific records
GET_RECORD FROM users 1;

-- Search for patterns
SEARCH_RECORDS FROM users MATCH "corrupted";
File System Analysis
# Check file sizes and growth
ls -lh data/*.pages data/*.log data/*.blobs*

# Verify file integrity
file data/*.pages  # Should show "data"
Memory Analysis
# Monitor memory usage during operations
watch 'ps aux | grep your_process'

# Check for memory leaks
valgrind --tool=memcheck --leak-check=full your_binary

# Analyze heap usage
heaptrack your_binary
Development Workflow and Best Practices
Setting Up Development Environment
# Clone and setup
git clone <repository>
cd kinesis-api

# Install dependencies
cargo build

# Setup test environment
mkdir -p data/tests
export RUST_LOG=debug
export DB_BUFFER_POOL_SIZE=1000
Running Tests
# Full test suite
cargo test
cargo test -- --test-threads 1
cargo test database::tests

# Specific test categories
cargo test database::tests::overflow_pages    # Storage tests
cargo test database::tests::concurrency       # Transaction tests
cargo test database::tests::schema            # Schema validation tests
cargo test database::tests::benchmark         # Performance tests

# Run with logging
RUST_LOG=debug cargo test database::tests::basic_operations
Adding New Features
1. Extending ValueType for New Data Types
#![allow(unused)]
fn main() {
// 1. Add to ValueType enum
#[derive(Debug, Clone, PartialEq, Serialize, Deserialize)]
pub enum ValueType {
    // ...existing variants...
    Decimal(rust_decimal::Decimal),
    Json(serde_json::Value),
}

// 2. Update FieldType enum
#[derive(Debug, Clone, PartialEq, Serialize, Deserialize)]
pub enum FieldType {
    // ...existing variants...
    Decimal,
    Json,
}

// 3. Add validation logic
impl FieldConstraint {
    pub fn validate_value(&self, value: &ValueType) -> Result<(), String> {
        match (&self.field_type, value) {
            // ...existing cases...
            (FieldType::Decimal, ValueType::Decimal(_)) => Ok(()),
            (FieldType::Json, ValueType::Json(_)) => Ok(()),
            _ => Err("Type mismatch".to_string()),
        }
    }
}

// 4. Add display formatting
impl fmt::Display for ValueType {
    fn fmt(&self, f: &mut fmt::Formatter<'_>) -> fmt::Result {
        match self {
            // ...existing cases...
            ValueType::Decimal(d) => write!(f, "{}", d),
            ValueType::Json(j) => write!(f, "{}", j),
        }
    }
}
}
2. Adding New REPL Commands
#![allow(unused)]
fn main() {
// 1. Add command variant
#[derive(Debug, Clone)]
pub enum Command {
    // ...existing commands...
    ExplainQuery { table: String, query: String },
    ShowIndexes { table: Option<String> },
}

// 2. Add parser case
fn parse_commands(&self, input: &str) -> Result<Vec<Command>, String> {
    // ...existing parsing...
    match tokens[0].to_uppercase().as_str() {
        // ...existing cases...
        "EXPLAIN" => self.parse_explain(&tokens[1..])?,
        "SHOW" if tokens.len() > 1 && tokens[1].to_uppercase() == "INDEXES" => {
            self.parse_show_indexes(&tokens[2..])?
        },
        _ => return Err(format!("Unknown command: {}", tokens[0])),
    }
}

// 3. Add executor case
fn execute(&mut self, input: &str, format: Option<OutputFormat>) -> Result<String, String> {
    // ...existing execution...
    match command {
        // ...existing cases...
        Command::ExplainQuery { table, query } => {
            self.explain_query(&table, &query)
        },
        Command::ShowIndexes { table } => {
            self.show_indexes(table.as_deref())
        },
    }
}
}
3. Implementing New Storage Backends
#![allow(unused)]
fn main() {
// 1. Add database type
#[derive(Debug, Clone, PartialEq, Serialize, Deserialize)]
pub enum DatabaseType {
    // ...existing variants...
    Distributed { nodes: Vec<String> },
    Compressed { algorithm: CompressionType },
}

// 2. Update engine initialization
impl DBEngine {
    pub fn new(db_type: DatabaseType, /* other params */) -> Self {
        let (page_store, blob_store) = match &db_type {
            // ...existing cases...
            DatabaseType::Distributed { nodes } => {
                (Some(DistributedPageStore::new(nodes)?),
                 Some(DistributedBlobStore::new(nodes)?))
            },
            DatabaseType::Compressed { algorithm } => {
                (Some(CompressedPageStore::new(algorithm)?),
                 Some(CompressedBlobStore::new(algorithm)?))
            },
        };

        // ...rest of initialization...
    }
}
}
Code Style and Standards
#![allow(unused)]
fn main() {
// Use descriptive names and comprehensive documentation
/// Commits a transaction, applying all staged changes atomically.
///
/// This method validates the transaction according to its isolation level,
/// acquires necessary locks, applies changes to the in-memory database,
/// logs to WAL (if applicable), and persists to disk.
///
/// # Arguments
/// * `tx` - The transaction to commit
///
/// # Returns
/// * `Ok(())` if the transaction was committed successfully
/// * `Err(String)` describing the failure reason
///
/// # Examples
/// ```rust
/// let mut tx = engine.begin_transaction();
/// engine.insert_record(&mut tx, "users", record)?;
/// engine.commit(tx)?;
/// ```
pub fn commit(&mut self, tx: Transaction) -> Result<(), String> {
    CommitGuard::new(self, tx).commit()
}

// Use proper error handling with context
match self.validate_transaction(&tx) {
    Ok(()) => { /* continue */ }
    Err(e) => return Err(format!("Transaction validation failed: {}", e)),
}

// Prefer explicit types for complex generics
let buffer_pool: Arc<Mutex<BufferPool>> = Arc::new(Mutex::new(
    BufferPool::new(buffer_pool_size, db_type)
));
}
Testing Guidelines
Unit Tests
#![allow(unused)]
fn main() {
#[test]
fn test_transaction_isolation() {
    let mut engine = setup_test_db("isolation_test", IsolationLevel::Serializable);

    // Test specific isolation behavior
    let mut tx1 = engine.begin_transaction();
    let mut tx2 = engine.begin_transaction();

    // Simulate concurrent operations
    engine.insert_record(&mut tx1, "test", record1)?;
    engine.insert_record(&mut tx2, "test", record2)?;

    // Verify isolation guarantees
    assert!(engine.commit(tx1).is_ok());
    assert!(engine.commit(tx2).is_err()); // Should conflict
}
}
Integration Tests
#![allow(unused)]
fn main() {
#[test]
fn test_crash_recovery_scenario() {
    let db_path = "test_crash_recovery";

    // Phase 1: Create initial state
    {
        let mut engine = create_engine(db_path);
        perform_operations(&mut engine);
        // Simulate crash - don't clean shutdown
    }

    // Phase 2: Recovery
    {
        let mut engine = create_engine(db_path); // Should recover automatically
        verify_recovered_state(&engine);
    }
}
}
Performance Tests
#![allow(unused)]
fn main() {
#[test]
fn test_bulk_insert_performance() {
    let mut engine = setup_test_db("perf_test", IsolationLevel::ReadCommitted);

    let start = Instant::now();
    let mut tx = engine.begin_transaction();

    for i in 0..10_000 {
        let record = create_test_record(i, &format!("Record {}", i));
        engine.insert_record(&mut tx, "perf_test", record)?;
    }

    engine.commit(tx)?;
    let duration = start.elapsed();

    println!("Bulk insert of 10k records: {:?}", duration);
    assert!(duration < Duration::from_secs(10)); // Performance threshold
}
}
FAQ and Troubleshooting
- Q: Why is my data not persisted?
- A: Ensure you are not using the
InMemorybackend. OnlyOnDiskandHybridpersist data.
- A: Ensure you are not using the
- Q: How do I recover from a crash?
- A: On startup, the engine automatically loads from disk and replays the WAL.
- Q: How do I enable indexes?
- A: Set the
DB_INDEXINGenvironment variable totruebefore starting the engine.
- A: Set the
- Q: How do I tune performance?
- A: Adjust
DB_BUFFER_POOL_SIZE, WAL rotation threshold, and use the appropriate backend for your workload.
- A: Adjust
Glossary
- MVCC: Multi-Version Concurrency Control, enables snapshot isolation.
- WAL: Write-Ahead Log, ensures durability and crash recovery.
- TOC: Table of Contents, metadata page mapping tables to page chains.
- Blob: Large binary or string data stored outside the main page store.
For further details, refer to the source code and inline documentation in each module.
References
- See the
src/database/directory for implementation details. - Consult module-level Rust docs for API usage and extension points.
- For design discussions and roadmap, refer to the project wiki or issue tracker.
This document is intended to be comprehensive. If you find any missing details or have suggestions for improvement, please update this file or open a new ticket.
Build APIs with Kinesis API
Welcome to the Kinesis API tutorials section. These step-by-step guides will help you learn how to build powerful, robust APIs using the Kinesis API platform. Whether you’re new to API development or an experienced developer looking to harness the full potential of Kinesis API, these tutorials will provide practical, hands-on experience.
About These Tutorials
Each tutorial in this section:
- Walks through a complete, real-world example
- Includes step-by-step instructions with screenshots
- Explains core concepts as they’re introduced
- Provides working code that you can adapt for your own projects
- Builds skills progressively from basic to advanced
Prerequisites
Before starting these tutorials, you should:
- Have Kinesis API installed and running (see Installation)
- Be familiar with basic API concepts
- Understand HTTP methods (GET, POST, PUT, DELETE)
- Have completed the initial setup of Kinesis API
Available Tutorials
Building a Simple Counter App
Difficulty: Beginner
This tutorial walks you through creating a basic counter API that demonstrates fundamental Kinesis API concepts. You’ll learn how to:
- Create a new project and collection
- Define structures for your data
- Build API routes for retrieving and updating the counter
- Test your API using the Playground
- Understand the basics of the X Engine
This is the perfect starting point if you’re new to Kinesis API.
Implementing JWT Authentication
Difficulty: Intermediate
This tutorial guides you through implementing secure user authentication using JSON Web Tokens (JWT). You’ll learn how to:
- Create a user authentication system
- Generate and validate JWTs
- Secure your API routes
This tutorial builds on the fundamentals and introduces more advanced security concepts.
Using Loops to Filter Data
Difficulty: Intermediate
This tutorial teaches you how to use loops to process and filter data. You’ll learn how to:
- Fetch a list of data objects
- Loop through the list
- Use conditional logic inside a loop
- Filter items based on URL parameters
- Return a filtered list of data
This is a great tutorial for understanding how to build more dynamic and complex API logic.
Approaching These Tutorials
We recommend following these tutorials in order, as each one builds on concepts introduced in previous tutorials. However, if you’re already familiar with Kinesis API basics, you can jump directly to more advanced tutorials.
As you work through the tutorials:
- Take your time: Understand each step before moving to the next
- Experiment: Try modifying examples to see how things work
- Refer to documentation: Use the API Reference and other documentation when needed
- Troubleshoot: If something doesn’t work, check for typos or review earlier steps
What You’ll Learn
By completing these tutorials, you’ll gain practical experience in:
- Designing and implementing APIs with Kinesis API
- Modeling data effectively using structures
- Creating secure, efficient API routes using the X Engine
- Testing and debugging your APIs
- Implementing common patterns like authentication, data validation, and error handling
Getting Help
If you encounter difficulties while following these tutorials:
- Check the FAQ for common issues
- Review the relevant documentation sections
- Contact support at [email protected]
- Create a new ticket in the issue tracker
Ready to Begin?
Start with Building a Simple Counter App to begin your journey with Kinesis API!
Building a Simple Counter App
This tutorial will guide you through building a simple counter API with Kinesis API. You’ll create an API endpoint that stores and increments a count value with each request. This is a perfect first project to help you understand the fundamentals of Kinesis API.
Prefer video tutorials? You can follow along with our YouTube walkthrough of this same project.
Prerequisites
Before you begin, you need:
- Access to a Kinesis API instance:
- Either the demo environment at demo.kinesis.world
- Or your own self-hosted instance
- A user account with ADMIN or ROOT privileges
- Basic understanding of REST APIs and HTTP methods
1. Creating a Project
First, we’ll create a project to organize our counter API:
- Log in to your Kinesis API instance
- Navigate to the Projects page from the main menu
- Click “Create a new project” to open the project creation modal
- Fill in the following details:
- Name: “Counter Project”
- ID: “counter”
- Description: “A dummy starter project for a counter.” (or anything else you want)
- API Path: “/counter” (this will be the base URL path for all routes in this project)
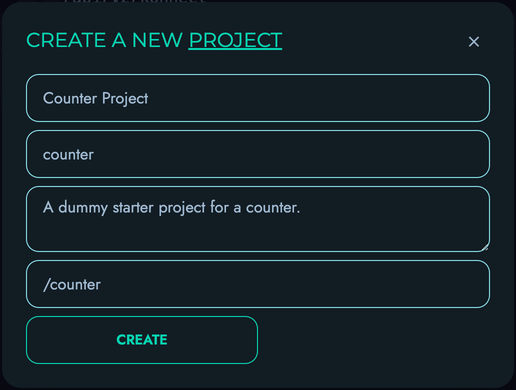
- Click “Create” to save your project
2. Creating a Collection
Next, we’ll create a collection to store our counter data:
- From your newly created project page, click “Create New” on the “Collections” section
- Fill in the following details:
- Name: “count”
- ID: “count”
- Description: “To store the actual count object.” (or anything else you want)
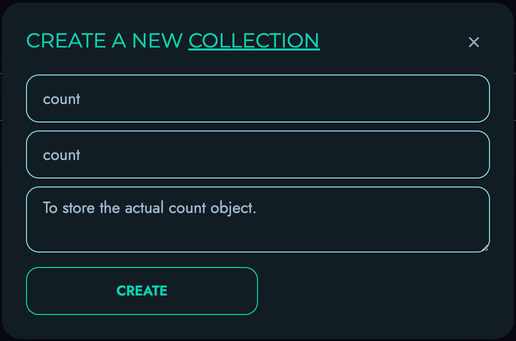
- Click “Create” to save your collection

3. Creating Structures
Now we’ll create some structures (fields) to store our counter value:
- From the “Count” collection page, locate the “Structures” section
- Click “Create New” to add a structure
- Fill in the following details:
- Name: “id”
- ID: “id”
- Description: “” (leave blank or insert anything else)
- Type: “INTEGER”
- Min: “0”
- Max: “1000”
- Default Value: “0”
- Required: Check this box
- Unique: Check this box
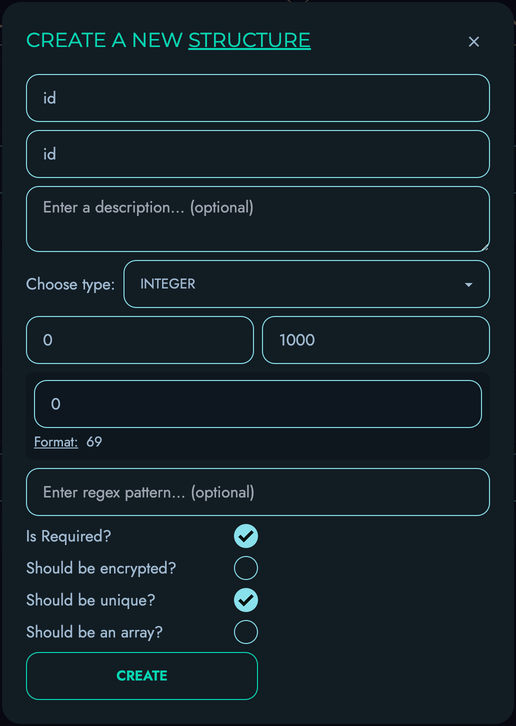
- Click “Create” to save the structure
- Click “Create New” to add another structure
- Fill in the following details:
- Name: “value”
- ID: “value”
- Description: “” (leave blank or insert anything else)
- Type: “INTEGER”
- Min: “0”
- Max: “999999999”
- Default Value: “0” (to start the counter at zero)
- Required: Check this box
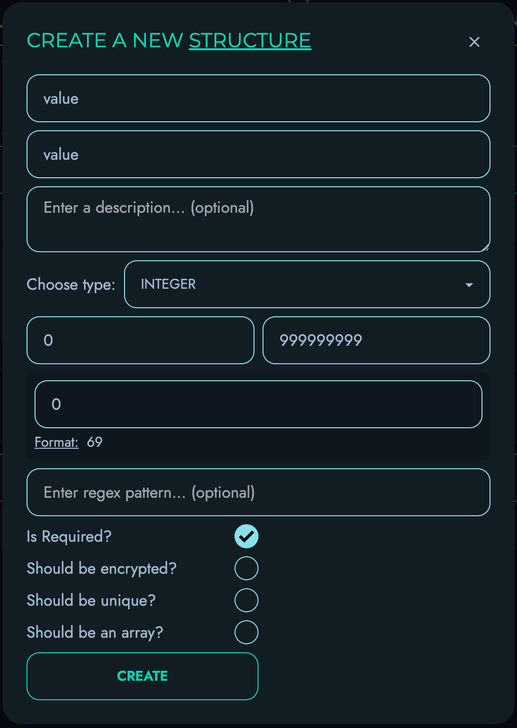
- Click “Create” to save the structure
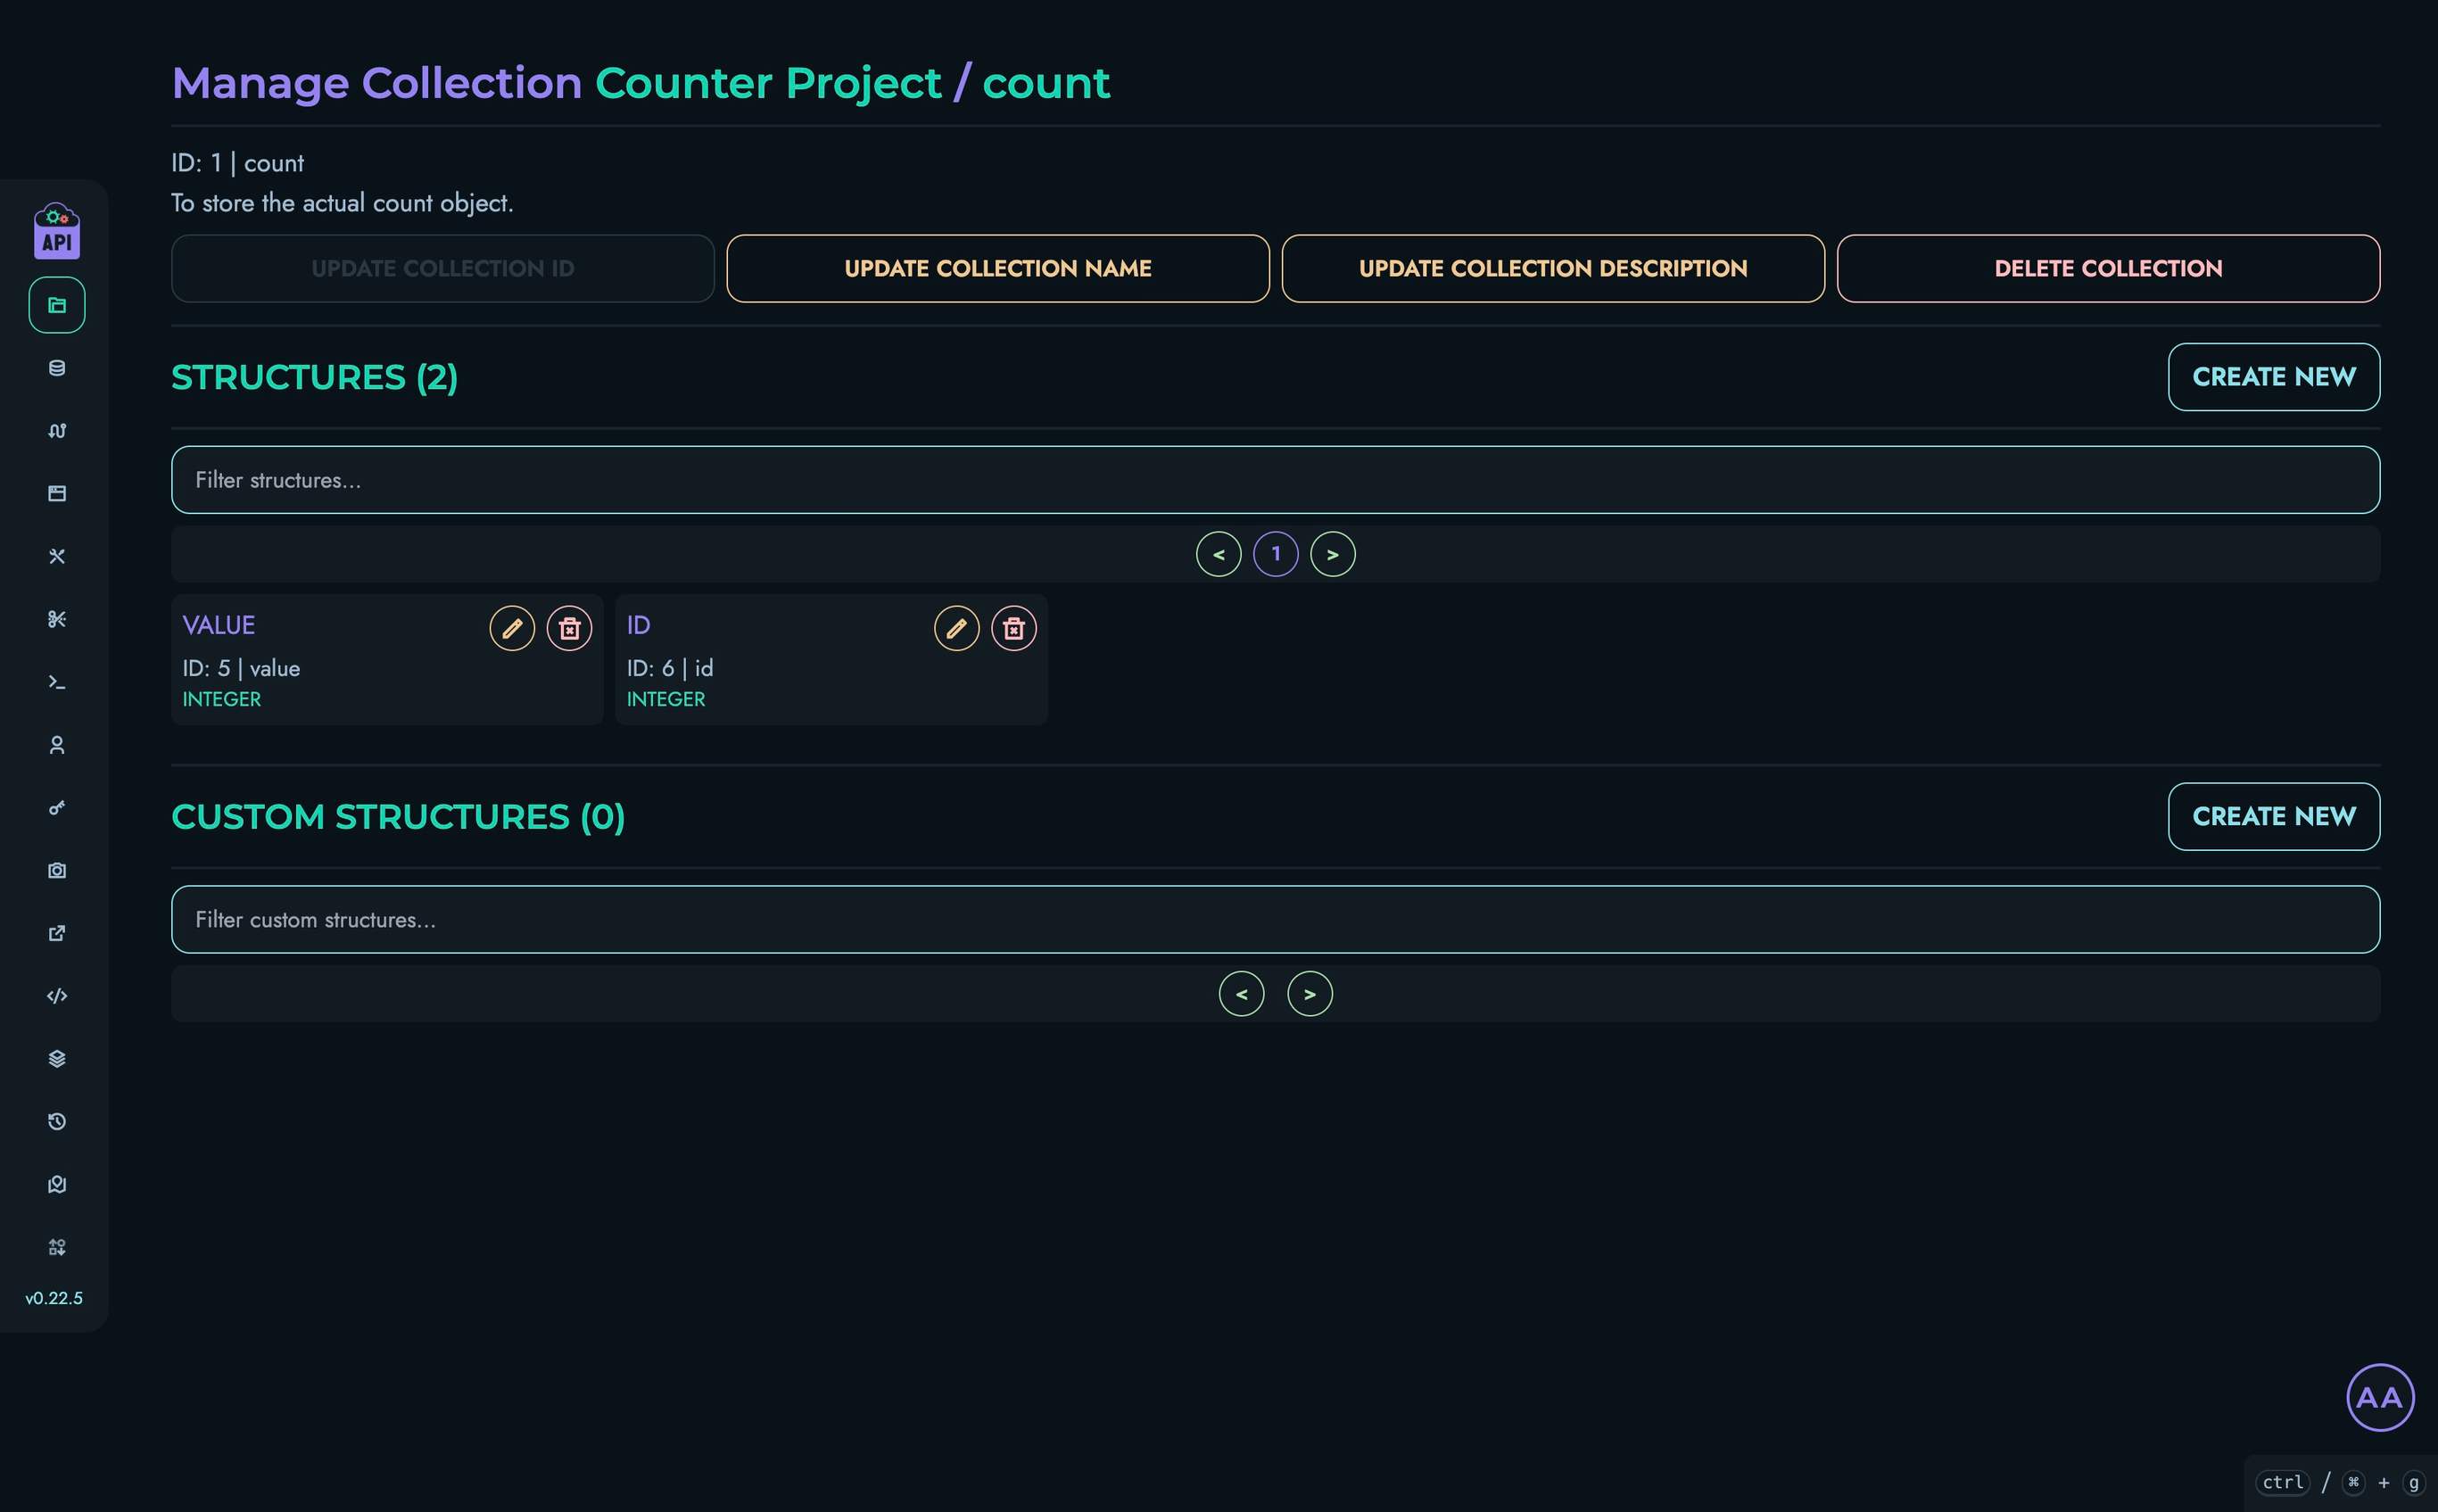
4. Creating Data
Now we’ll create an initial data object with our counter:
- Navigate to the “Data” section in the top navigation bar
- Select your project and then the “Count” collection
- Click “Create New” to create a data object
- Add a nickname (optional)
- For the “id” field, enter: “0”
- For the “value” field, enter: “0”
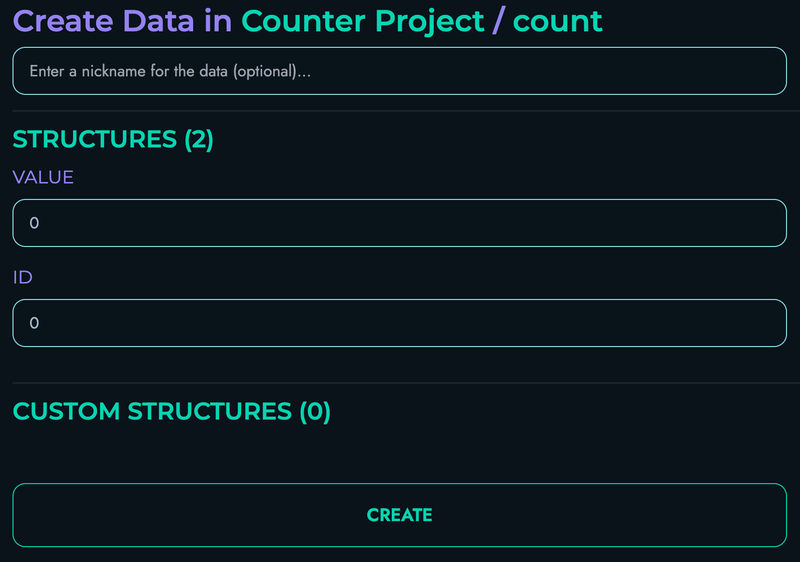
- Click “Create” to save your data object
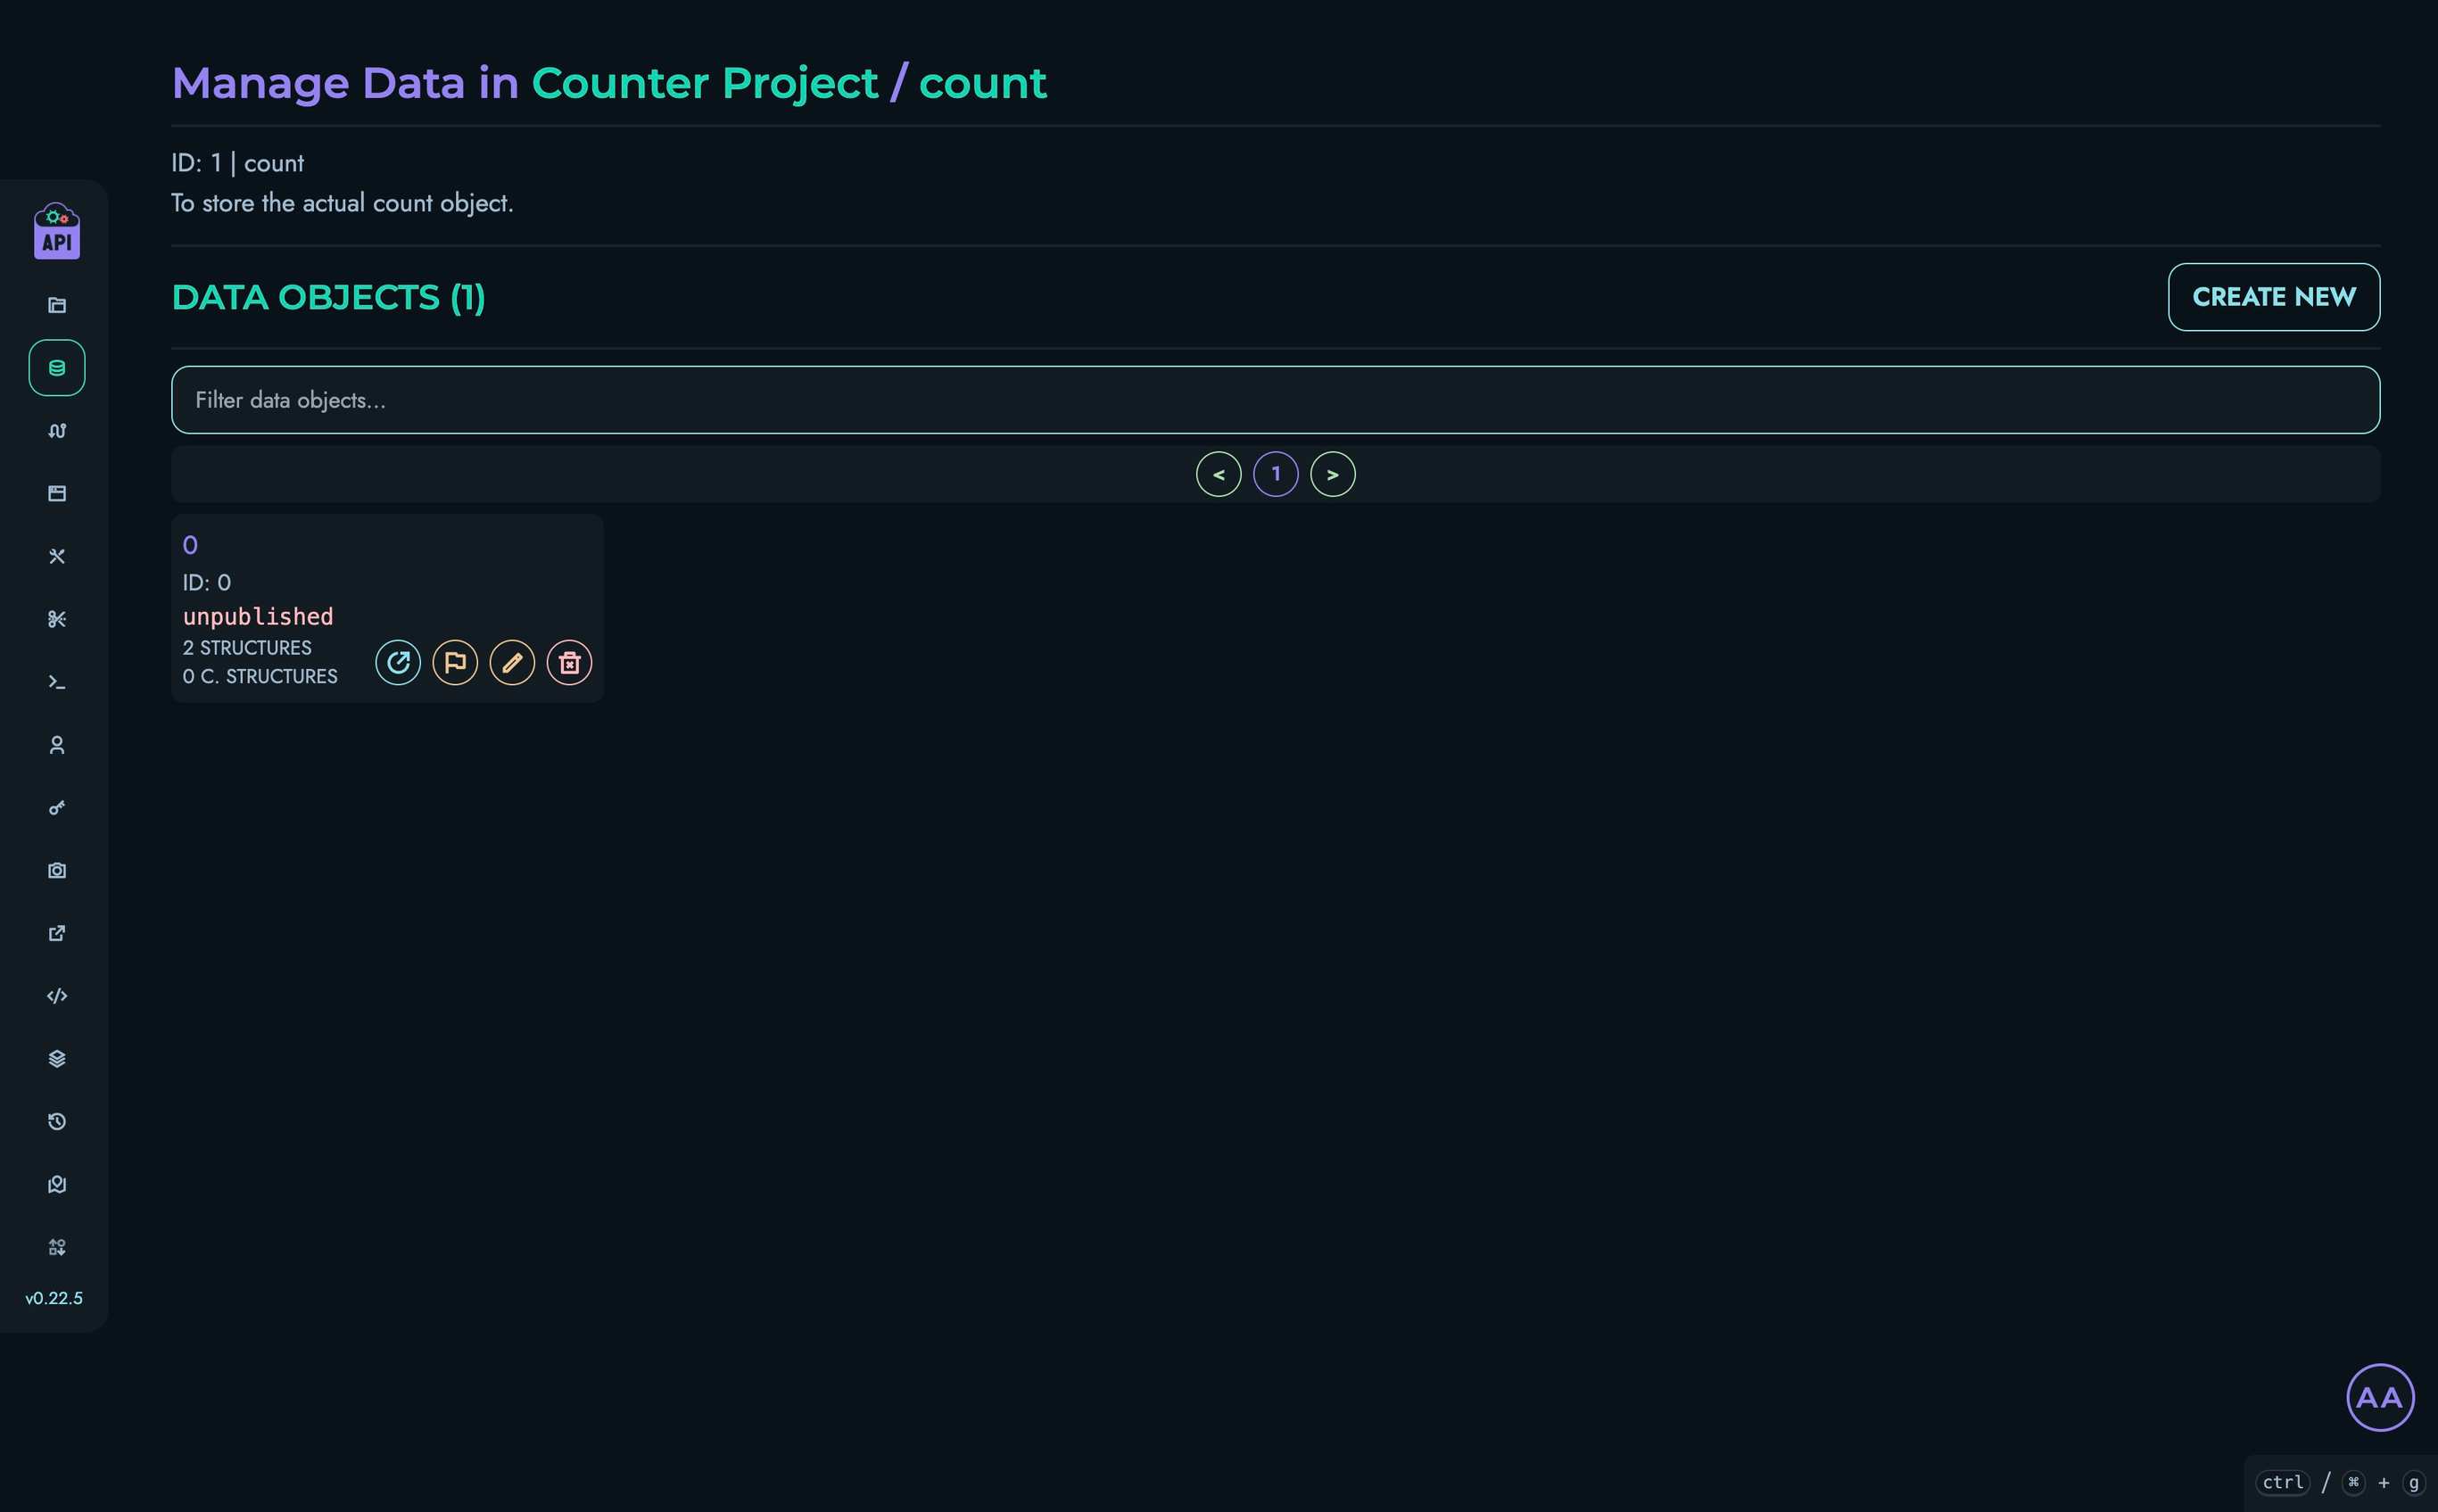
5. Creating a Route
Now we’ll create a route that increments the counter:
- Navigate to Routes in the top navigation bar
- Select your project
- Click “Create New” to create a route
- Fill in the route details:
- Route ID: “GET_COUNTER”
- Route Path: “/get”
- HTTP Method: “GET”
- The “JWT Authentication”, “URL Parameters” and “Body” sections don’t need to be modified
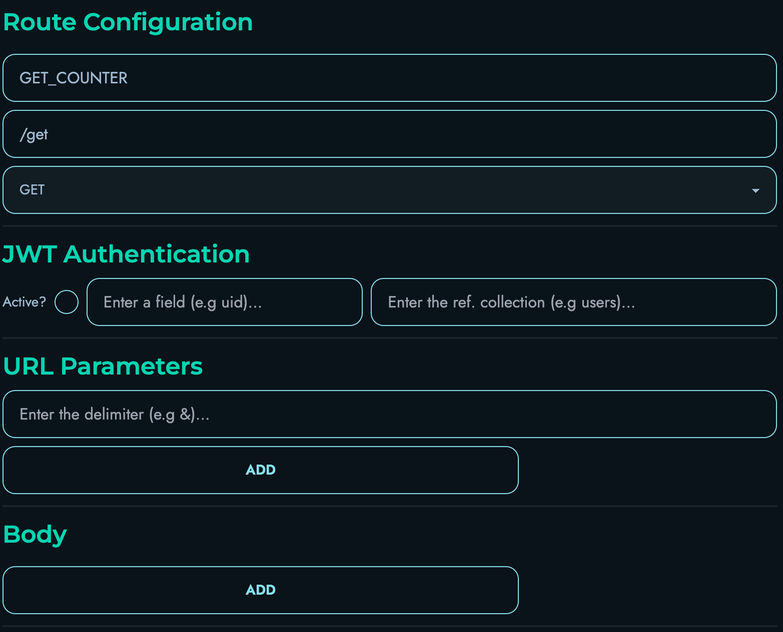
Building the Route Logic in the Flow Editor
The Flow Editor is where we define what happens when our route is called. We’ll build a flow that:
- Fetches the current counter value
- Increments it by 1
- Updates the stored value
- Returns the new value
Follow these steps:
-
Add a FETCH block:
- Drag a FETCH block onto the canvas and connect the START node to it
- Fill in the following details:
- Local Name: “_allCounts”
- Reference Collection: “count”
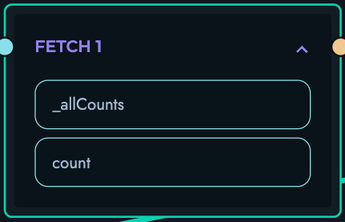
-
Add a PROPERTY block:
- Drag a PROPERTY block onto the canvas and connect the FETCH block to it
- Fill in the following details:
- Local Name: “_currentCount”
- Property Apply: “GET_INDEX”
- Additional: “0”
- As for the data section, fill in the following details:
- Reference: Check this box
- Type: “Array”
- Data: “_allCounts”
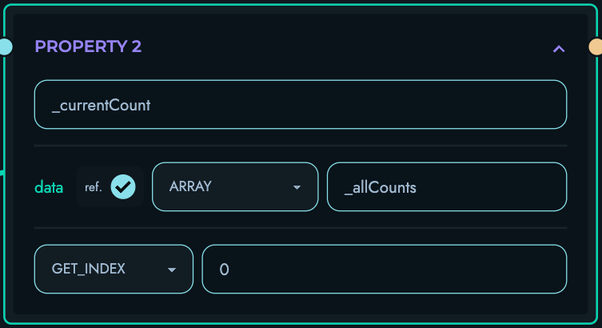
-
Add another PROPERTY block:
- Drag another PROPERTY block onto the canvas and connect the previous PROPERTY block to it
- Fill in the following details:
- Local Name: “currentCountValue”
- Property Apply: “GET_PROPERTY”
- Additional: “value”
- As for the data section, fill in the following details:
- Reference: Check this box
- Type: “Other”
- Data: “_currentCount”
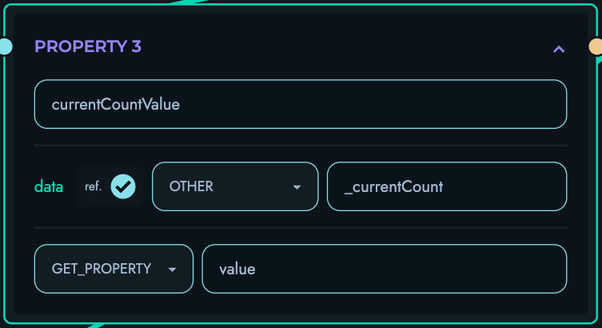
-
Add an ASSIGNMENT block:
- Drag an ASSIGNMENT block onto the canvas and connect the PROPERTY block to it
- Fill in the following details:
- Local Name: “updatedCount”
- Add an “operation” submodule with 2 operands, and fill in the following details:
- First Operand:
- Reference: Check this box
- Type: “Integer”
- Data: “currentCountValue”
- Second Operand:
- Reference: Leave unchecked
- Type: “Integer”
- Data: “1”
- First Operand:
- Operation Type: “Addition”
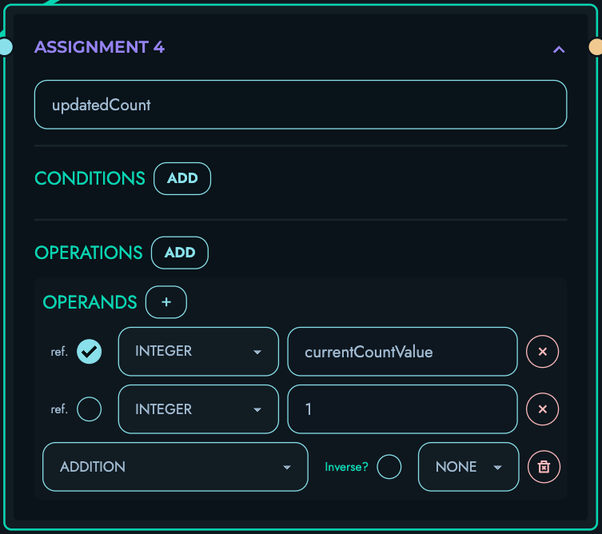
-
Add an UPDATE block:
- Drag an UPDATE block onto the canvas and connect the ASSIGNMENT block to it
- Fill in the following details:
- Reference Collection: “count”
- Reference Property: “value”
- As for the set section, fill in the following details:
- Reference: Check this box
- Type: “Integer”
- Data: “updatedCount”
- Add an “update target” submodule with 1 operand, and fill in the following details:
- Field: “id”
- Operand:
- Reference: Leave unchecked
- Type: “Integer”
- Data: “0”
- Condition Type: “Equal To”
- Set: Check this box
- Save: Check this box
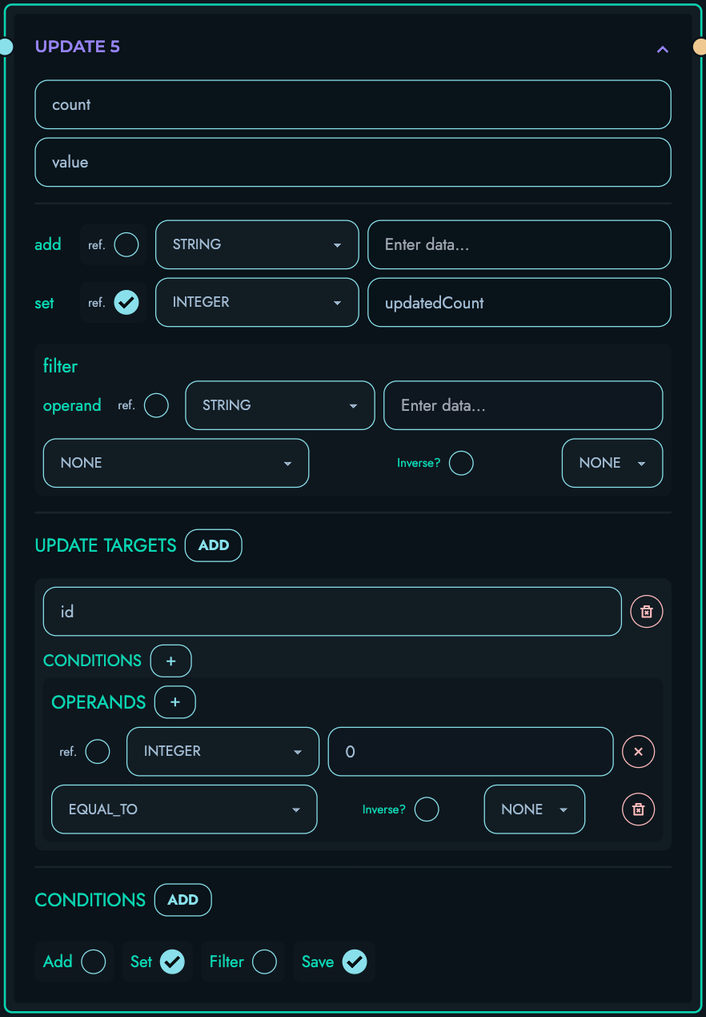
-
Add a RETURN block:
- Drag a RETURN block onto the canvas and connect the UPDATE block to it
- Add an “object pair” submodule
- Fill in the following details:
- id: “count”
- data:
- Reference: Check this box
- Type: “Integer”
- Data: “updatedCount”
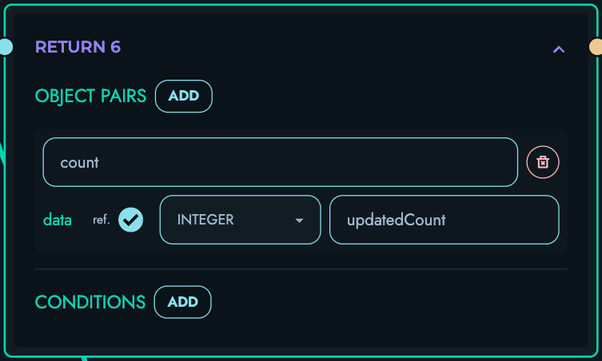
-
Ensure that your Flow Editor looks like the following:
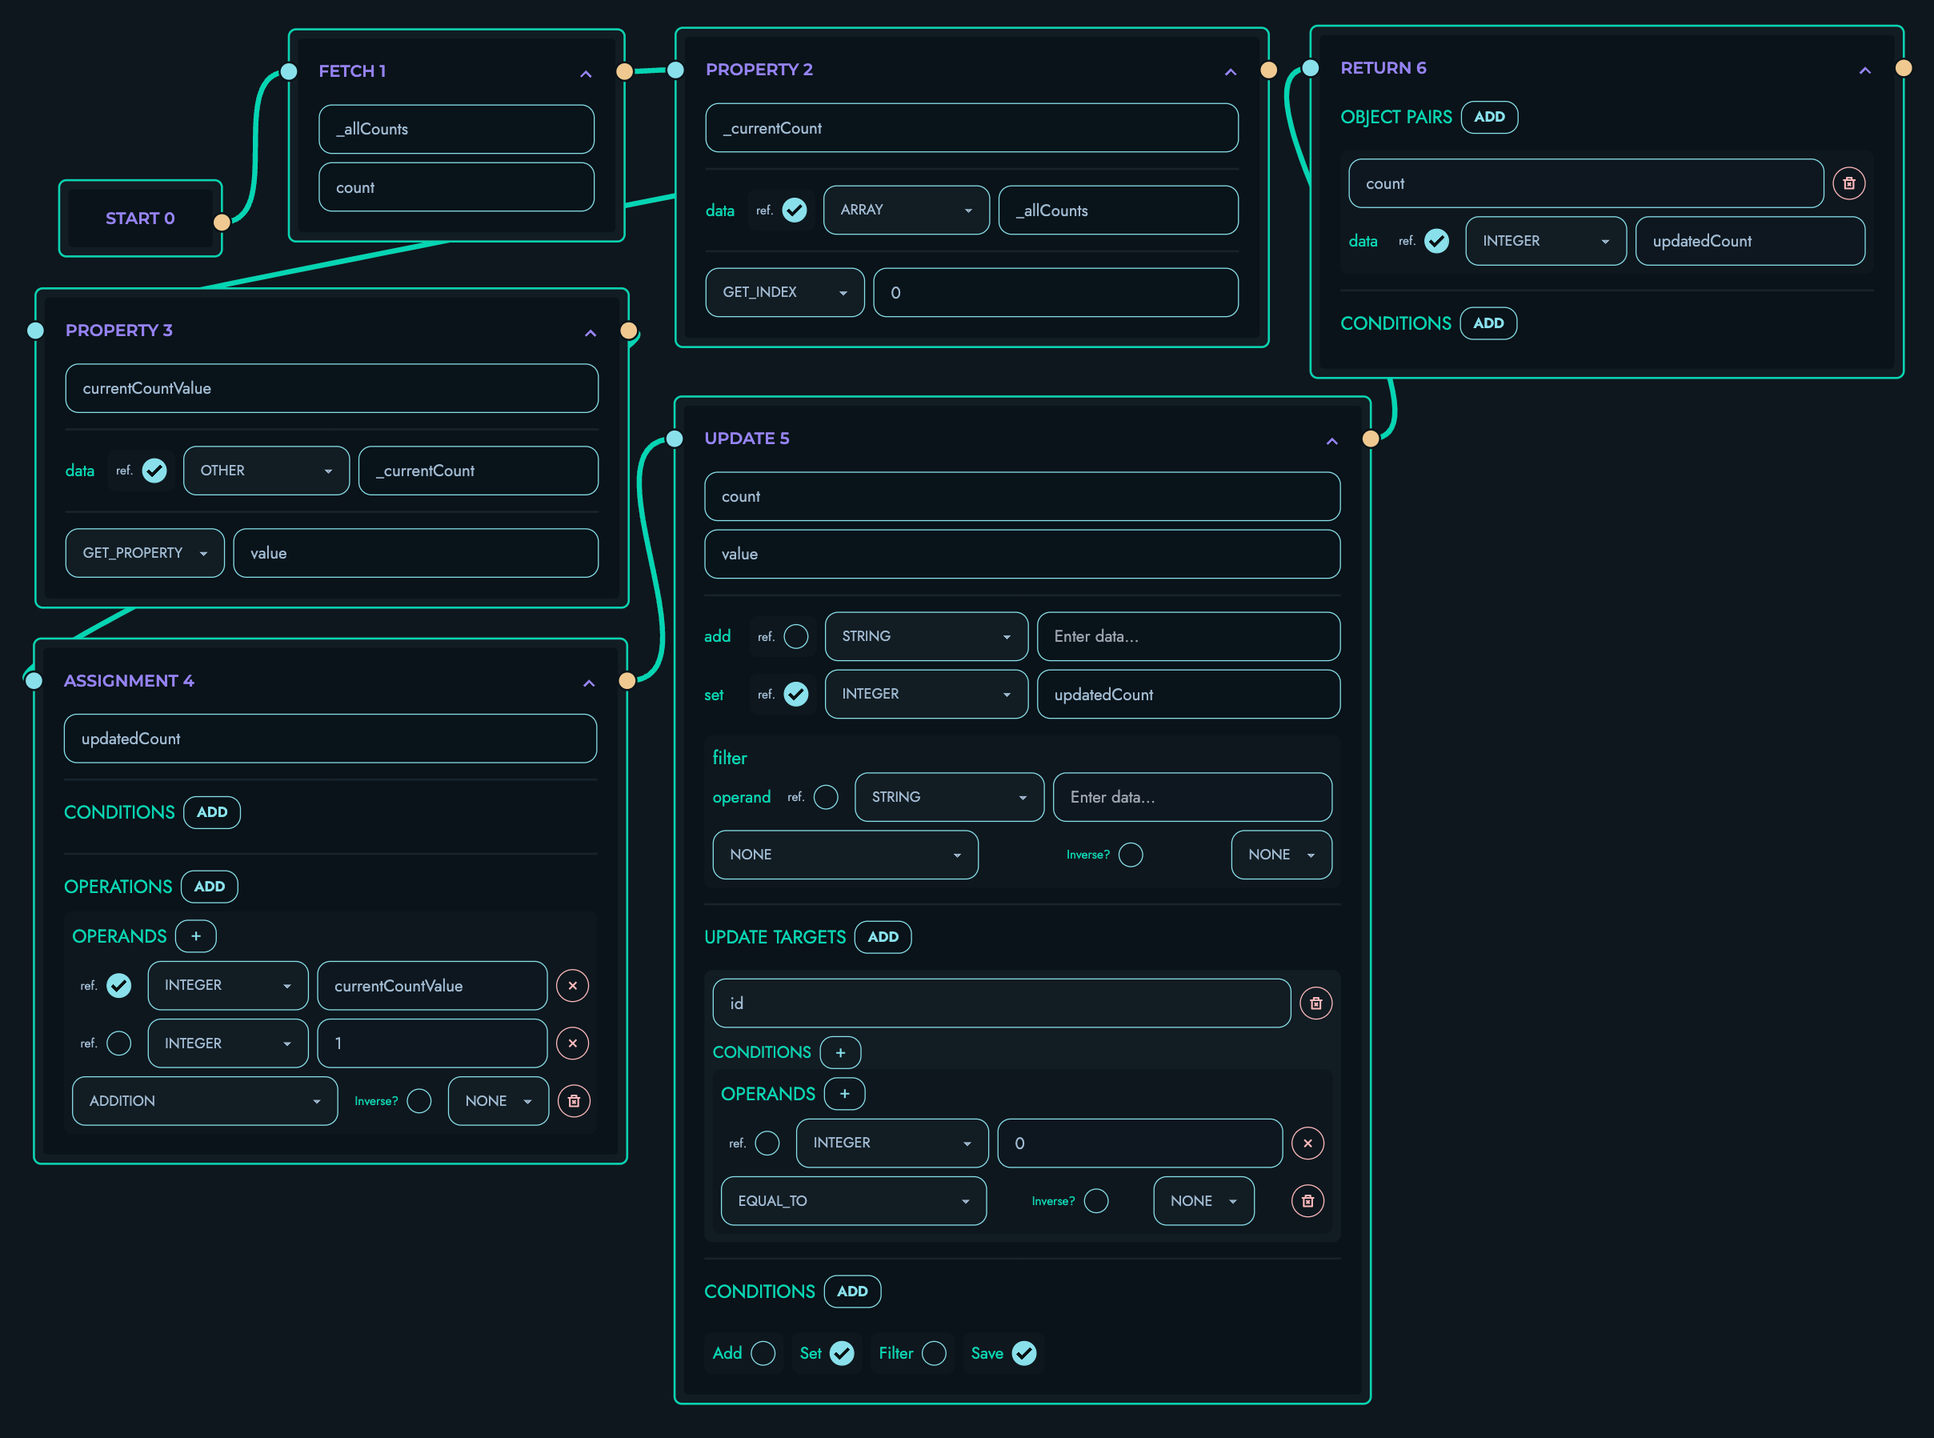
-
Click “Create” to save your route
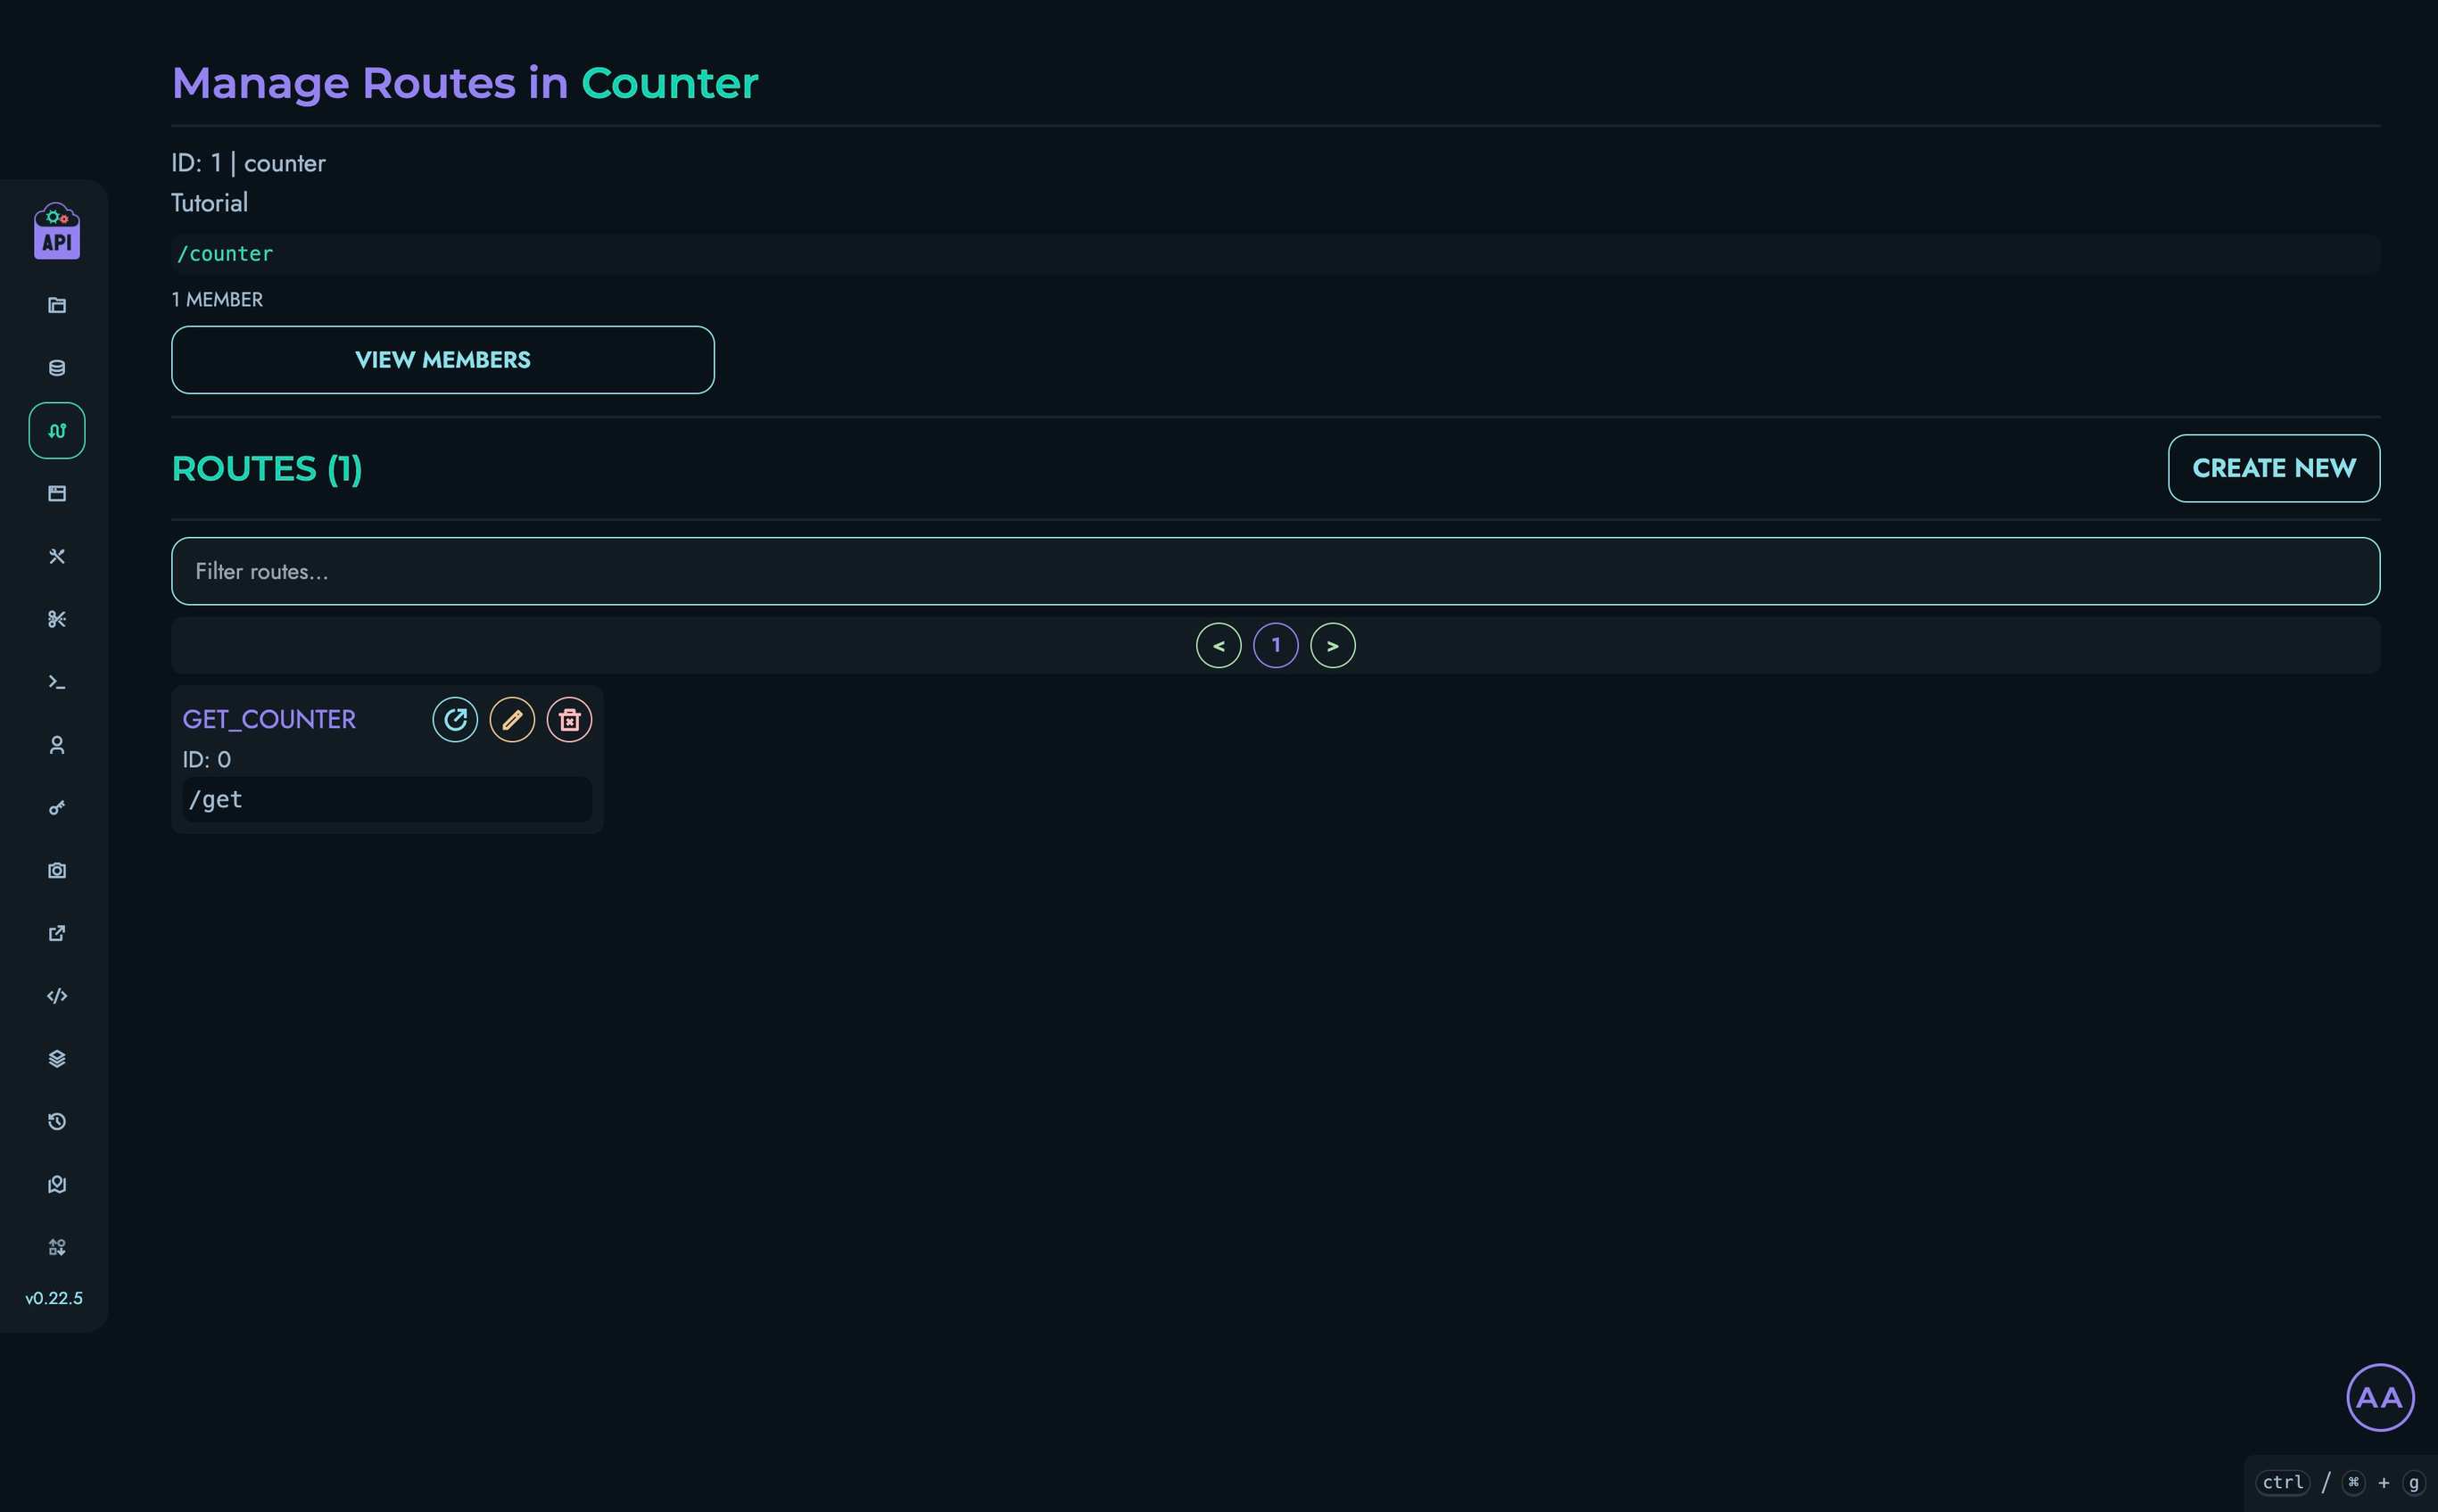
6. Testing via Playground
Now let’s test our counter API:
- Navigate to Playground in the top navigation bar
- Select your project
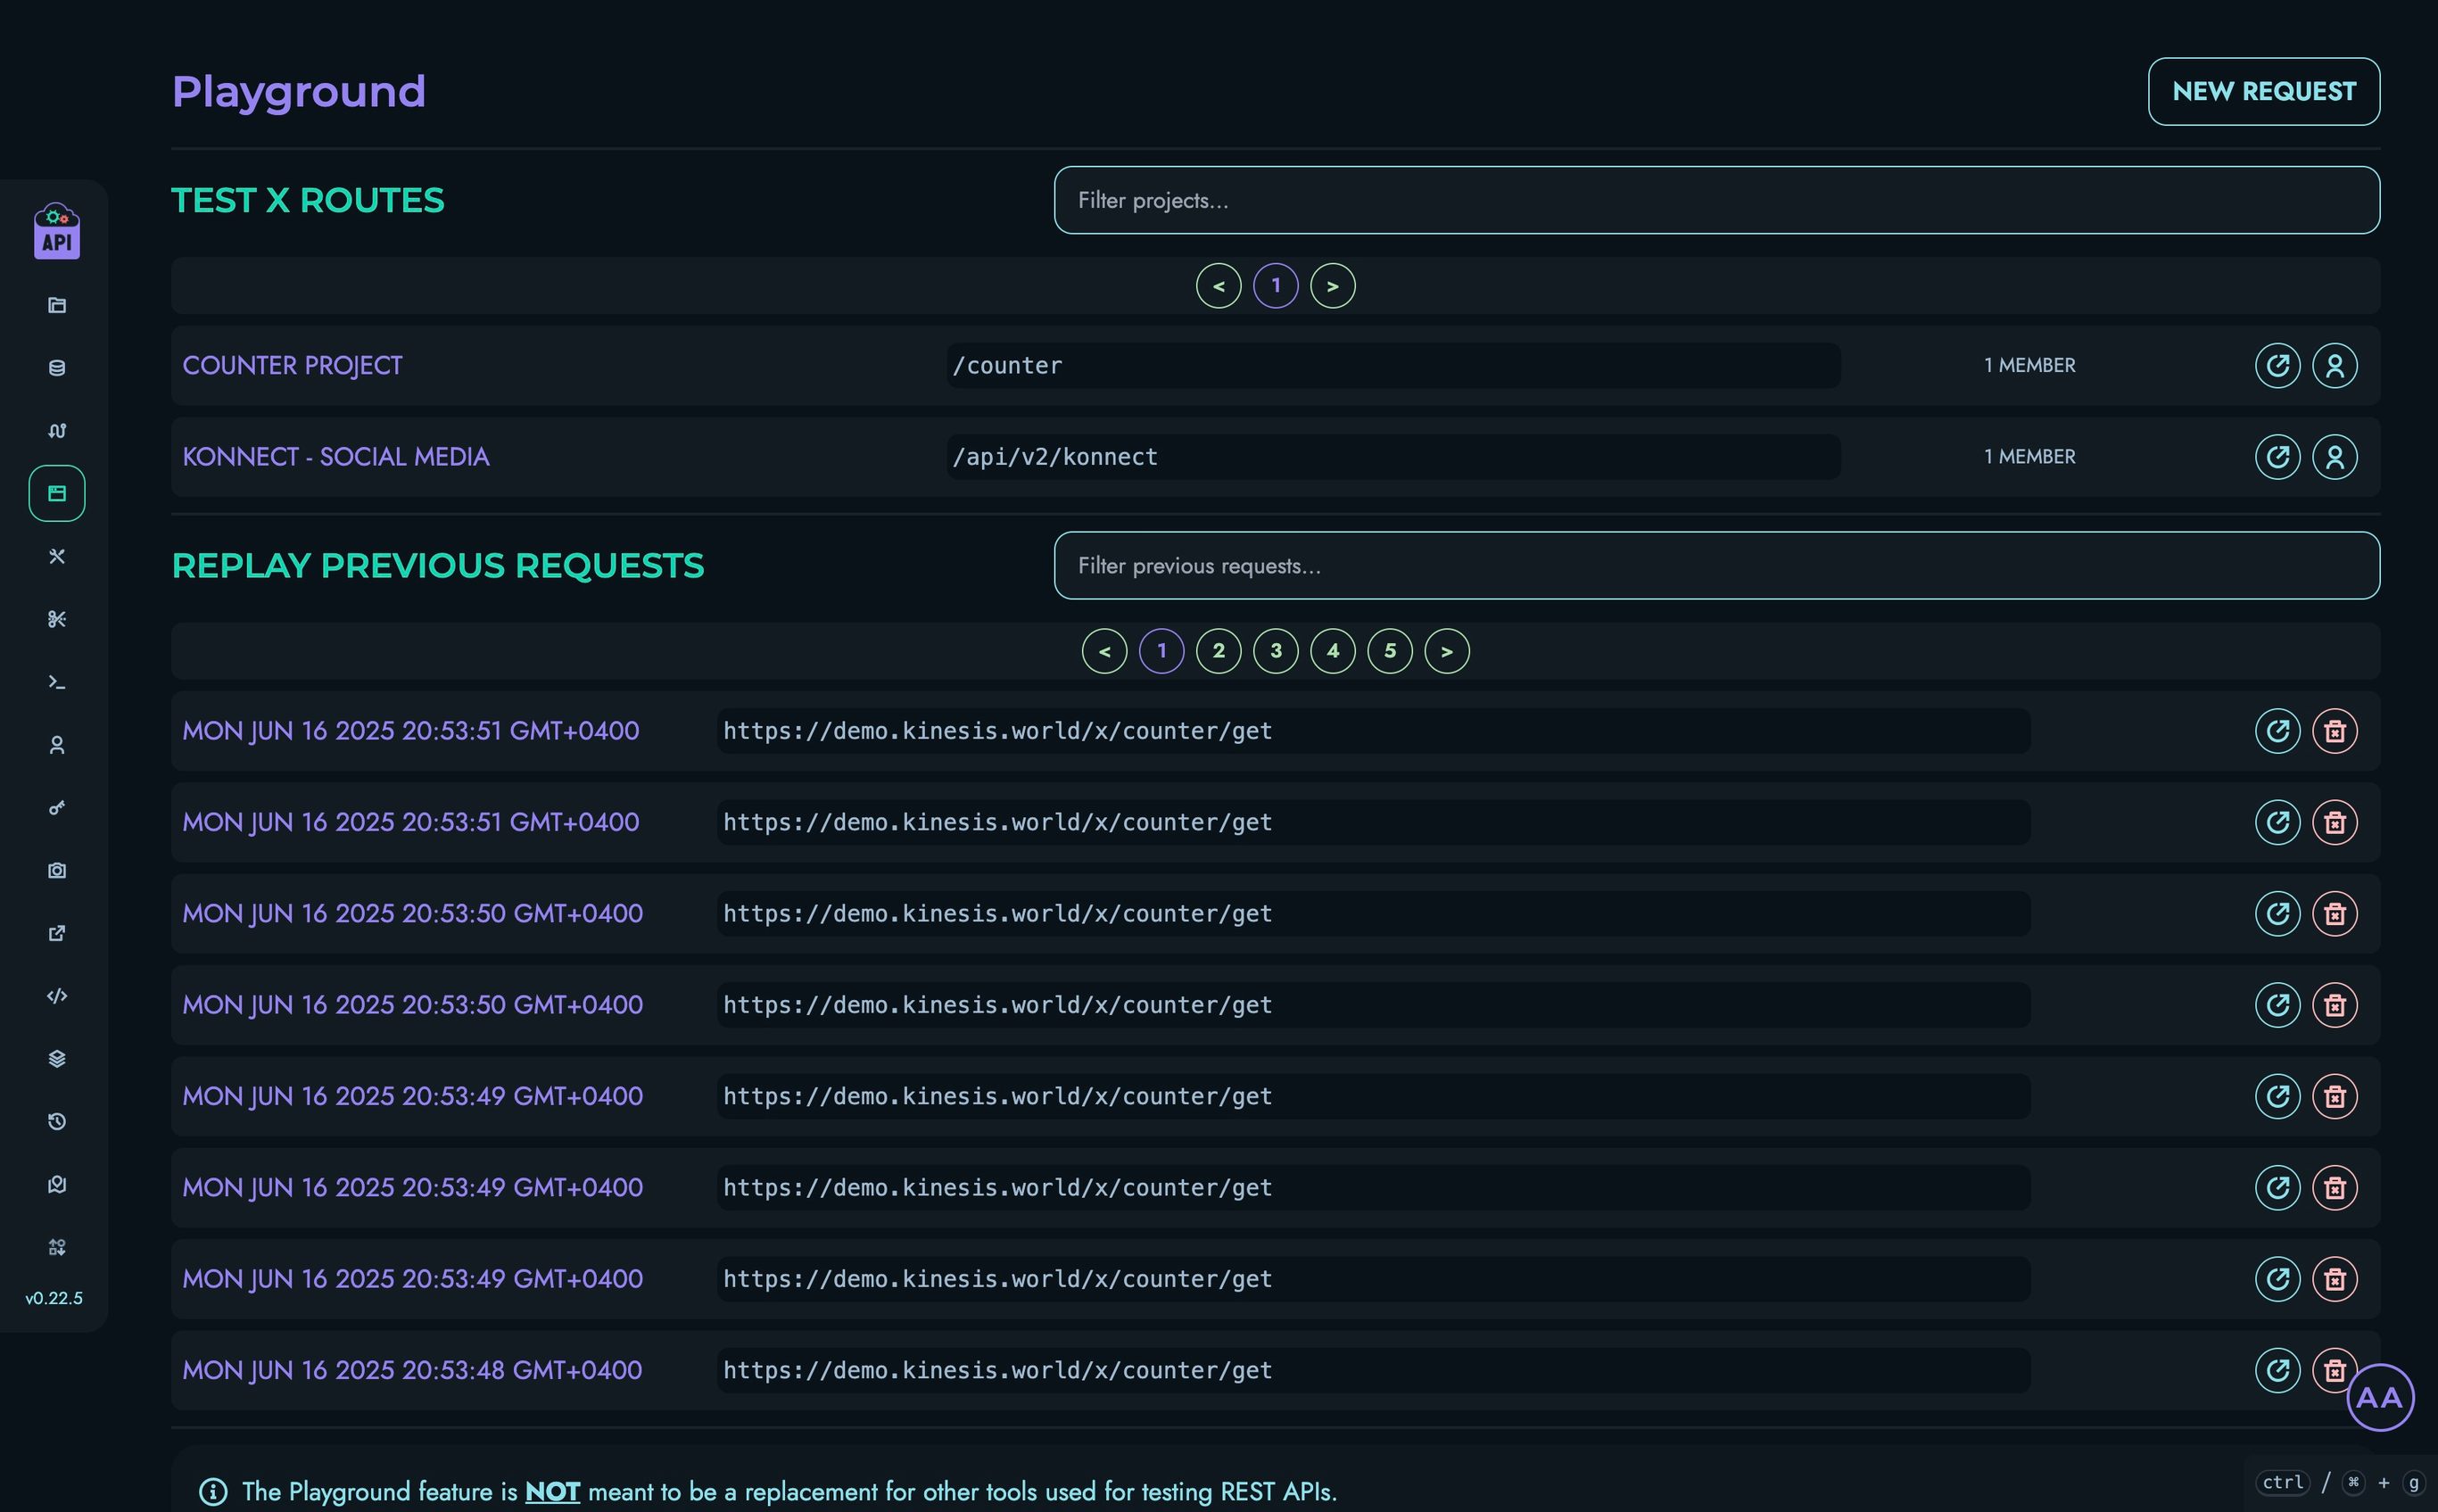
- Click on the “GET_COUNTER” route
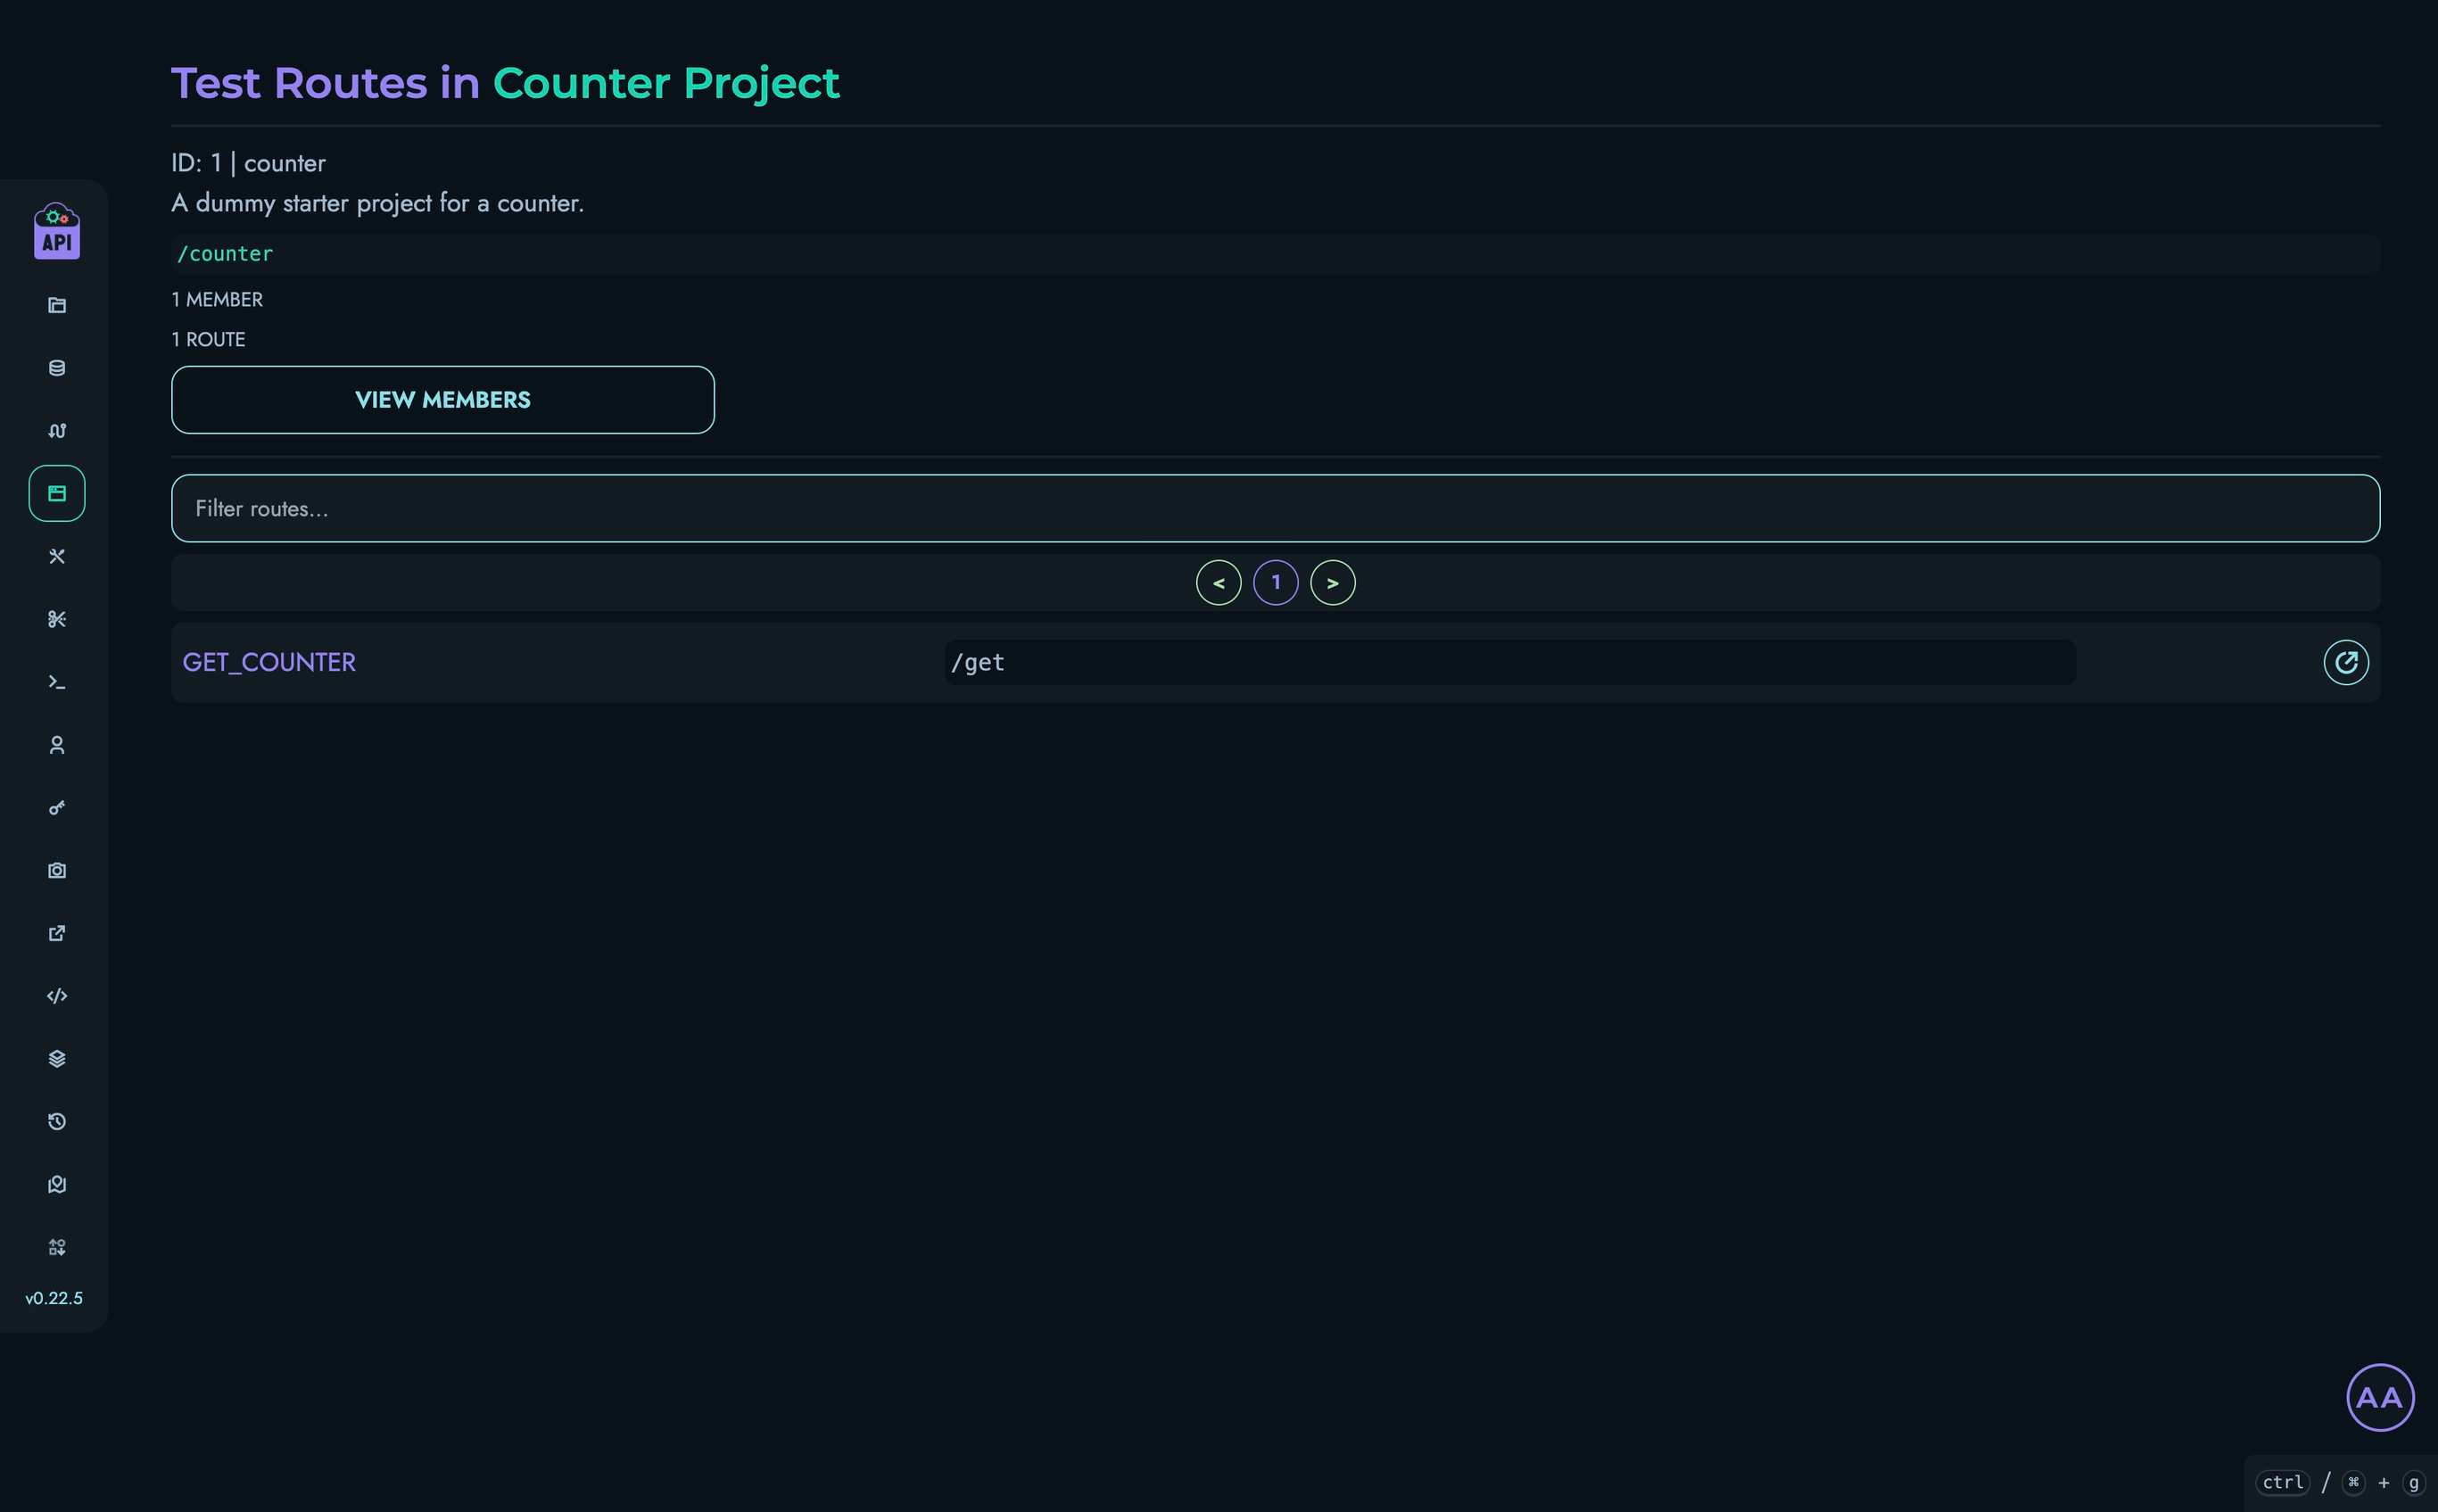
- Click “Send” to make a request to your API
- You should see a response like:
{ "count": 1 } - Click “Send” again and you should see the counter increment:
{
  "count": 2
}
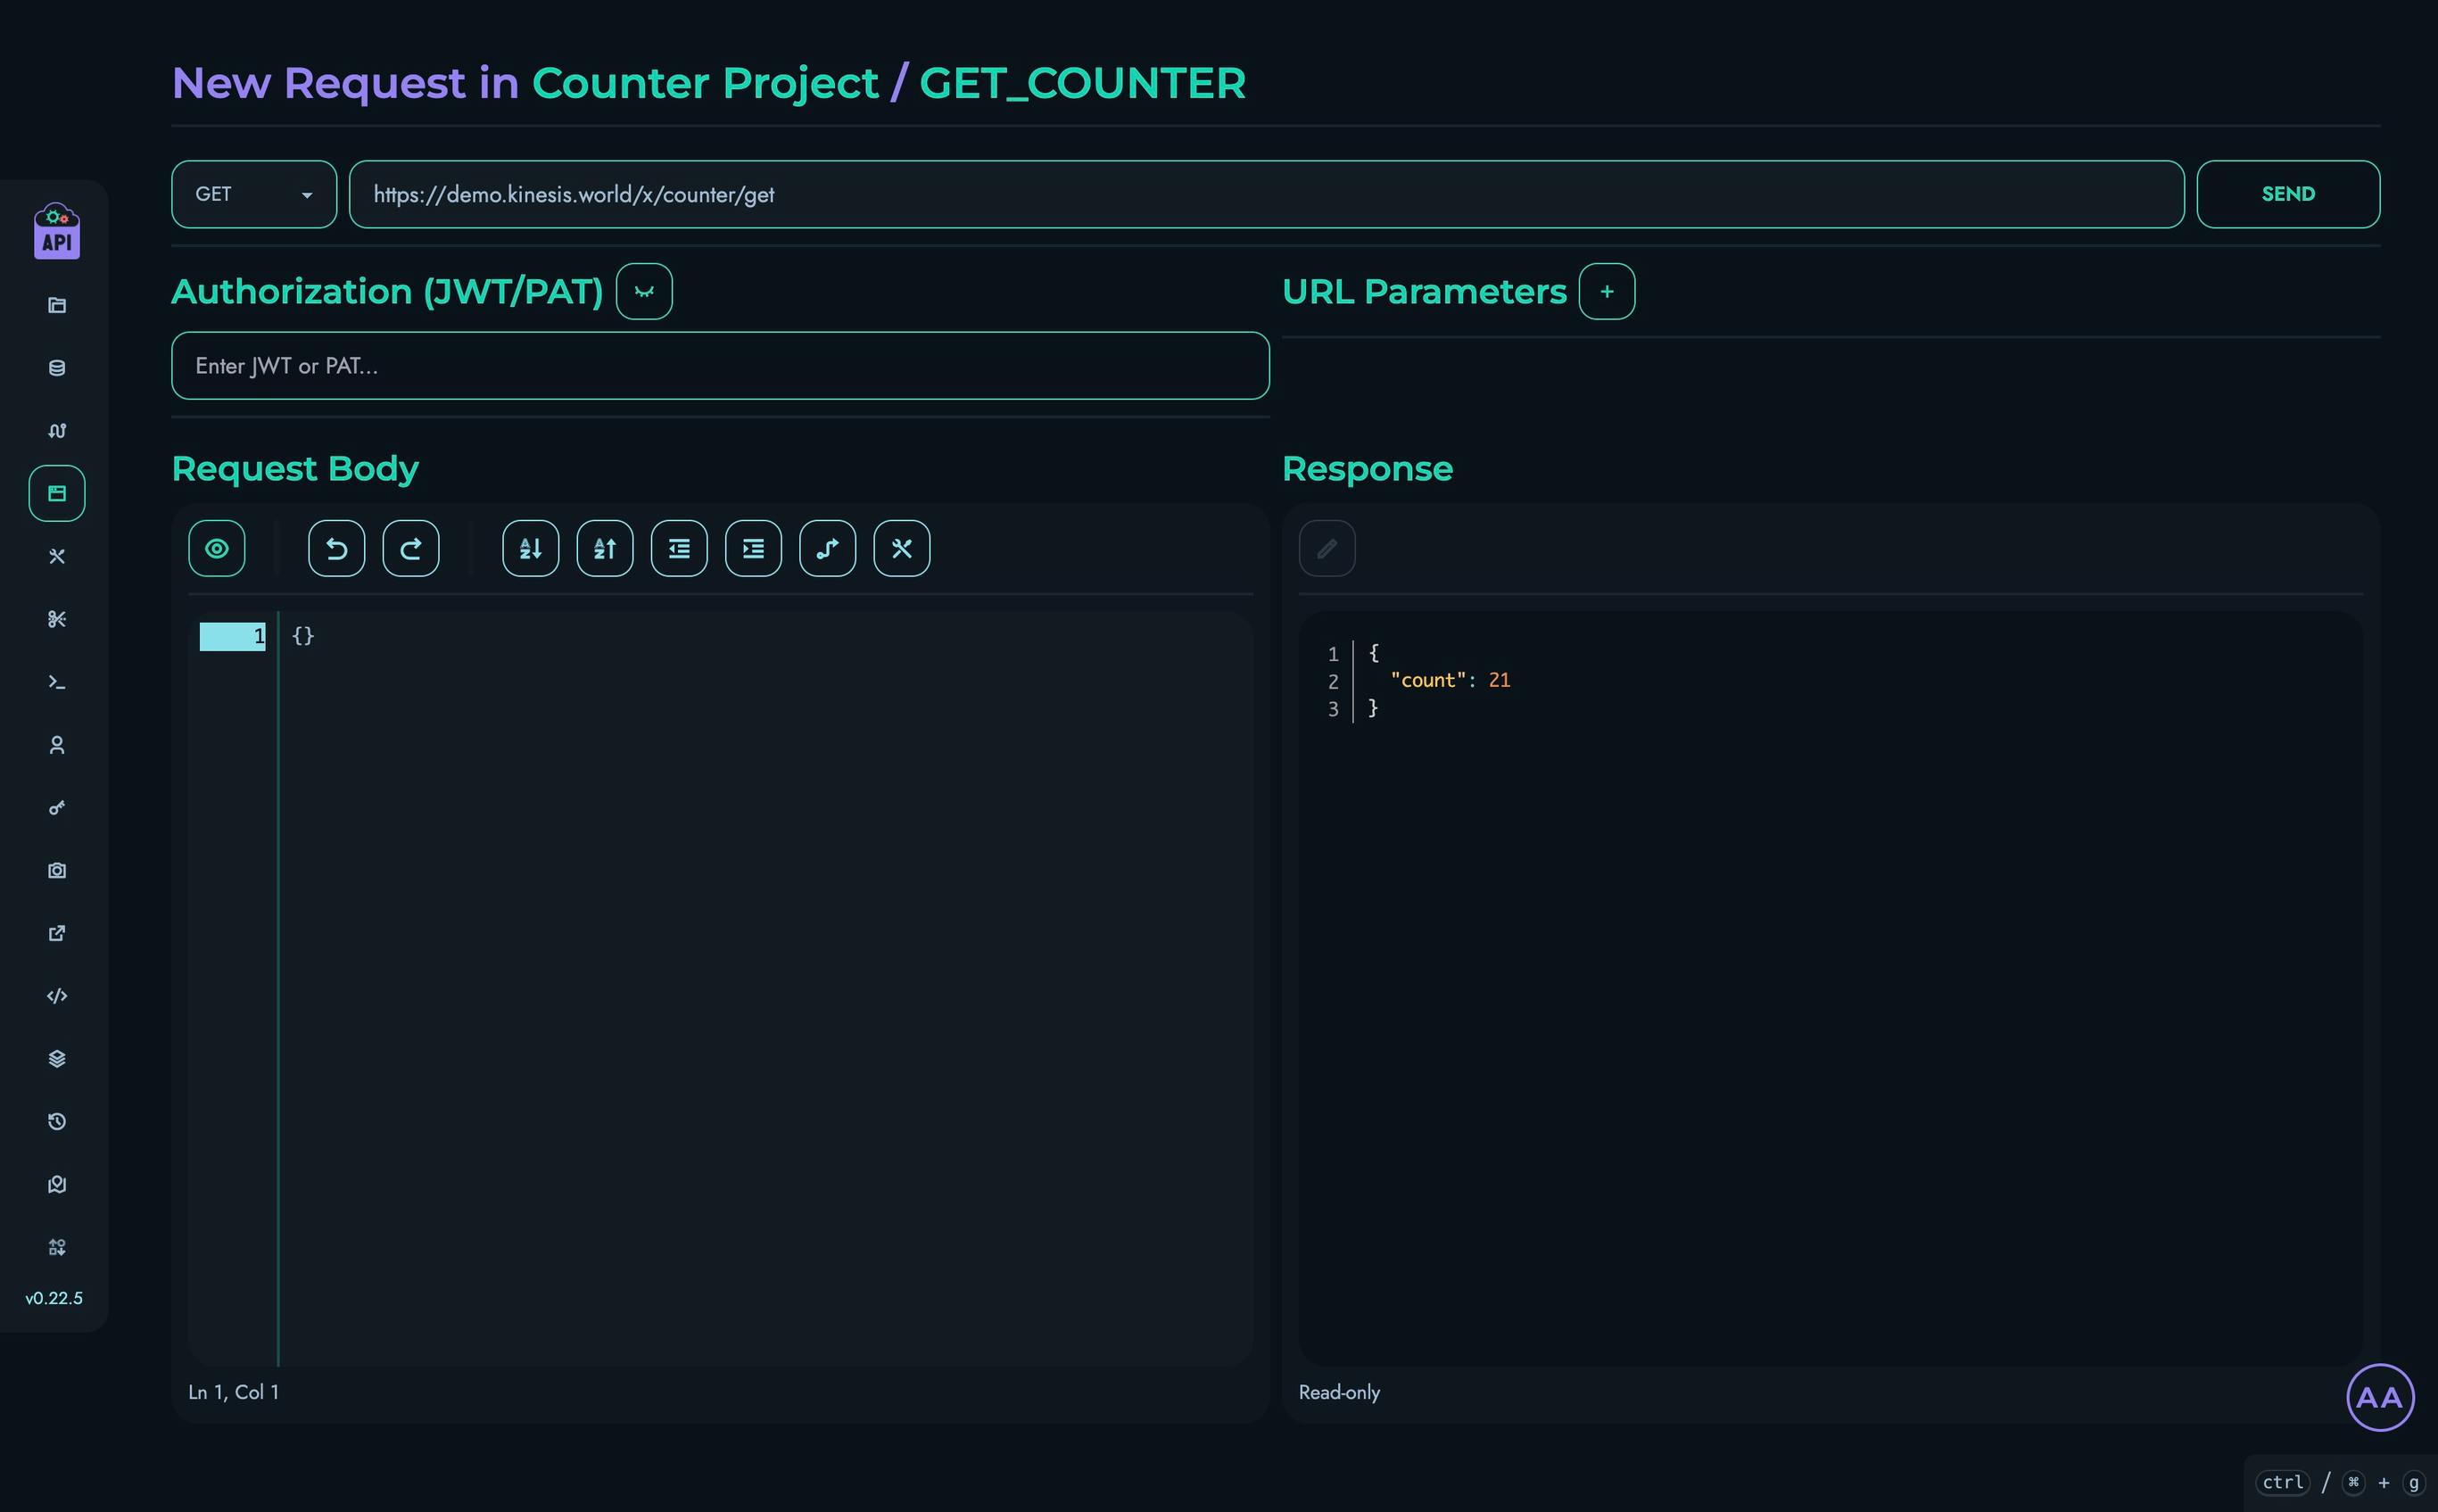
Congratulations!
You’ve successfully built a simple counter API using Kinesis API! Here’s what you’ve accomplished:
- Created a project to organize your API
- Set up a collection to store data
- Defined some structures (fields) for your counter
- Created a data object with an initial value
- Built a route that increments the counter
- Tested your API and verified it works
Next Steps
Now that you understand the basics, here are some ways to extend this project:
- Add a reset route: Create a new route that resets the counter to zero
- Add custom increment: Modify the route to accept a parameter that specifies how much to increment by
- Add multiple counters: Create multiple data objects and update your route to increment a specific counter
- Add authentication: Require a token to increment the counter
Continuous Improvement
Note: Kinesis API is continuously evolving based on user feedback. As users test and provide suggestions, the platform will become simpler, more intuitive, and easier to use. This tutorial will be updated regularly to reflect improvements in the user experience and new features.
We value your feedback! If you have suggestions for improving this tutorial or the Kinesis API platform, please reach out through our contact page or consider raising a new ticket.
Related Documentation
- Projects - Learn more about managing projects
- Collections - Detailed information about collections
- Structures - Advanced structure options
- Routes - More about creating routes
- Playground - Testing your APIs
Implementing JWT Authentication
This tutorial will guide you through implementing a complete JWT (JSON Web Token) authentication system using Kinesis API. You’ll create login functionality that generates tokens and a verification endpoint that validates those tokens, establishing a secure authentication flow for your APIs.
Prefer video tutorials? You can follow along with our YouTube walkthrough of this same project.
Prerequisites
Before you begin, you need:
- Access to a Kinesis API instance:
- Either the demo environment at demo.kinesis.world
- Or your own self-hosted instance
- A user account with ADMIN or ROOT privileges
- Basic understanding of:
- REST APIs and HTTP methods
- Authentication concepts
- JSON Web Tokens (JWT)
What is JWT Authentication?
JWT (JSON Web Token) is an open standard for securely transmitting information between parties. In the context of authentication:
- A user logs in with their credentials
- The server validates the credentials and generates a signed JWT
- The client stores this JWT and sends it with subsequent requests
- The server verifies the JWT’s signature to authenticate the user
This stateless approach eliminates the need for server-side session storage, making it ideal for APIs.
1. Creating the Authentication Project
First, let’s create a project to organize our authentication API:
- Log in to your Kinesis API instance
- Navigate to the Projects page from the main menu
- Click “Create New” to open the project creation modal
- Fill in the following details:
- Name: “Authentication”
- ID: “auth”
- Description: “Simple project to test JWT authentication.” (or anything else you want)
- API Path: “/auth” (this will be the base URL path for all routes in this project)
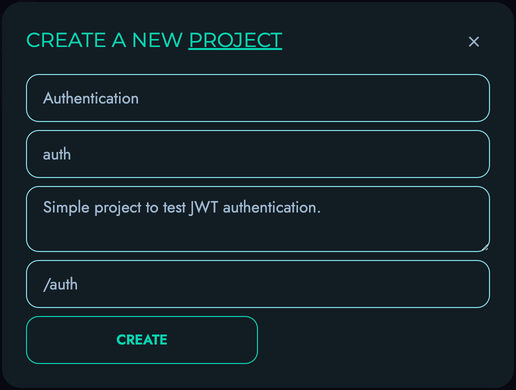
- Click “Create” to save your project
2. Creating the Accounts Collection
Next, let’s create a collection to store user accounts:
- From your newly created project page, click “Create New” on the “Collections” section
- Fill in the following details:
- Name: “Accounts”
- ID: “accounts”
- Description: “To store user accounts.” (or anything else you want)
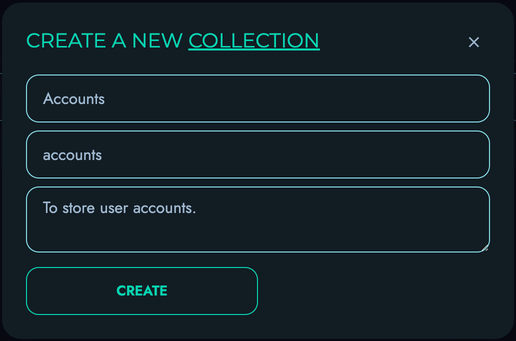
- Click “Create” to save your collection
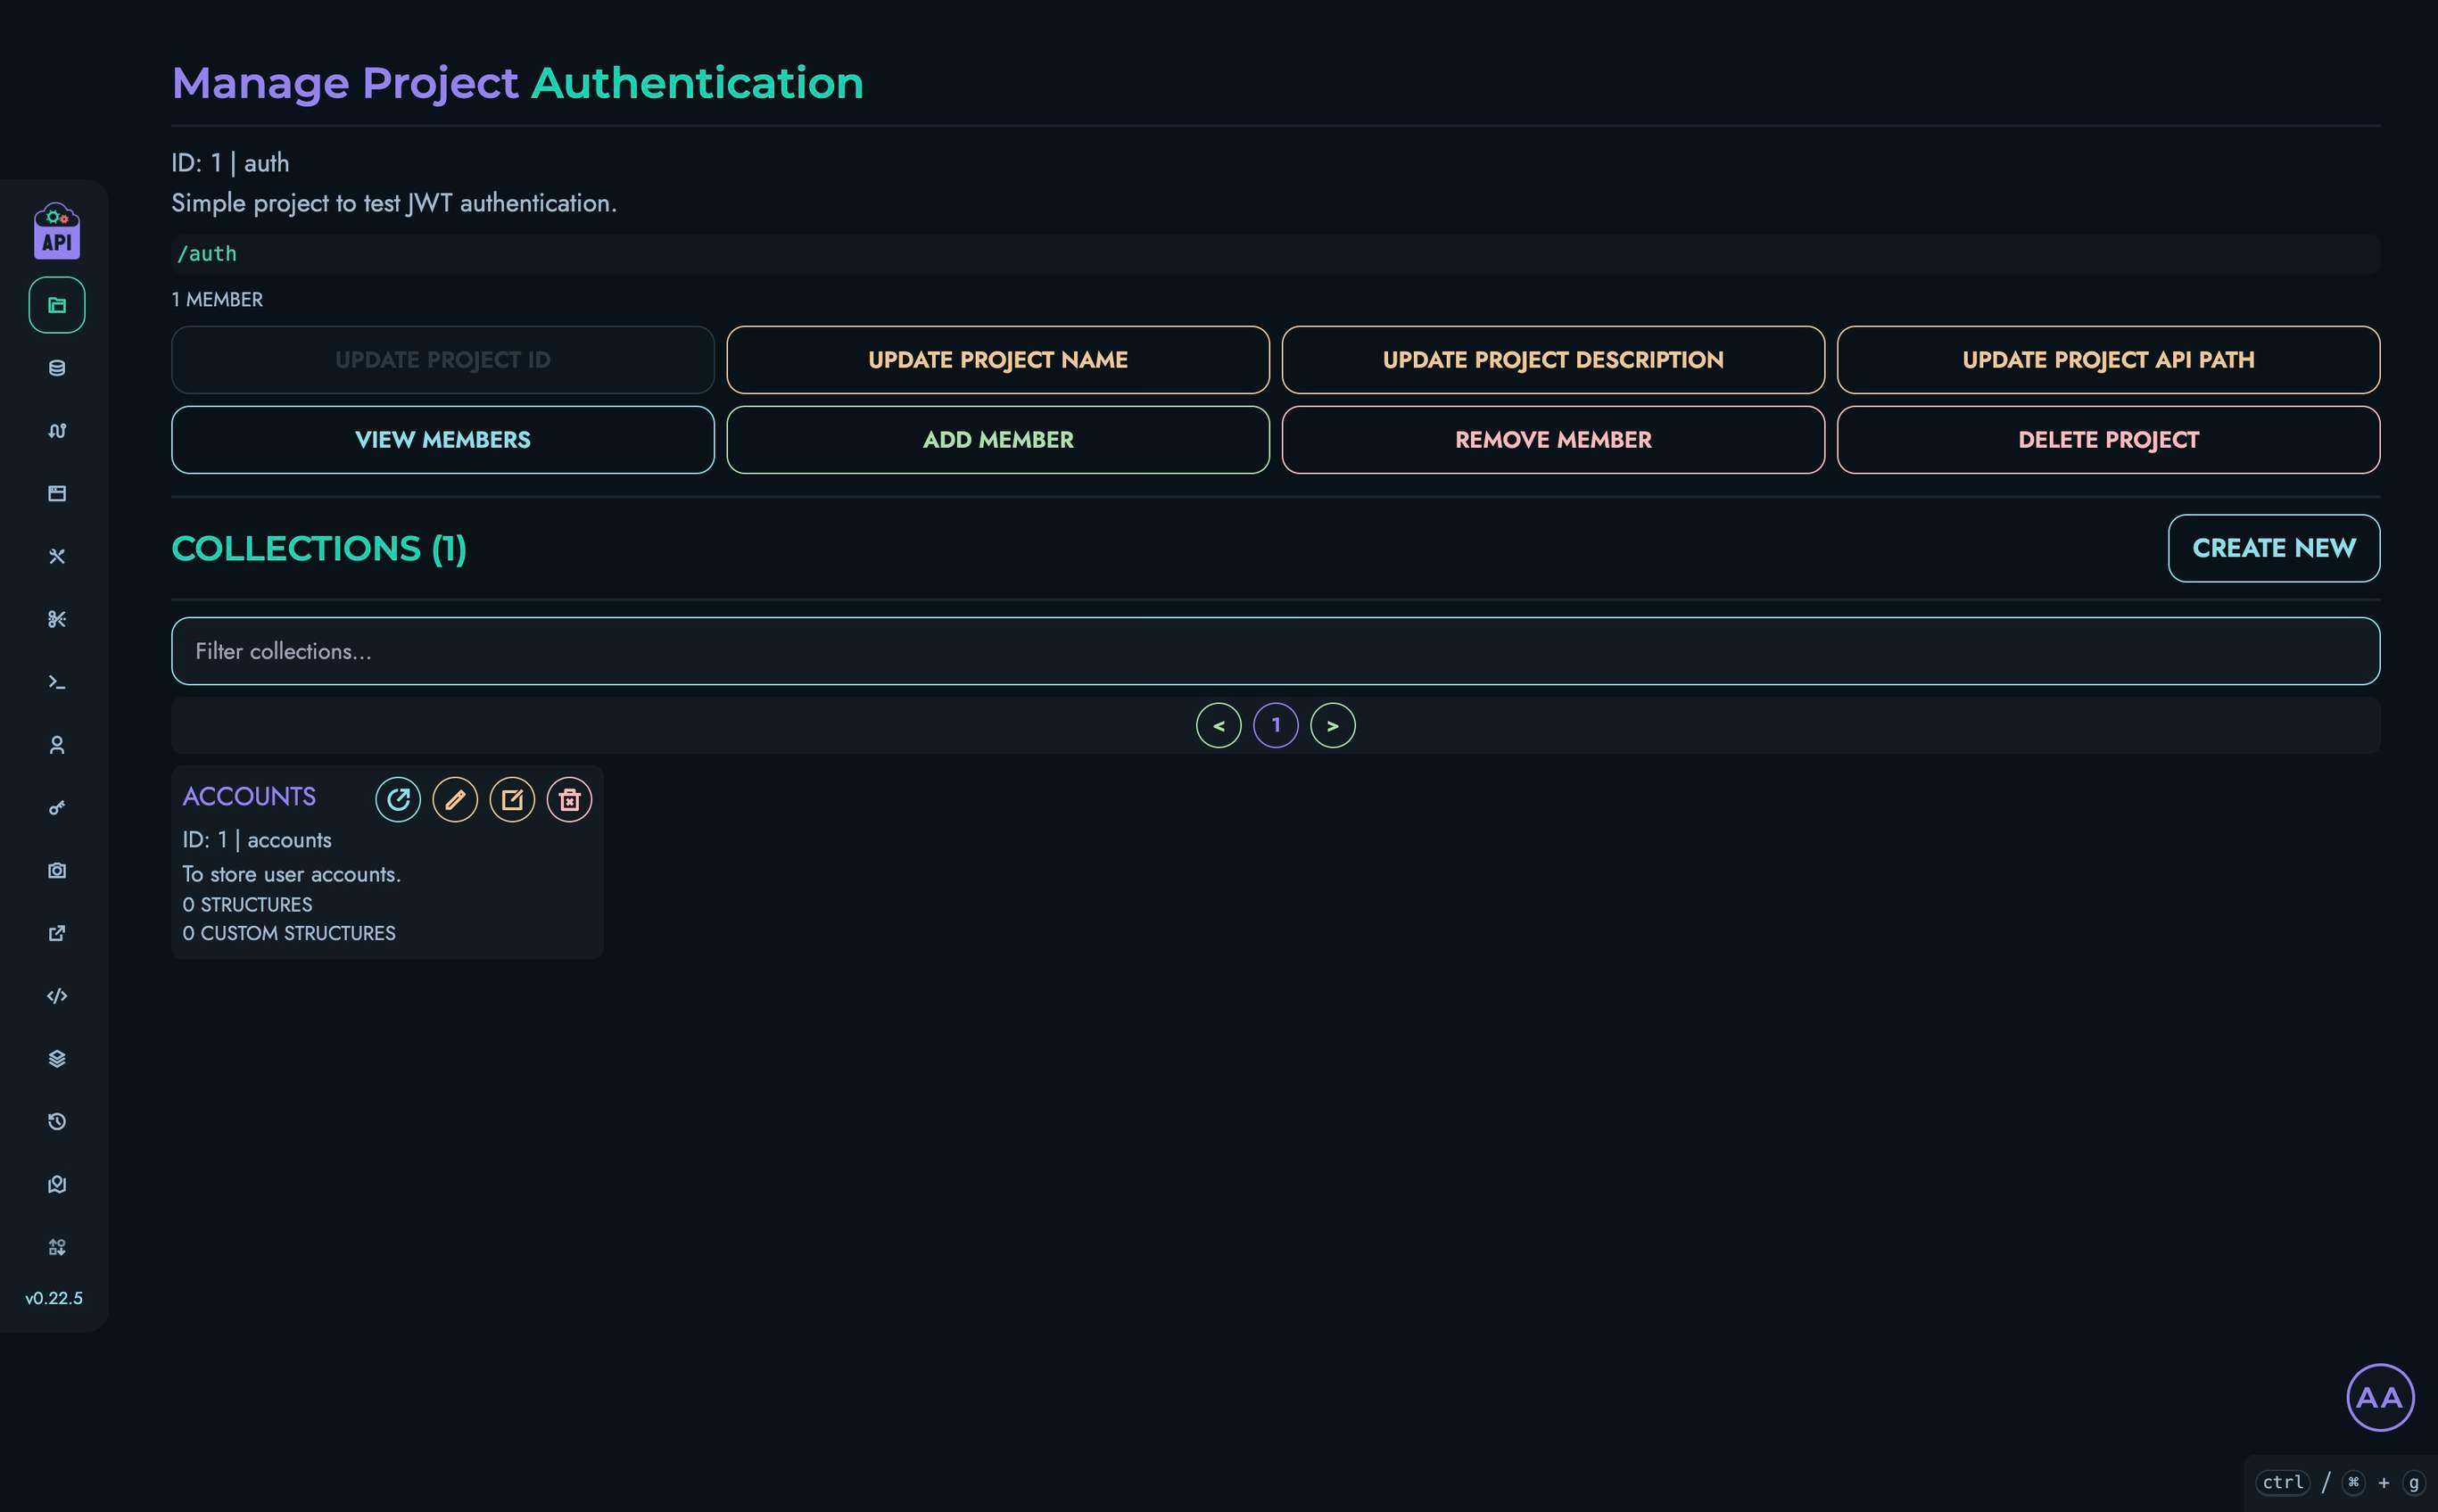
3. Creating Structures
Now we’ll create structures (fields) to store user information:
UID Structure
- From the “Accounts” collection page, locate the “Structures” section
- Click “Create New” to add a structure
- Fill in the following details:
- Name: “uid”
- ID: “uid”
- Description: “” (leave blank or insert anything else)
- Type: “INTEGER”
- Min: “0”
- Max: “1000”
- Default Value: “0”
- Required: Check this box
- Unique: Check this box

- Click “Create” to save the structure
Username Structure
- Click “Create New” again to add another structure
- Fill in the following details:
- Name: “username”
- ID: “username”
- Description: “” (leave blank or insert anything else)
- Type: “TEXT”
- Min: “4”
- Max: “100”
- Required: Check this box
- Unique: Check this box
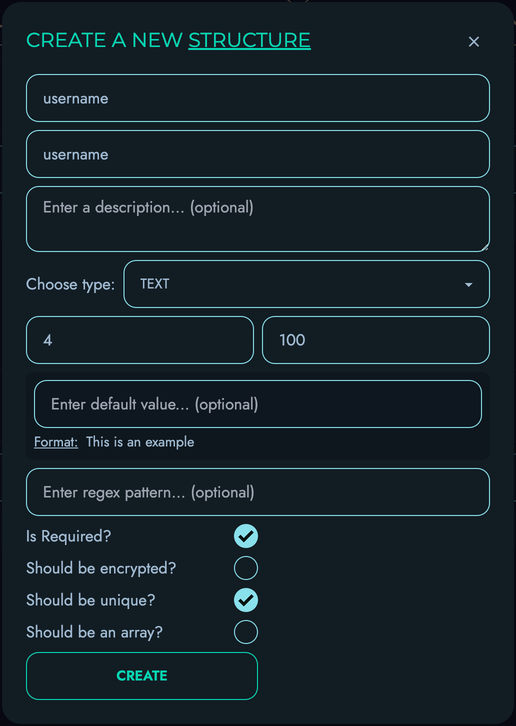
- Click “Create” to save the structure
Password Structure
- Click “Create New” again to add the final structure
- Fill in the following details:
- Name: “password”
- ID: “password”
- Description: “” (leave blank or insert anything else)
- Type: “PASSWORD”
- Min: “8”
- Max: “100”
- Required: Check this box
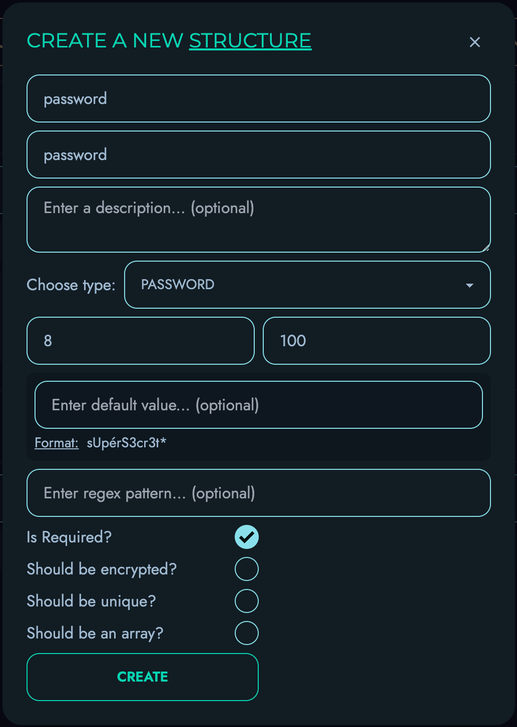
- Click “Create” to save the structure

4. Creating a Test User Account
Let’s create a test user to demonstrate our authentication system:
- Navigate to the “Data” section in the top navigation bar
- Select your “Authentication” project and then the “Accounts” collection
- Click “Create New” to create a data object
- Add a nickname (optional)
- Fill in the fields:
- uid: “0” (this will be our unique identifier)
- username: “john_doe”
- password: “password123” (in a real system, you’d use a strong password)
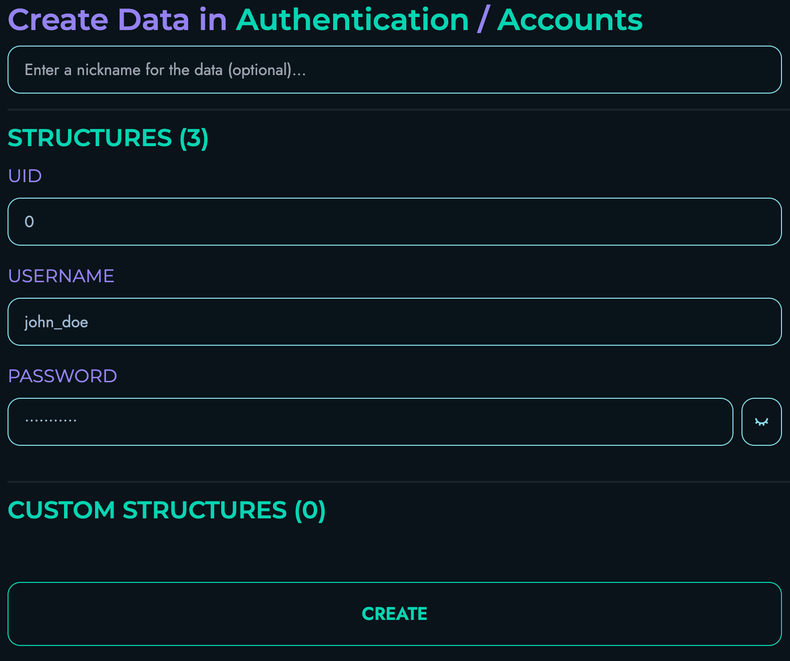
- Click “Create” to save your data object
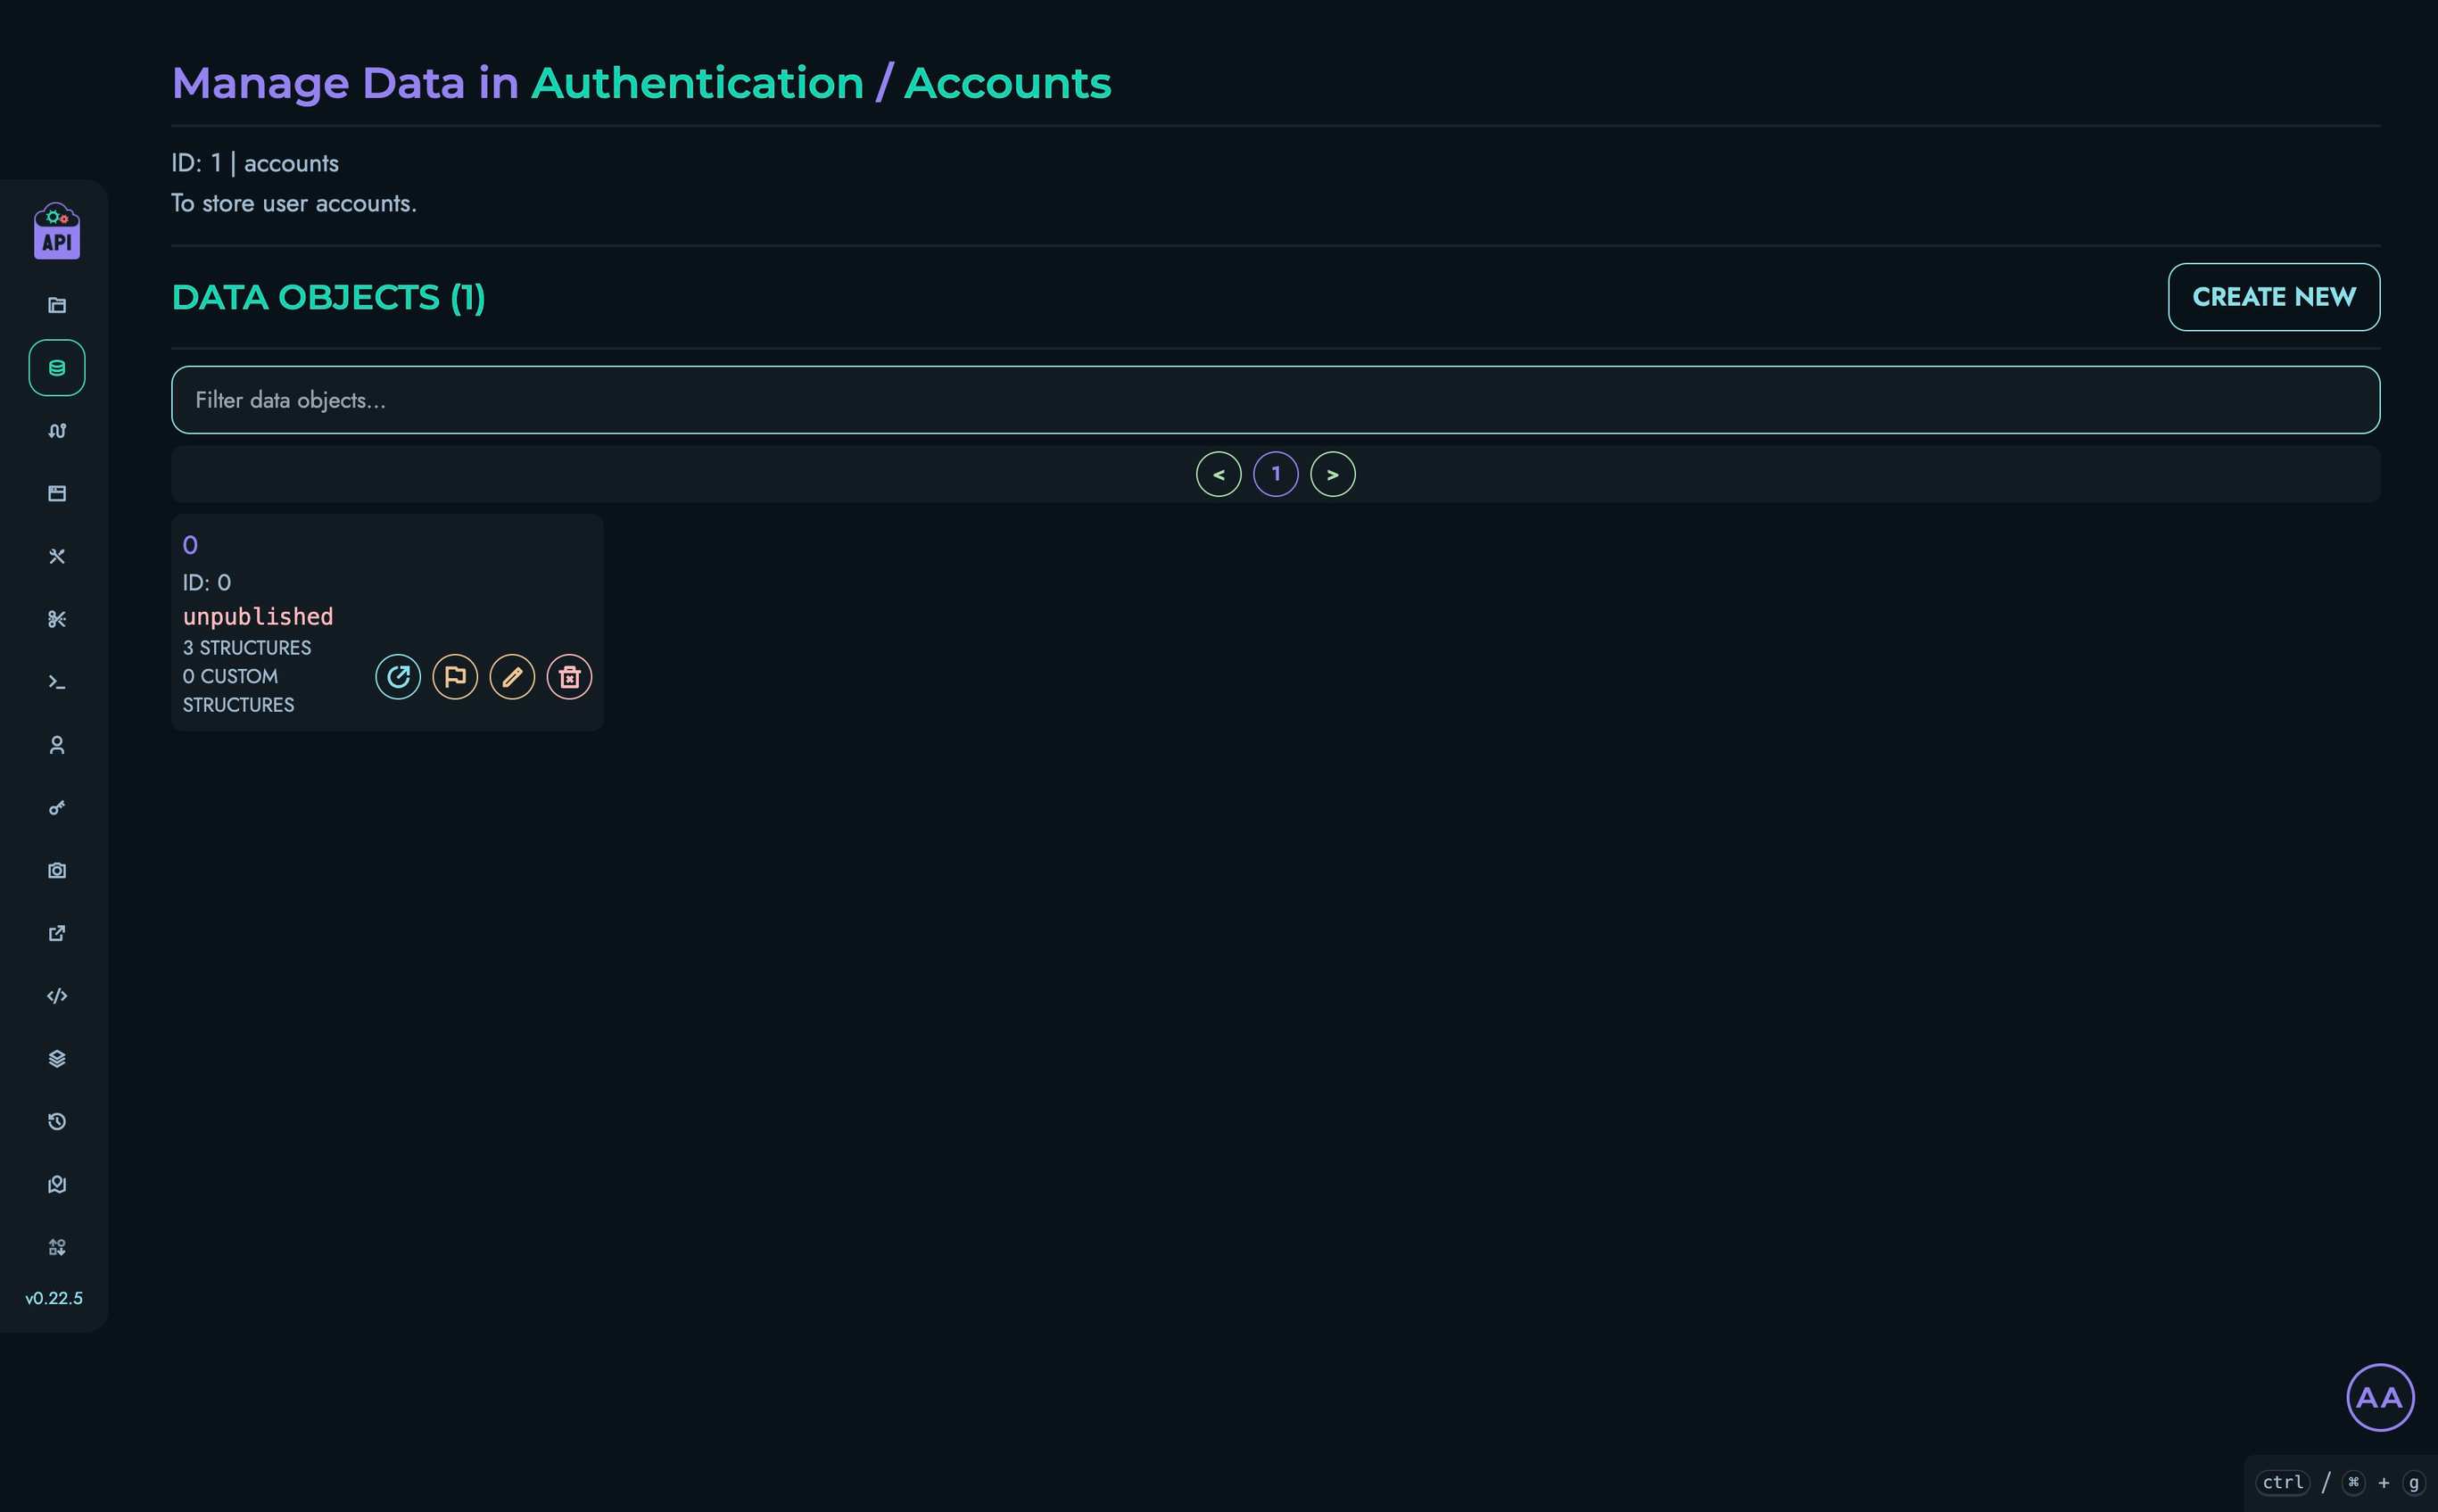
5. Creating the Login Route
Now we’ll create a route that validates credentials and generates a JWT token:
- Navigate to Routes in the top navigation bar
- Select your “Authentication” project
- Click “Create New” to create a route
- Fill in the route details:
- Route ID: “LOGIN”
- Route Path: “/login”
- HTTP Method: “POST”
- Add 2 parameters to the “Body” section:
- username: “STRING”
- password: “STRING”
- The “JWT Authentication” and “URL Parameters” sections don’t need to be modified
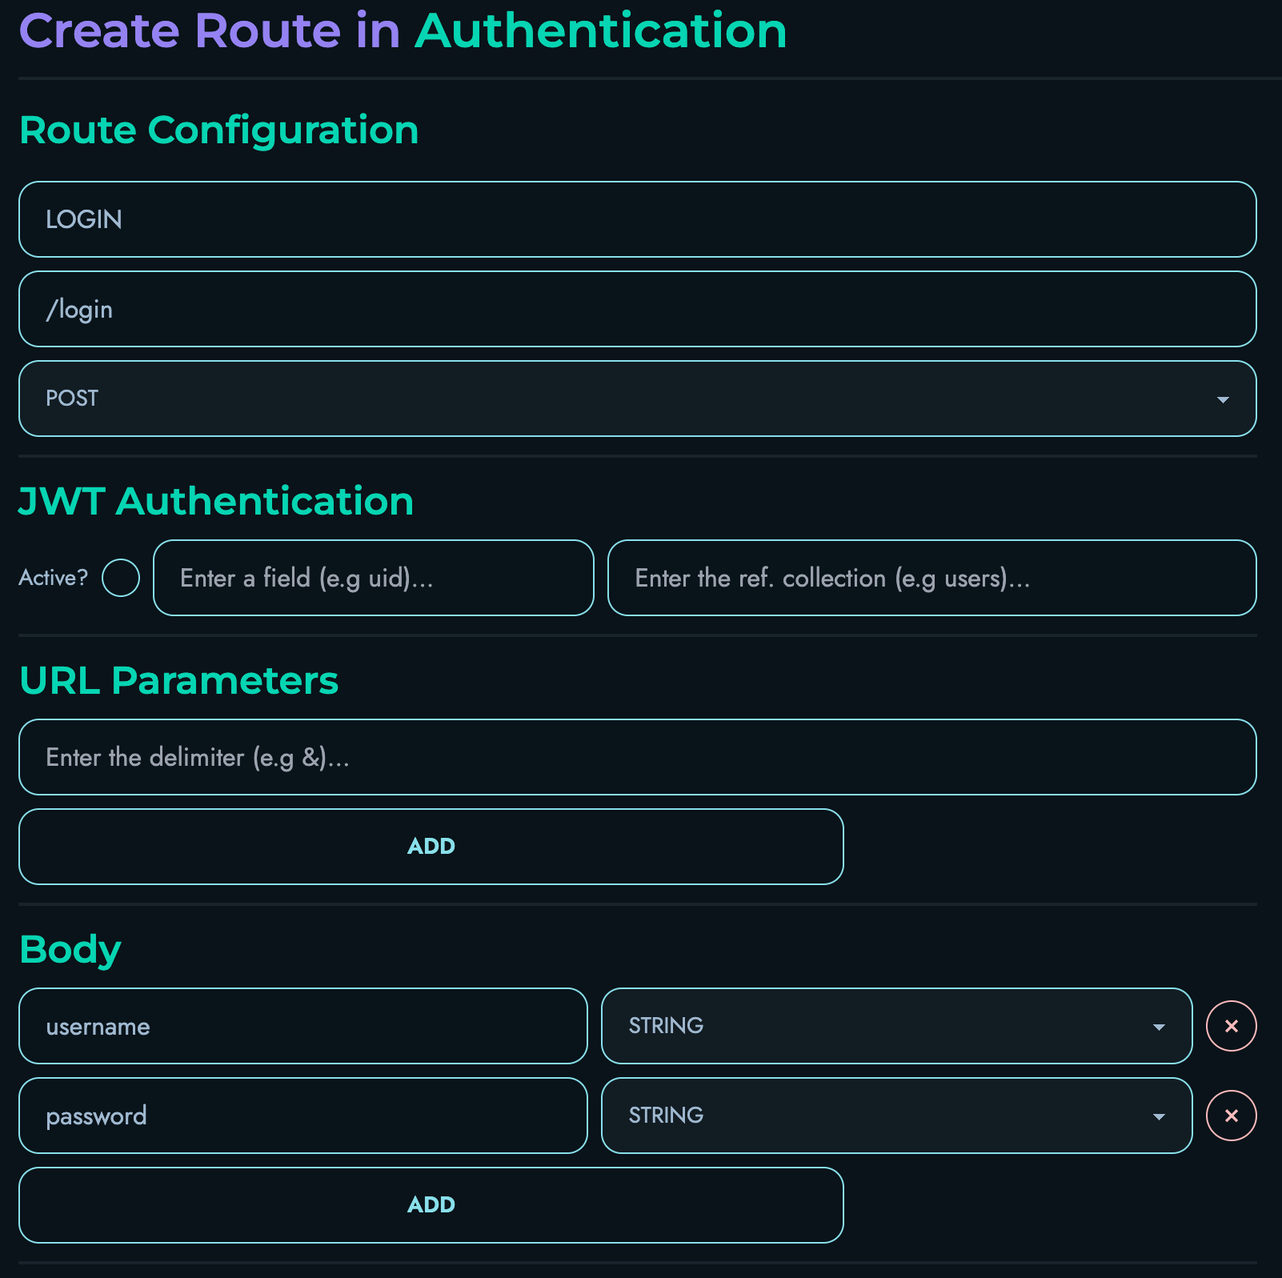
Building the Login Route Logic
In the Flow Editor, we’ll create a flow that:
- Accepts username and password from the request body
- Validates these against our stored accounts
- Generates a JWT token if credentials are valid
- Returns an error if credentials are invalid
Follow these steps:
-
Add a FETCH block:
- Drag a FETCH block onto the canvas and connect the START node to it
- Fill in the following details:
- Local Name: “_accounts”
- Reference Collection: “accounts”

-
Add a FILTER block:
- Drag a FILTER block onto the canvas and connect the FETCH block to it
- Fill in the following details:
- Local Name: “_matchingAccounts”
- Reference Variable: “_accounts”
- Reference Property: “username”
- Add a “filter” submodule and fill in the following details:
- Operation Type: “Equal To”
- Operand:
- Reference: Check this box
- Type: “String”
- Data: “username”

-
Add a PROPERTY block:
- Drag a PROPERTY block onto the canvas and connect the FILTER block to it
- Fill in the following details:
- Local Name: “_matchingAccountsLength”
- Property Apply: “LENGTH”
- As for the data section, fill in the following details:
- Reference: Check this box
- Type: “Array”
- Data: “_matchingAccounts”

-
Add a CONDITION block:
- Drag a CONDITION block onto the canvas and connect the PROPERTY block to it
- Fill in the following details:
- Action: “Fail”
- Fail Object Status: “404”
- Fail Object Message: “User not found”
- Add a “condition” submodule with 2 operands, and fill in the following details:
- First Operand:
- Reference: Check this box
- Type: “Integer”
- Data: “_matchingAccountsLength”
- Second Operand:
- Reference: Leave unchecked
- Type: “Integer”
- Data: “1”
- Condition Type: “Less than”
- First Operand:

-
Add a PROPERTY block:
- Drag a PROPERTY block onto the canvas and connect the CONDITION block to it
- Fill in the following details:
- Local Name: “_foundAccount”
- Property Apply: “GET_FIRST”
- As for the data section, fill in the following details:
- Reference: Check this box
- Type: “Array”
- Data: “_matchingAccounts”

-
Add a PROPERTY block:
- Drag a PROPERTY block onto the canvas and connect the previous PROPERTY block to it
- Fill in the following details:
- Local Name: “_savedPassword”
- Property Apply: “GET_PROPERTY”
- Additional: “password”
- As for the data section, fill in the following details:
- Reference: Check this box
- Type: “Other”
- Data: “_foundAccount”

-
Add a CONDITION block:
- Drag a CONDITION block onto the canvas and connect the PROPERTY block to it
- Fill in the following details:
- Action: “Fail”
- Fail Object Status: “401”
- Fail Object Message: “Invalid Password”
- Add a “condition” submodule with 2 operands, and fill in the following details:
- First Operand:
- Reference: Check this box
- Type: “String”
- Data: “password”
- Second Operand:
- Reference: Check this box
- Type: “String”
- Data: “_savedPassword”
- Condition Type: “Not equal to”
- First Operand:

-
Add a PROPERTY block:
- Drag a PROPERTY block onto the canvas and connect the CONDITION block to it
- Fill in the following details:
- Local Name: “_uid”
- Property Apply: “GET_PROPERTY”
- Additional: “uid”
- As for the data section, fill in the following details:
- Reference: Check this box
- Type: “Other”
- Data: “_foundAccount”

-
Add a FUNCTION block:
- Drag a FUNCTION block onto the canvas and connect the PROPERTY block to it
- Fill in the following details:
- Local Name: “_jwt”
- Function: “GENERATE_JWT_TOKEN”
- Add a “parameter” submodule and fill in the following details:
- Reference: Check this box
- Type: “Integer”
- Data: “_uid”

-
Add a RETURN block:
- Drag a RETURN block onto the canvas and connect the FUNCTION block to it
- Add an “object pair” submodule
- Fill in the following details:
- id: “uid”
- data:
- Reference: Check this box
- Type: “Integer”
- Data: “_uid”
- Add another “object pair” submodule
- Fill in the following details:
- id: “jwt”
- data:
- Reference: Check this box
- Type: “String”
- Data: “_jwt”

-
Ensure that your Flow Editor looks like the following:

-
Click “Create” to save your route
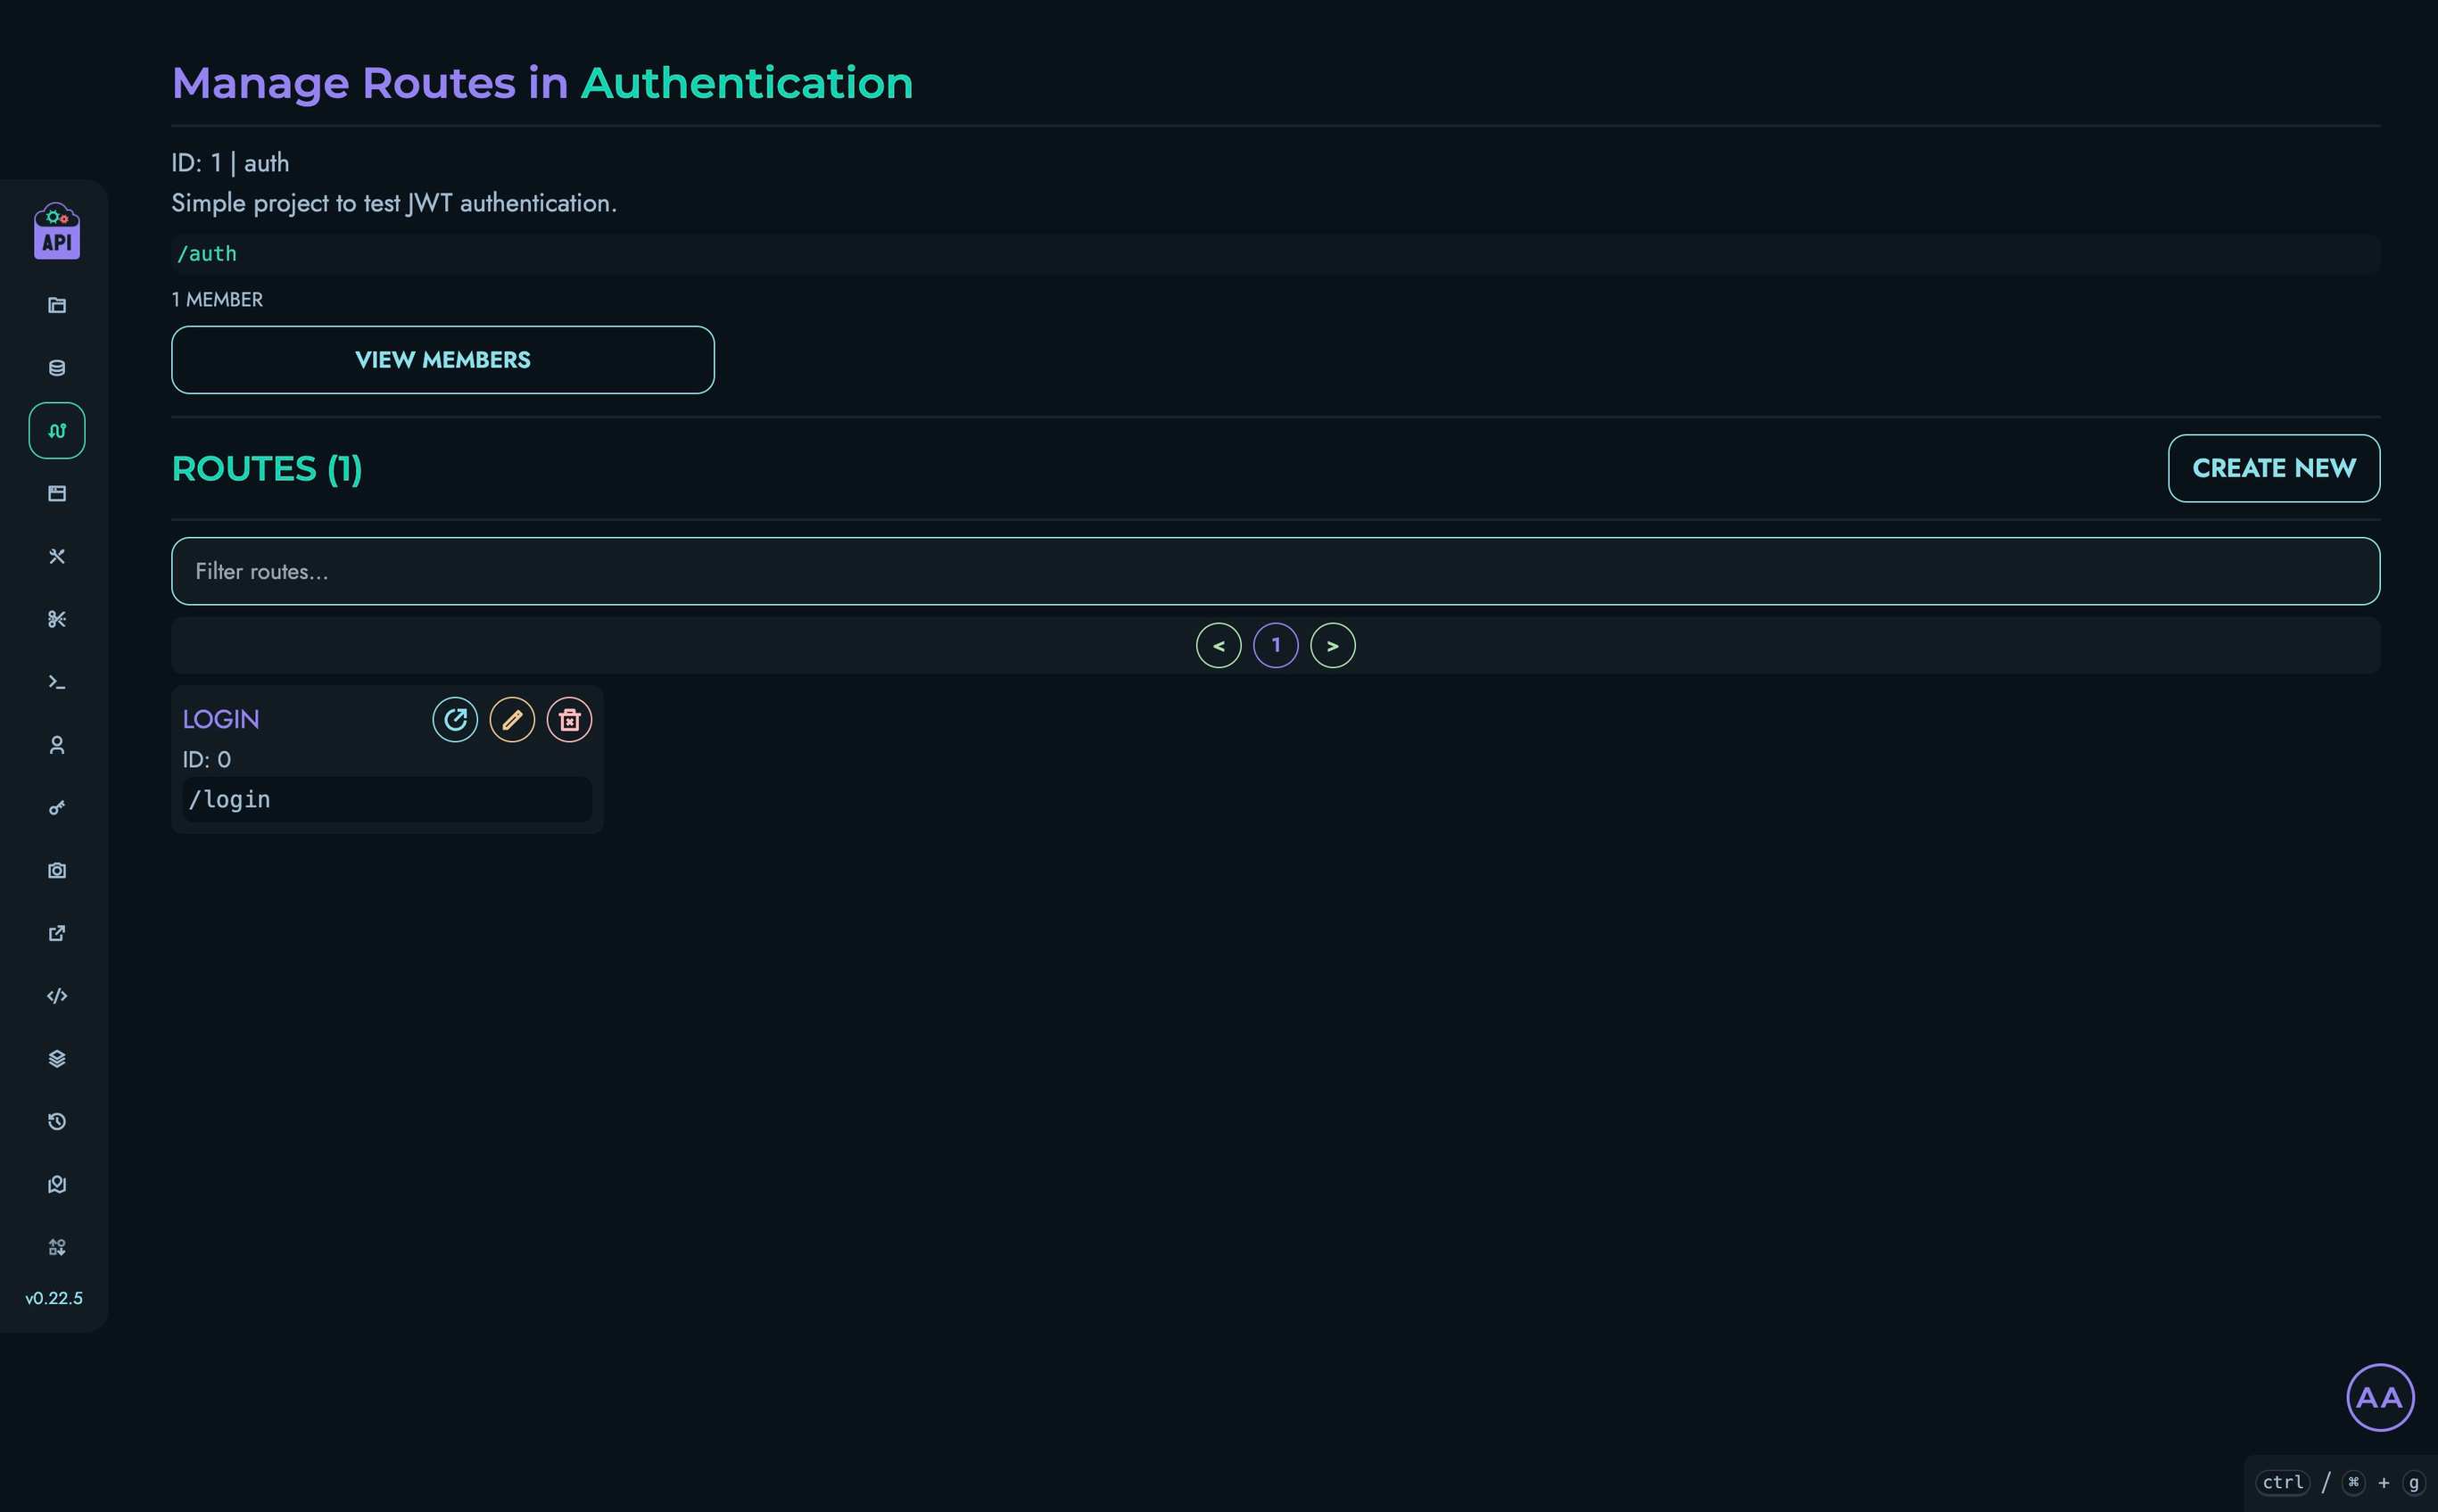
6. Creating the Verify Route
Now let’s create a route that verifies JWT tokens:
- Navigate back to Routes in the top navigation bar
- Select your “Authentication” project
- Click “Create New” to create a route
- Fill in the route details:
- Route ID: “VERIFY”
- Route Path: “/verify”
- HTTP Method: “GET”
- Fill in the details for the “JWT Authentication” section:
- Active: Check this box
- Field: “uid”
- Reference Collection: “accounts”
- Set the “delimiter” to be “&” for the “URL Parameters” section
- Add 1 parameter to the “URL Parameters” section:
- uid: “INTEGER”
- The “Body” section doesn’t need to be modified
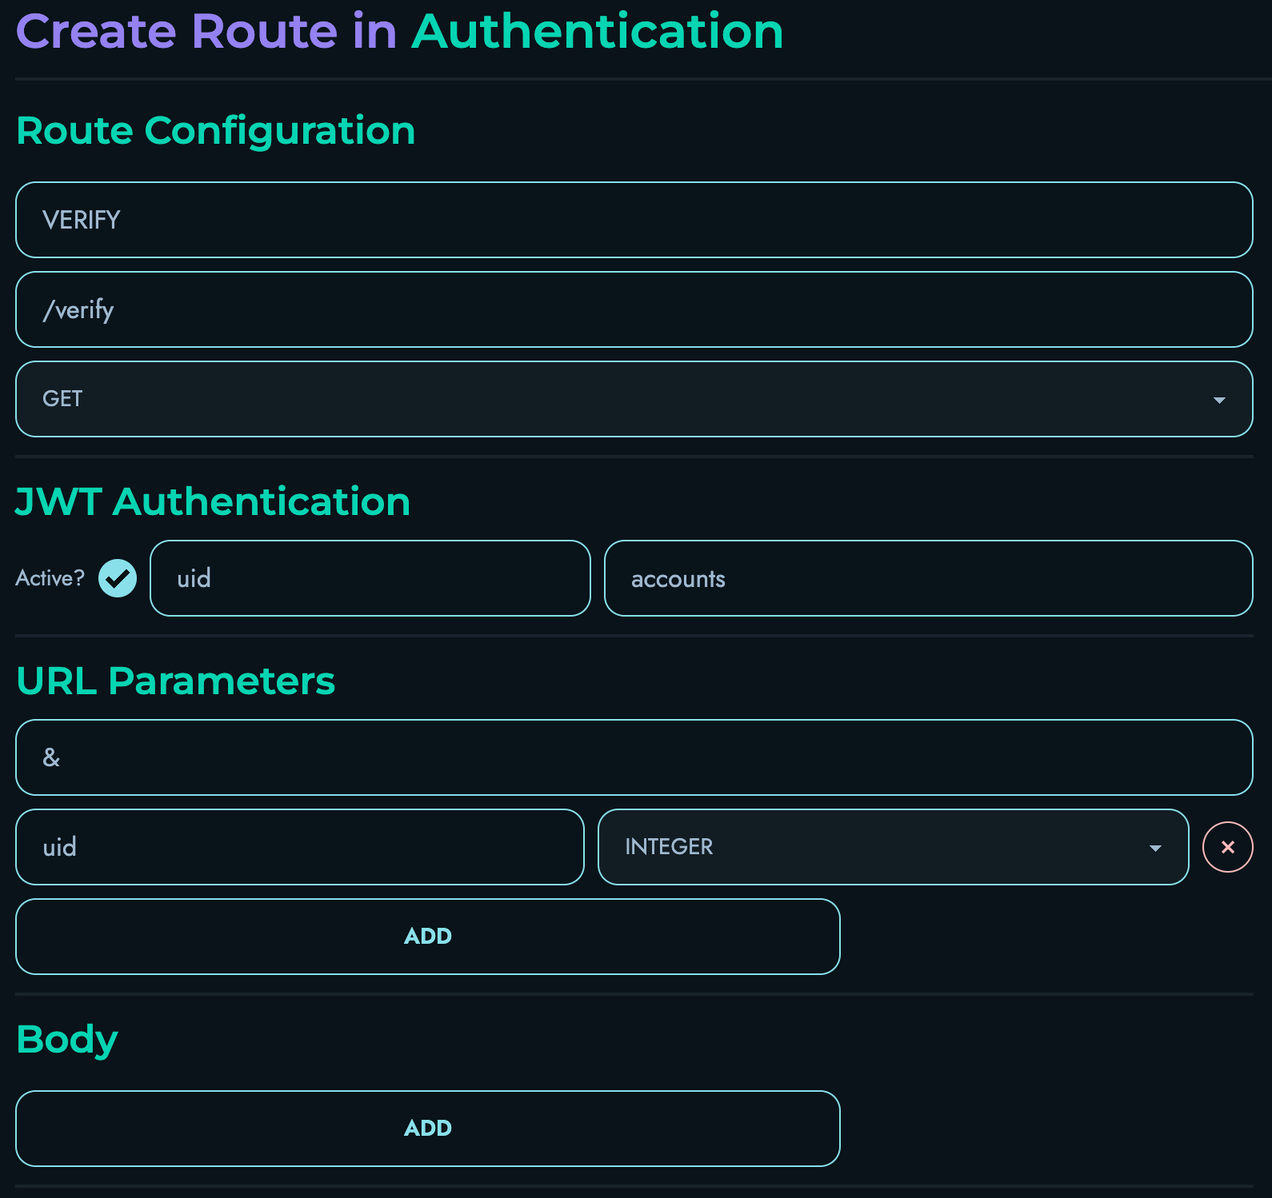
Building the Verification Route Logic
In the Flow Editor, we’ll create a flow that:
- Extracts the JWT token from the Authorization header
- Verifies the token’s signature and expiration
- Returns the decoded payload if valid
- Returns an error if invalid
Follow these steps:
-
Add a FETCH block:
- Drag a FETCH block onto the canvas and connect the START node to it
- Fill in the following details:
- Local Name: “_accounts”
- Reference Collection: “accounts”
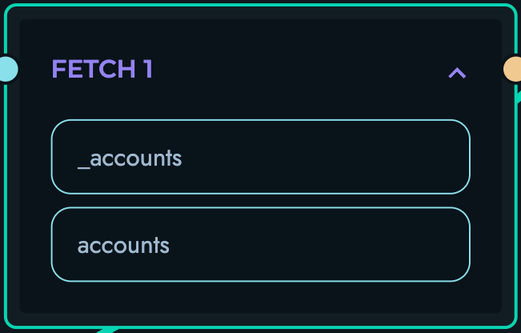
-
Add a FILTER block:
- Drag a FILTER block onto the canvas and connect the FETCH block to it
- Fill in the following details:
- Local Name: “_matchingAccounts”
- Reference Variable: “_accounts”
- Reference Property: “uid”
- Add a “filter” submodule and fill in the following details:
- Operation Type: “Equal To”
- Operand:
- Reference: Check this box
- Type: “Integer”
- Data: “uid”
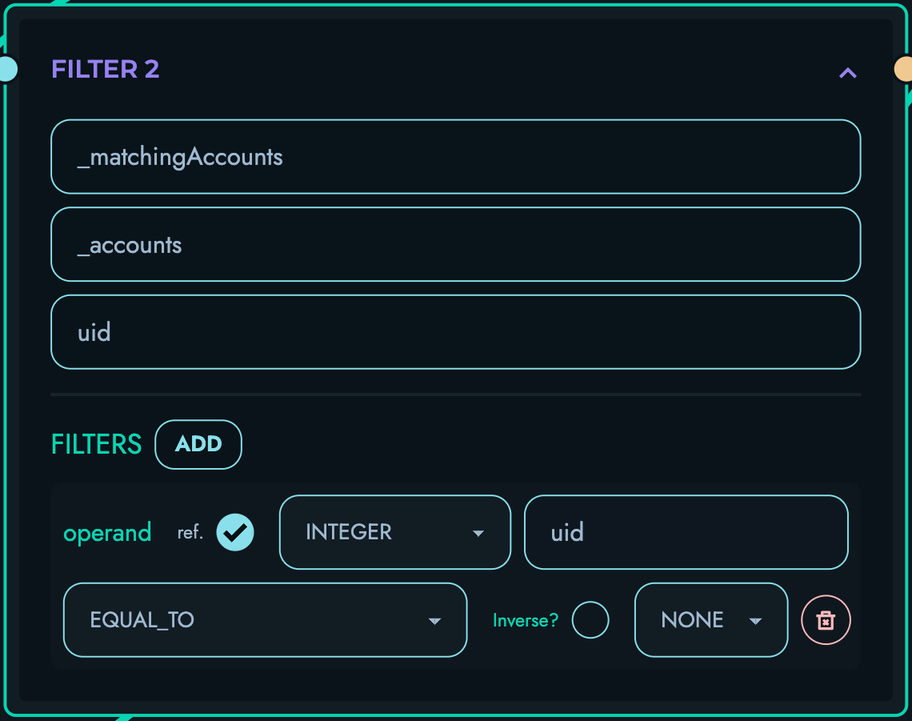
-
Add a PROPERTY block:
- Drag a PROPERTY block onto the canvas and connect the FILTER block to it
- Fill in the following details:
- Local Name: “_foundAccount”
- Property Apply: “GET_FIRST”
- As for the data section, fill in the following details:
- Reference: Check this box
- Type: “Array”
- Data: “_matchingAccounts”
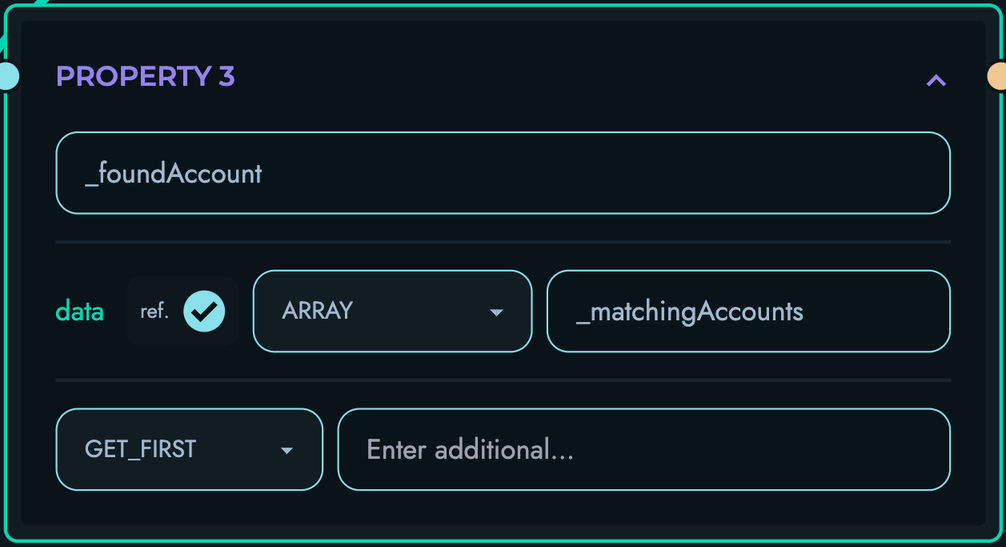
-
Add a PROPERTY block:
- Drag a PROPERTY block onto the canvas and connect the previous PROPERTY block to it
- Fill in the following details:
- Local Name: “_username”
- Property Apply: “GET_PROPERTY”
- Additional: “username”
- As for the data section, fill in the following details:
- Reference: Check this box
- Type: “Other”
- Data: “_foundAccount”
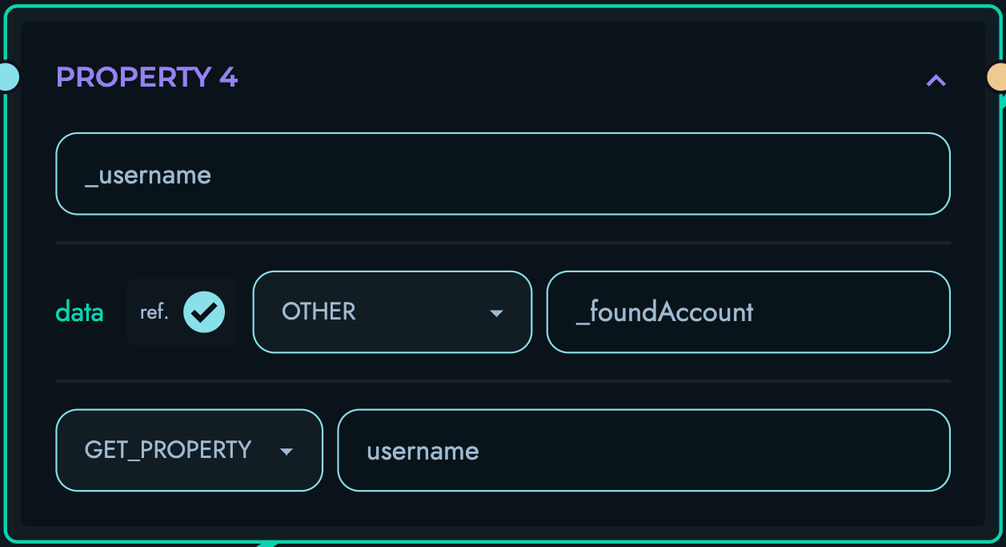
-
Add a RETURN block:
- Drag a RETURN block onto the canvas and connect the PROPERTY block to it
- Add an “object pair” submodule
- Fill in the following details:
- id: “message”
- data:
- Reference: Leave unchecked
- Type: “String”
- Data: “Authentication Succeeded!”
- Add another “object pair” submodule
- Fill in the following details:
- id: “username”
- data:
- Reference: Check this box
- Type: “String”
- Data: “_username”
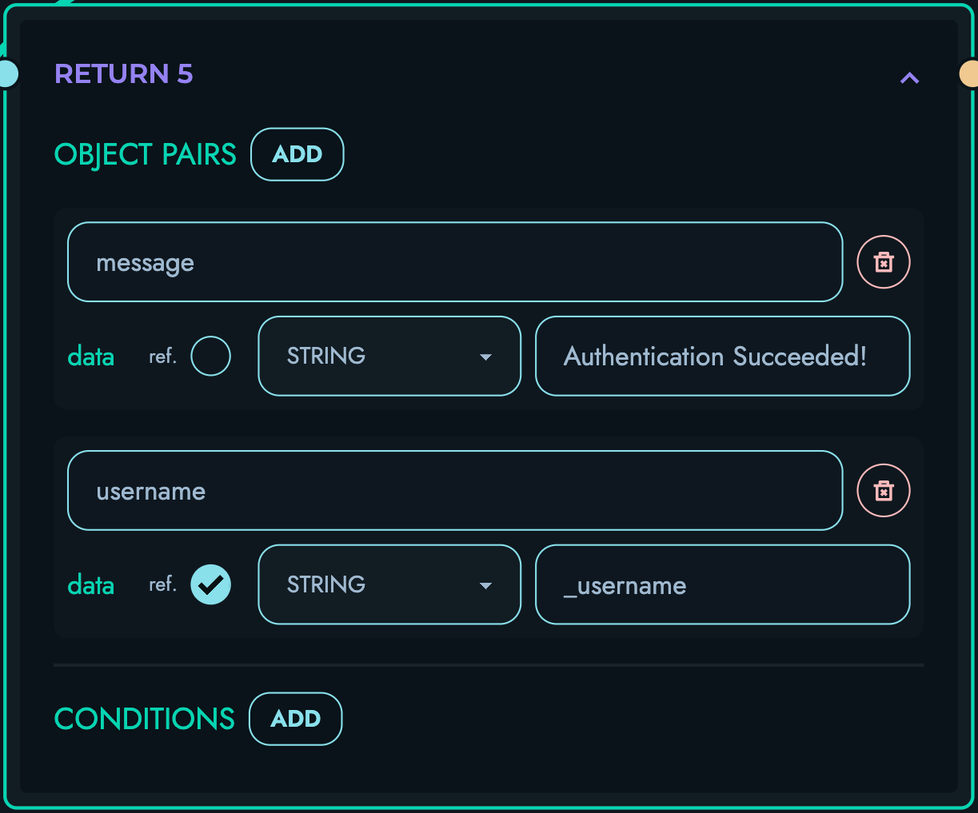
-
Ensure that your Flow Editor looks like the following:
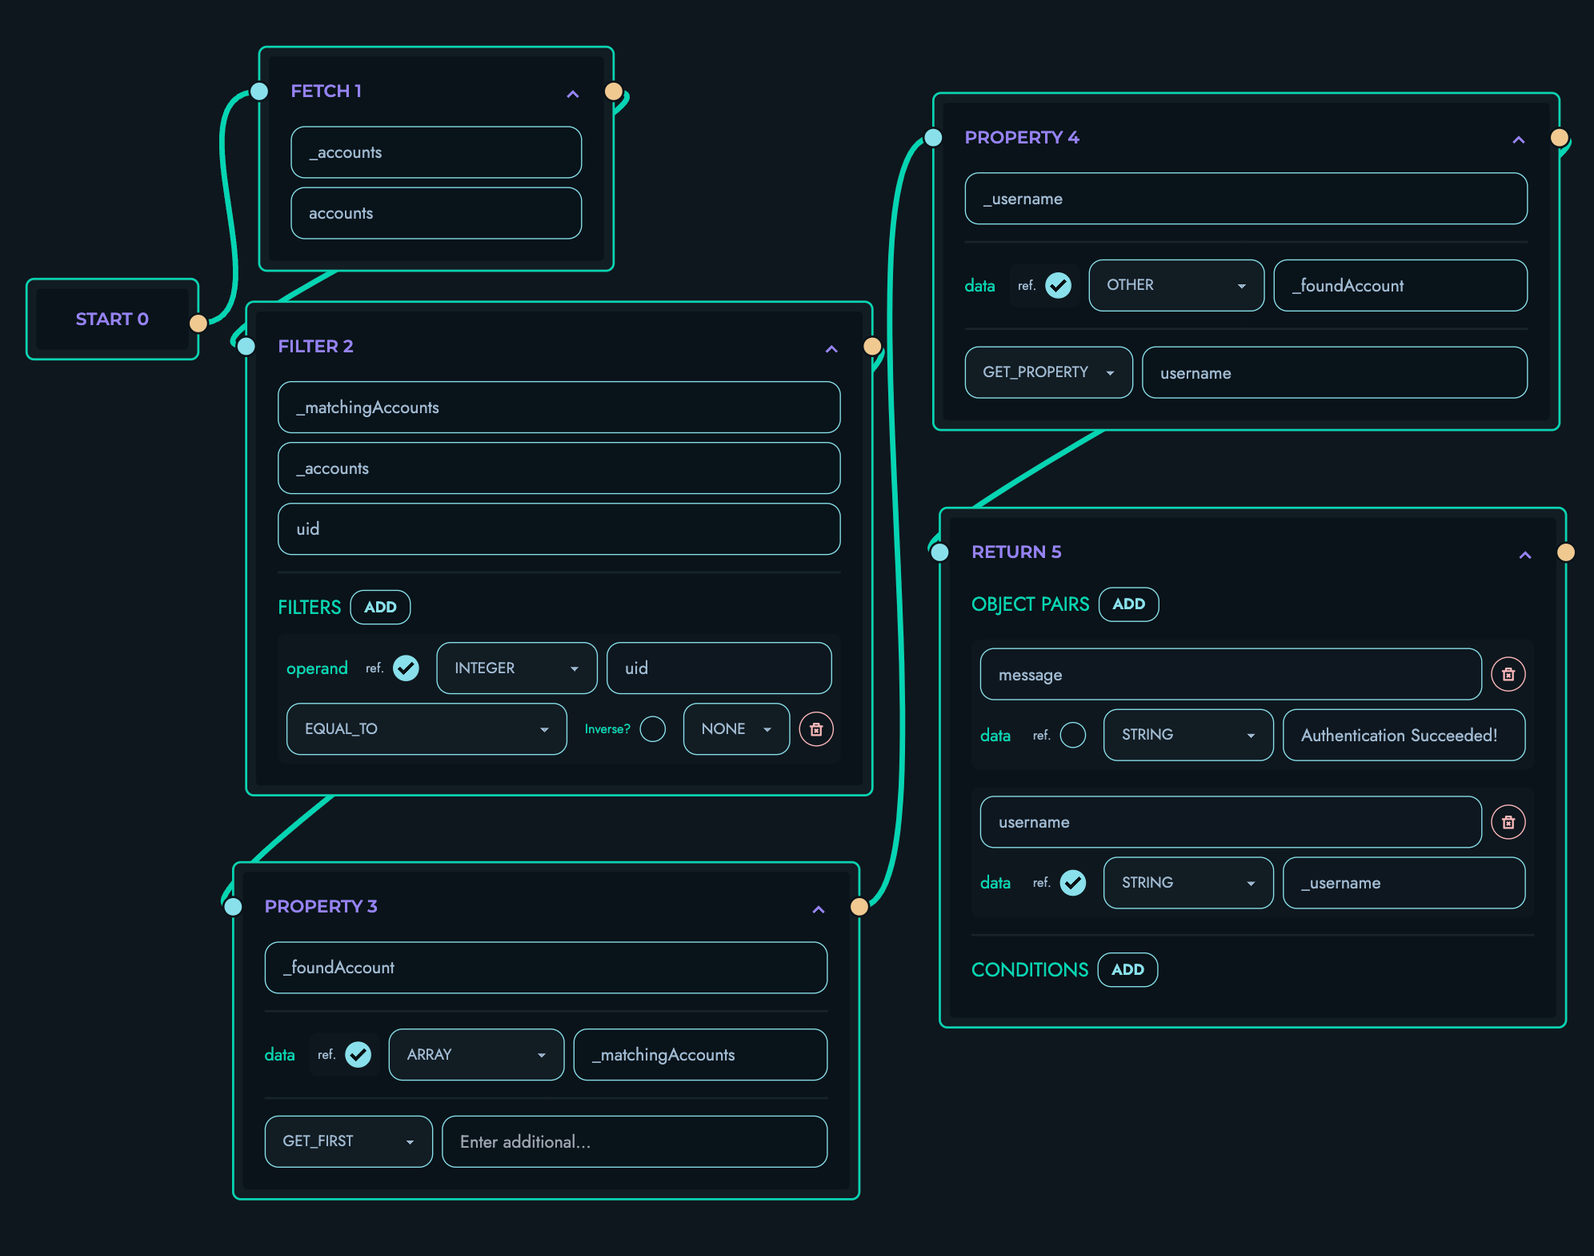
-
Click “Create” to save your route
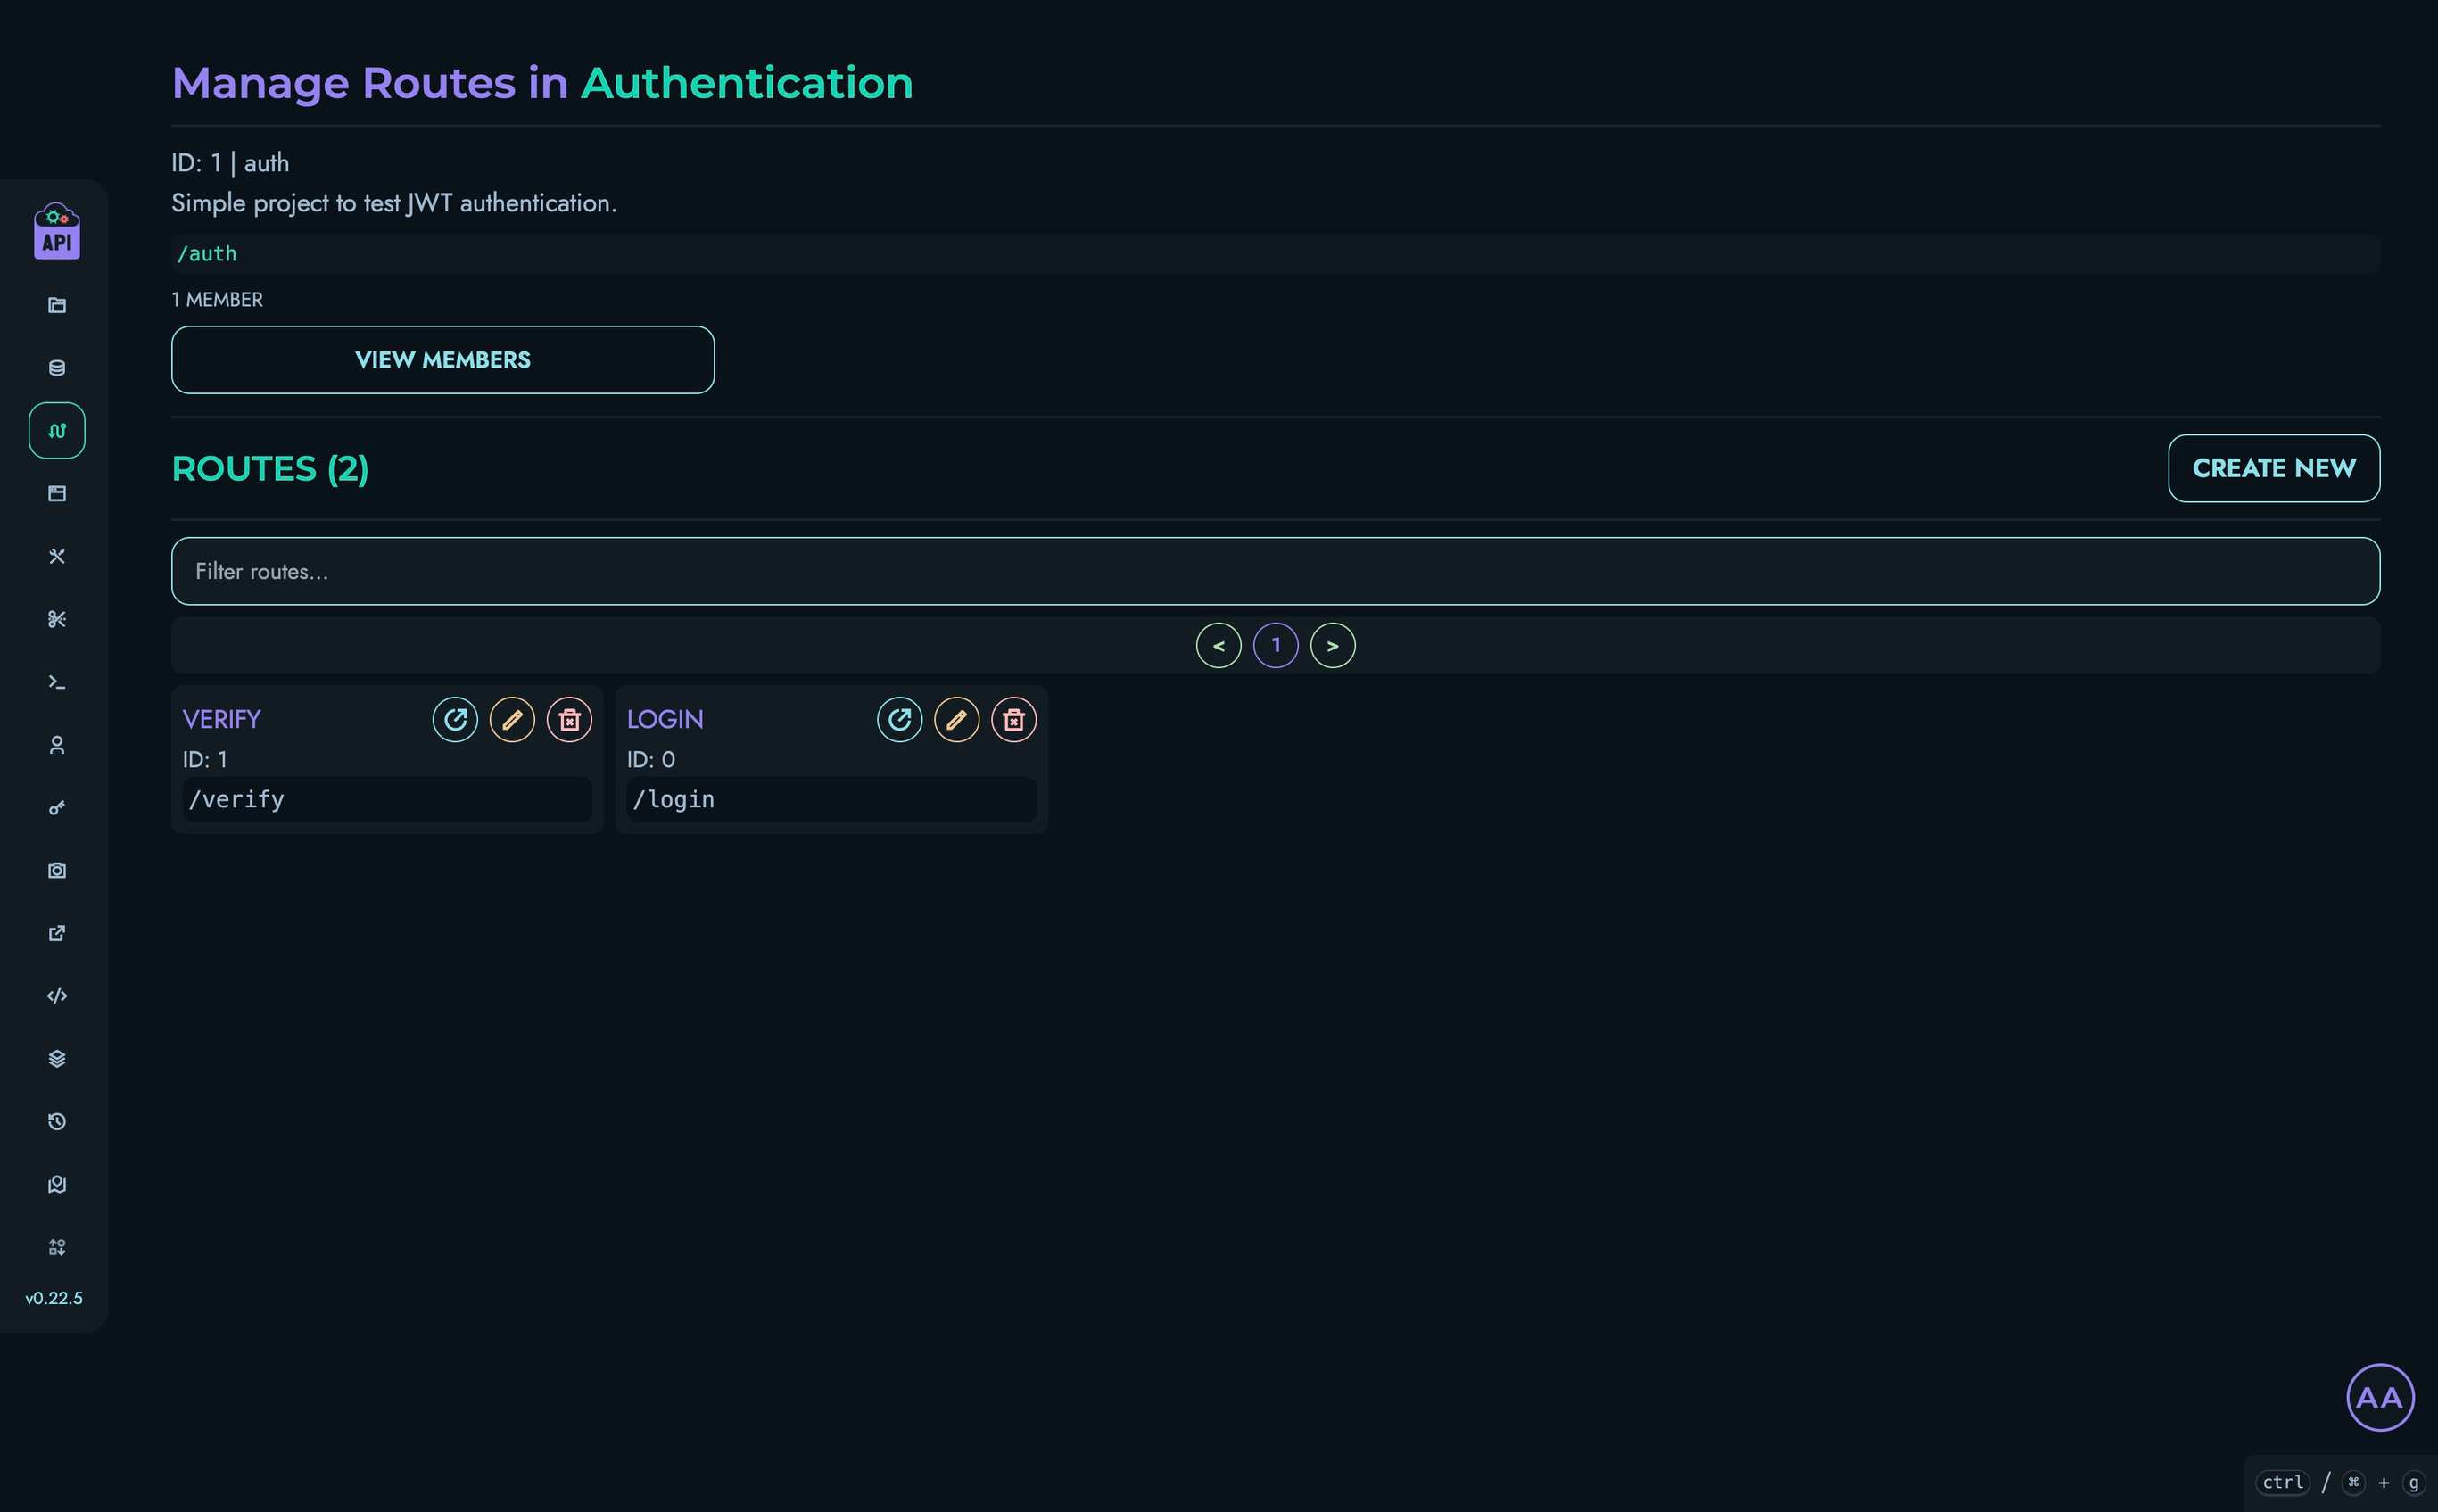
7. Testing the Authentication System
Now let’s test our JWT authentication system using the Playground:
Testing the Login Route
- Navigate to Playground in the top navigation bar
- Select your “Authentication” project

- Click on the “LOGIN” route
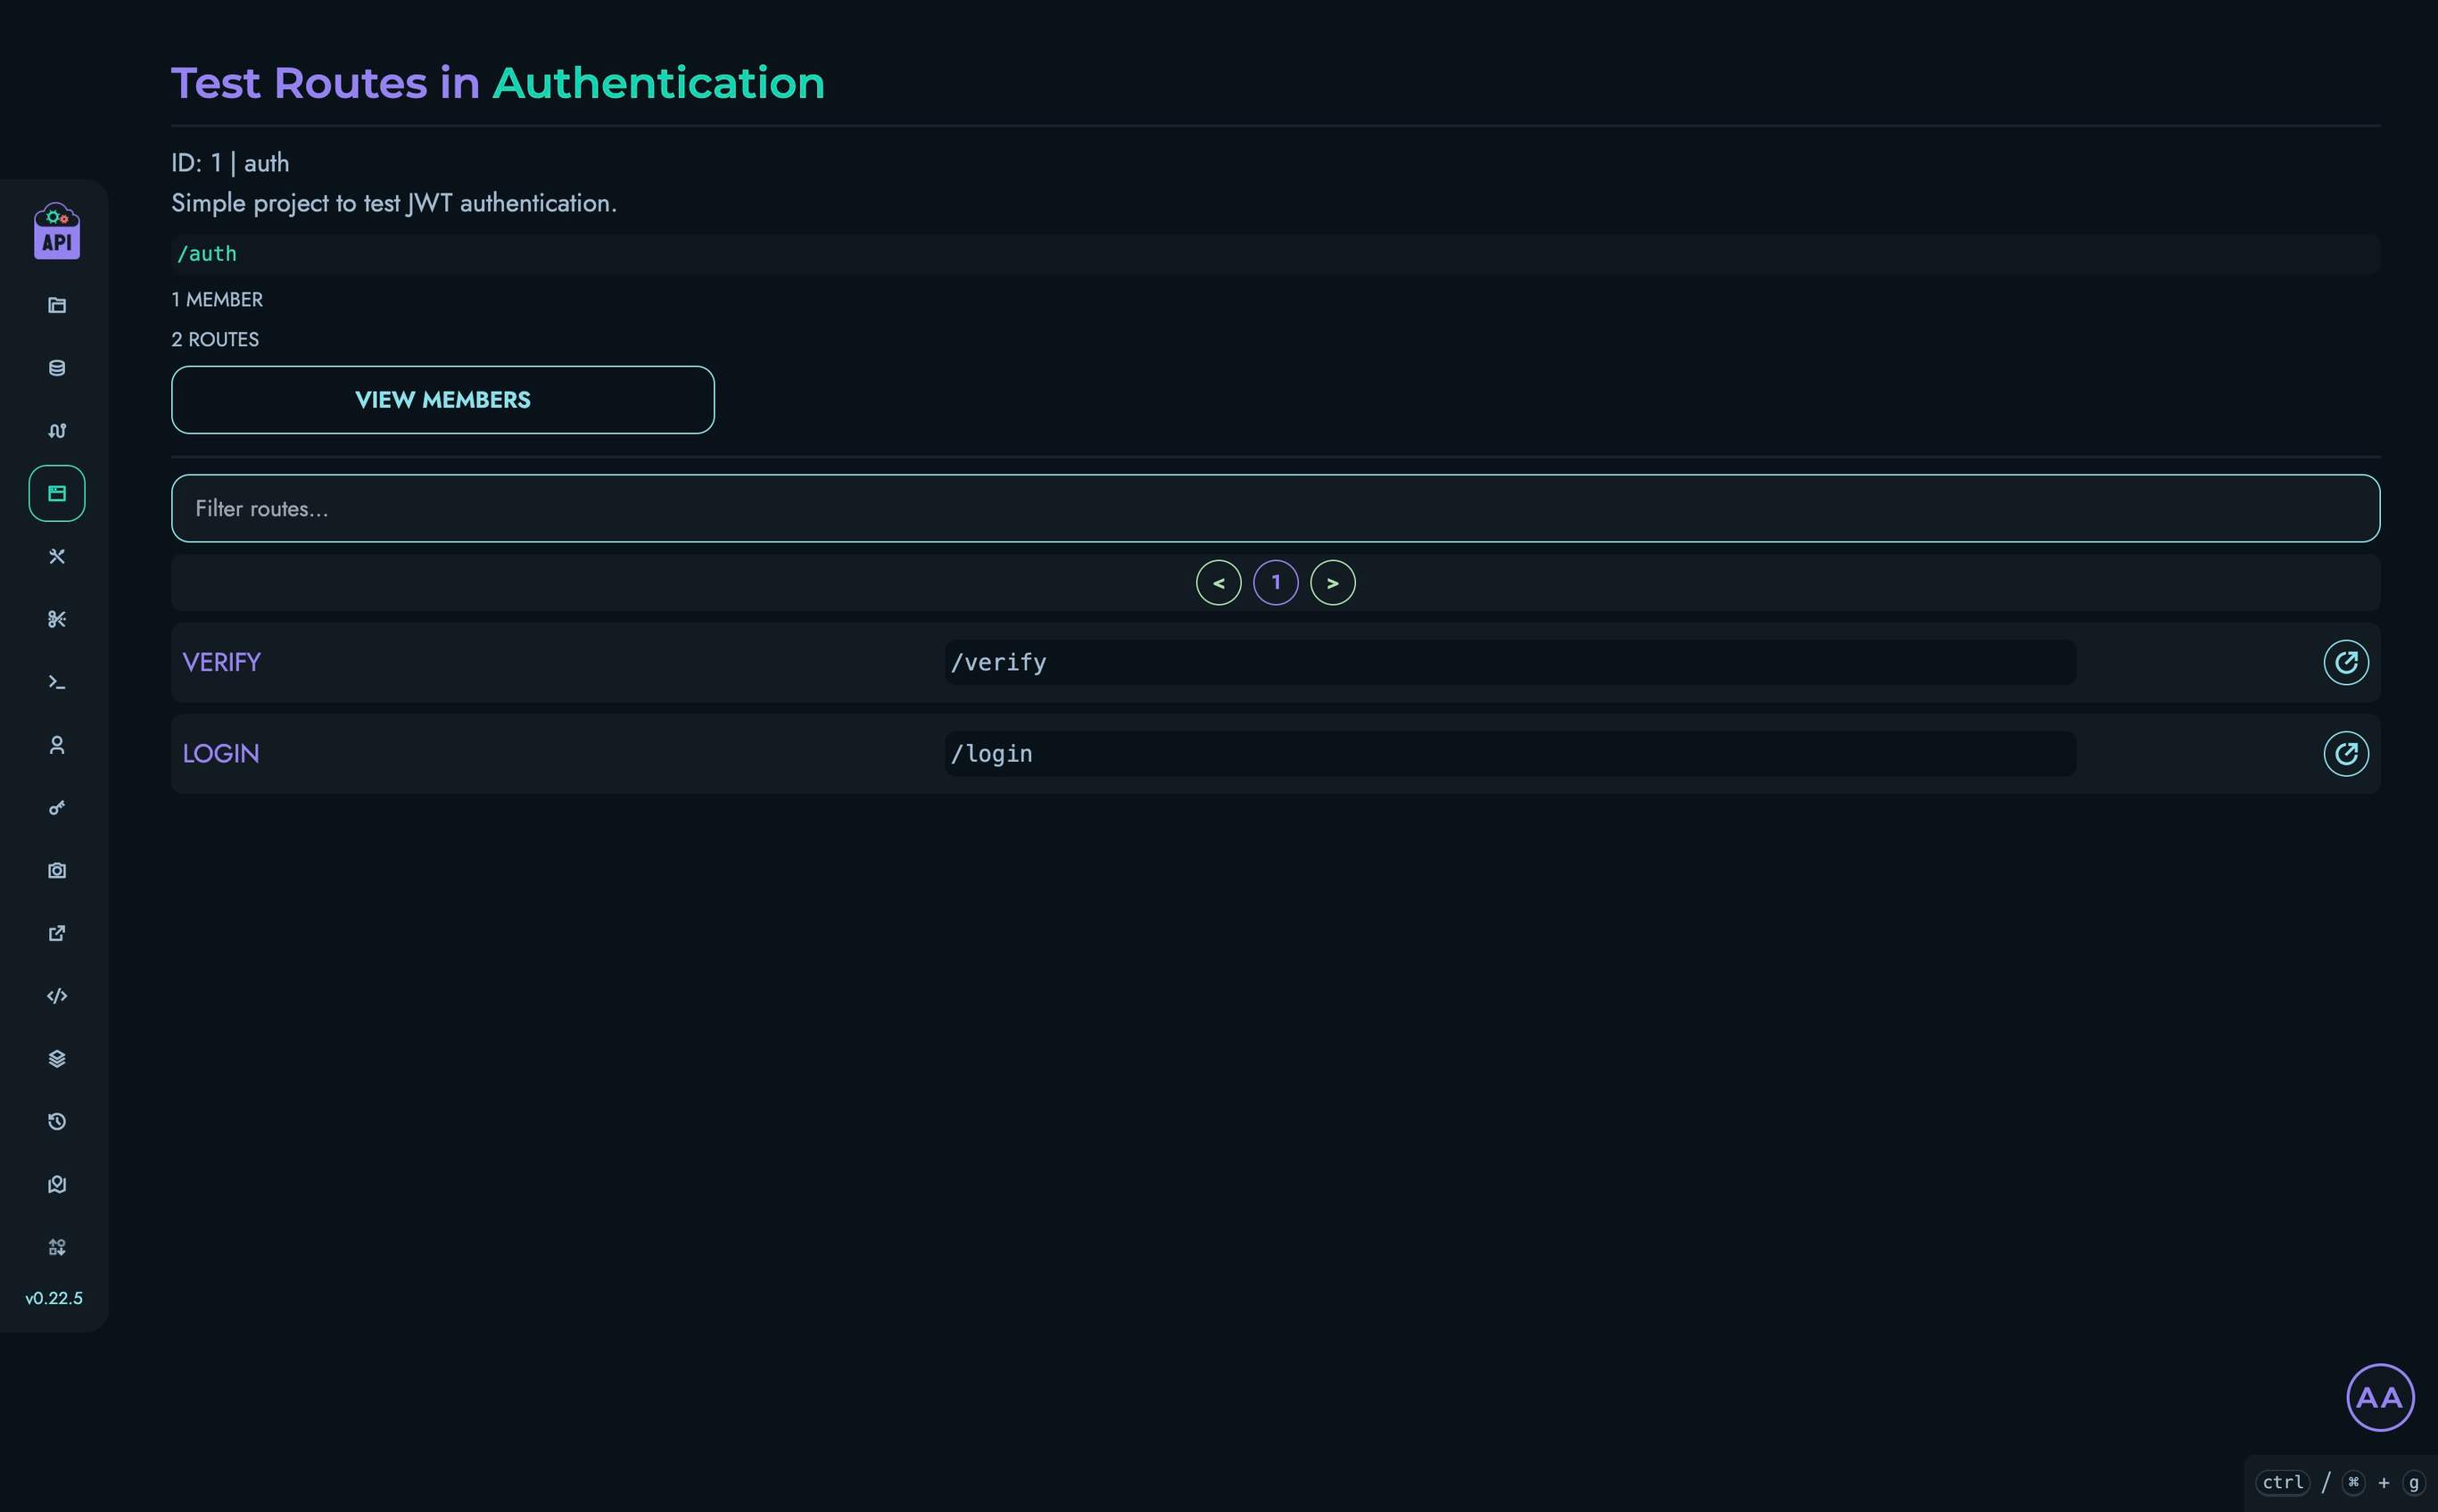
- Set the request body to:
{ "username": "john_doe", "password": "password123" } - Click “Send” to make a request to your API
- You should see a response like:
{ "uid": 0, "jwt": "eyJ0eXAiOiJKV1QiLCJhbGciOiJIUzUxMiJ9..." } - Copy the generated JWT token and memorize the value of the uid
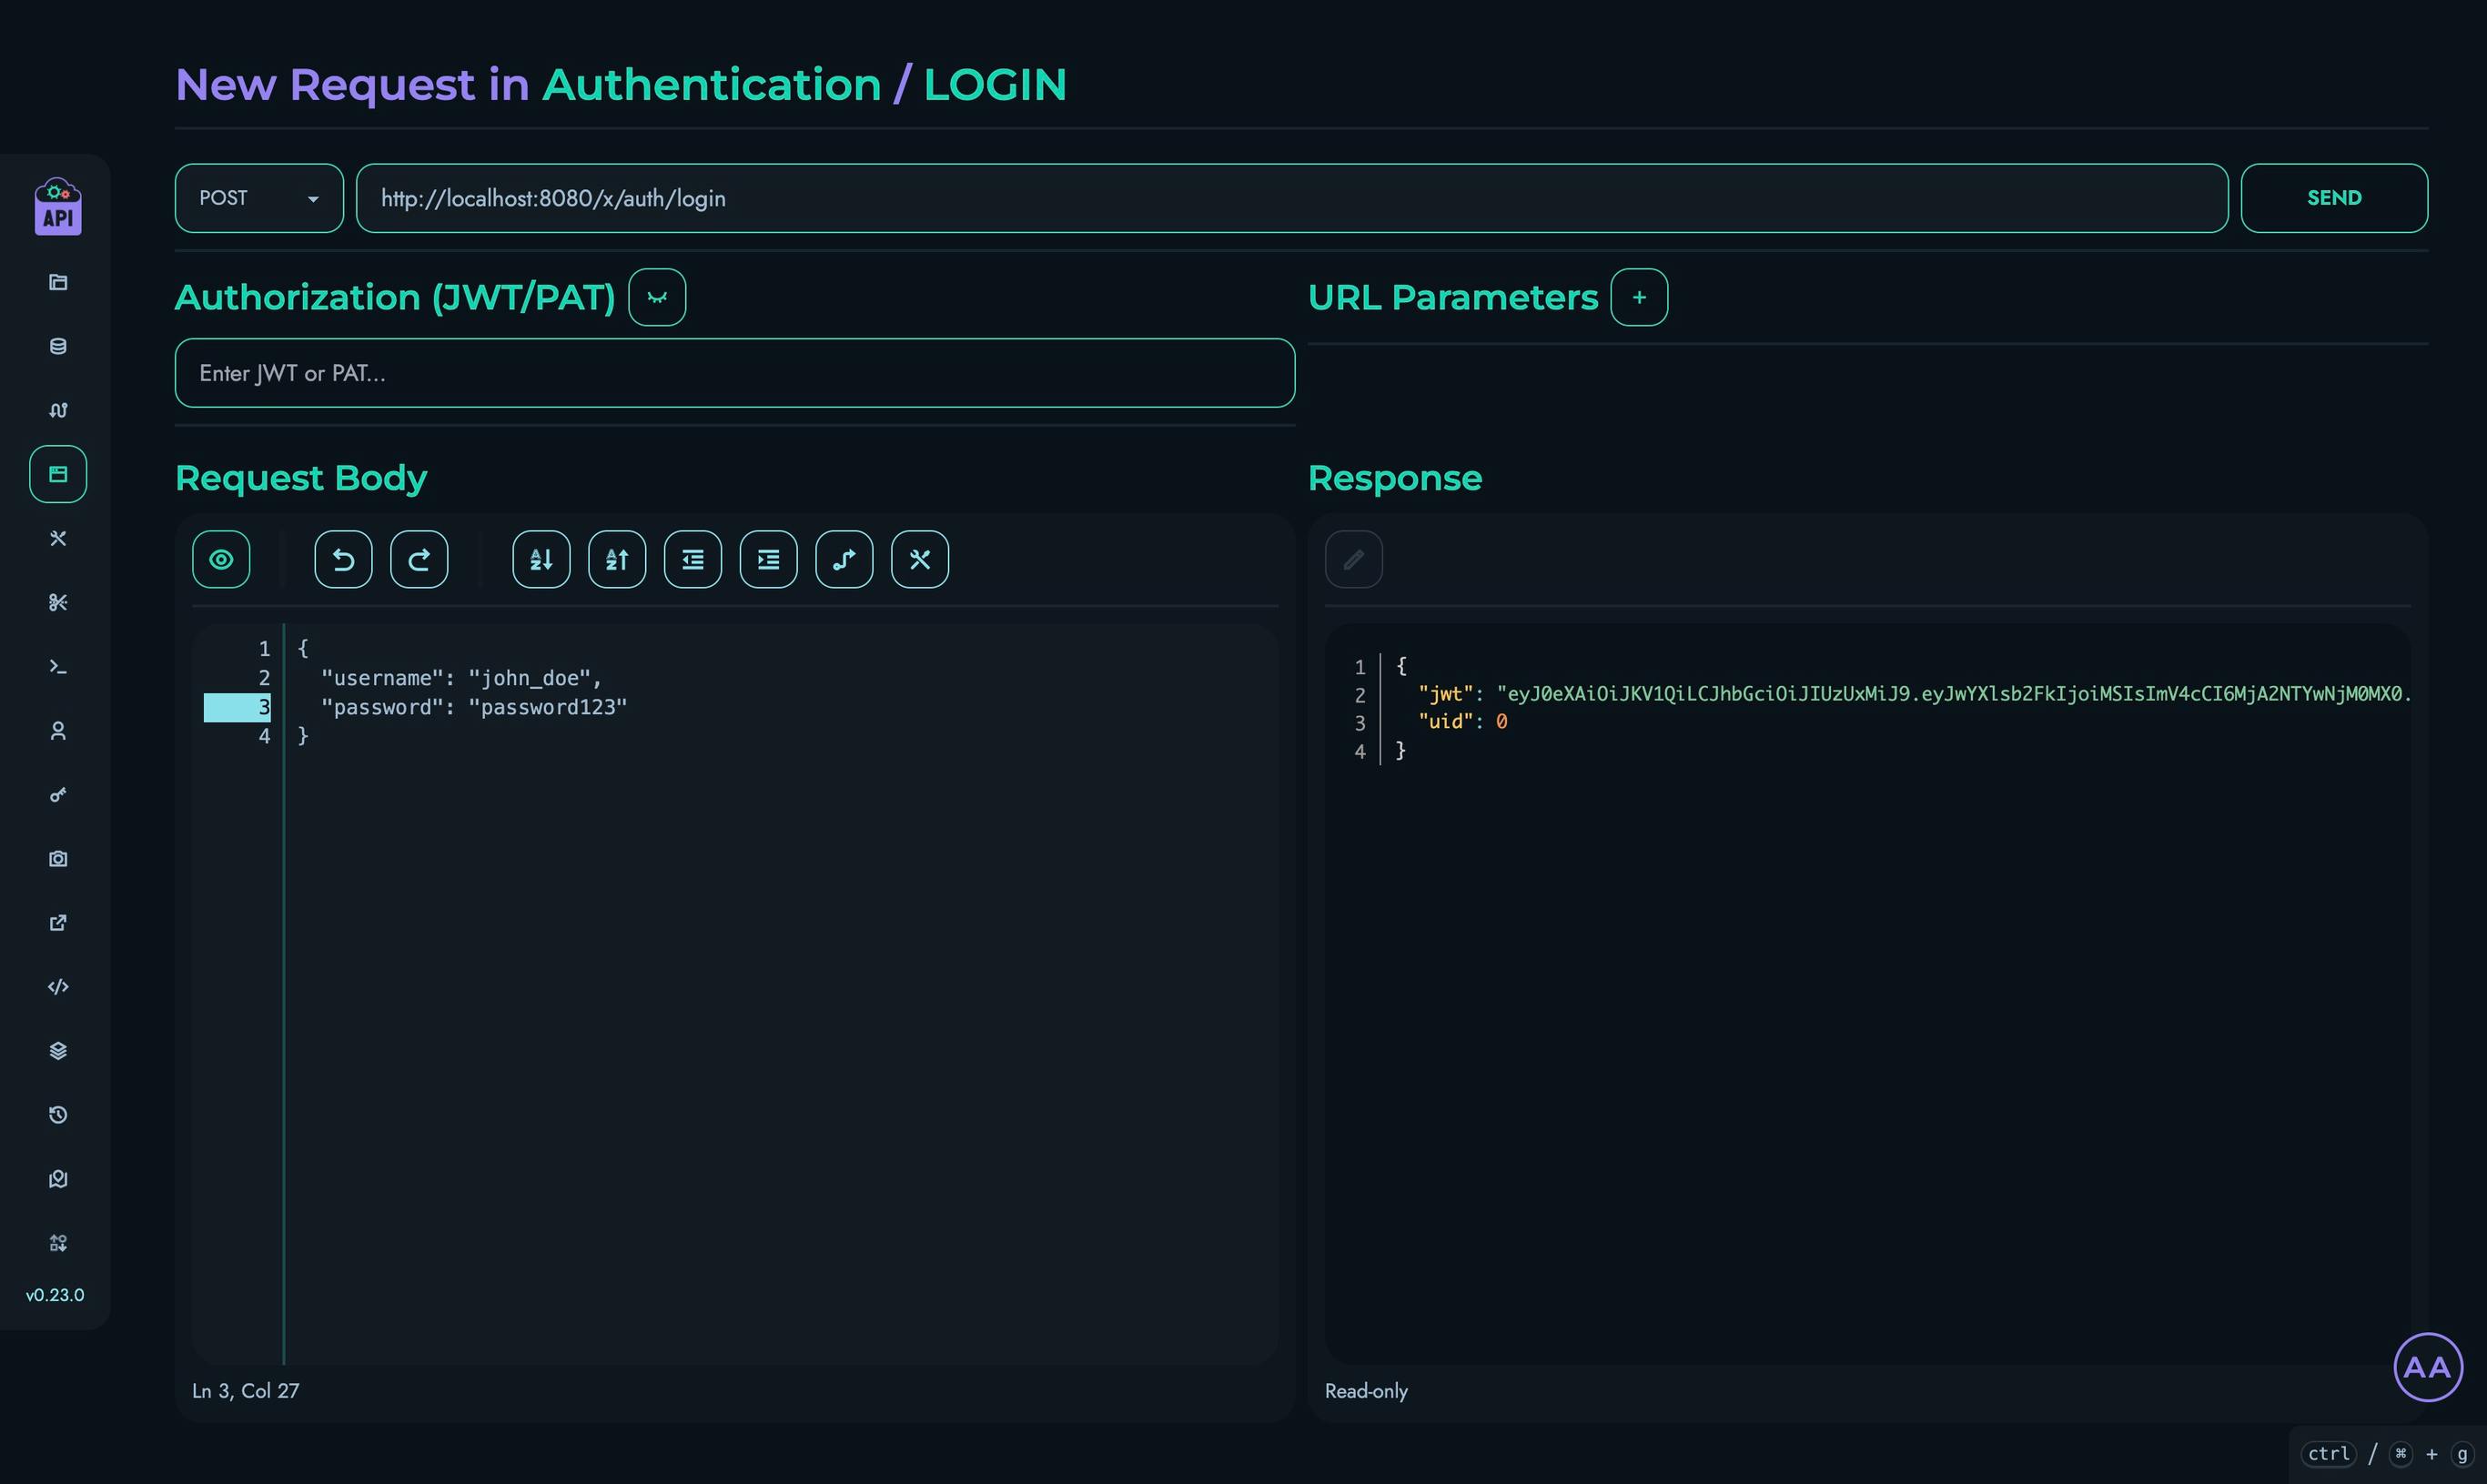
Testing Edge Cases
Let’s test some edge cases to ensure our authentication system is robust:
-
Invalid Username
- Try the login route with an invalid username:
{ "username": "wronguser", "password": "password123" } - You should receive a 404 error response:
{
  "message": "User not found",
  "status": 404
}
- Try the login route with an invalid username:
-
Invalid Password
- Try the login route with an incorrect password:
{ "username": "john_doe", "password": "wrongpassword" } - You should receive a 401 error response:
{
  "message": "Invalid Password",
  "status": 401
}
- Try the login route with an incorrect password:
Testing the Verify Route
- Navigate to Playground in the top navigation bar
- Select your “Authentication” project
- Click on the “VERIFY” route
- Paste the JWT token that you copied from the previous section in the “Authorization” field
- Enter the value “0” for the “uid” field in the “URL Parameters” section
- Click “Send” to make a request to your API
- You should see a response like:
{
  "message": "Authentication Succeeded!",
  "username": "john_doe"
}
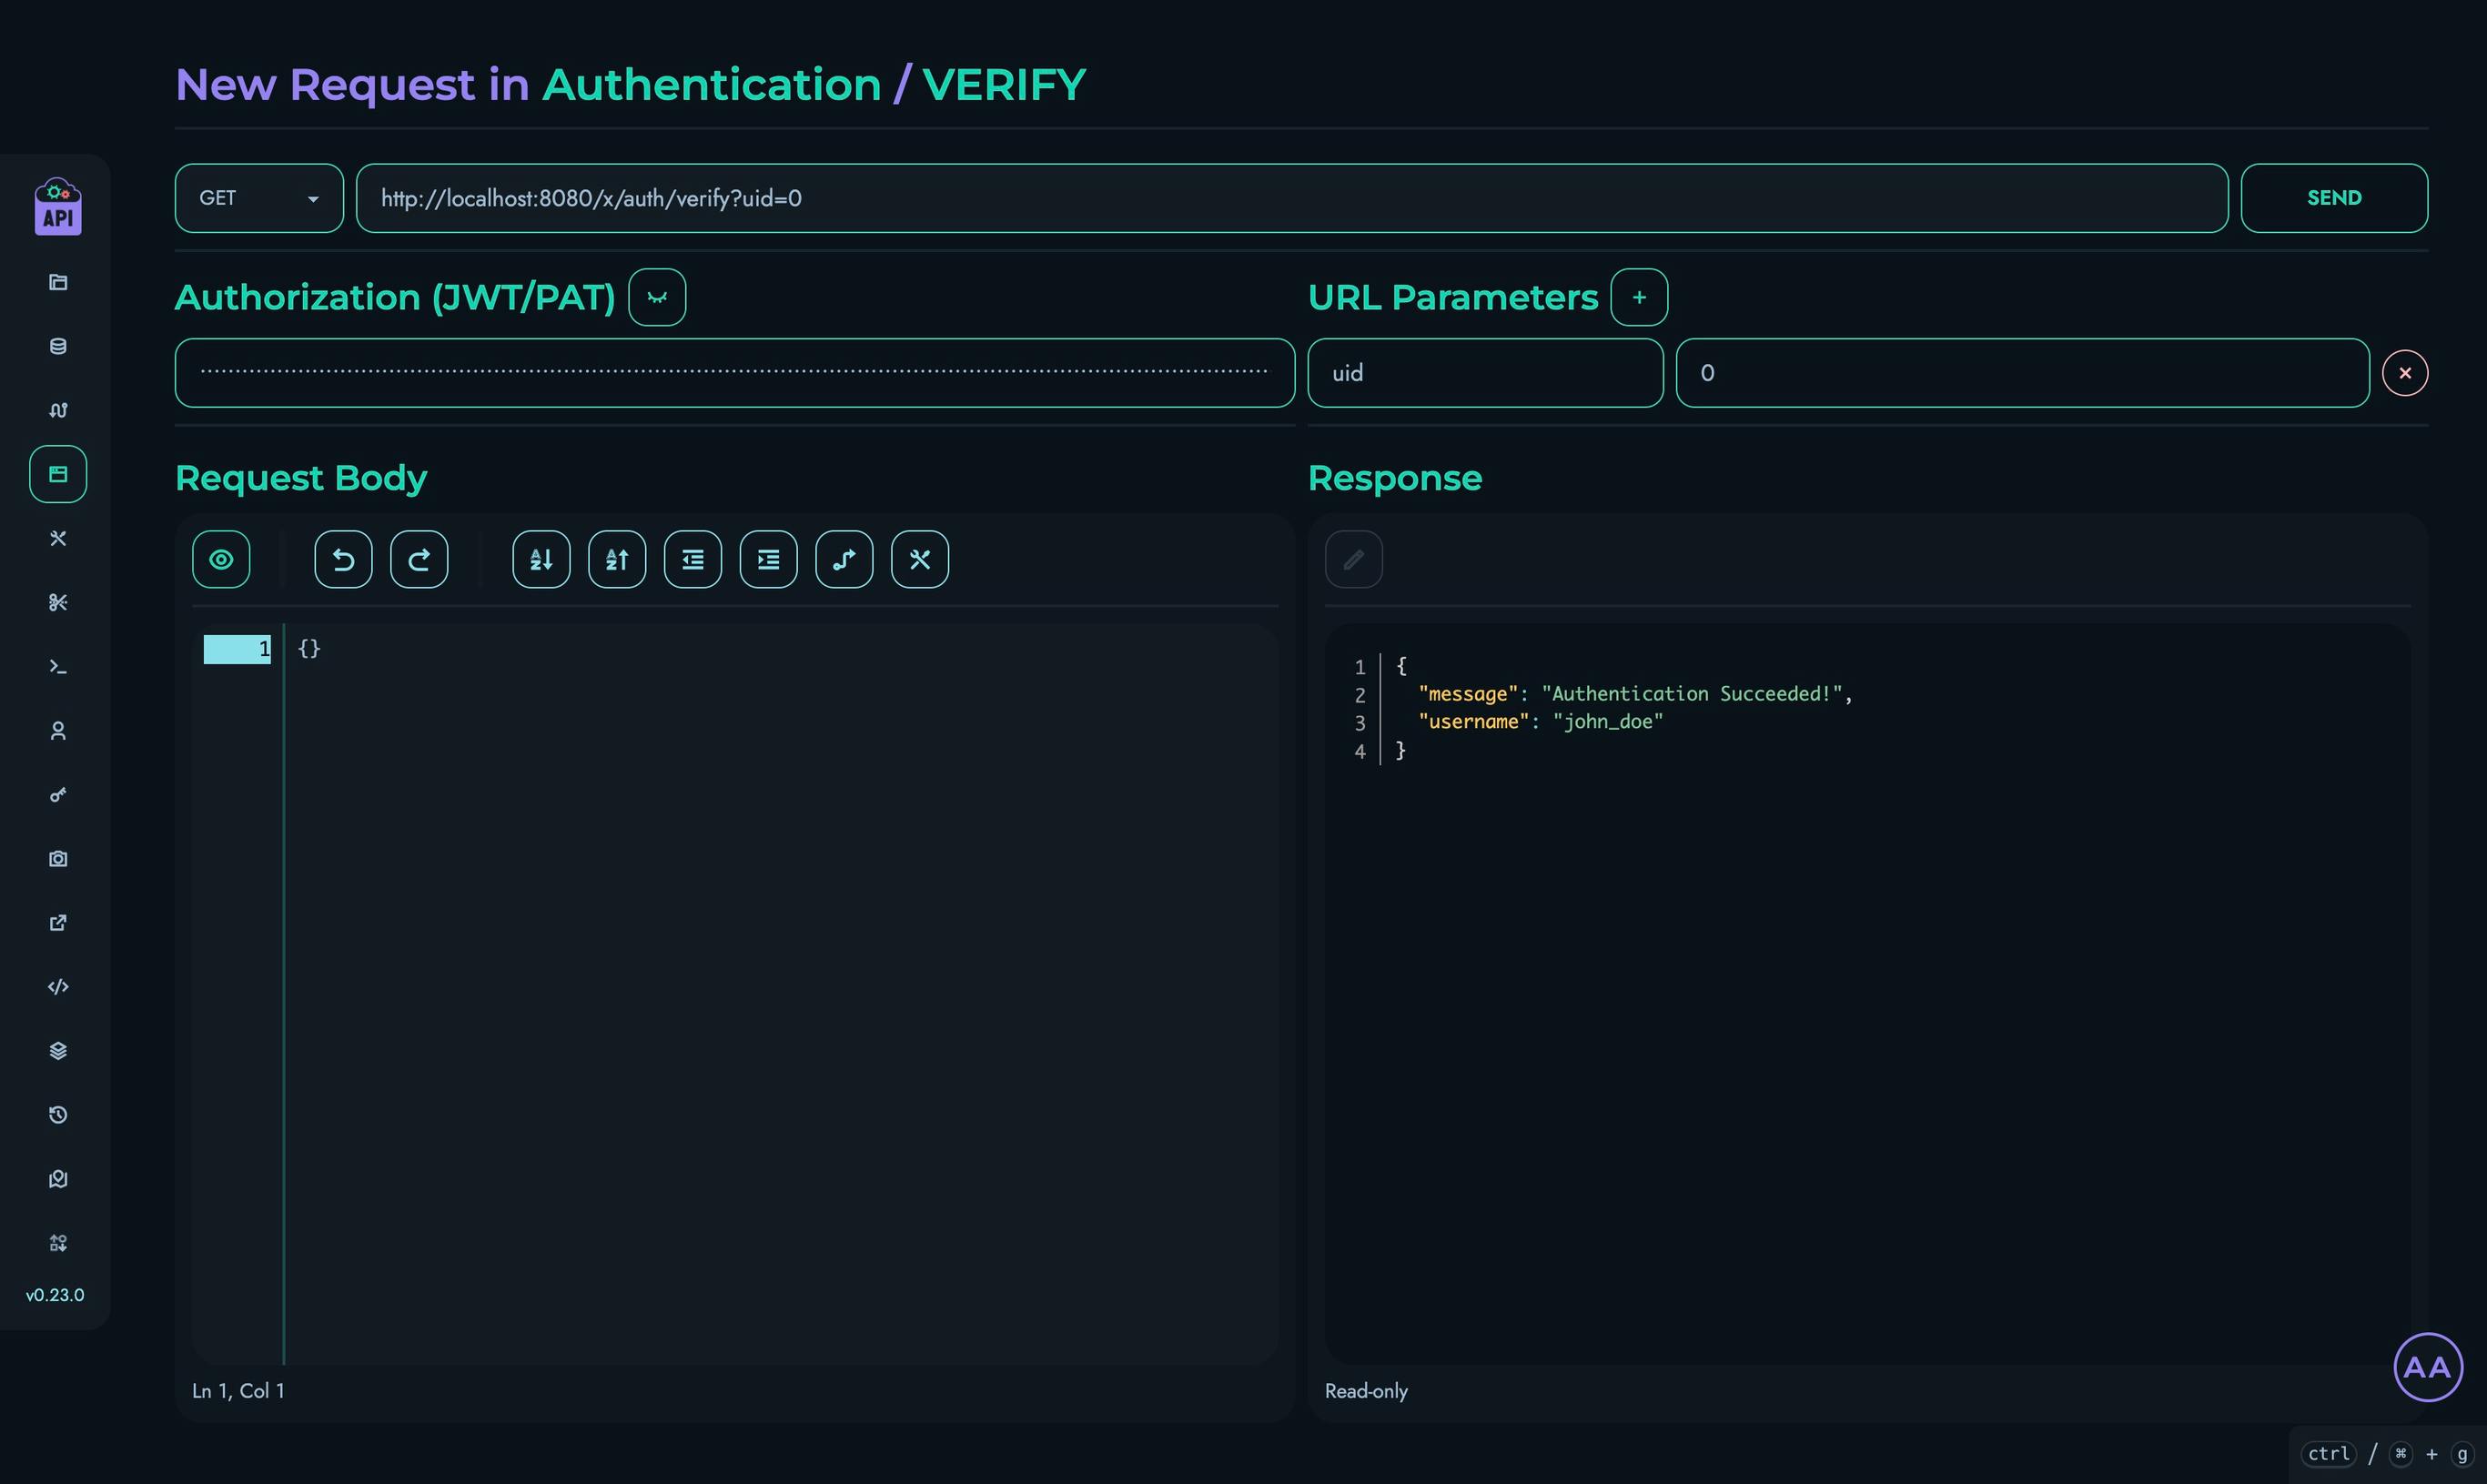
Testing Edge Cases
Let’s test some edge cases to ensure our authentication system is robust:
-
No Authorization Header / Invalid Token
- Try the verify route without an Authorization header or by setting it to a random value
- You should receive a 500 error response:
{
  "message": "Error: Failed decoding JWT (InvalidToken)",
  "status": 500
}
-
Wrong UID
- Try the verify route with a different value for the “uid” field
- You should receive a 403 error response:
{
  "message": "Error: Incorrect uid",
  "status": 403
}
Congratulations!
You’ve successfully implemented a complete JWT authentication system using Kinesis API! Here’s what you’ve accomplished:
- Created a project and collection to store user accounts
- Set up the necessary data structures for authentication
- Built a login route that validates credentials and generates JWT tokens
- Created a verification route that validates tokens
- Tested both successful authentication flows and edge cases
Next Steps
To build on this authentication system, you could:
- Add User Registration: Create a route that allows new users to register
- Add Role-Based Access Control: Extend the JWT payload to include user roles for authorization
- Create Protected Routes: Build additional routes that require valid authentication
- Add Refresh Tokens: Implement a token refresh mechanism for longer sessions
Continuous Improvement
Note: Kinesis API is continuously evolving based on user feedback. As users test and provide suggestions, the platform will become simpler, more intuitive, and easier to use. This tutorial will be updated regularly to reflect improvements in the user experience and new features. A dedicated “AUTH” block is planned for the future to dramatically simplify the process of adding authentication to your APIs.
We value your feedback! If you have suggestions for improving this tutorial or the Kinesis API platform, please reach out through our contact page or consider raising a new ticket.
Related Documentation
- Projects - Learn more about managing projects
- Collections - Detailed information about collections
- Structures - Advanced structure options
- Routes - More about creating routes
- Playground - Testing your APIs
Using Loops to Filter Data
This tutorial will guide you through using loops in Kinesis API to filter a list of data. You’ll create an API endpoint that fetches a list of creatures and returns only the ones that match a specific criterion passed in the URL. This is a great way to learn how to build more dynamic and powerful API logic.
Prefer video tutorials? You can follow along with our YouTube walkthrough of this same project.
Prerequisites
Before you begin, you need:
- Access to a Kinesis API instance:
- Either the demo environment at demo.kinesis.world
- Or your own self-hosted instance
- A user account with ADMIN or ROOT privileges
- Basic understanding of REST APIs and the Flow Editor
1. Creating a Project
First, let’s create a project for our creatures API:
- Log in to your Kinesis API instance
- Navigate to the Projects page from the main menu
- Click “Create a new project” to open the project creation modal
- Fill in the following details:
- Name: “Creatures”
- ID: “creatures”
- Description: “To have fun with some beings.” (or anything else you want)
- API Path: “/creatures” (this will be the base URL path for all routes in this project)

- Click “Create” to save your project
2. Creating a Collection
Next, we’ll create a collection to store our creature data:
- From your newly created project page, click “Create New” on the “Collections” section
- Fill in the following details:
- Name: “Creatures”
- ID: “creatures”
- Description: “To store details on every creature.” (or anything else you want)

- Click “Create” to save your collection

3. Creating Structures
Now we’ll create some structures (fields) to store our creature value:
- From the “Creatures” collection page, locate the “Structures” section
- Click “Create New” to add a structure
- Fill in the following details:
- Name: “Species”
- ID: “species”
- Description: “” (leave blank or insert anything else)
- Type: “TEXT”
- Required: Check this box
- Unique: Check this box

- Click “Create” to save the structure
- Click “Create New” to add another structure
- Fill in the following details:
- Name: “Is a pet”
- ID: “is_pet”
- Description: “Whether the species is considered as a pet.” (leave blank or insert anything else)
- Type: “BOOLEAN”
- Required: Check this box

- Click “Create” to save the structure

4. Creating Data
Now we’ll create some initial data objects for our creatures:
- Navigate to the “Data” section in the top navigation bar
- Select your project and then the “Creatures” collection
- Click “Create New” to create a data object
- Add a nickname (optional)
- For the “species” field, enter: “Dog”
- For the “is a pet” field, check the checkbox
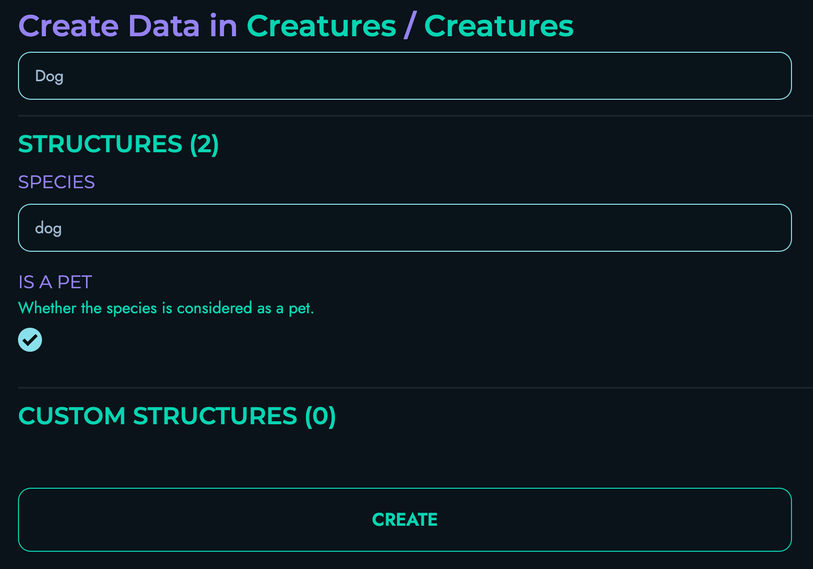
- Click “Create” to save your data object
- Repeat the above steps as many times as you want for different species and whether they are typically considered to be pets
- Those are the data objects that have been created as example for this tutorial:
- Creature 1:
- species: “Dog”
- is_pet:
true
- Creature 2:
- species: “Cat”
- is_pet:
true
- Creature 3:
- species: “Scorpion”
- is_pet:
false
- Creature 4:
- species: “Kangaroo”
- is_pet:
false
- Creature 5:
- species: “Hamster”
- is_pet:
true
- Creature 1:

5. Creating a Route
Now, we’ll create a route that filters these creatures based on whether they are a pet:
- Navigate to Routes in the top navigation bar
- Select your project
- Click “Create New” to create a route
- Fill in the route details:
- Route ID: “fetch_creatures”
- Route Path: “/fetch”
- HTTP Method: “GET”
- In the URL Parameters section, set the delimiter to be “&”, then click “Add” and define a parameter:
- ID: “pet”
- Type: “BOOLEAN”
- The “JWT Authentication” and “Body” sections don’t need to be modified

Building the Route Logic in the Flow Editor
The Flow Editor is where we define what happens when our route is called. We’ll build a flow that fetches all creatures, loops through them, and returns only the ones that match the pet URL parameter.
Follow these steps:
-
Add a FETCH block:
- Drag a FETCH block onto the canvas and connect the START node to it
- Fill in the following details:
- Local Name: “_allCreatures”
- Reference Collection: “creatures”

-
Add a PROPERTY block:
- Drag a PROPERTY block onto the canvas and connect the FETCH block to it
- Fill in the following details:
- Local Name: “_allCreaturesLength”
- Property Apply: “LENGTH”
- As for the data section, fill in the following details:
- Reference: Check this box
- Type: “Array”
- Data: “_allCreatures”

-
Add an ASSIGNMENT block:
- Drag an ASSIGNMENT block onto the canvas and connect the PROPERTY block to it
- Fill in the following details:
- Local Name: “_foundCreatures”
- Add an “operation” submodule with 1 operand, and fill in the following details:
- Reference: Leave unchecked
- Type: “Array”
- Data: “”
- Operation Type: “None”

-
Add a LOOP block:
- Drag a LOOP block onto the canvas and connect the ASSIGNMENT block to it
- Fill in the following details:
- Local Name: “index”
- Fill in the following details for the start section:
- Reference: Leave unchecked
- Type: “Integer”
- Data: “0”
- Fill in the following details for the end section:
- Reference: Check this box
- Type: “Integer”
- Data: “_allCreaturesLength”
- Leave everything else as it is

-
Add a PROPERTY block:
- Drag a PROPERTY block onto the canvas and connect the previous LOOP block to it
- Fill in the following details:
- Local Name: “_creature”
- Property Apply: “GET_INDEX”
- Additional: “index”
- As for the data section, fill in the following details:
- Reference: Check this box
- Type: “Array”
- Data: “_allCreatures”

-
Add another PROPERTY block:
- Drag another PROPERTY block onto the canvas and connect the previous PROPERTY block to it
- Fill in the following details:
- Local Name: “_species”
- Property Apply: “GET_PROPERTY”
- Additional: “species”
- As for the data section, fill in the following details:
- Reference: Check this box
- Type: “Other”
- Data: “_creature”
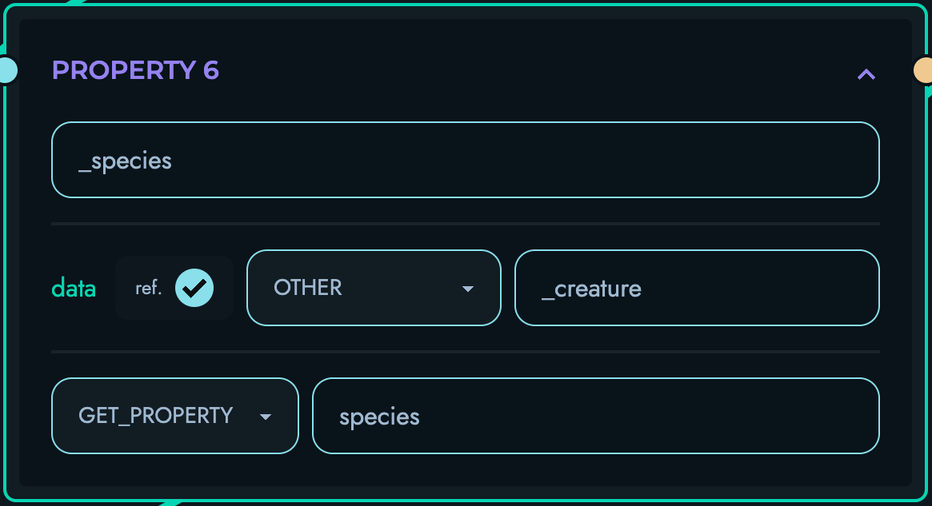
-
Add another PROPERTY block:
- Drag another PROPERTY block onto the canvas and connect the previous PROPERTY block to it
- Fill in the following details:
- Local Name: “_is_pet”
- Property Apply: “GET_PROPERTY”
- Additional: “is_pet”
- As for the data section, fill in the following details:
- Reference: Check this box
- Type: “Other”
- Data: “_creature”
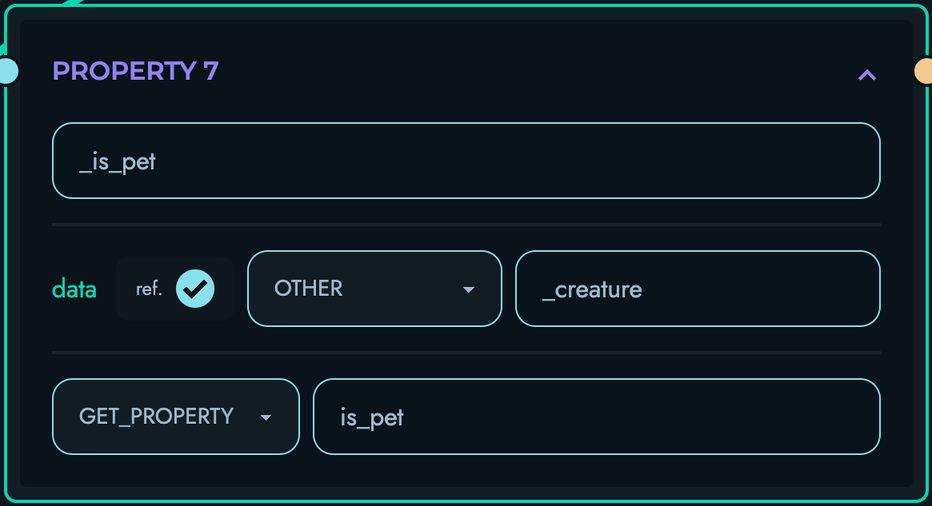
-
Add an ASSIGNMENT block:
- Drag an ASSIGNMENT block onto the canvas and connect the PROPERTY block to it
- Fill in the following details:
- Local Name: “_foundCreatures”
- Add a “condition” submodule with 2 operands, and fill in the following details:
- First Operand:
- Reference: Check this box
- Type: “Boolean”
- Data: “_is_pet”
- Second Operand:
- Reference: Check this box
- Type: “Boolean”
- Data: “pet”
- First Operand:
- Condition Type: “Equal To”
- Add an “operation” submodule with 2 operands, and fill in the following details:
- First Operand:
- Reference: Check this box
- Type: “Array”
- Data: “_foundCreatures”
- Second Operand:
- Reference: Check this box
- Type: “Array”
- Data: “_species”
- First Operand:
- Operation Type: “Addition”

-
Add an END_LOOP block:
- Drag an END_LOOP block onto the canvas and connect the ASSIGNMENT block to it
- Fill in the following details:
- Local Name: “index”

-
Add a RETURN block:
- Drag a RETURN block onto the canvas and connect the END_LOOP block to it
- Add an “object pair” submodule
- Fill in the following details:
- id: “creatures”
- data:
- Reference: Check this box
- Type: “Array”
- Data: “_foundCreatures”

-
Ensure that your Flow Editor looks like the following:

-
Click “Create” to save your route

6. Testing via Playground
Now let’s test our creatures API:
- Navigate to Playground in the top navigation bar
- Select your project
- Click on the “FETCH_CREATURES” route

- Enter the value “true” for the “pet” field in the “URL Parameters” section
- Click “Send” to make a request to your API
- You should see a response like:
{ "creatures": ["dog", "cat", "hamster"] } - Enter the value “false” for the “pet” field in the “URL Parameters” section
- Click “Send” again
- You should see a response like:
{
  "creatures": ["scorpion", "kangaroo"]
}

Congratulations!
You’ve successfully built an API that uses a loop to filter data based on user input. You have learned how to:
- Fetch a list of data objects
- Create an empty array to store results
- Loop through a data list
- Use conditional logic within a loop
- Add items to an array dynamically
- Return the filtered results
Next Steps
Challenge yourself by extending this project:
- Add more structures: Add a
diet(e.g., “carnivore”, “herbivore”) orhabitatstructure to your collection - More complex filtering: Modify the route to accept multiple filter parameters (e.g.,
petanddiet) - Implement sorting: After filtering, use another loop or a different block to sort the results alphabetically by species
Continuous Improvement
Note: Kinesis API is continuously evolving based on user feedback. As users test and provide suggestions, the platform will become simpler, more intuitive, and easier to use. This tutorial will be updated regularly to reflect improvements in the user experience and new features.
We value your feedback! If you have suggestions for improving this tutorial or the Kinesis API platform, please reach out through our contact page or consider raising a new ticket.
Related Documentation
- Projects - Learn more about managing projects
- Collections - Detailed information about collections
- Structures - Advanced structure options
- Routes - More about creating routes
- Playground - Testing your APIs