Constraints
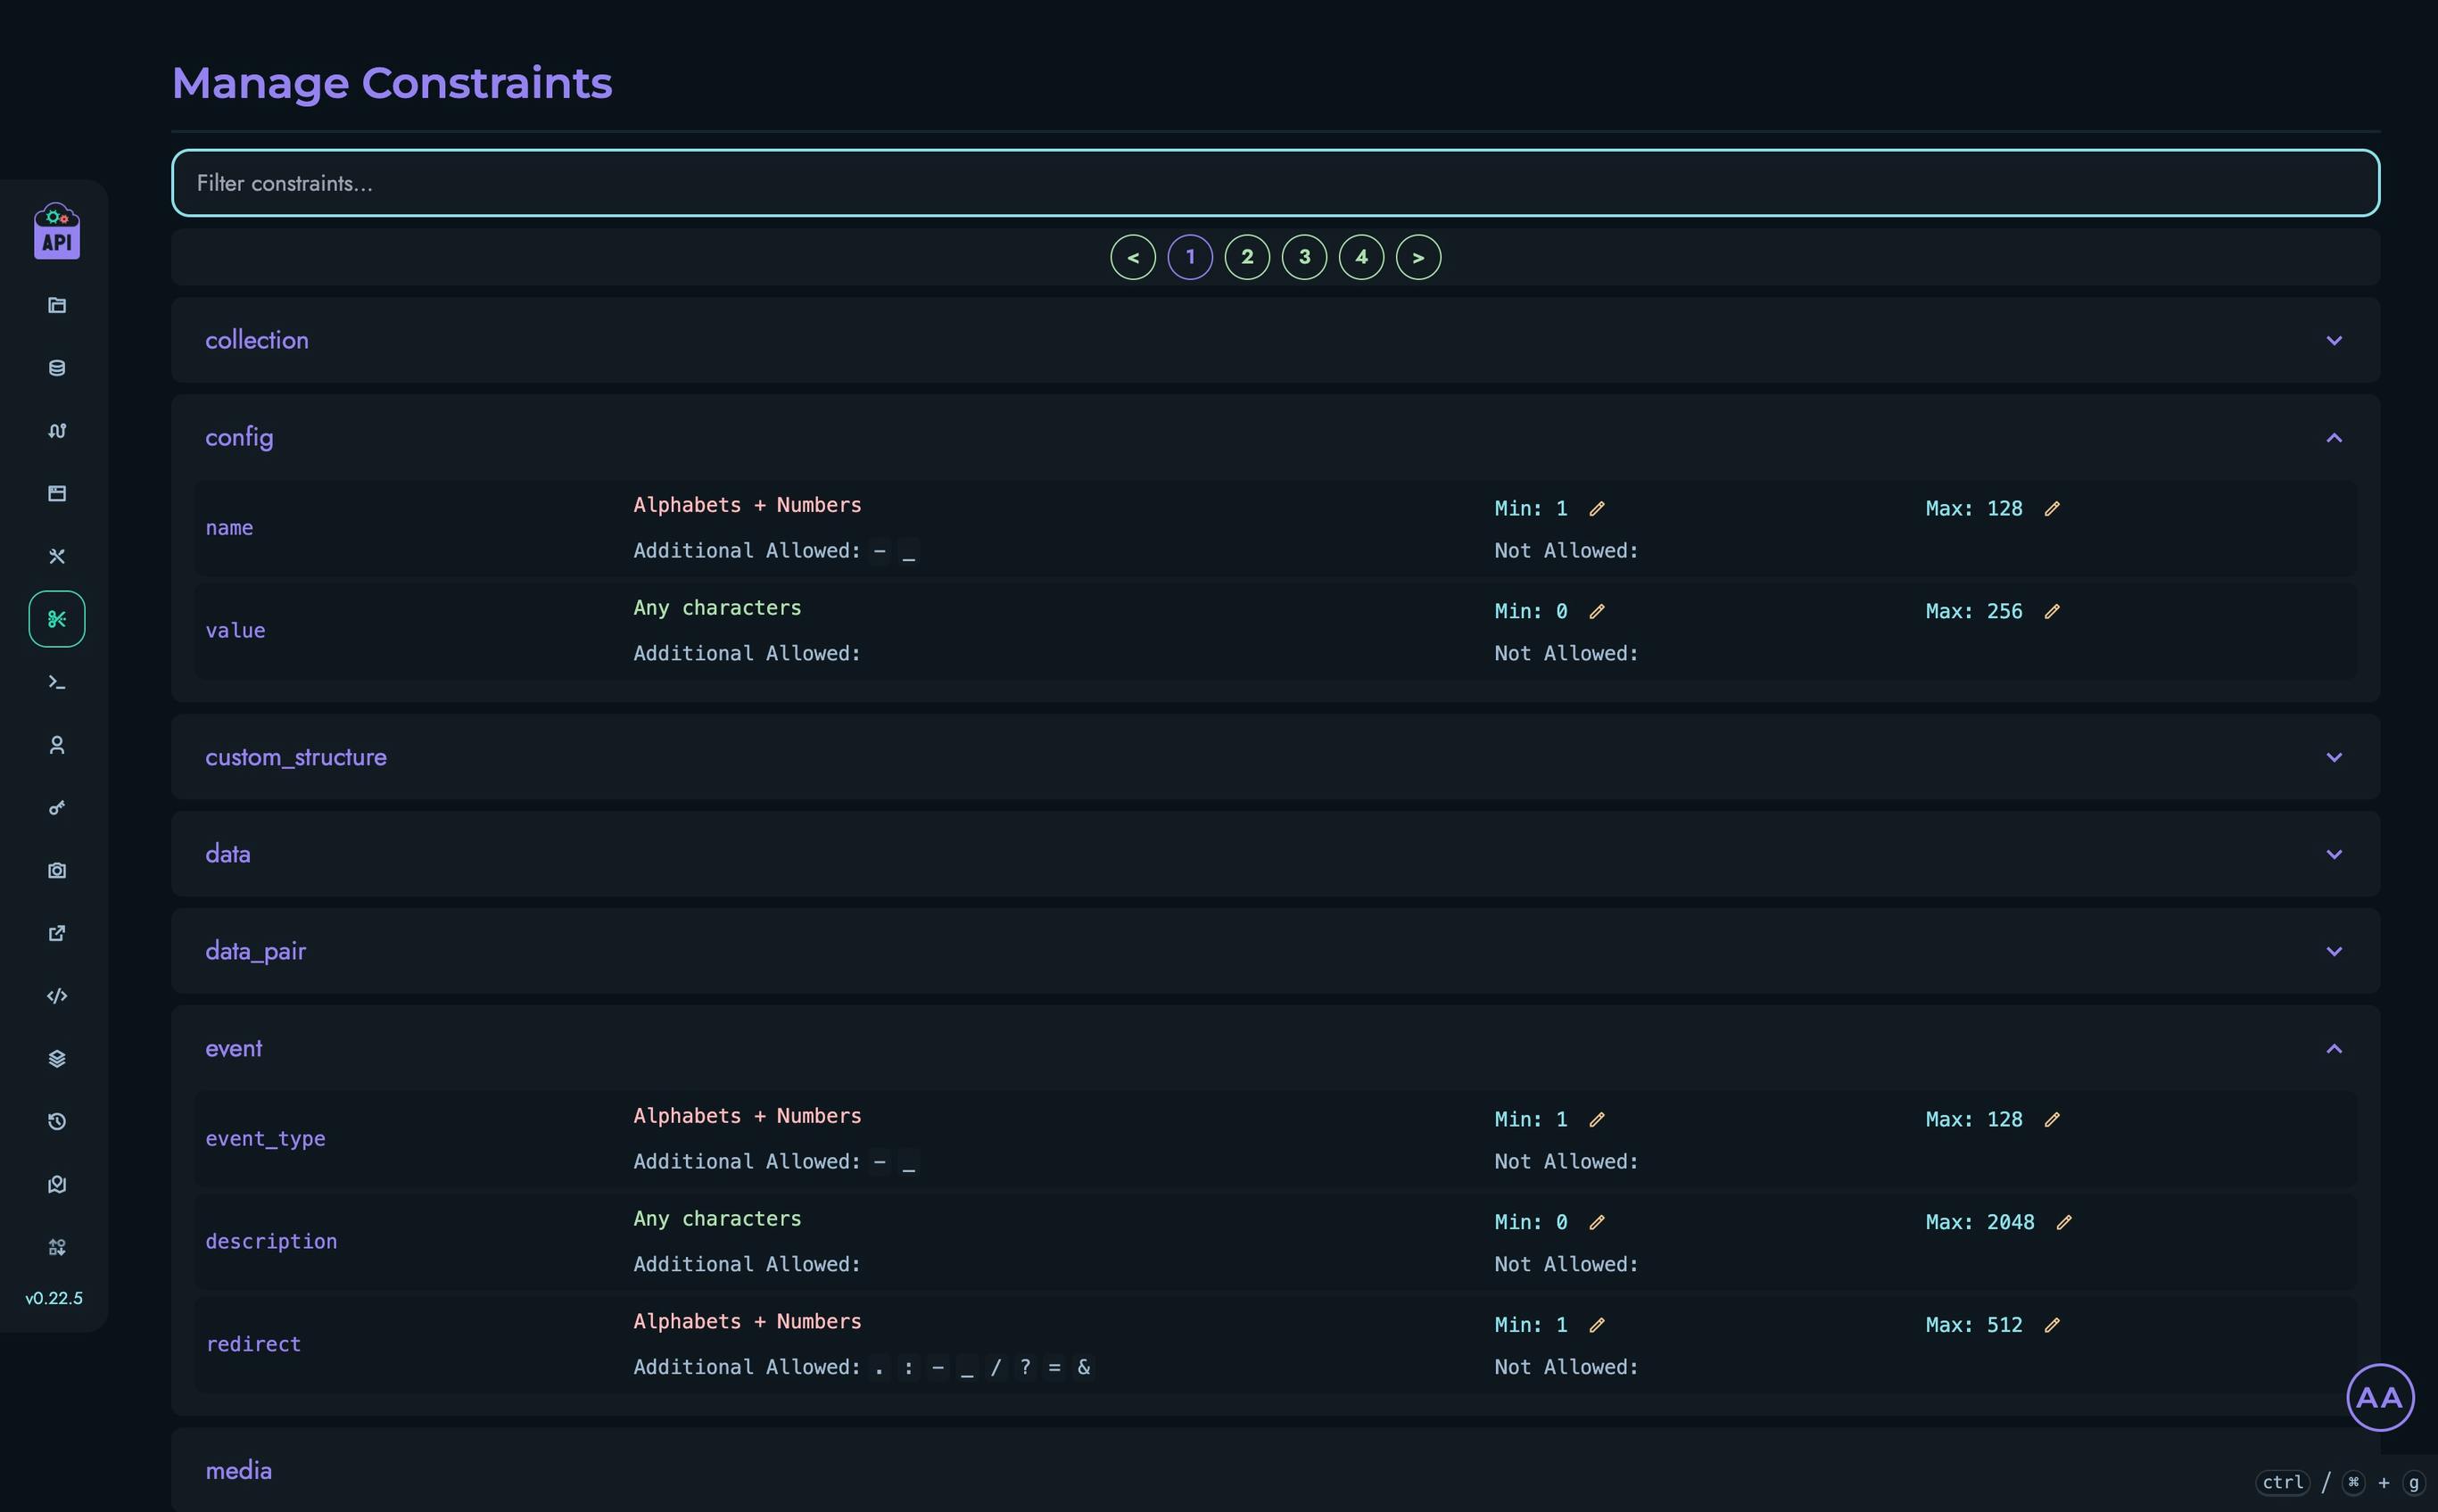
Constraints in Kinesis API are system-level validation rules that enforce data integrity across different components of the system. They organize into a hierarchical structure that provides comprehensive validation for various system elements.
Understanding the Constraint System
The constraint system in Kinesis API has two primary levels:
- Constraints: Top-level categories that apply to a group of related items (e.g., “config”, “user”, “project”)
- Constraint Properties: Specific validation rules within each constraint (e.g., “name” and “value” for configs)
This hierarchical approach ensures consistent validation across all aspects of the system while maintaining flexibility for different data types.
Constraint Structure
Constraints
Constraints are the top-level categories that group related validation rules. Examples include:
- CONFIG: Applies to configuration settings
- USER: Applies to user account data
- PROJECT: Applies to project details
- COLLECTION: Applies to collection information
Each constraint contains one or more constraint properties.
Constraint Properties
Constraint properties are the specific elements within a constraint that have defined validation rules. For example, the CONFIG constraint includes properties like:
- name: Validates the configuration key name
- value: Validates the configuration value
Each constraint property has its own set of validation rules:
-
Character Type:
- Alphabetical: Only letters (a-z, A-Z) are allowed
- Numerical: Only numbers (0-9) are allowed
- Alphanumerical: Both letters and numbers are allowed
-
Character Restrictions:
- Allow List: Specific characters that are permitted
- Deny List: Specific characters that are forbidden
-
Length Restrictions:
- Min Length: Minimum number of characters required
- Max Length: Maximum number of characters allowed
Viewing Constraints
Users with appropriate permissions can view the constraints system:
- Log in to your Kinesis API instance
- Navigate to
/web/constraintsin your browser - You’ll see a list of all system constraints

Each constraint can be expanded to show its associated constraint properties.
Viewing Constraint Properties
To view the properties of a specific constraint:
- On the Constraints page, click on a constraint name
- You’ll see a list of properties associated with that constraint
- Each property displays its:
- Character type (alphabetical, numerical, alphanumerical)
- Allow/deny lists
- Current min/max length settings
Modifying Constraints
⚠️ Important: End users can only modify the minimum and maximum length settings of constraint properties. The character types, allow/deny lists, and other fundamental aspects are locked to preserve system integrity.
Modifying Min/Max Values
To modify the min/max settings of a constraint property:
- Navigate to the Constraints page (
/web/constraints) - Click on a constraint to view its properties
- Find the constraint property you want to modify
- For the minimum value:
- Click the edit (pencil) icon next to the Min value
- Enter the new minimum value
- Click “Save” to apply the change
- For the maximum value:
- Click the edit (pencil) icon next to the Max value
- Enter the new maximum value
- Click “Save” to apply the change
Best Practices
When modifying constraint property length settings:
- Maintain Balance: Set minimum lengths to ensure data quality while setting maximum lengths to prevent excessive data
- Consider Real-World Usage: Adjust length limits based on realistic use cases
- Test After Changes: After modifying constraints, test affected components to ensure proper functionality
- Document Changes: Keep a record of any constraint modifications for future reference
- Preserve Relationships: Ensure related constraint properties have compatible settings