Routes
Routes in Kinesis API are the endpoints that expose your API functionality to the outside world. They define how your API responds to HTTP requests, what logic executes when an endpoint is called, and what data is returned to clients. Kinesis API provides a powerful visual route builder called the Flow Editor to create complex API routes without having to write traditional code.
Understanding Routes
Each route in Kinesis API has:
- Route ID: A unique identifier for the route within the project
- Path: The URL path through which the route is accessed
- HTTP Method: The HTTP method the route responds to (GET, POST, PUT, PATCH, DELETE, etc.)
- Authentication Settings: Optional JWT authentication requirements
- Parameters: URL parameters the route can accept
- Body: JSON body structure the route expects (for POST, PUT, PATCH)
- Flow: The visual logic flow that defines the route’s behavior
Routes belong to projects and are managed at the project level, allowing you to organize related functionality in a logical way.
Accessing Routes Management
To access the routes management interface:
- Log in to your Kinesis API account
- Navigate to
/web/routesin your browser or click “Routes” in the main navigation menu - You’ll see a list of all projects you have access to
- Click on a project to view and manage its routes at
/web/routes/project?id=project_id
Browsing Projects and Routes
Projects Level
At /web/routes, you’ll see all projects you have access to:
- Each project card displays the project’s name, ID, description, and API path
- You can filter projects using the search box
- View the number of members in each project
- Click the eye icon to view project members
- Click on any project to navigate to its routes
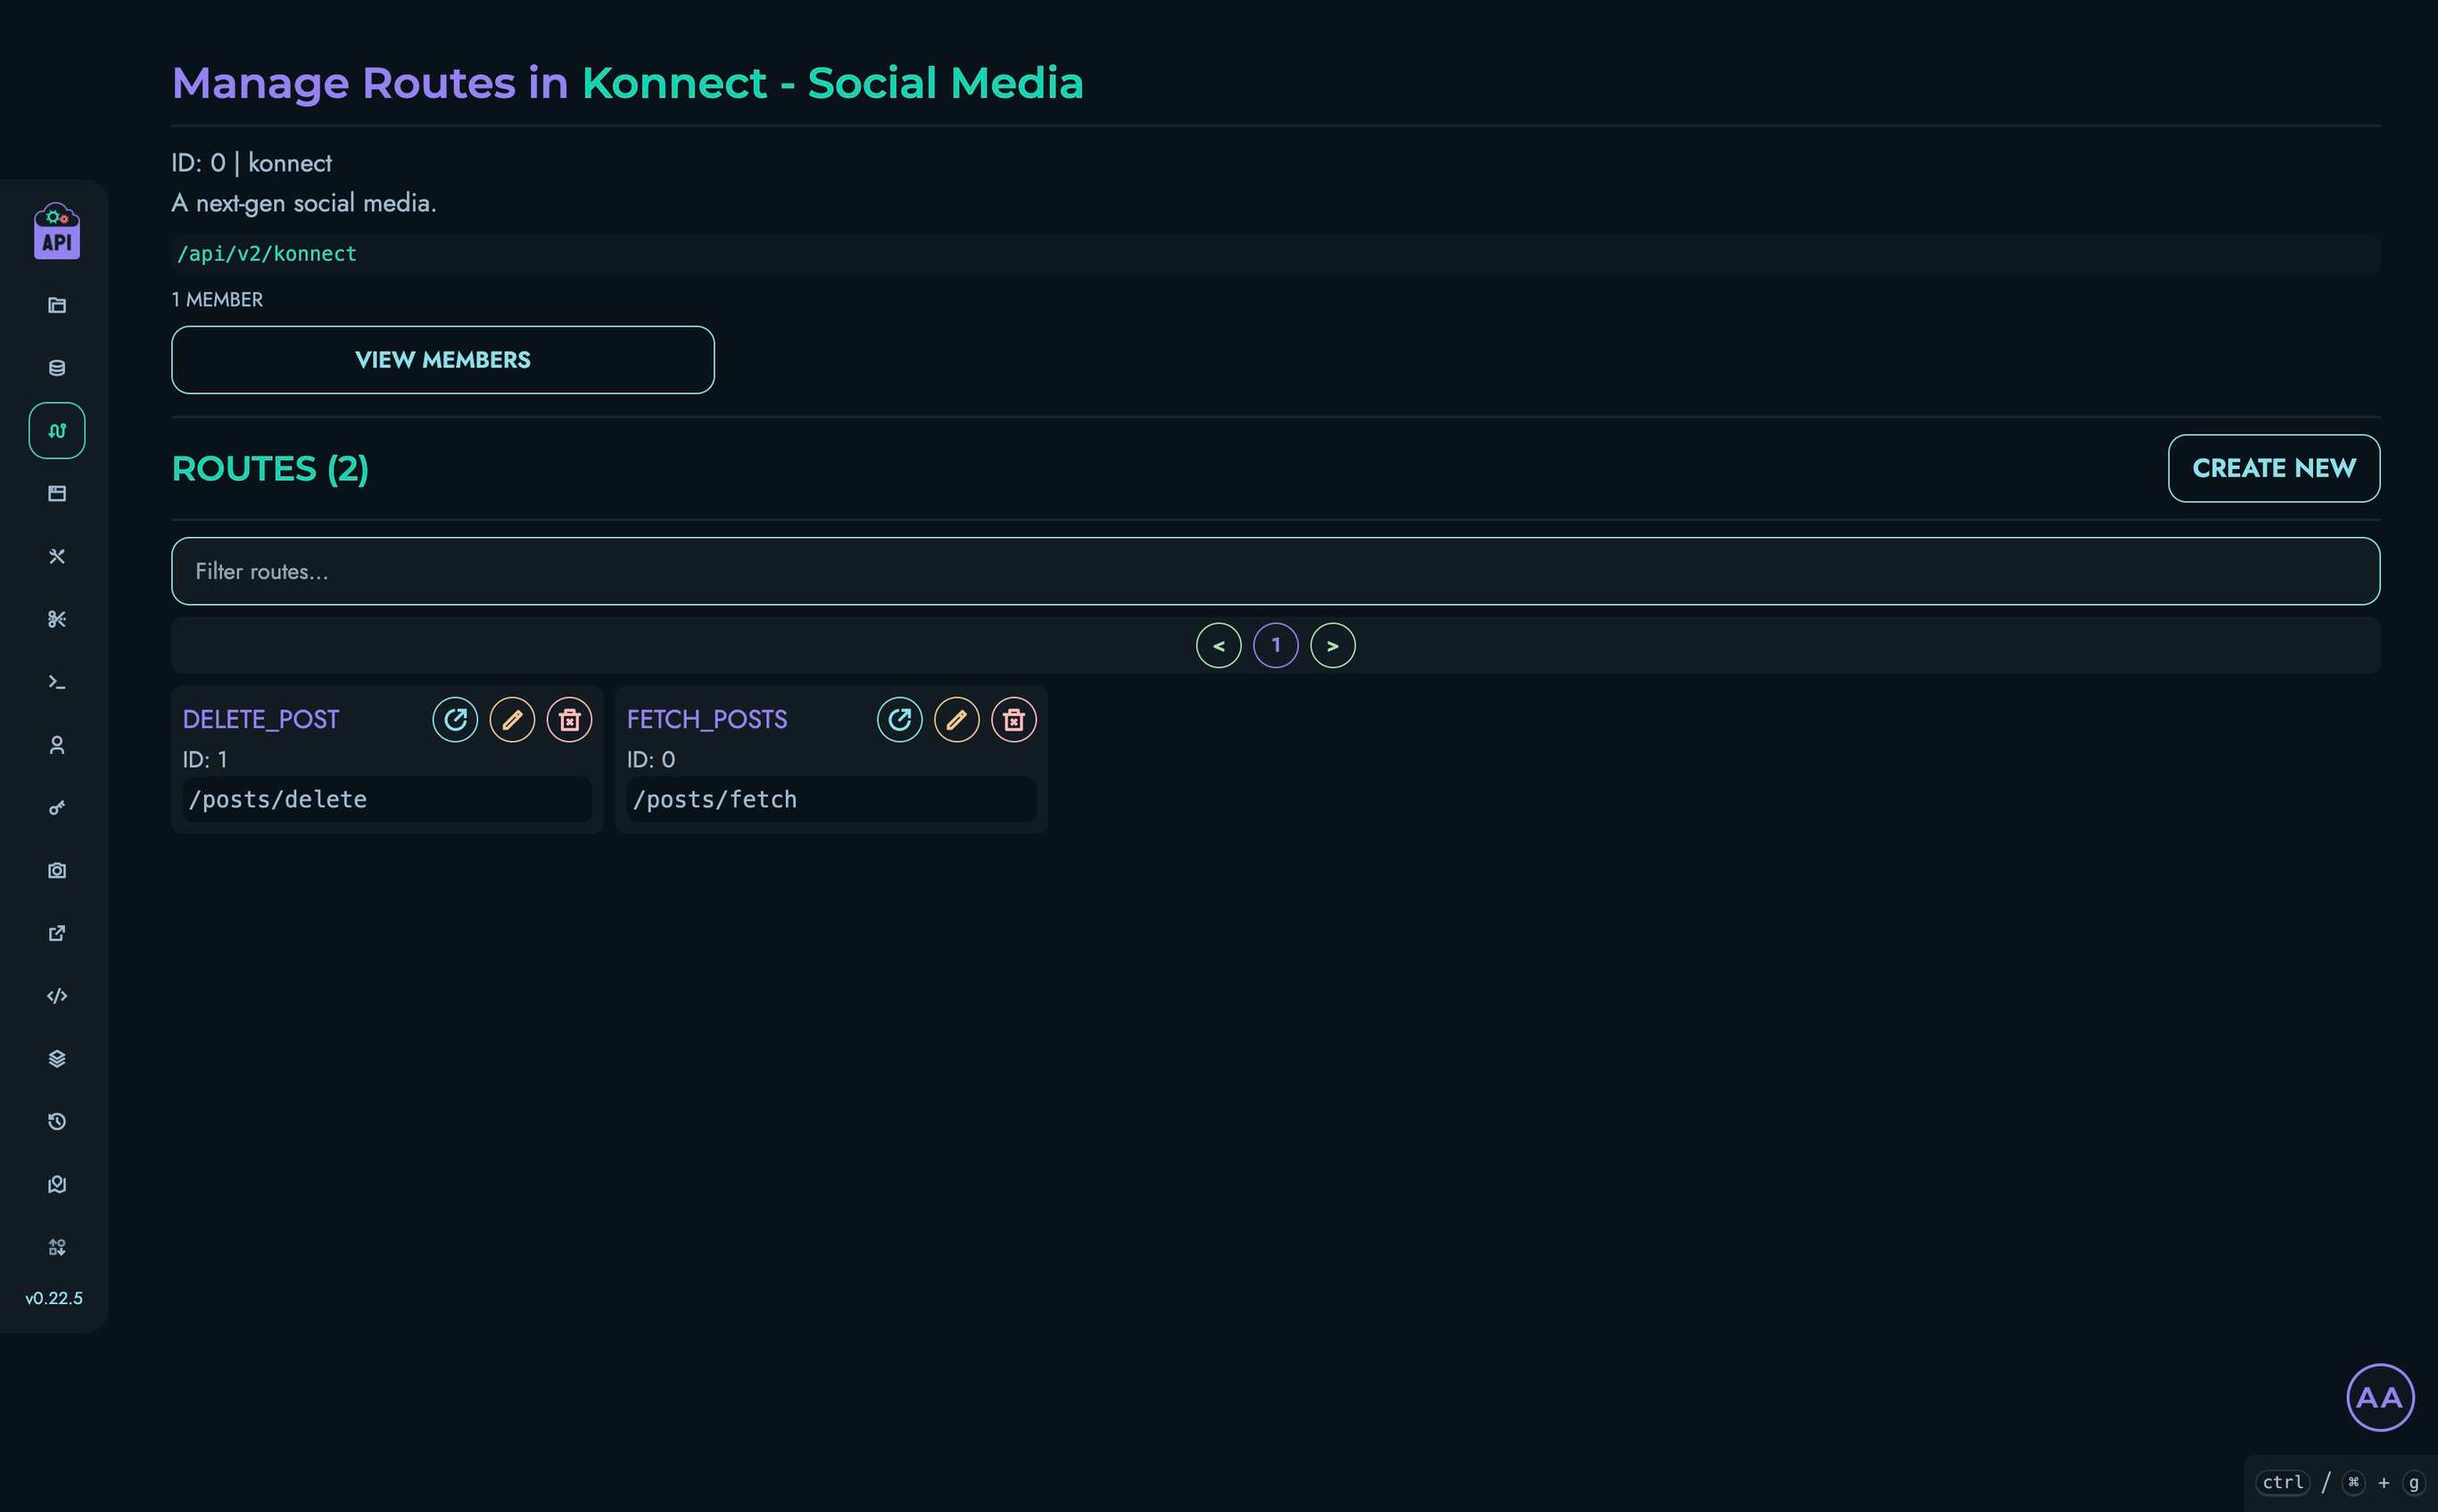
Routes Level
At /web/routes/project?id=project_id, you’ll see all routes within the selected project:
- Each route card shows the route’s ID and path
- You can filter routes using the search box
- View, edit, or delete routes using the action buttons
- Create new routes using the “Create New” button (ADMIN and ROOT users only)
Route API Path Construction
The complete API path that clients will use to access your route is constructed from multiple components:
- Base URL: The root URL of your Kinesis API instance (e.g.,
https://api.kinesis.world) - API Prefix: The global prefix for all routes in your instance (e.g.,
/api/v1) - Project Path: The API path segment for the project the route belongs to (e.g.,
/my_project) - Route Path: The path defined for the route (e.g.,
/users/fetch/all)
The final API path is a concatenation of these components, forming a URL like https://api.kinesis.world/api/v1/x/my_project/users/fetch/all (notice the /x/).
HTTP Methods
When creating a route, you must select which HTTP method it will respond to. Each method has a specific purpose:
| Method | Description | Body Support | Typical Use |
|---|---|---|---|
| GET | Retrieve data without modifying resources | No | Fetching data, searching, filtering |
| POST | Create new resources or submit data | Yes | Creating new records, submitting forms |
| PUT | Replace an entire resource with new data | Yes | Complete resource updates |
| PATCH | Apply partial updates to a resource | Yes | Partial resource updates |
| DELETE | Remove a resource | No* | Deleting records |
| OPTIONS | Describe communication options for the resource | No | CORS preflight requests, API discovery |
| HEAD | Like GET but returns only headers, no body | No | Checking resource existence/metadata |
*Note: While DELETE technically can have a body according to HTTP specifications, it’s uncommon and not supported in all clients.
JWT Authentication
Routes can be configured to require JSON Web Token (JWT) authentication. To implement JWT authentication in your API:
-
Create a collection to store user data with at least:
- A unique identifier field (e.g.,
uidorusername) - Password field (should be stored securely)
- Any additional user information
- A unique identifier field (e.g.,
-
Create two essential routes:
- Login/Token Creation: Validates credentials and issues a JWT
- Token Validation: Verifies the JWT and extracts user information
JWT Authentication Flow
- User sends credentials to the login route
- Route validates credentials against the user collection
- If valid, a JWT containing the user’s identifier is created and returned
- For subsequent requests to protected routes, the client includes this token
- Protected routes verify the token before processing the request
Note: For a detailed implementation guide, see the JWT Authentication Tutorial.
URL Parameters
URL parameters allow clients to pass data to your API through the URL. When configuring a route, you can define:
-
Parameter Delimiter: The character that separates parameters in the URL
- Typically
?for the first parameter and&for subsequent ones - Example:
/users/search?name=John&age=30
- Typically
-
Parameter Definitions: For each parameter, you define:
- Name: The parameter identifier
- Type: Data type (String, Number, Boolean, etc.)
Kinesis API automatically validates incoming parameter values against these definitions, rejecting requests with invalid parameters.
Request Body
For routes using HTTP methods that support a request body (POST, PUT, PATCH), you can define the expected structure of that body. Define each field in the body with:
- Name: The field identifier
- Type: Data type expected (Integer, Float, String, Boolean, Array, Other)
Kinesis API validates incoming request bodies against this defined structure, ensuring data integrity before your route logic executes.
⚠️ Important Note: For comprehensive understanding of routes, authentication flows, and advanced API features, please refer to the Tutorials Section. These tutorials provide step-by-step guides and real-world examples that demonstrate how to effectively use Kinesis API’s routing capabilities.
Flow Editor: Visual Route Builder
The Flow Editor is a visual programming tool that allows you to build complex API logic without writing traditional code. Unlike a traditional node-graph editor, the Flow Editor uses a linear block sequence — blocks execute top to bottom in the order they appear on the canvas.
The editor is split into three areas:
- Left sidebar — Lists all available block types. Click a block type to append it to the end of the flow.
- Center canvas — Displays the current flow as a vertical sequence of blocks connected by arrows, representing execution order. Click any block to select it.
- Right details panel — Slides in when a block is selected, showing all configuration fields for that block. Close it with the
←button or by clicking elsewhere on the canvas.
Blocks can be reordered with the up/down arrows in the details panel, and deleted with the trash icon. Every flow begins with a mandatory START block.
Available blocks include:
| Block Type | Purpose |
|---|---|
| START | Mandatory starting point of every flow |
| FETCH | Retrieve data from collections |
| ASSIGNMENT | Assign values to variables using conditions/ops |
| TEMPLATE | Build a string value from a template and data items |
| CONDITION | Branch or fail based on conditions |
| LOOP | Iterate over a range with a loop variable |
| END_LOOP | Mark the end of a LOOP block |
| FILTER | Filter a list of objects by a property |
| PROPERTY | Apply an operation to a value (length, split, etc.) |
| FUNCTION | Call a built-in function (e.g. generate UUID) |
| RANDOM | Generate a random value within a range |
| VAULT | Retrieve a secret from the project vault |
| OBJECT | Construct an object from key/value pairs |
| UPDATE | Update records in a collection |
| SIMPLE_UPDATE | Update records with a simple set operation |
| CREATE | Save a variable as a new record in a collection |
| Send an email using a named template | |
| RETURN | Return a response and end execution |
Creating Routes
Users with ROOT or ADMIN roles can create new routes:
- From a project’s routes page, click the “Create New” button
- Fill in the route configuration details:
- Route ID: Unique identifier for the route (e.g.,
fetch_users) - Route Path: The URL path (e.g.,
/users/fetch/all) - HTTP Method: Select GET, POST, PUT, PATCH, DELETE, etc.
- Route ID: Unique identifier for the route (e.g.,
- Configure optional JWT authentication requirements
- Define URL parameters and their delimiter (typically
∨) - Define the expected request body structure (for POST, PUT, PATCH)
- Build your route logic using the visual X Engine flow editor
- Click “Create” to save the route

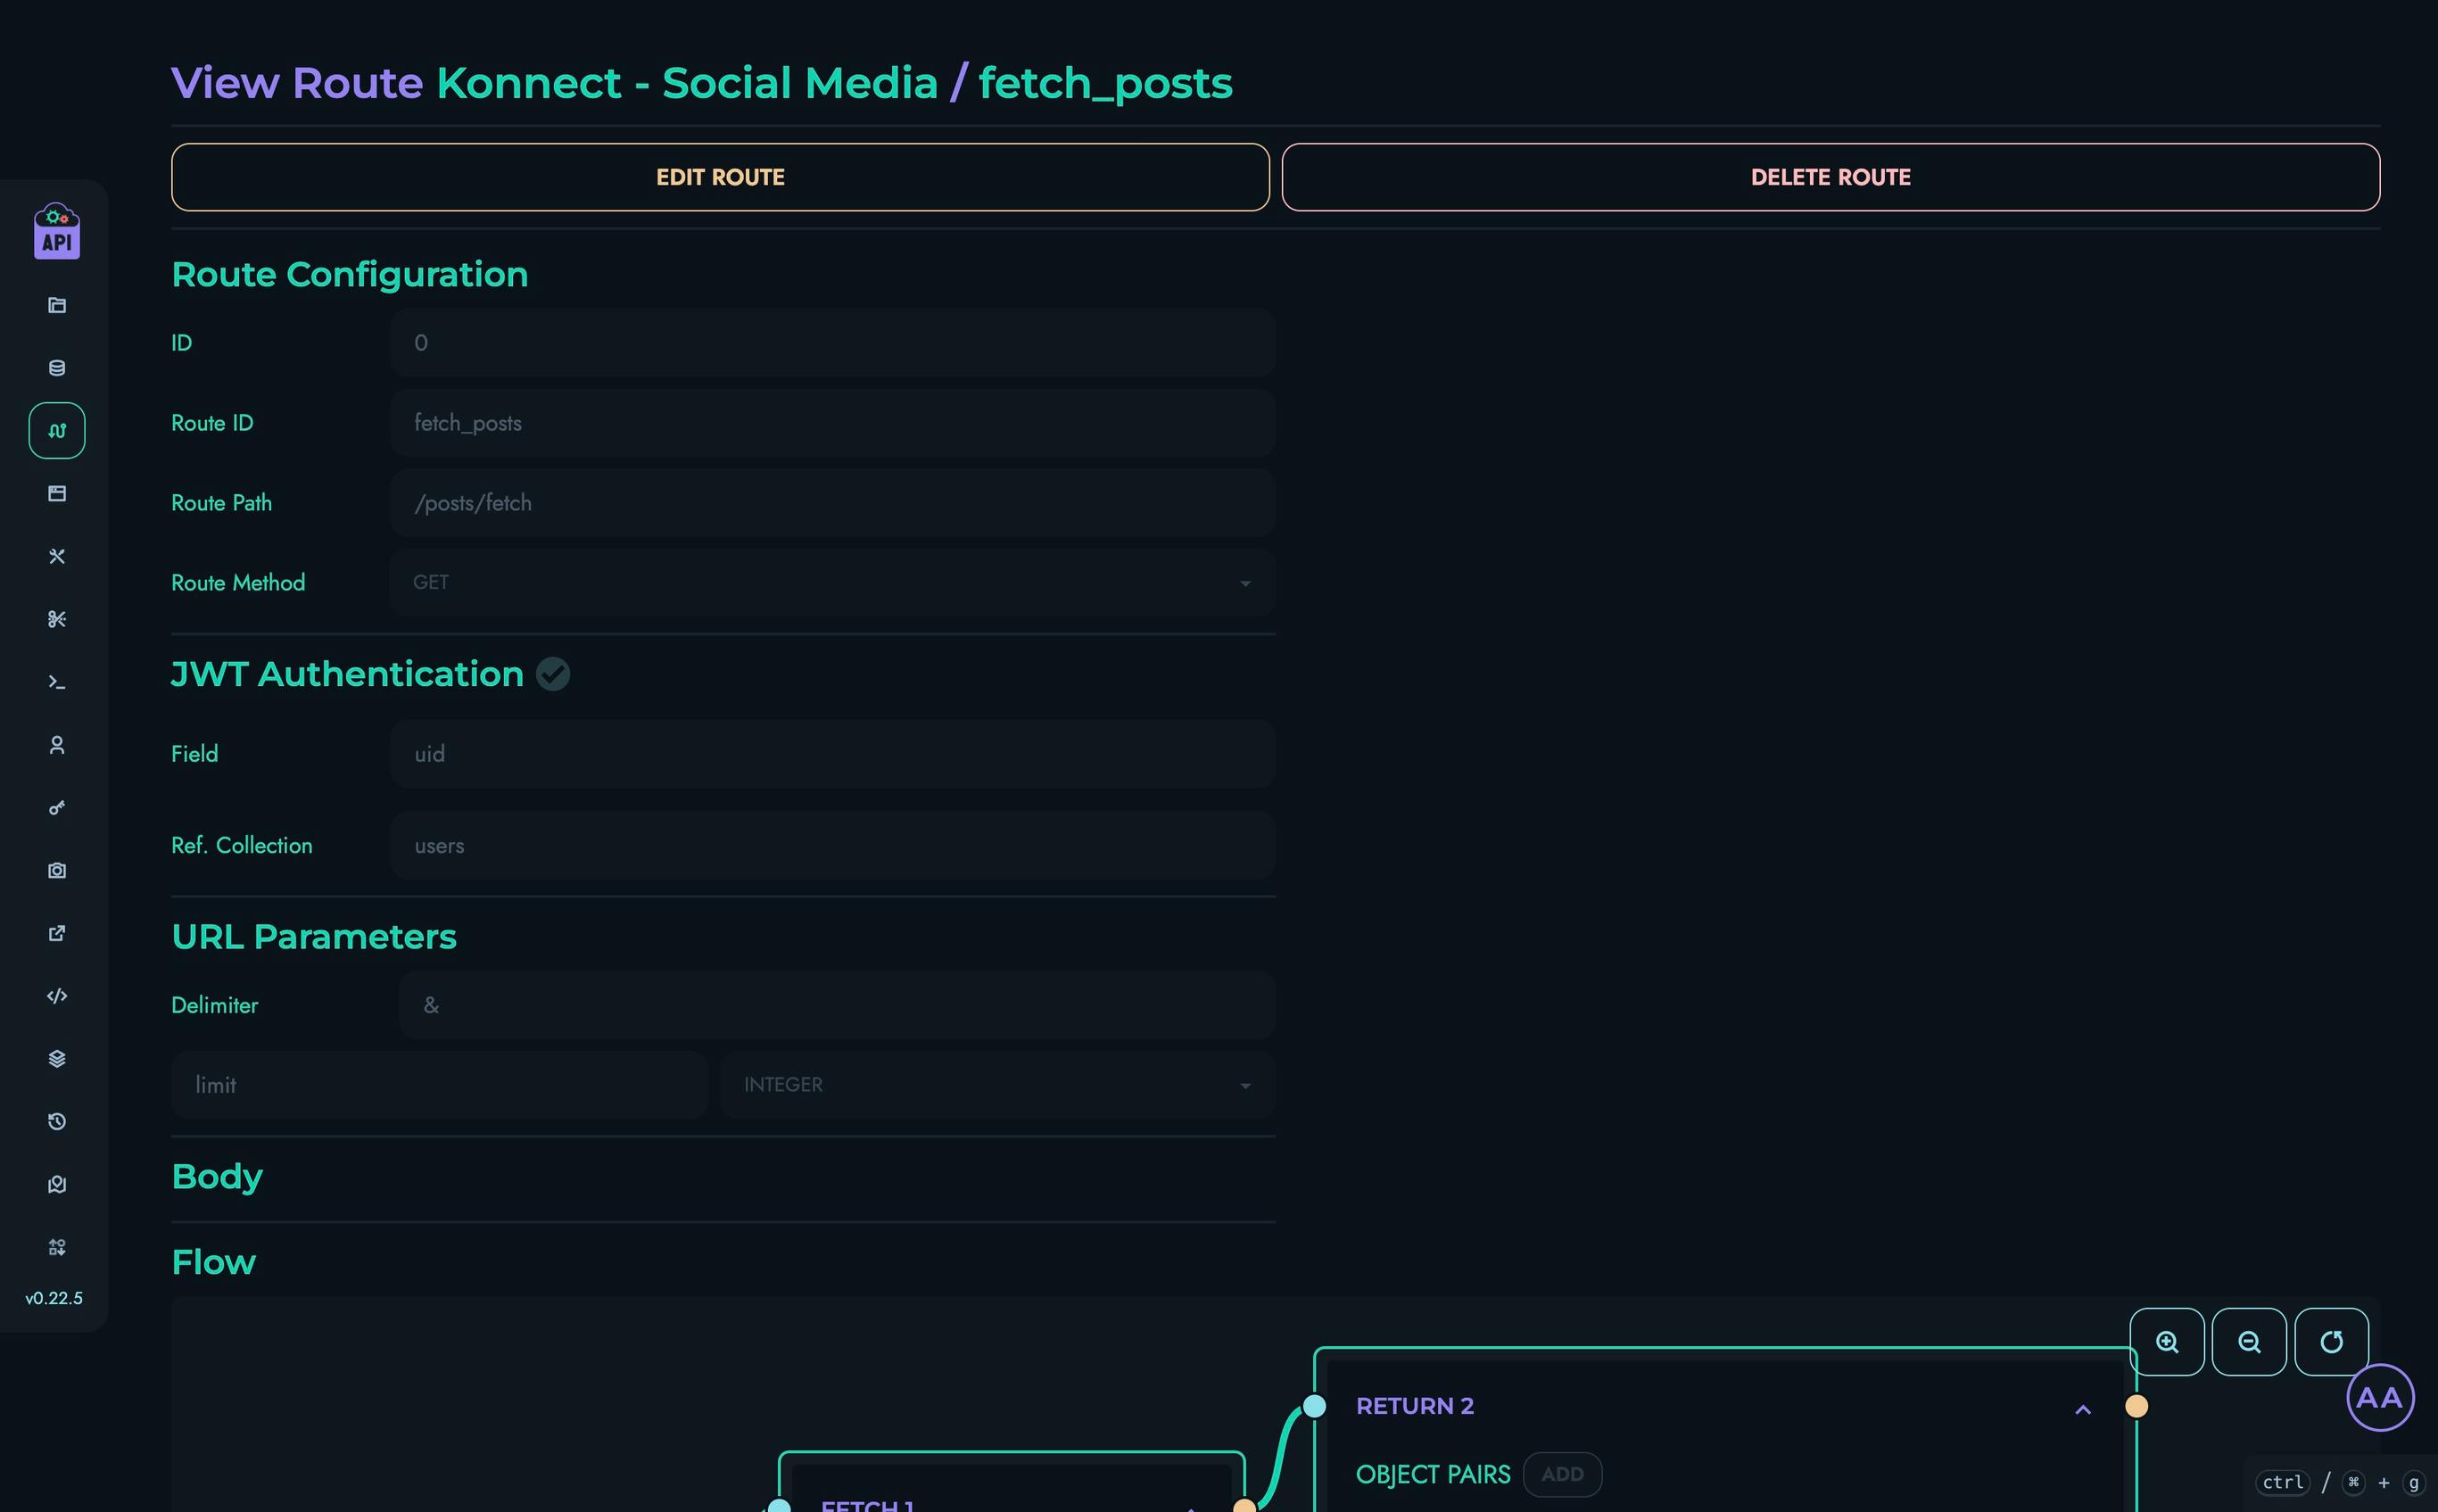
Viewing Routes
To view a route’s details:
- From a project’s routes page, click the view button (open link icon) on a route card
- You’ll see the route’s configuration details:
- Basic information (ID, path, method)
- Authentication settings
- Parameter definitions
- Body structure
- Visual representation of the route’s logic flow
From the route view page, you can:
- Test the route using the Playground
- Edit the route (if you have appropriate permissions)
- Delete the route (if you have appropriate permissions)
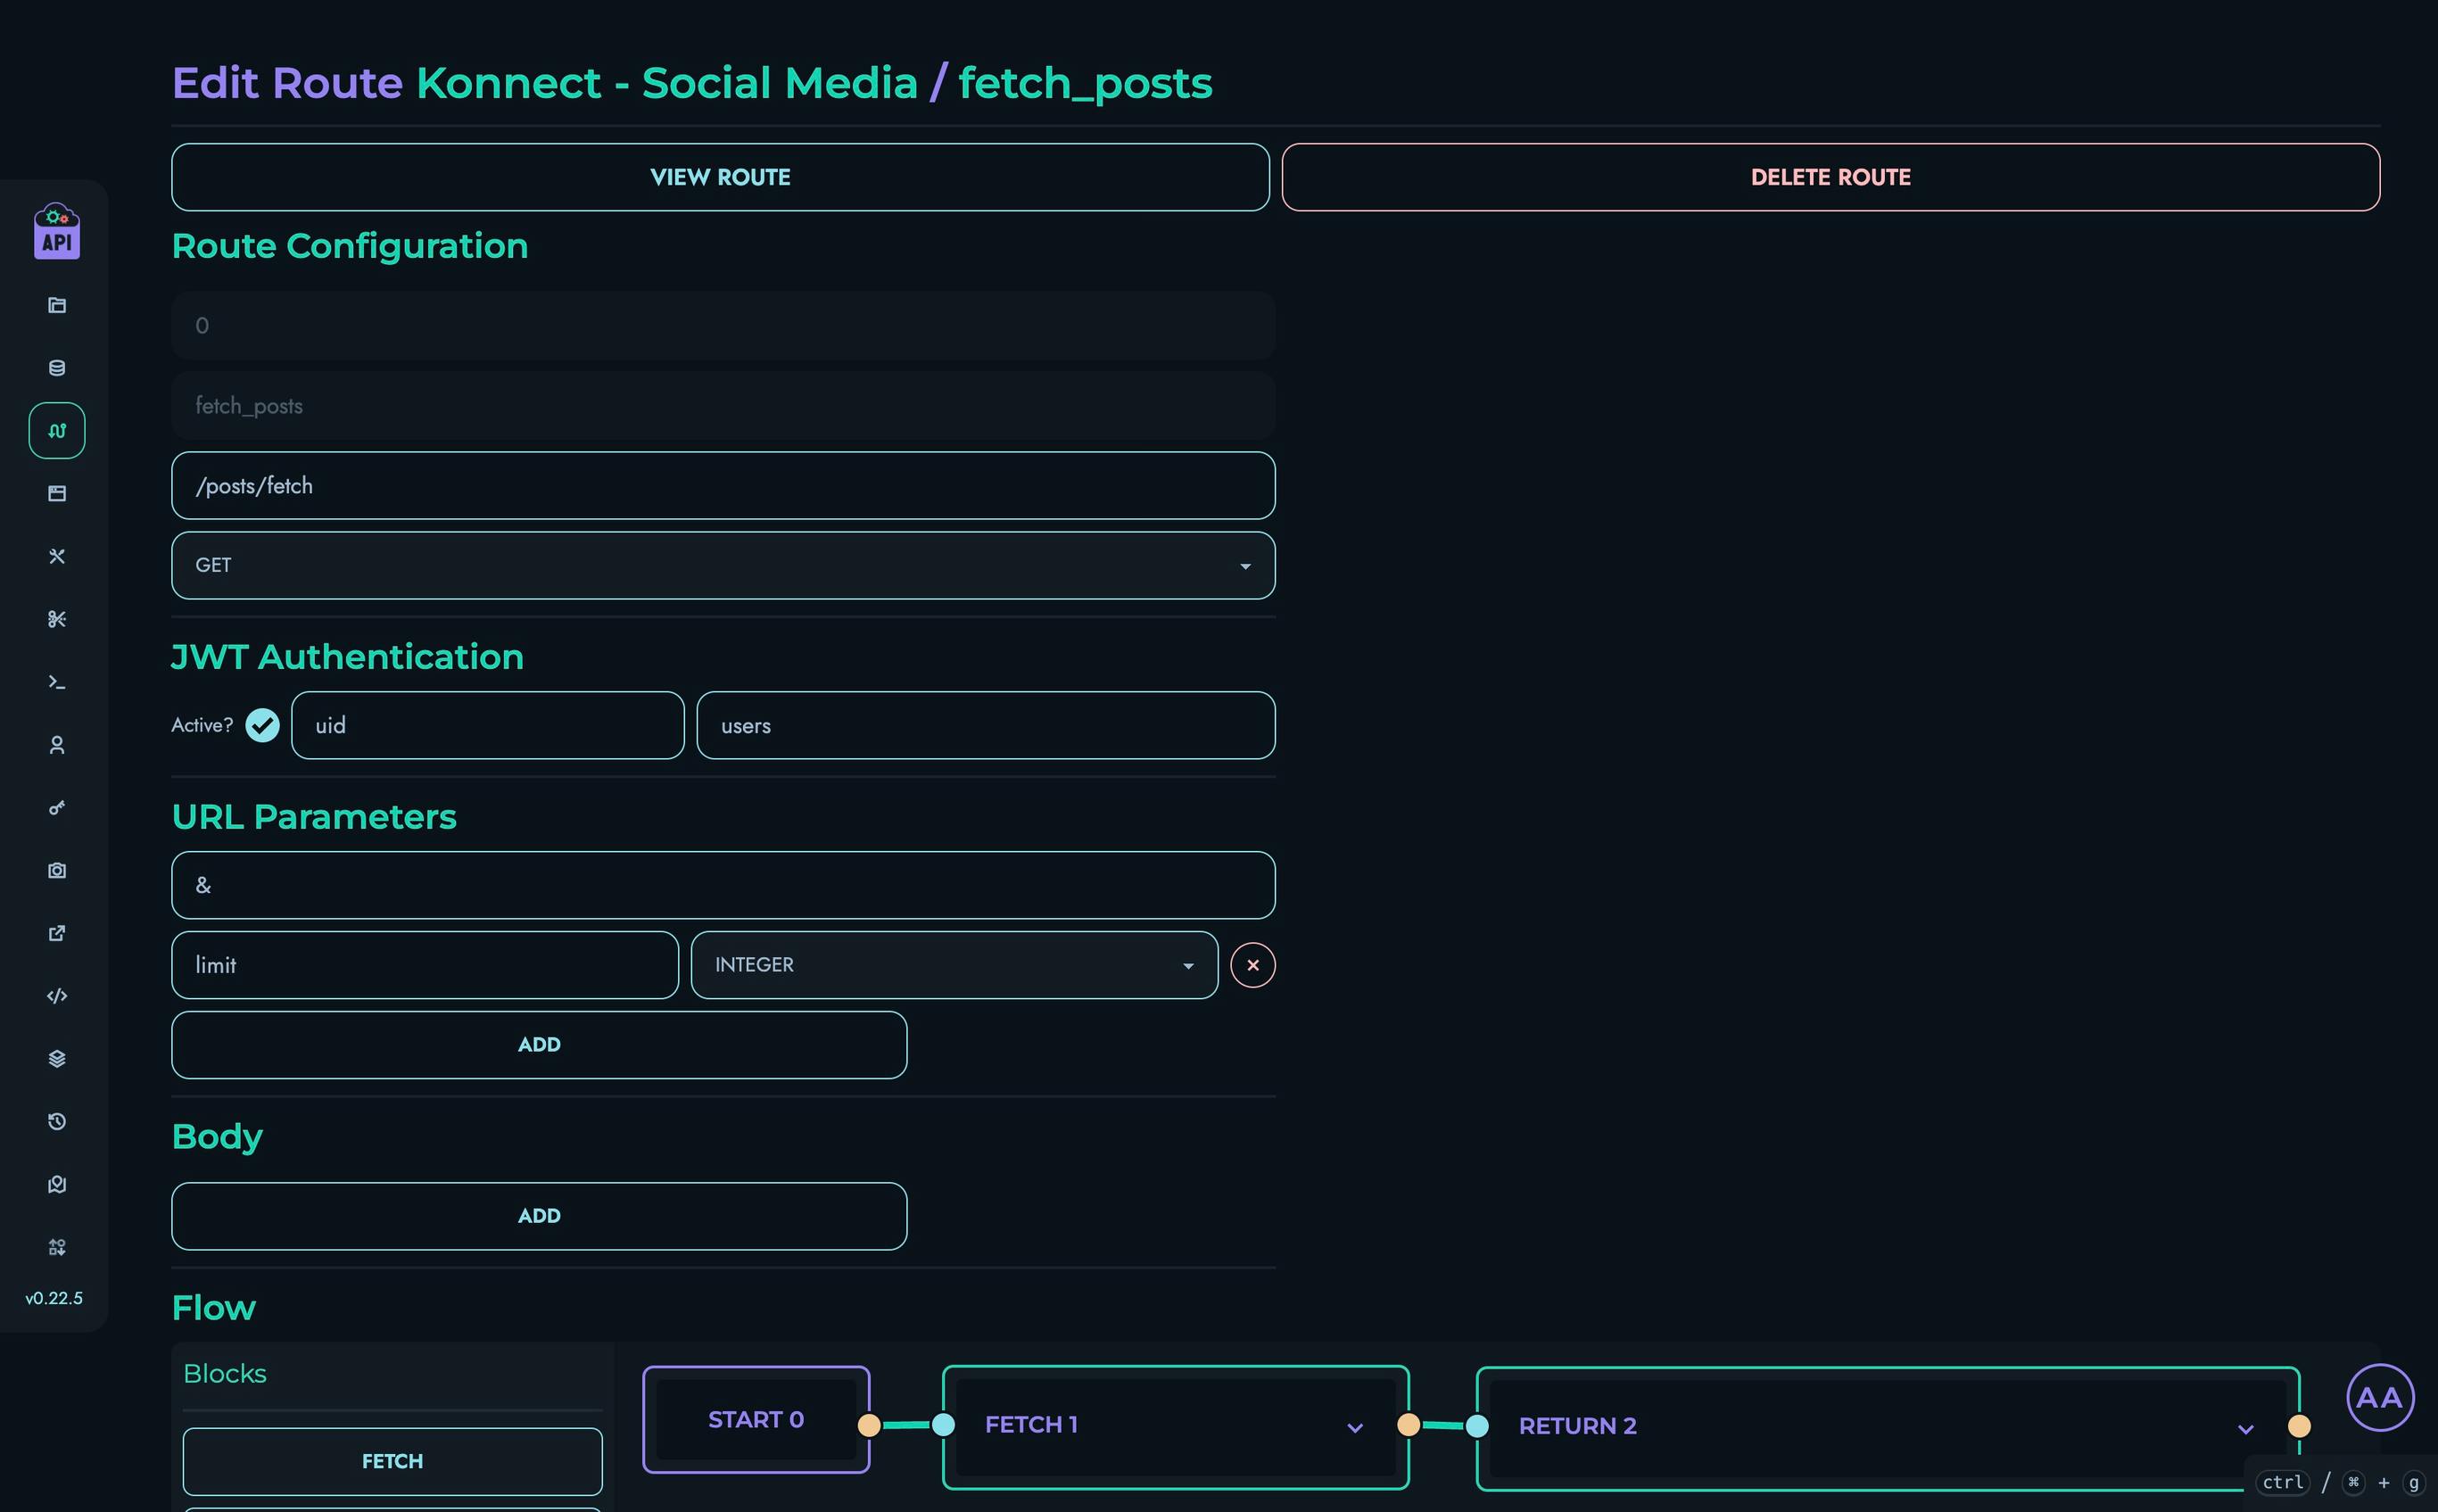
Editing Routes
Users with ROOT or ADMIN roles can edit existing routes:
- From a project’s routes page, click the edit button (pencil icon) on a route card
- Modify any aspect of the route:
- Update the route path
- Change the HTTP method
- Modify authentication settings
- Add or remove parameters
- Change body structure
- Redesign the logic flow using the X Engine
- Click “Update” to save your changes
Deleting Routes
Users with ROOT or ADMIN roles can delete routes:
- From a project’s routes page, click the delete button (trash icon) on a route card
- Alternatively, click “Delete Route” on the route view or edit page
- Confirm the deletion in the modal that appears
⚠️ Warning: Deleting a route permanently removes it from the system. Any applications or services relying on this route will no longer be able to access it.
User Permissions
Access to routes management is controlled by user roles:
| Role | View Routes | Create Routes | Edit Routes | Delete Routes |
|---|---|---|---|---|
| ROOT | ✓ | ✓ | ✓ | ✓ |
| ADMIN | ✓ | ✓ | ✓ | ✓ |
| AUTHOR | ✓ | ✗ | ✗ | ✗ |
| VIEWER | ✓ | ✗ | ✗ | ✗ |
Additionally, users can only access routes within projects they are members of.
Testing Routes
After creating or modifying a route, you should test it to ensure it behaves as expected:
- Use the Playground to send test requests to your route
- Verify that the response matches your expectations
- Test different parameter values and edge cases
- Check error handling by sending invalid requests
Route Security Best Practices
- Authentication: Use JWT authentication for routes that access sensitive data or perform modifications
- Input Validation: Validate all incoming data using appropriate blocks in your flow
- Error Handling: Add proper error handling to provide meaningful feedback on failures
- Rate Limiting: Consider implementing rate limiting for public-facing routes
- Minimal Exposure: Only expose the minimum data necessary in responses
- Testing: Thoroughly test routes before making them available to clients
Related Documentation
- X Engine - Detailed information about the X Engine
- Playground - Testing your API routes