Implementing JWT Authentication
This tutorial will guide you through implementing a complete JWT (JSON Web Token) authentication system using Kinesis API. You’ll create login functionality that generates tokens and a verification endpoint that validates those tokens, establishing a secure authentication flow for your APIs.
Prefer video tutorials? You can follow along with our YouTube walkthrough of this same project.
Prerequisites
Before you begin, you need:
- Access to a Kinesis API instance:
- Either the demo environment at demo.kinesis.world
- Or your own self-hosted instance
- A user account with ADMIN or ROOT privileges
- Basic understanding of:
- REST APIs and HTTP methods
- Authentication concepts
- JSON Web Tokens (JWT)
What is JWT Authentication?
JWT (JSON Web Token) is an open standard for securely transmitting information between parties. In the context of authentication:
- A user logs in with their credentials
- The server validates the credentials and generates a signed JWT
- The client stores this JWT and sends it with subsequent requests
- The server verifies the JWT’s signature to authenticate the user
This stateless approach eliminates the need for server-side session storage, making it ideal for APIs.
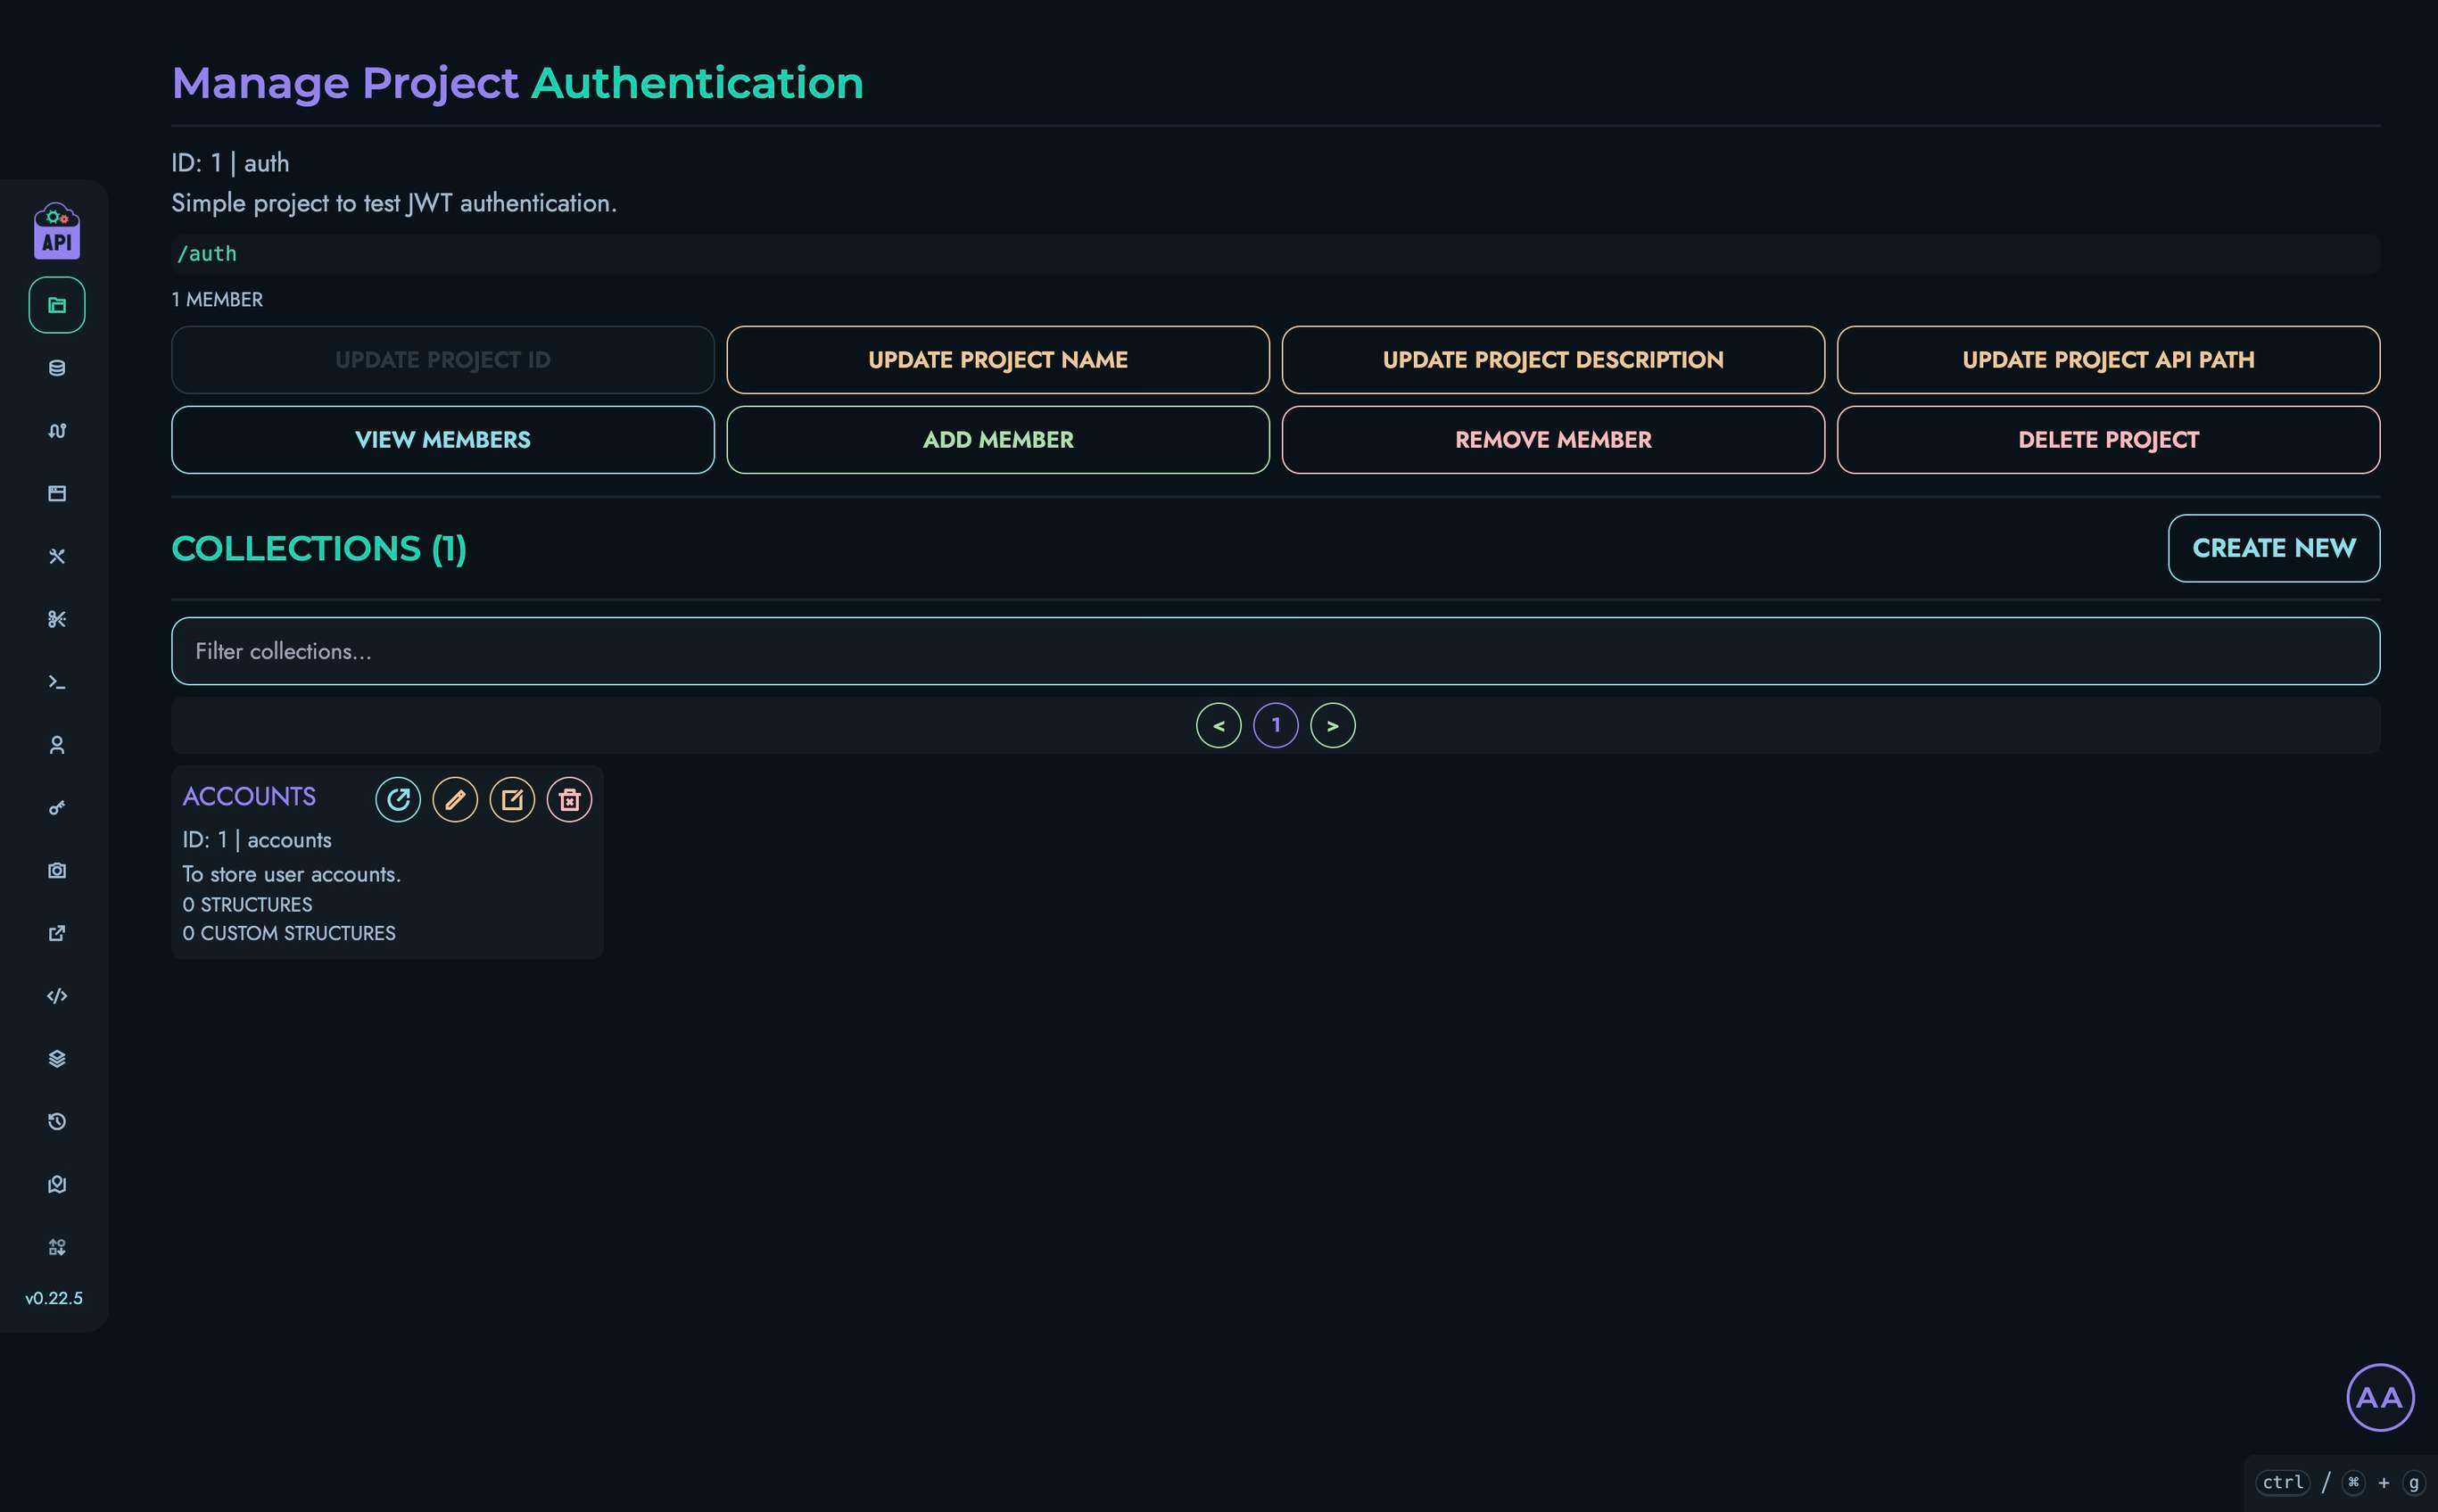
1. Creating the Authentication Project
First, let’s create a project to organize our authentication API:
- Log in to your Kinesis API instance
- Navigate to the Projects page from the main menu
- Click “Create New” to open the project creation modal
- Fill in the following details:
- Name: “Authentication”
- ID: “auth”
- Description: “Simple project to test JWT authentication.” (or anything else you want)
- API Path: “/auth” (this will be the base URL path for all routes in this project)
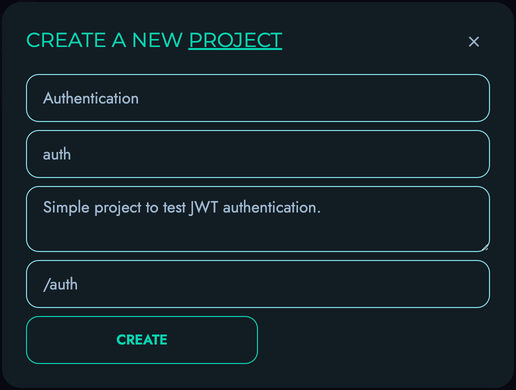
- Click “Create” to save your project
2. Creating the Accounts Collection
Next, let’s create a collection to store user accounts:
- From your newly created project page, click “Create New” on the “Collections” section
- Fill in the following details:
- Name: “Accounts”
- ID: “accounts”
- Description: “To store user accounts.” (or anything else you want)
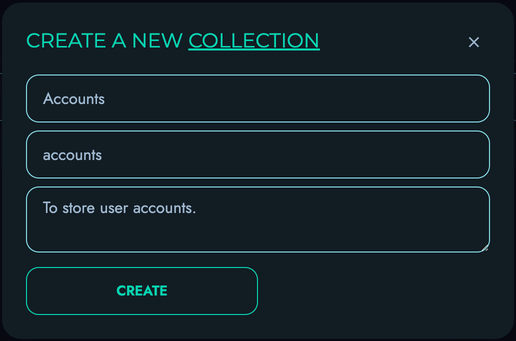
- Click “Create” to save your collection
3. Creating Structures
Now we’ll create structures (fields) to store user information:
UID Structure
- From the “Accounts” collection page, locate the “Structures” section
- Click “Create New” to add a structure
- Fill in the following details:
- Name: “uid”
- ID: “uid”
- Description: “” (leave blank or insert anything else)
- Type: “INTEGER”
- Min: “0”
- Max: “1000”
- Default Value: “0”
- Required: Check this box
- Unique: Check this box
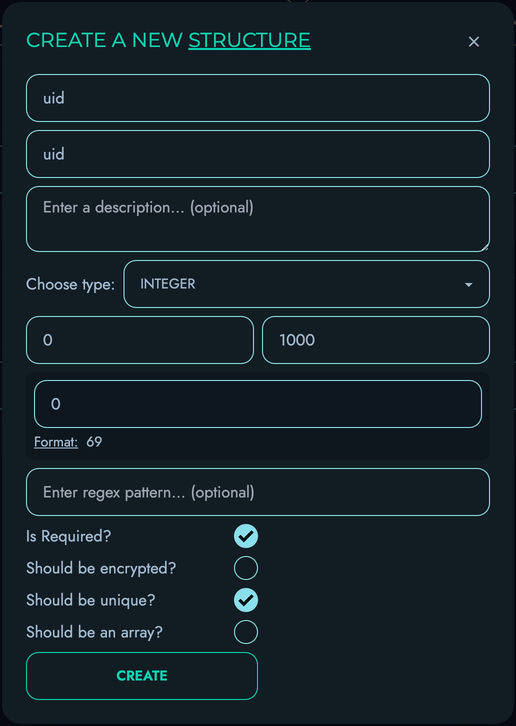
- Click “Create” to save the structure
Username Structure
- Click “Create New” again to add another structure
- Fill in the following details:
- Name: “username”
- ID: “username”
- Description: “” (leave blank or insert anything else)
- Type: “TEXT”
- Min: “4”
- Max: “100”
- Required: Check this box
- Unique: Check this box
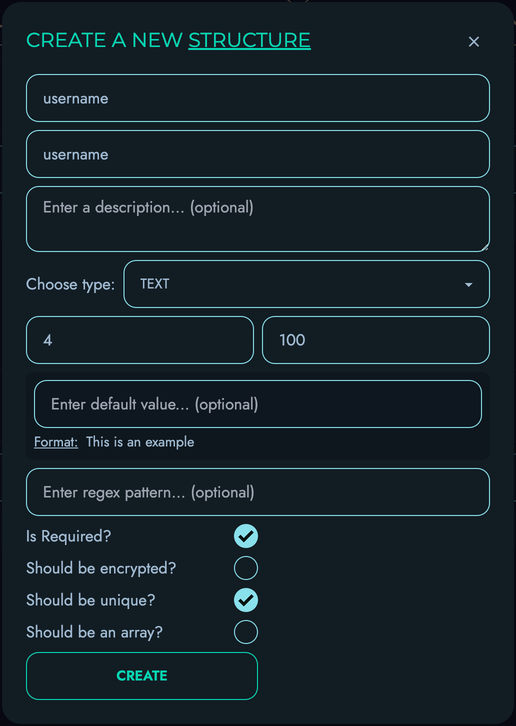
- Click “Create” to save the structure
Password Structure
- Click “Create New” again to add the final structure
- Fill in the following details:
- Name: “password”
- ID: “password”
- Description: “” (leave blank or insert anything else)
- Type: “PASSWORD”
- Min: “8”
- Max: “100”
- Required: Check this box
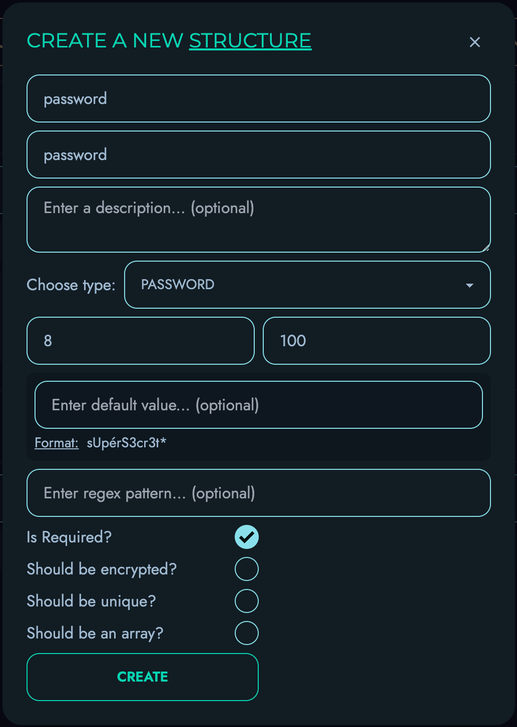
- Click “Create” to save the structure

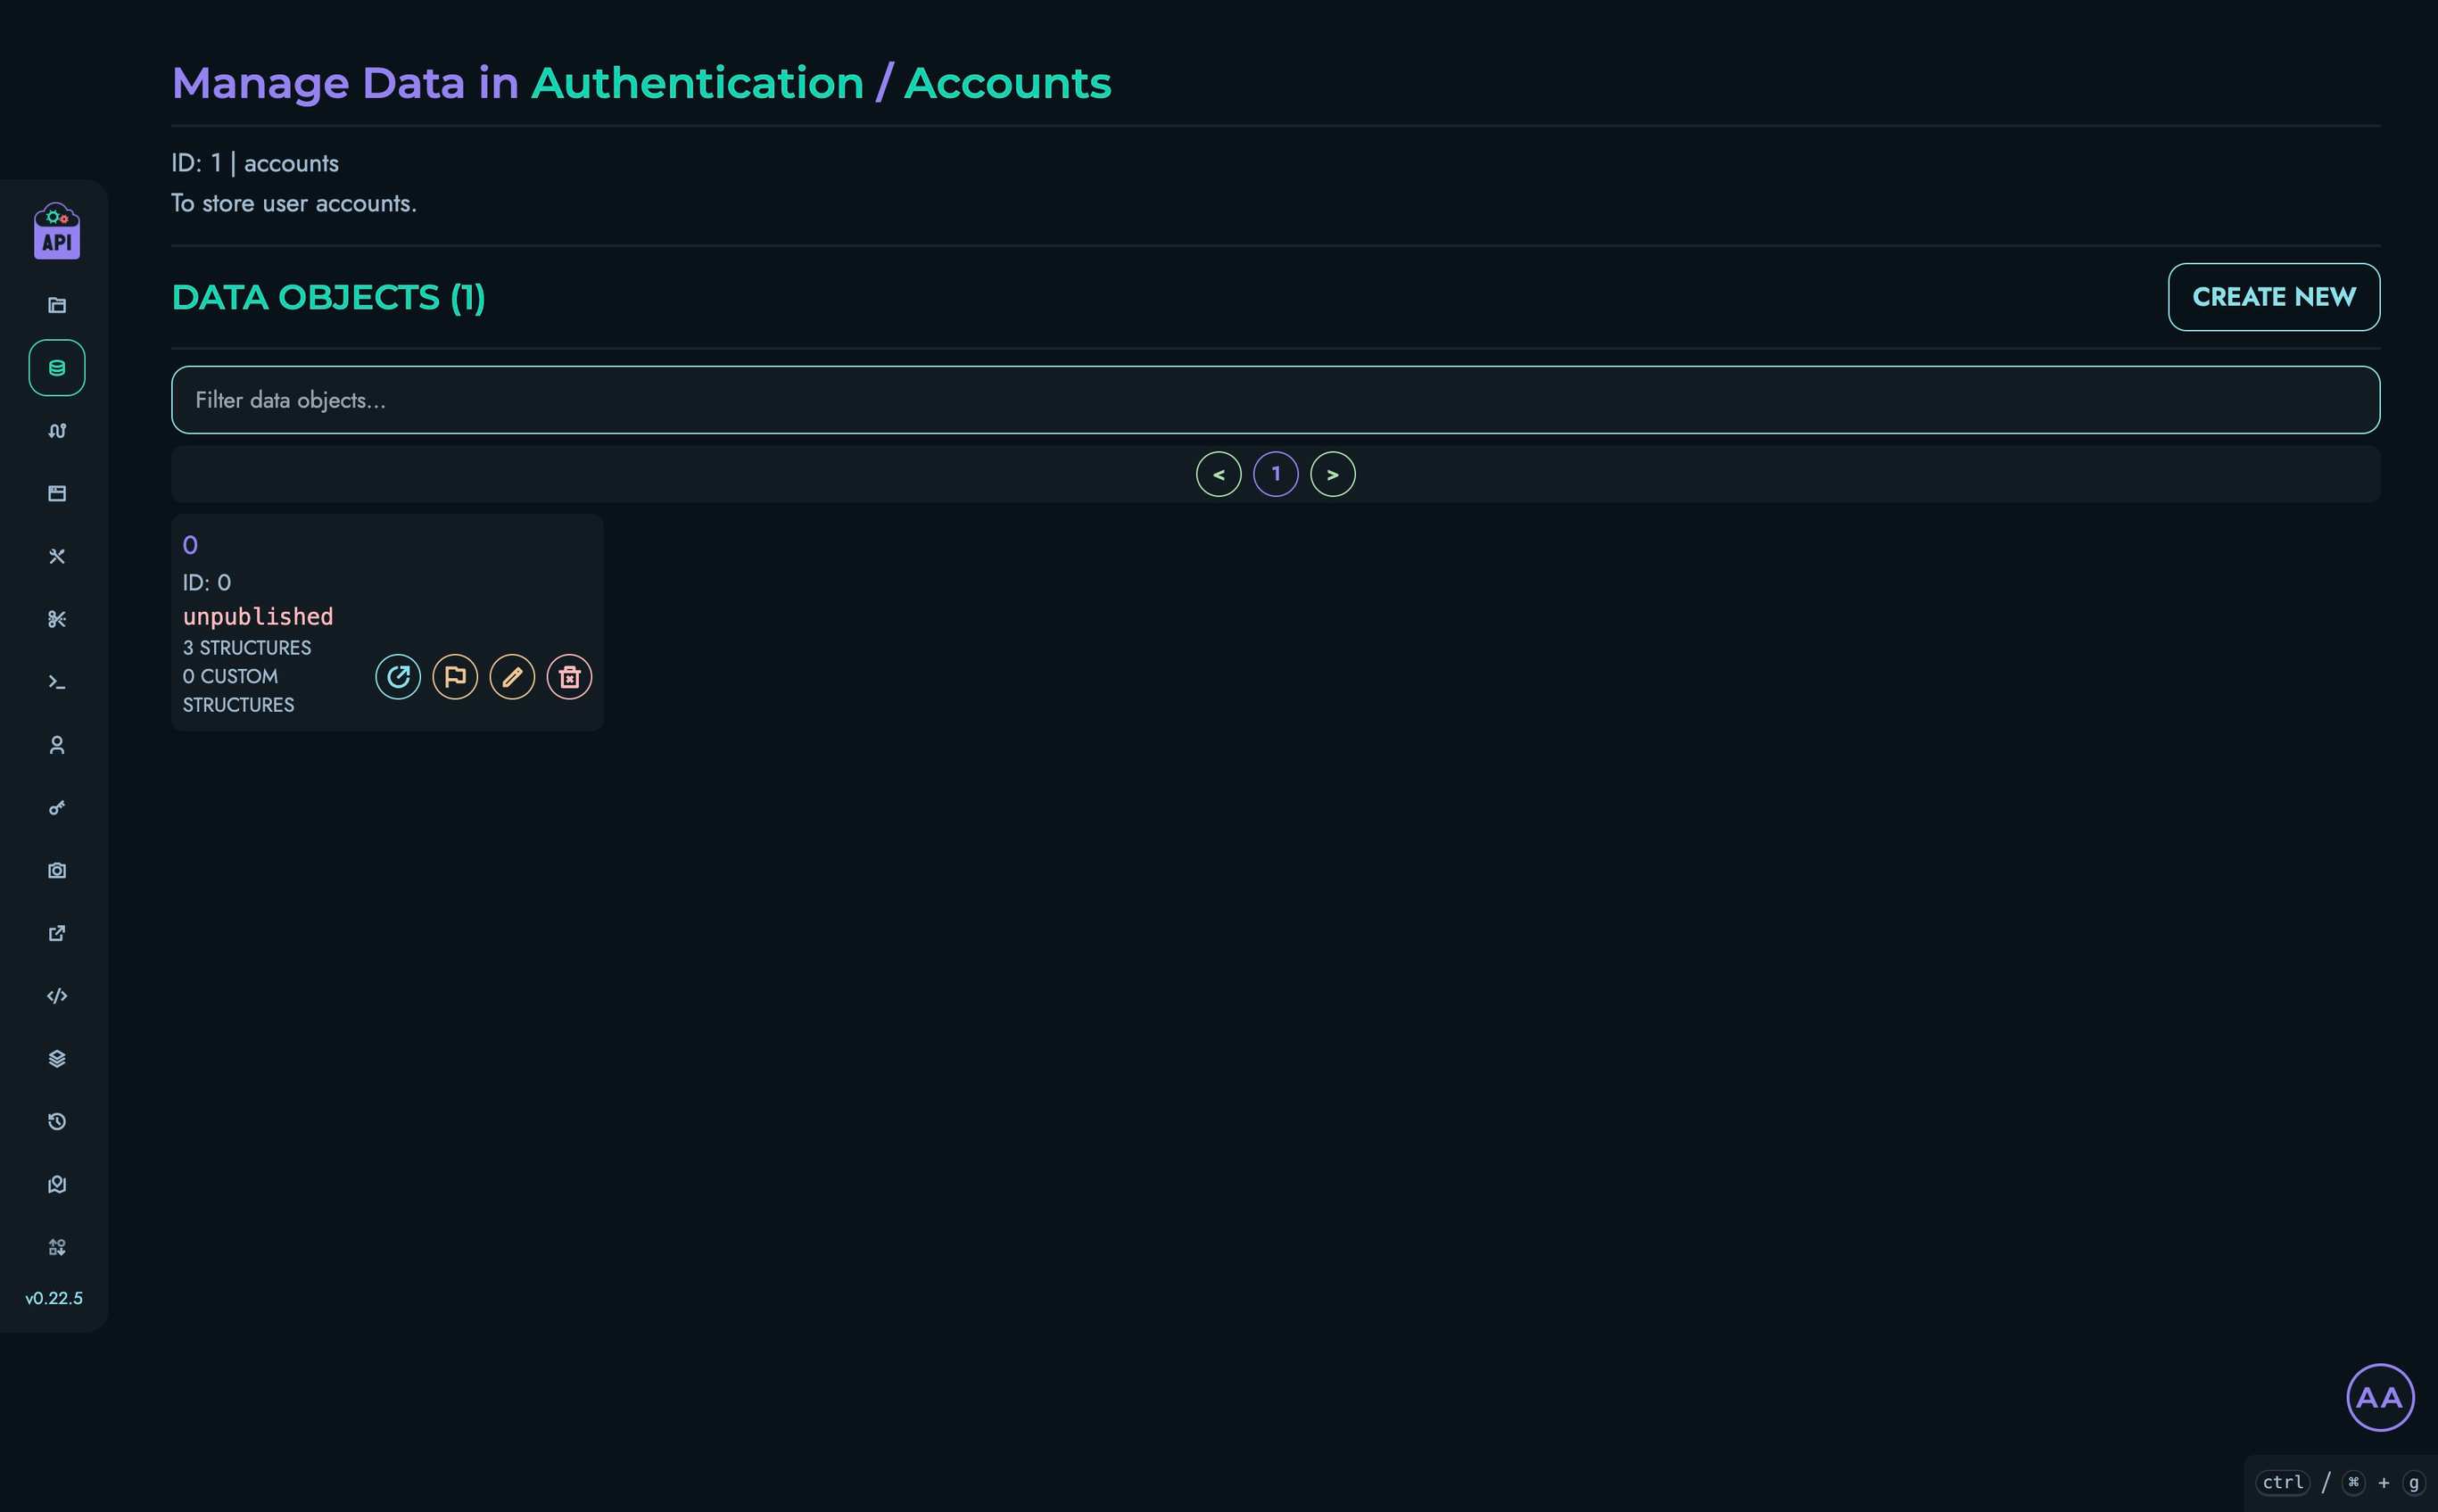
4. Creating a Test User Account
Let’s create a test user to demonstrate our authentication system:
- Navigate to the “Data” section in the top navigation bar
- Select your “Authentication” project and then the “Accounts” collection
- Click “Create New” to create a data object
- Add a nickname (optional)
- Fill in the fields:
- uid: “0” (this will be our unique identifier)
- username: “john_doe”
- password: “password123” (in a real system, you’d use a strong password)
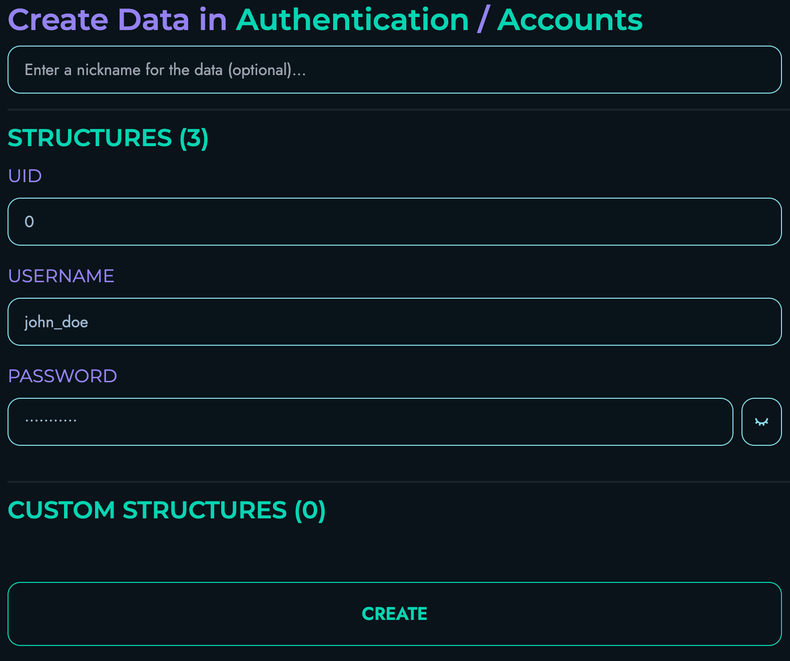
- Click “Create” to save your data object
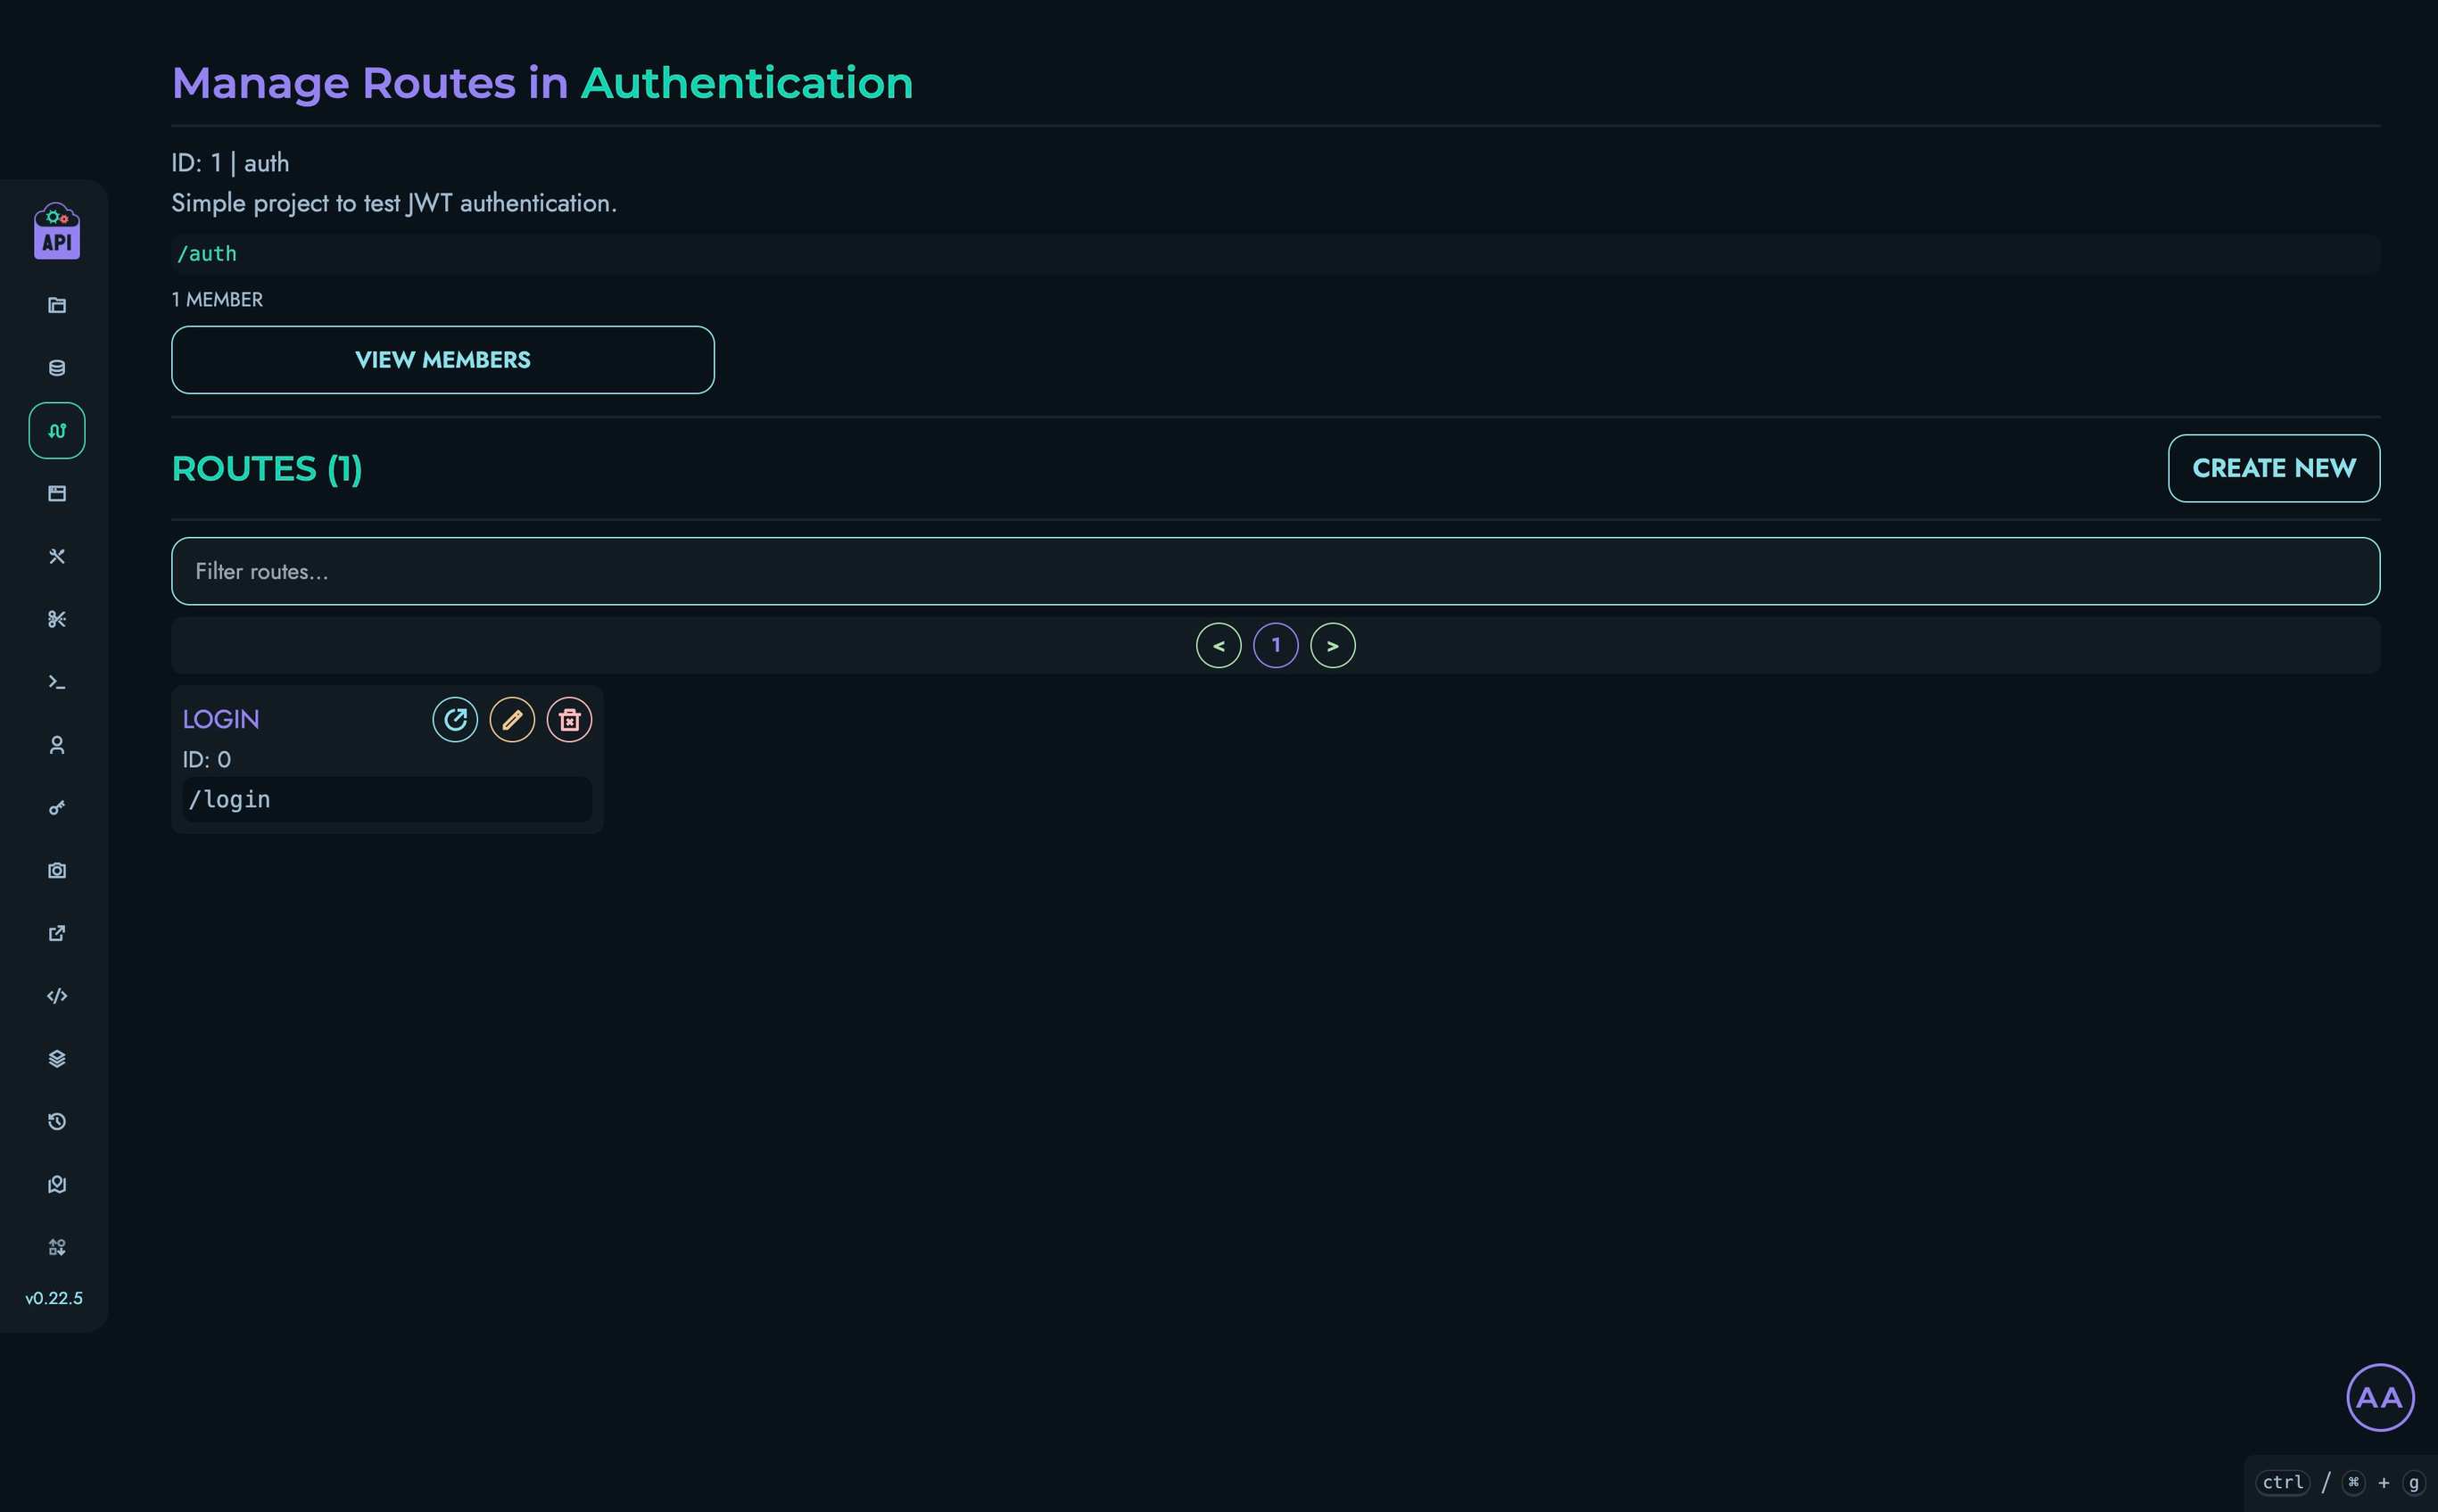
5. Creating the Login Route
Now we’ll create a route that validates credentials and generates a JWT token:
- Navigate to Routes in the top navigation bar
- Select your “Authentication” project
- Click “Create New” to create a route
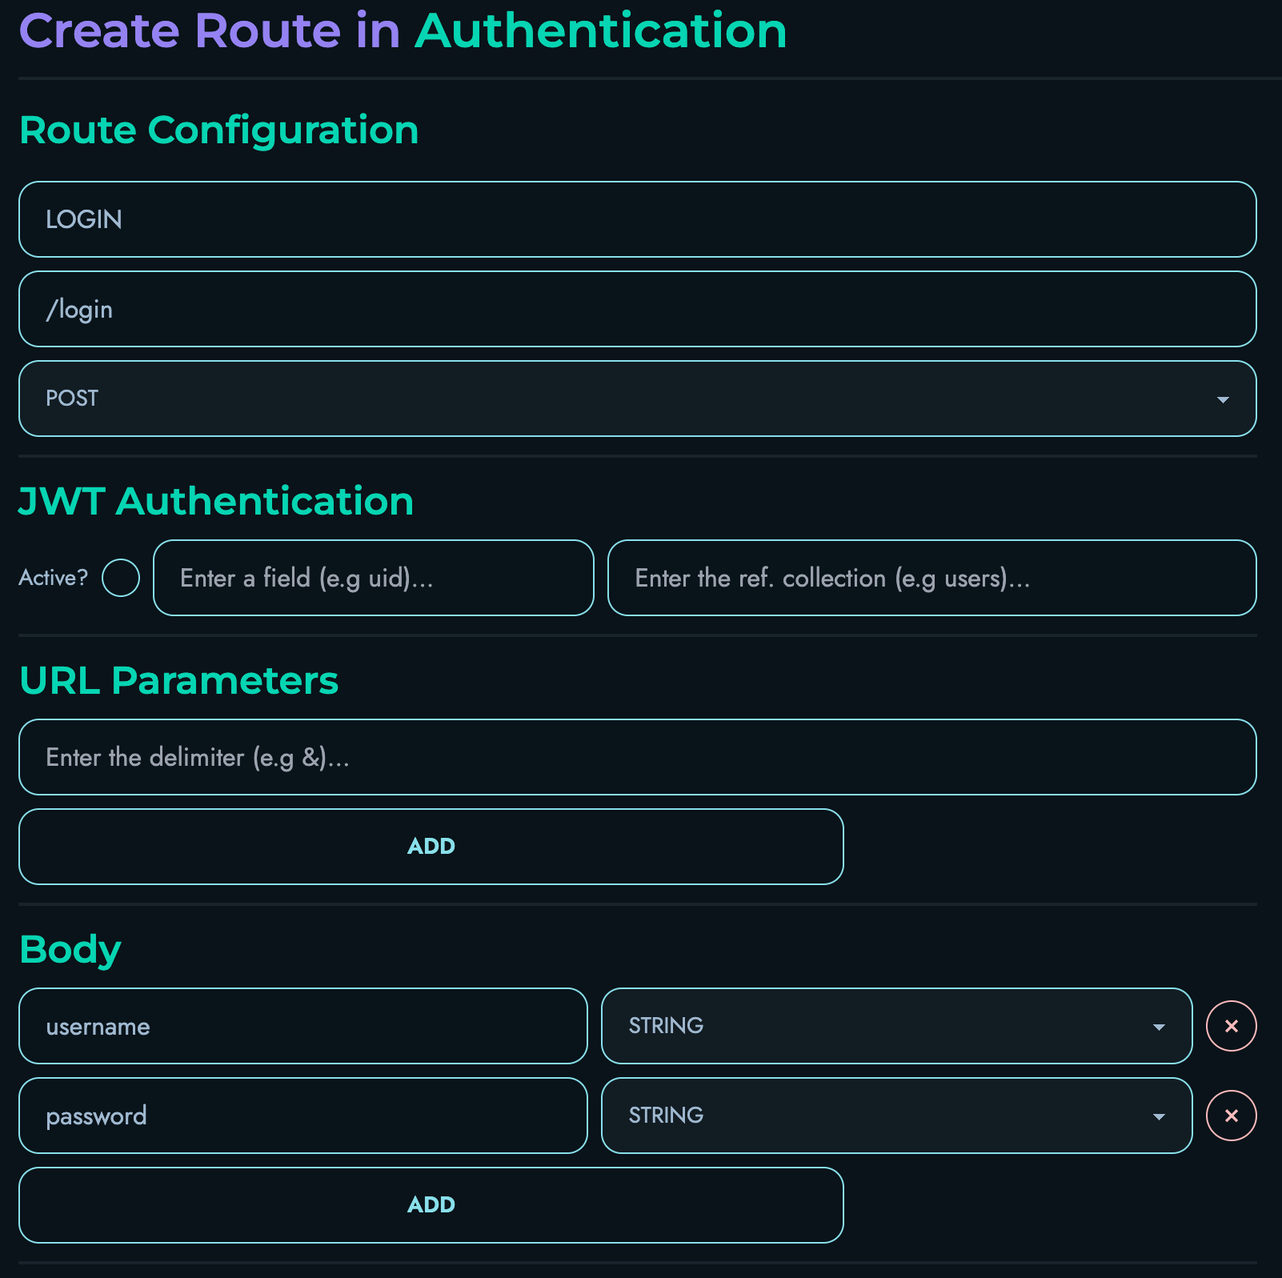
- Fill in the route details:
- Route ID: “LOGIN”
- Route Path: “/login”
- HTTP Method: “POST”
- Add 2 parameters to the “Body” section:
- username: “STRING”
- password: “STRING”
- The “JWT Authentication” and “URL Parameters” sections don’t need to be modified
Building the Login Route Logic
In the Flow Editor, we’ll create a flow that:
- Accepts username and password from the request body
- Validates these against our stored accounts
- Generates a JWT token if credentials are valid
- Returns an error if credentials are invalid
Follow these steps:
-
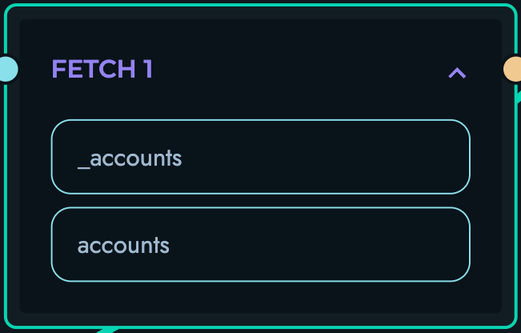
Add a FETCH block:
- Drag a FETCH block onto the canvas and connect the START node to it
- Fill in the following details:
- Local Name: “_accounts”
- Reference Collection: “accounts”

-
Add a FILTER block:
- Drag a FILTER block onto the canvas and connect the FETCH block to it
- Fill in the following details:
- Local Name: “_matchingAccounts”
- Reference Variable: “_accounts”
- Reference Property: “username”
- Add a “filter” submodule and fill in the following details:
- Operation Type: “Equal To”
- Operand:
- Reference: Check this box
- Type: “String”
- Data: “username”

-
Add a PROPERTY block:
- Drag a PROPERTY block onto the canvas and connect the FILTER block to it
- Fill in the following details:
- Local Name: “_matchingAccountsLength”
- Property Apply: “LENGTH”
- As for the data section, fill in the following details:
- Reference: Check this box
- Type: “Array”
- Data: “_matchingAccounts”

-
Add a CONDITION block:
- Drag a CONDITION block onto the canvas and connect the PROPERTY block to it
- Fill in the following details:
- Action: “Fail”
- Fail Object Status: “404”
- Fail Object Message: “User not found”
- Add a “condition” submodule with 2 operands, and fill in the following details:
- First Operand:
- Reference: Check this box
- Type: “Integer”
- Data: “_matchingAccountsLength”
- Second Operand:
- Reference: Leave unchecked
- Type: “Integer”
- Data: “1”
- Condition Type: “Less than”
- First Operand:

-
Add a PROPERTY block:
- Drag a PROPERTY block onto the canvas and connect the CONDITION block to it
- Fill in the following details:
- Local Name: “_foundAccount”
- Property Apply: “GET_FIRST”
- As for the data section, fill in the following details:
- Reference: Check this box
- Type: “Array”
- Data: “_matchingAccounts”

-
Add a PROPERTY block:
- Drag a PROPERTY block onto the canvas and connect the previous PROPERTY block to it
- Fill in the following details:
- Local Name: “_savedPassword”
- Property Apply: “GET_PROPERTY”
- Additional: “password”
- As for the data section, fill in the following details:
- Reference: Check this box
- Type: “Other”
- Data: “_foundAccount”

-
Add a CONDITION block:
- Drag a CONDITION block onto the canvas and connect the PROPERTY block to it
- Fill in the following details:
- Action: “Fail”
- Fail Object Status: “401”
- Fail Object Message: “Invalid Password”
- Add a “condition” submodule with 2 operands, and fill in the following details:
- First Operand:
- Reference: Check this box
- Type: “String”
- Data: “password”
- Second Operand:
- Reference: Check this box
- Type: “String”
- Data: “_savedPassword”
- Condition Type: “Not equal to”
- First Operand:

-
Add a PROPERTY block:
- Drag a PROPERTY block onto the canvas and connect the CONDITION block to it
- Fill in the following details:
- Local Name: “_uid”
- Property Apply: “GET_PROPERTY”
- Additional: “uid”
- As for the data section, fill in the following details:
- Reference: Check this box
- Type: “Other”
- Data: “_foundAccount”

-
Add a FUNCTION block:
- Drag a FUNCTION block onto the canvas and connect the PROPERTY block to it
- Fill in the following details:
- Local Name: “_jwt”
- Function: “GENERATE_JWT_TOKEN”
- Add a “parameter” submodule and fill in the following details:
- Reference: Check this box
- Type: “Integer”
- Data: “_uid”

-
Add a RETURN block:
- Drag a RETURN block onto the canvas and connect the FUNCTION block to it
- Add an “object pair” submodule
- Fill in the following details:
- id: “uid”
- data:
- Reference: Check this box
- Type: “Integer”
- Data: “_uid”
- Add another “object pair” submodule
- Fill in the following details:
- id: “jwt”
- data:
- Reference: Check this box
- Type: “String”
- Data: “_jwt”

-
Ensure that your Flow Editor looks like the following:

-
Click “Create” to save your route
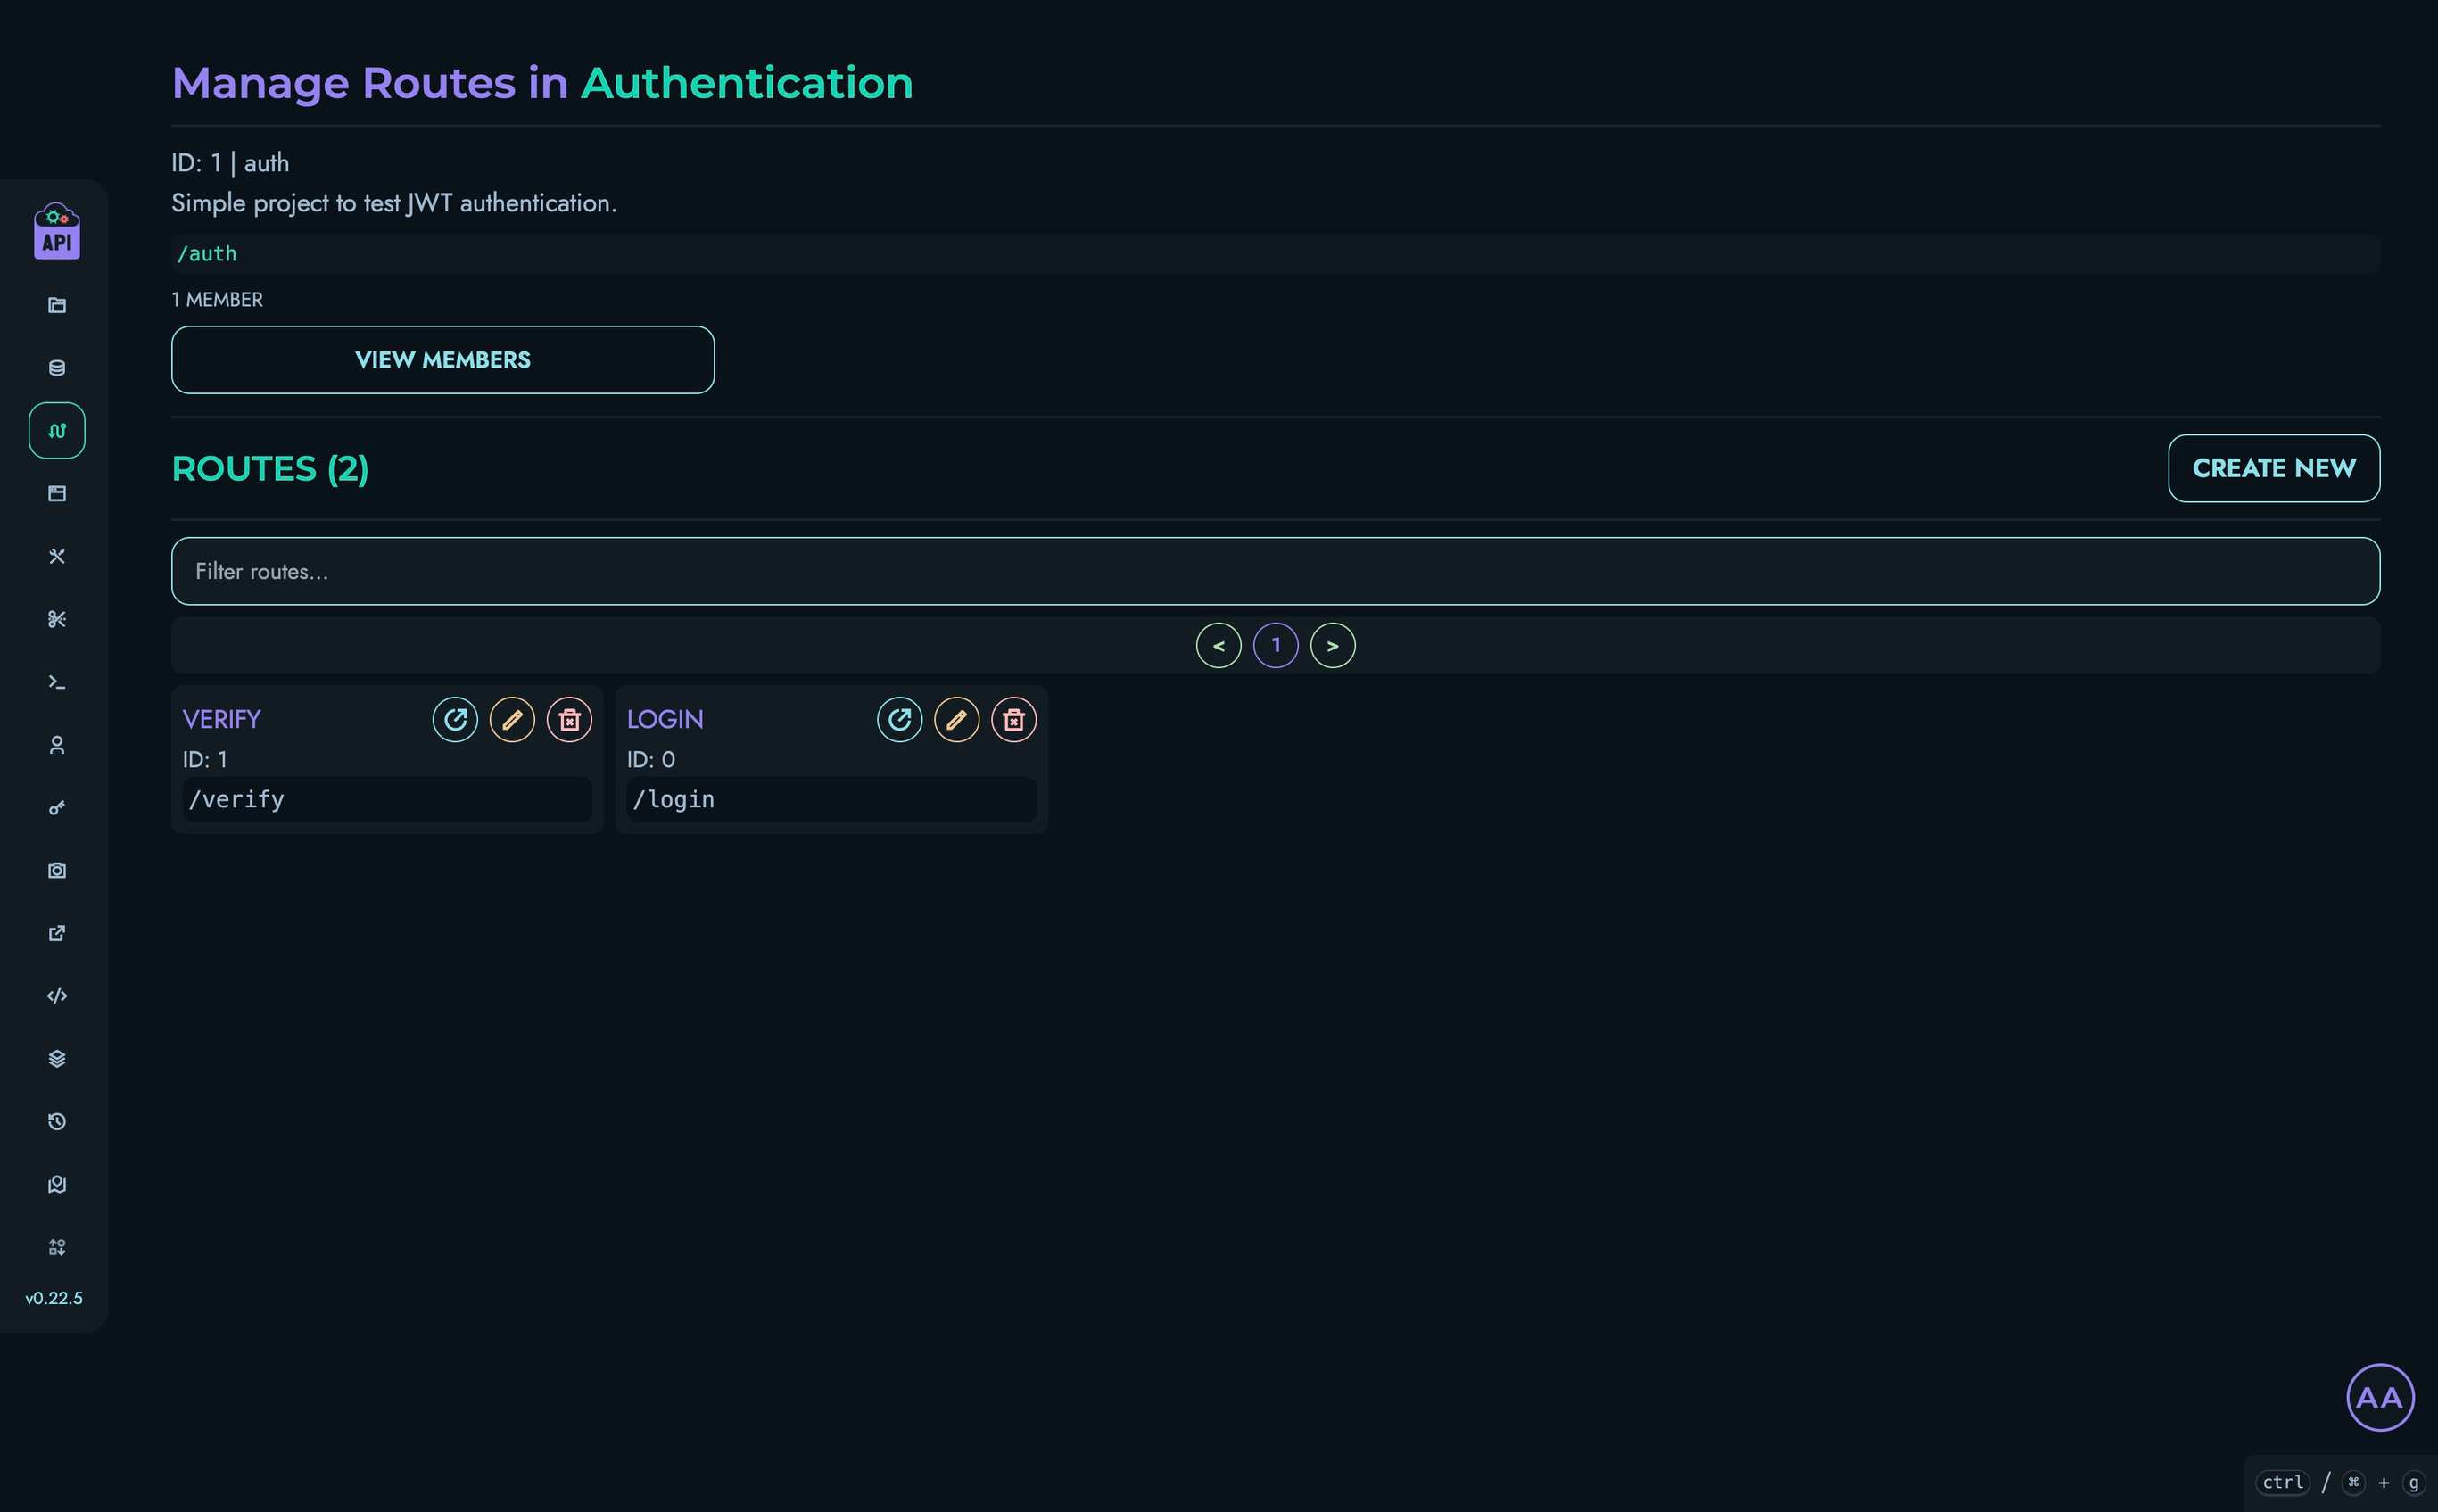
6. Creating the Verify Route
Now let’s create a route that verifies JWT tokens:
- Navigate back to Routes in the top navigation bar
- Select your “Authentication” project
- Click “Create New” to create a route
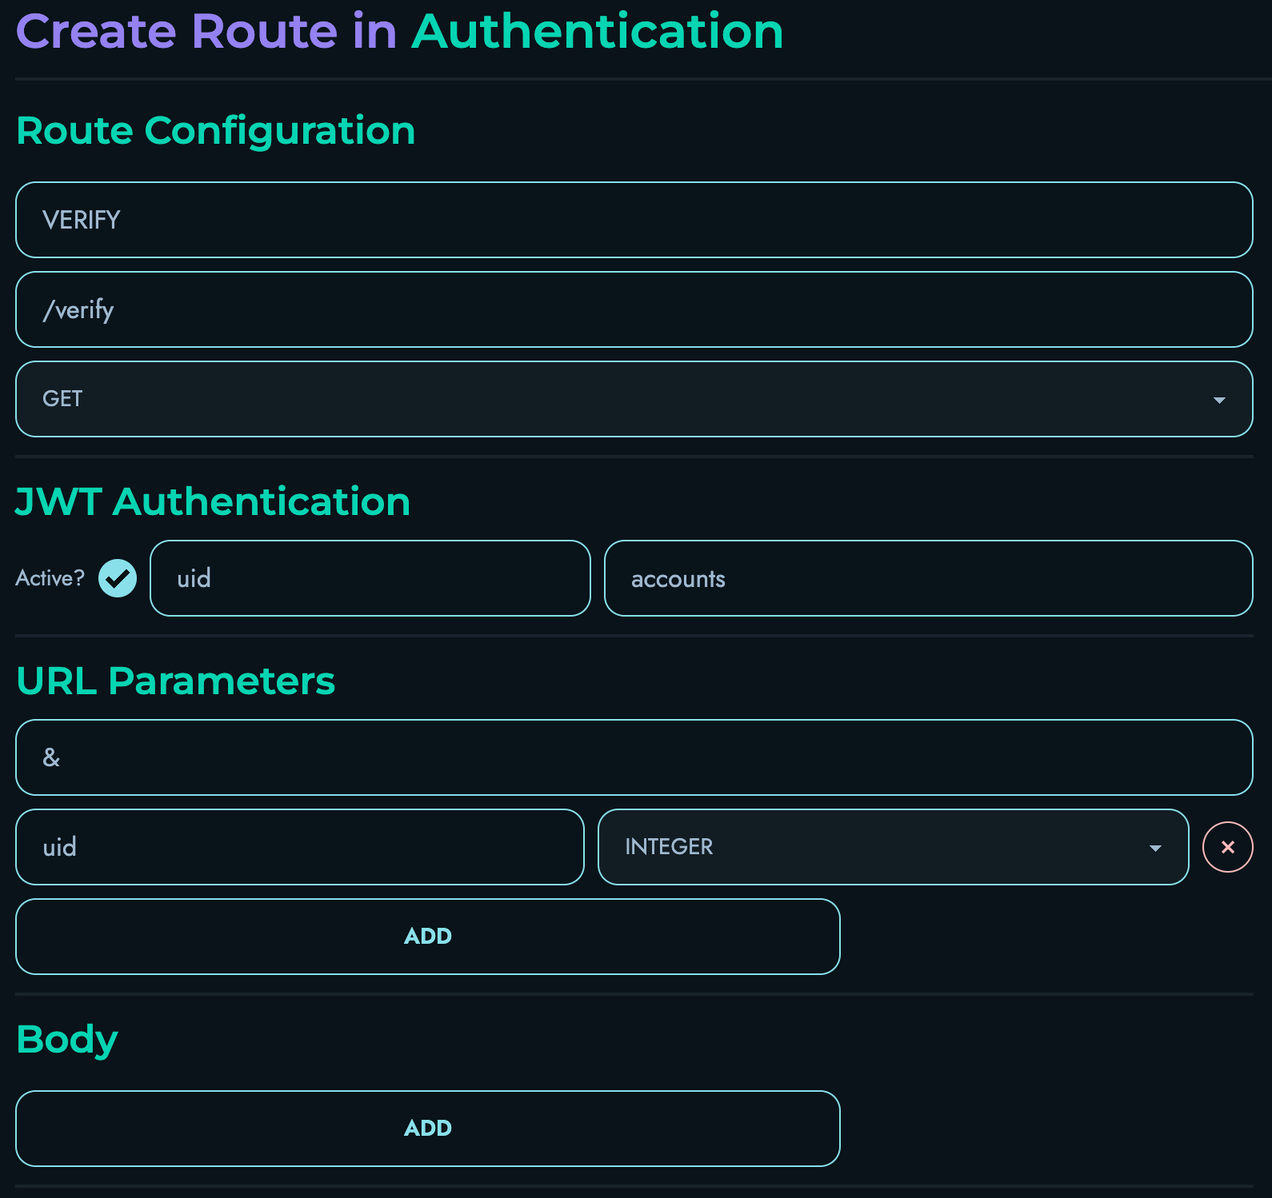
- Fill in the route details:
- Route ID: “VERIFY”
- Route Path: “/verify”
- HTTP Method: “GET”
- Fill in the details for the “JWT Authentication” section:
- Active: Check this box
- Field: “uid”
- Reference Collection: “accounts”
- Set the “delimiter” to be “&” for the “URL Parameters” section
- Add 1 parameter to the “URL Parameters” section:
- uid: “INTEGER”
- The “Body” section doesn’t need to be modified
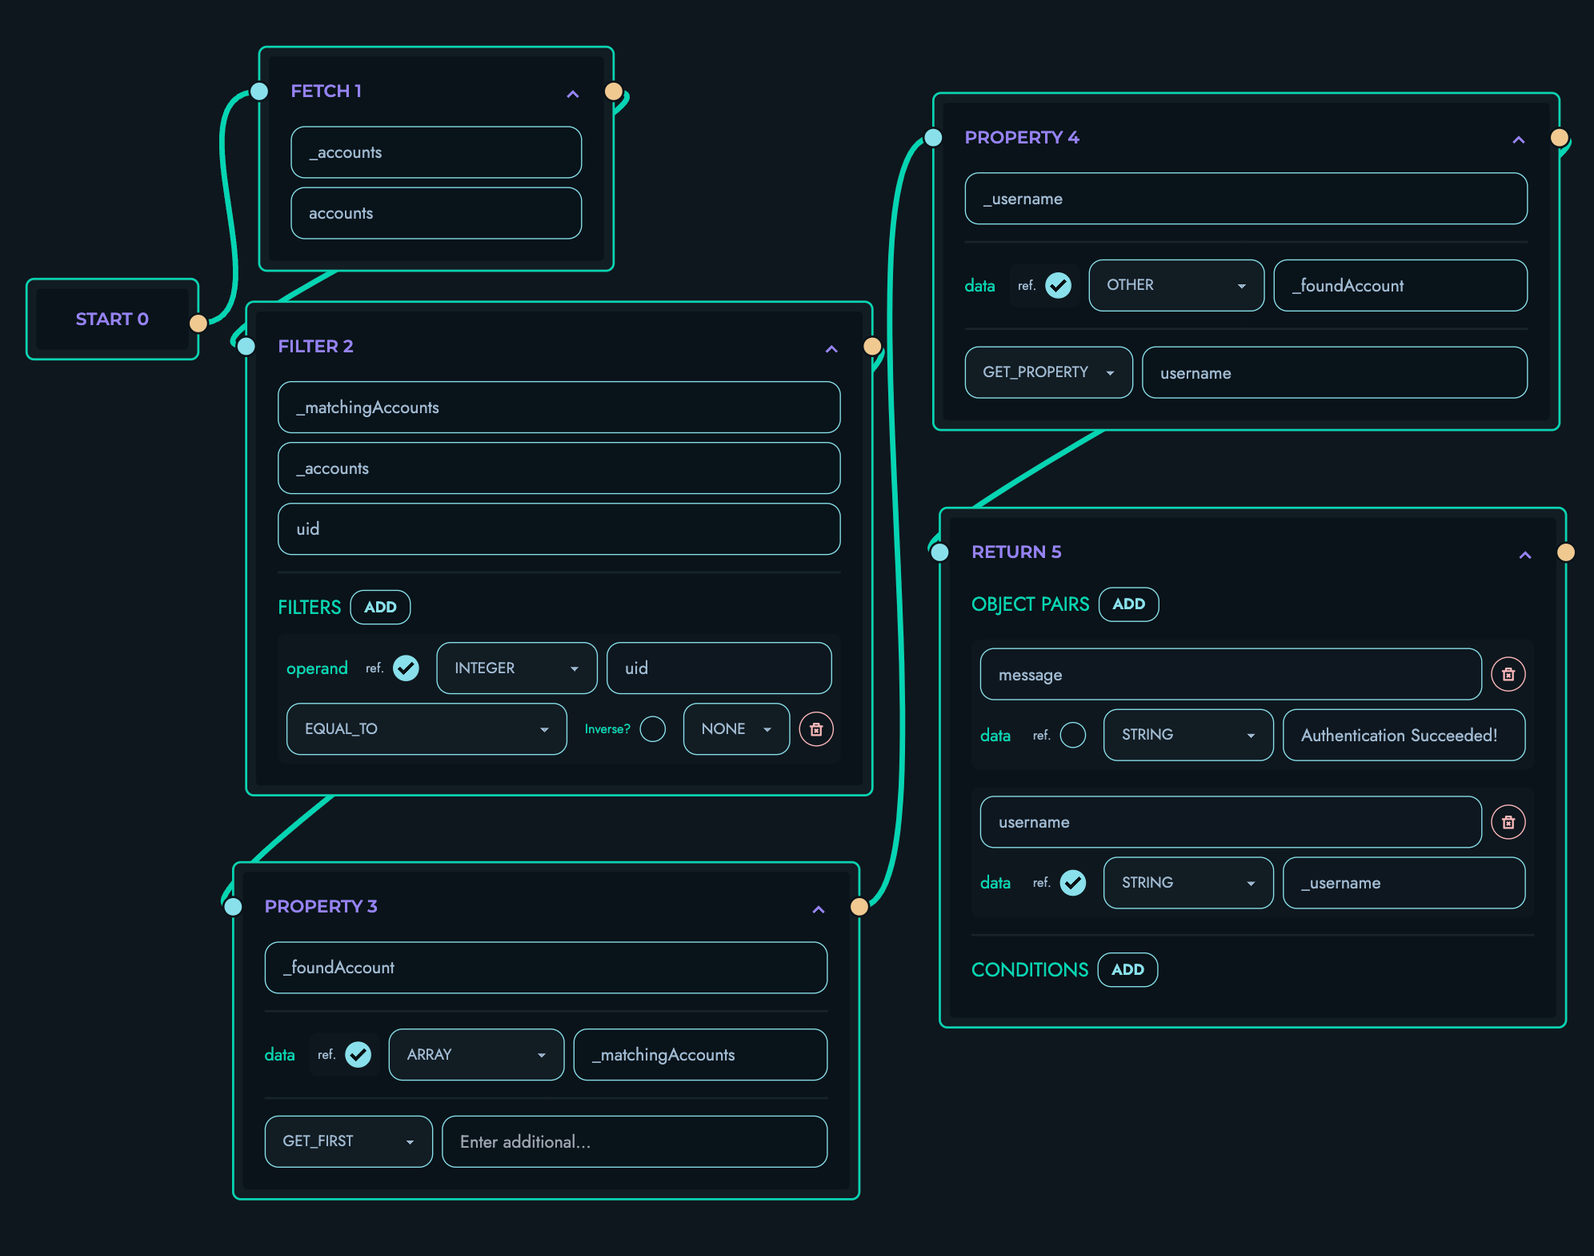
Building the Verification Route Logic
In the Flow Editor, we’ll create a flow that:
- Extracts the JWT token from the Authorization header
- Verifies the token’s signature and expiration
- Returns the decoded payload if valid
- Returns an error if invalid
Follow these steps:
-
Add a FETCH block:
- Drag a FETCH block onto the canvas and connect the START node to it
- Fill in the following details:
- Local Name: “_accounts”
- Reference Collection: “accounts”
-
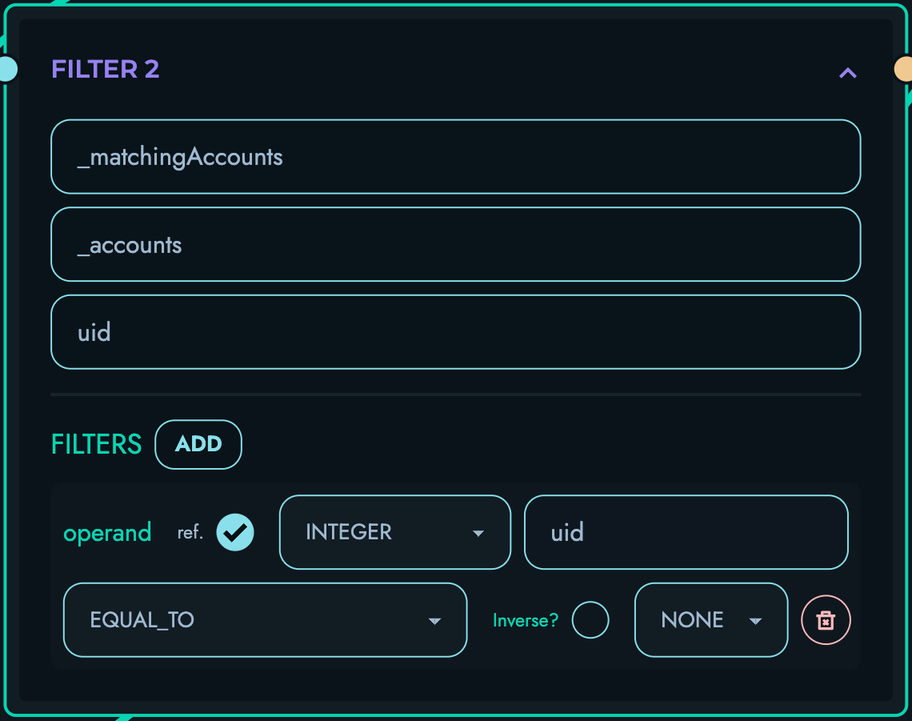
Add a FILTER block:
- Drag a FILTER block onto the canvas and connect the FETCH block to it
- Fill in the following details:
- Local Name: “_matchingAccounts”
- Reference Variable: “_accounts”
- Reference Property: “uid”
- Add a “filter” submodule and fill in the following details:
- Operation Type: “Equal To”
- Operand:
- Reference: Check this box
- Type: “Integer”
- Data: “uid”
-
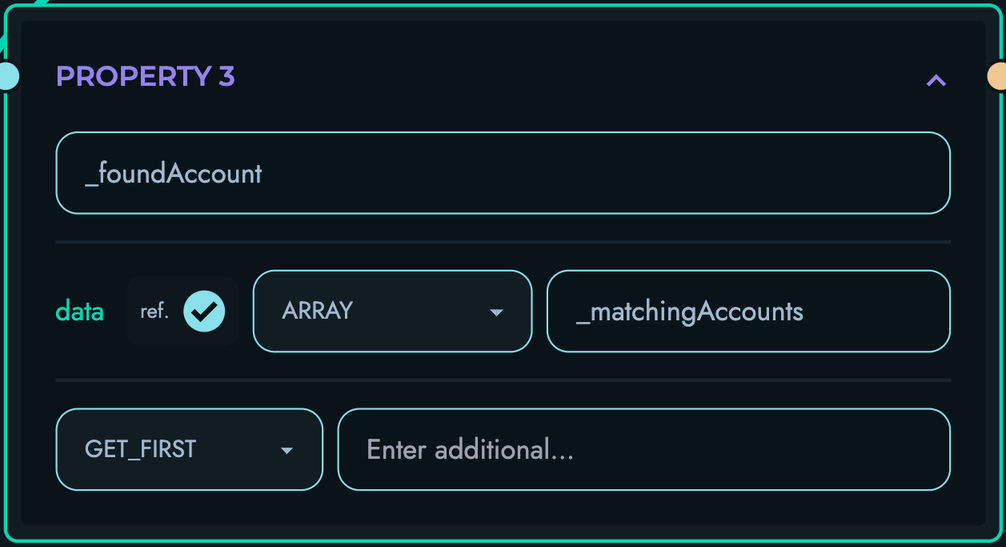
Add a PROPERTY block:
- Drag a PROPERTY block onto the canvas and connect the FILTER block to it
- Fill in the following details:
- Local Name: “_foundAccount”
- Property Apply: “GET_FIRST”
- As for the data section, fill in the following details:
- Reference: Check this box
- Type: “Array”
- Data: “_matchingAccounts”
-
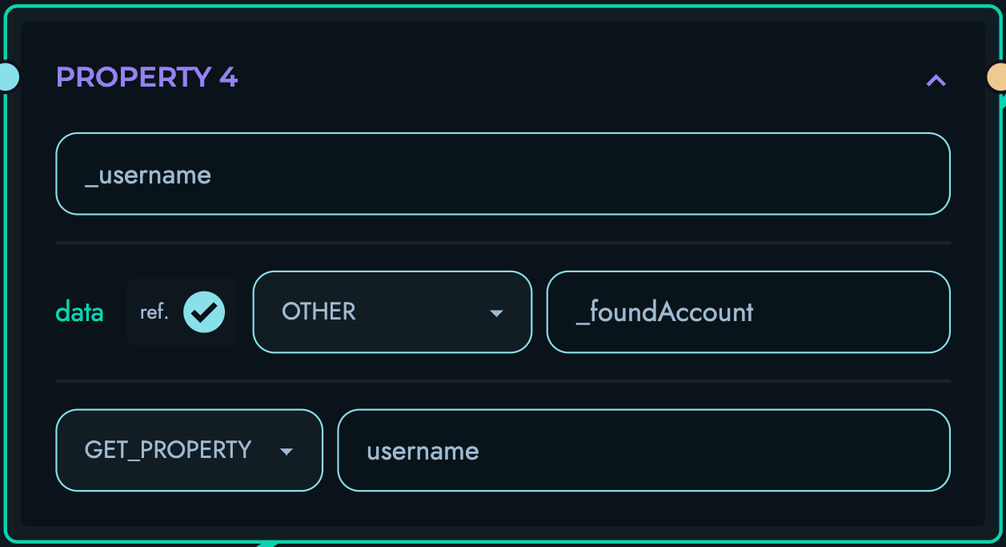
Add a PROPERTY block:
- Drag a PROPERTY block onto the canvas and connect the previous PROPERTY block to it
- Fill in the following details:
- Local Name: “_username”
- Property Apply: “GET_PROPERTY”
- Additional: “username”
- As for the data section, fill in the following details:
- Reference: Check this box
- Type: “Other”
- Data: “_foundAccount”
-
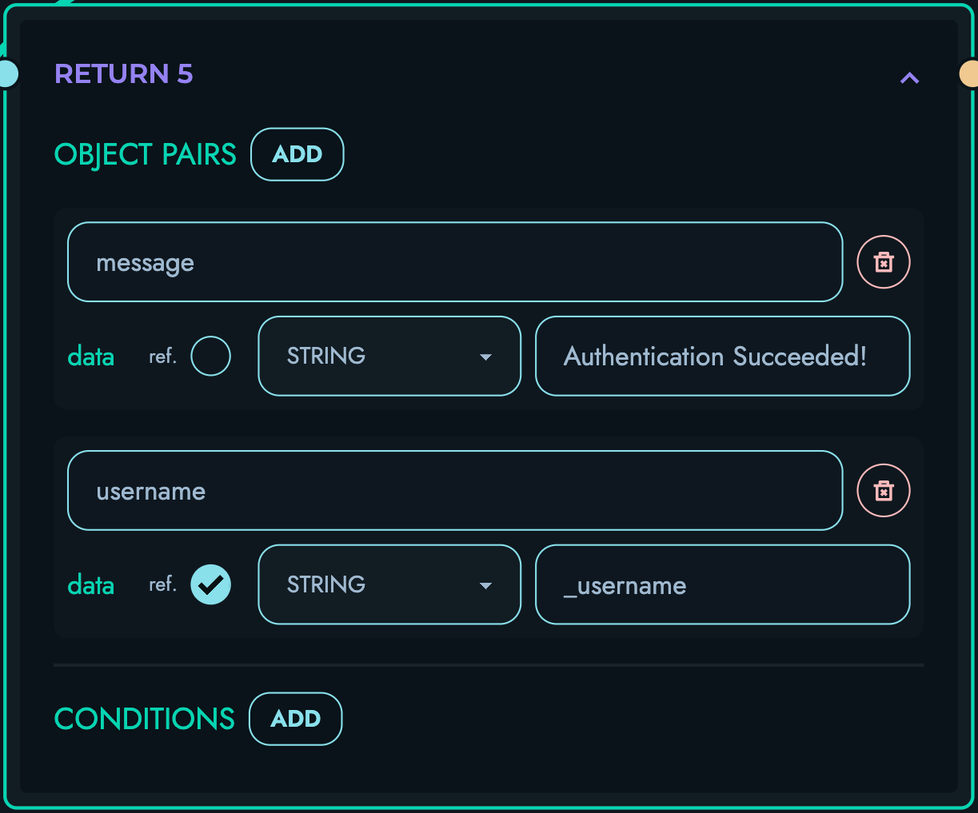
Add a RETURN block:
- Drag a RETURN block onto the canvas and connect the PROPERTY block to it
- Add an “object pair” submodule
- Fill in the following details:
- id: “message”
- data:
- Reference: Leave unchecked
- Type: “String”
- Data: “Authentication Succeeded!”
- Add another “object pair” submodule
- Fill in the following details:
- id: “username”
- data:
- Reference: Check this box
- Type: “String”
- Data: “_username”
-
Ensure that your Flow Editor looks like the following:
-
Click “Create” to save your route
7. Testing the Authentication System
Now let’s test our JWT authentication system using the Playground:
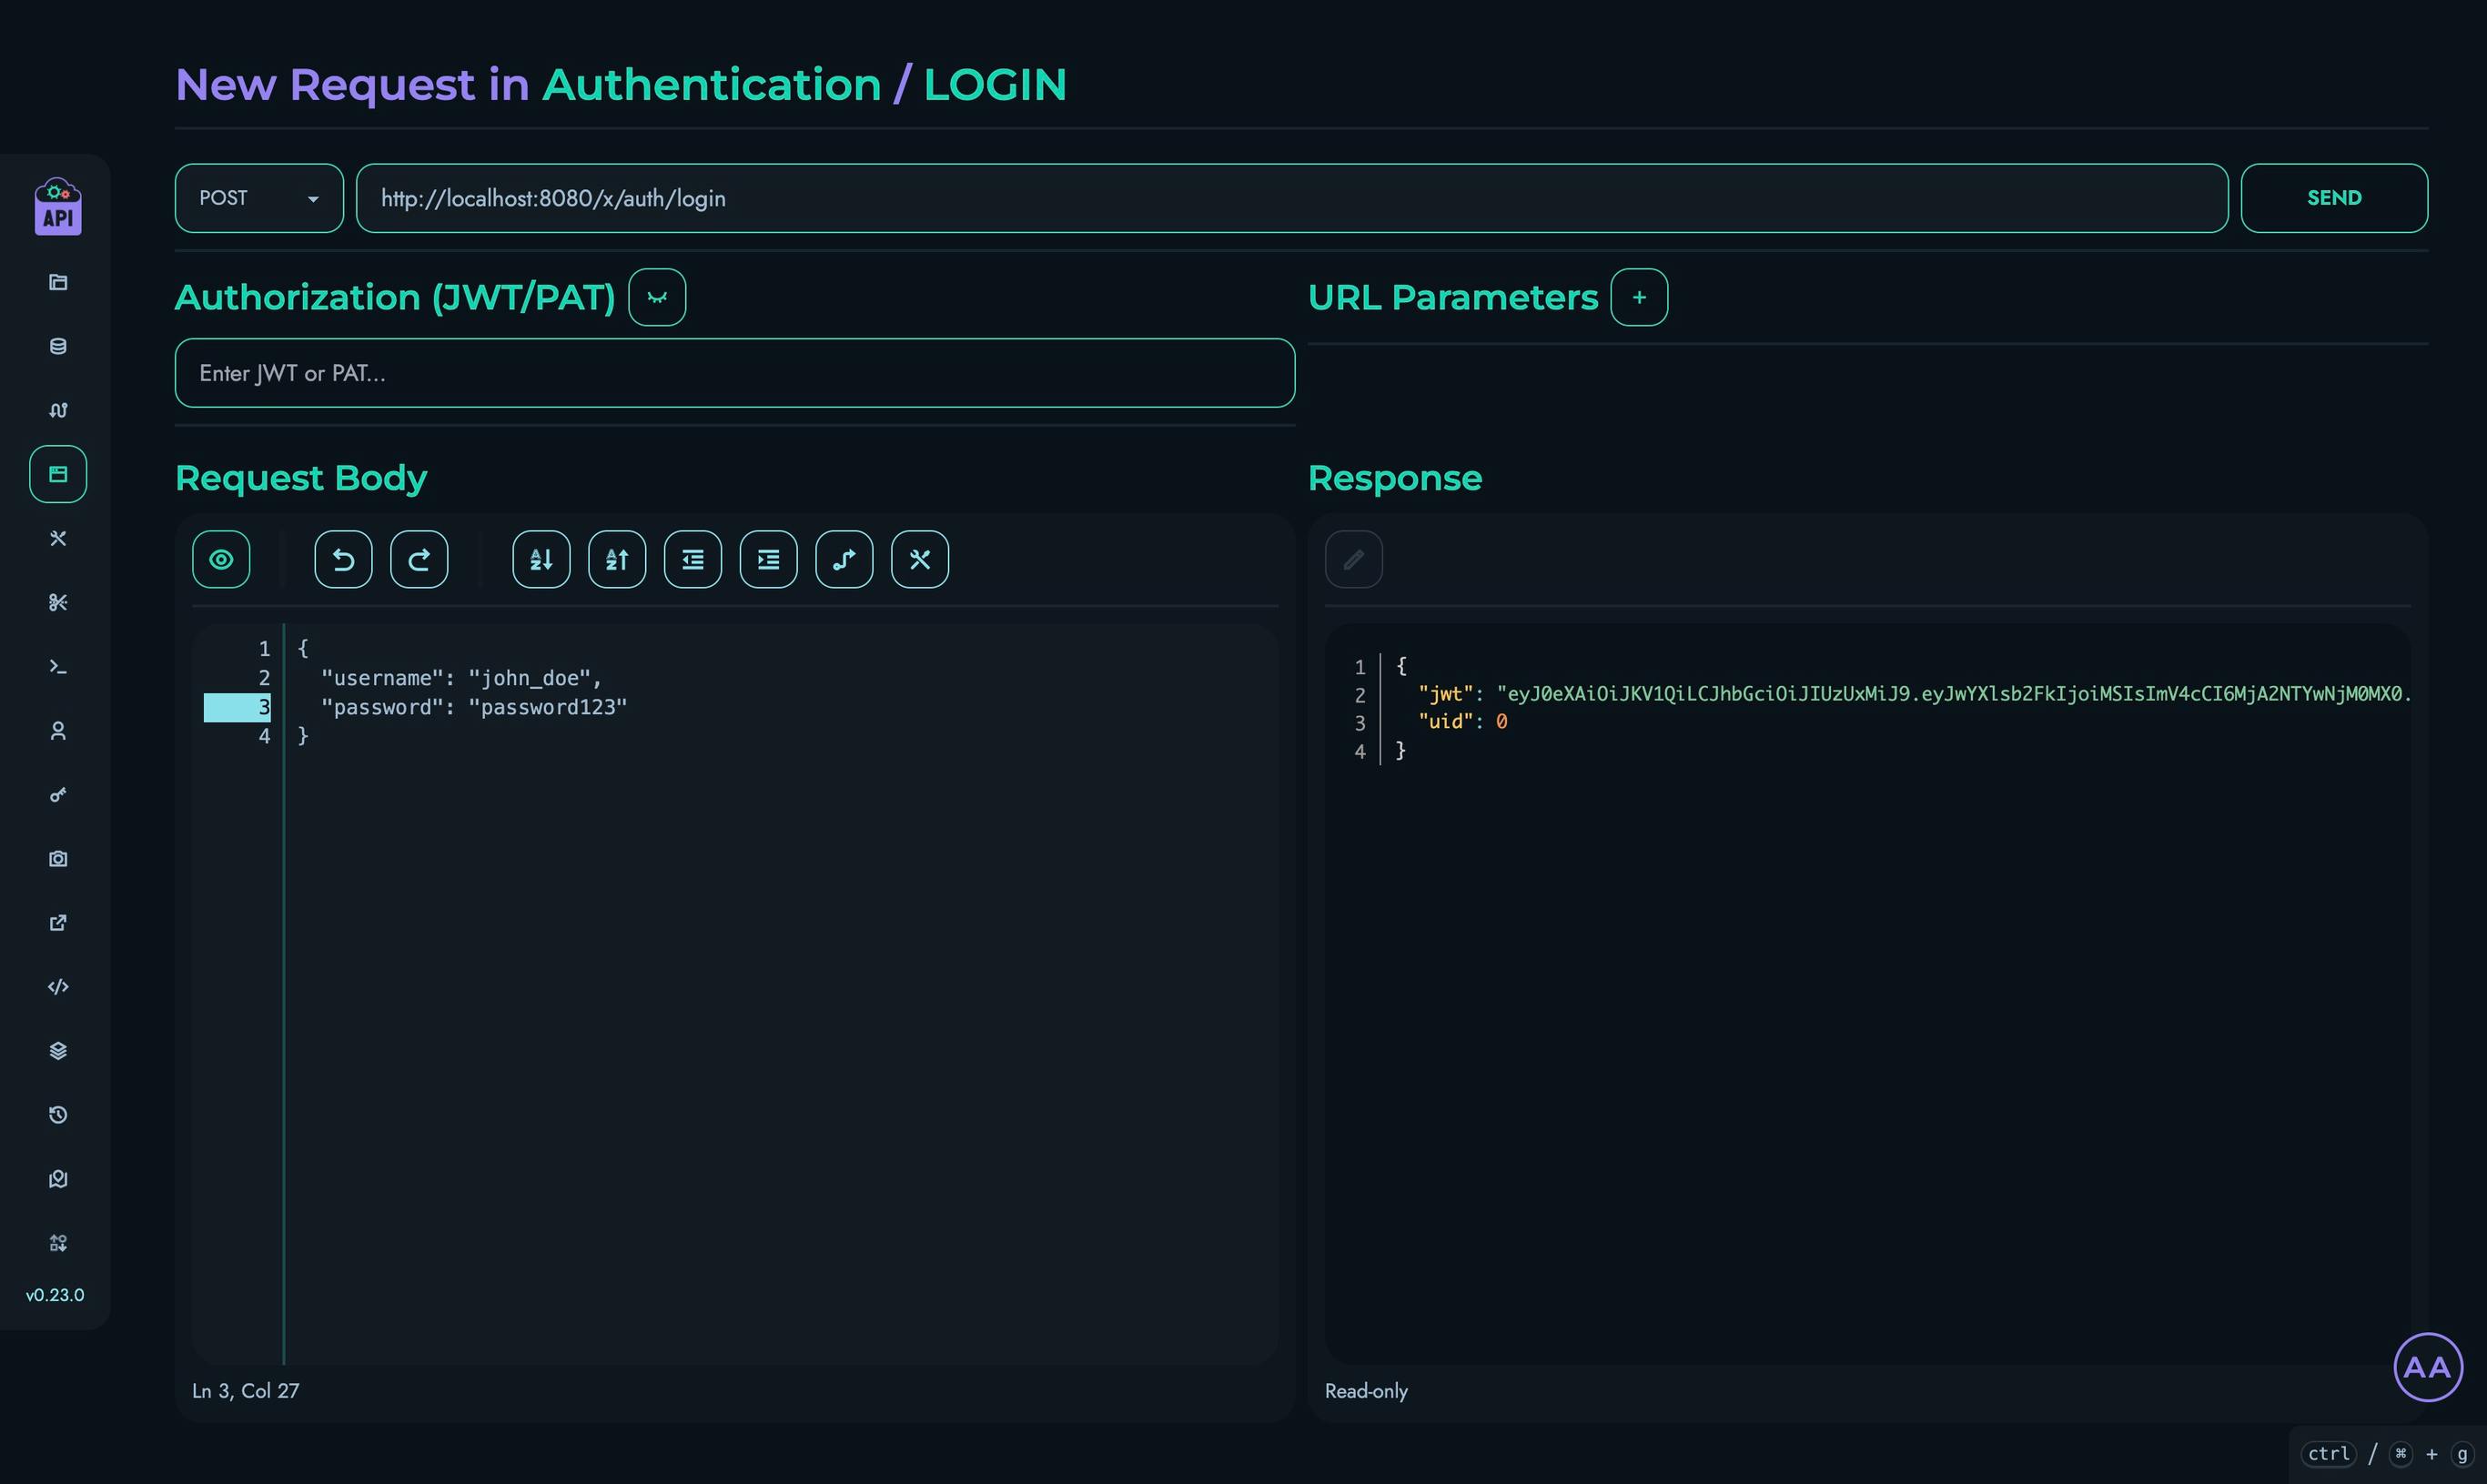
Testing the Login Route
- Navigate to Playground in the top navigation bar
- Select your “Authentication” project
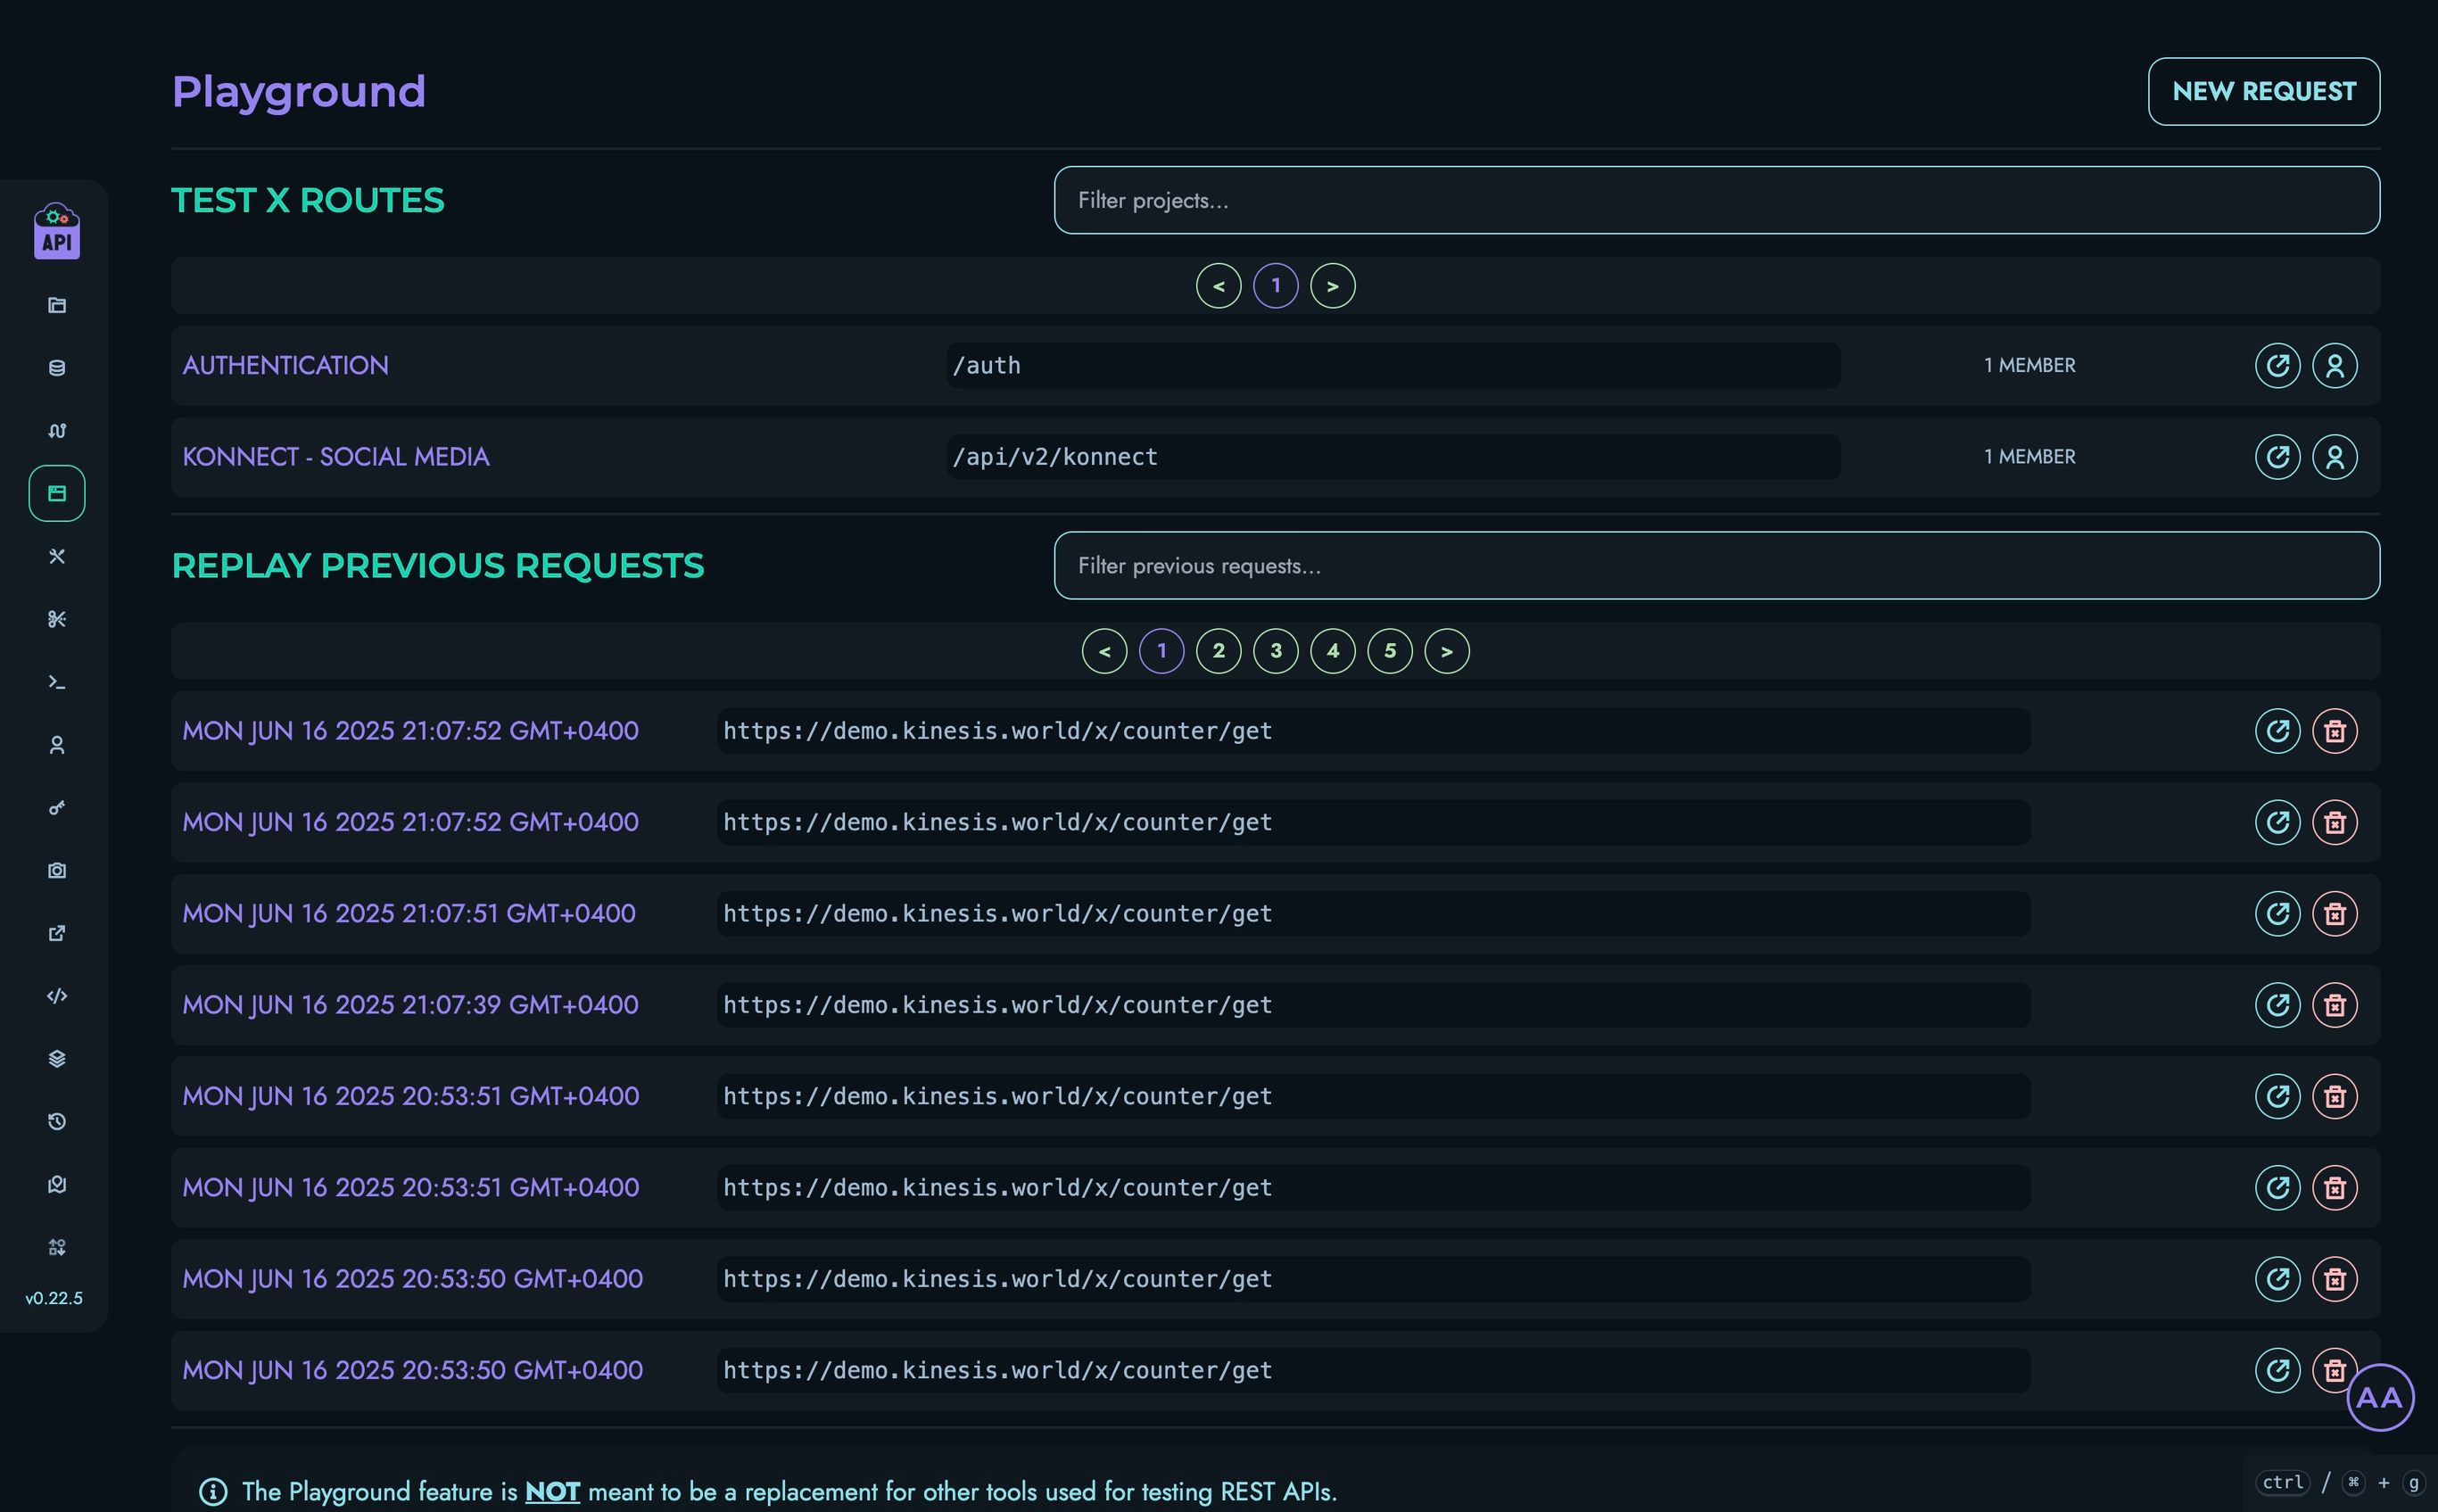
- Click on the “LOGIN” route
- Set the request body to:
{ "username": "john_doe", "password": "password123" } - Click “Send” to make a request to your API
- You should see a response like:
{ "uid": 0, "jwt": "eyJ0eXAiOiJKV1QiLCJhbGciOiJIUzUxMiJ9..." } - Copy the generated JWT token and memorize the value of the uid
Testing Edge Cases
Let’s test some edge cases to ensure our authentication system is robust:
-
Invalid Username
- Try the login route with an invalid username:
{ "username": "wronguser", "password": "password123" } - You should receive a 404 error response:
{
  "message": "User not found",
  "status": 404
}
- Try the login route with an invalid username:
-
Invalid Password
- Try the login route with an incorrect password:
{ "username": "john_doe", "password": "wrongpassword" } - You should receive a 401 error response:
{
  "message": "Invalid Password",
  "status": 401
}
- Try the login route with an incorrect password:
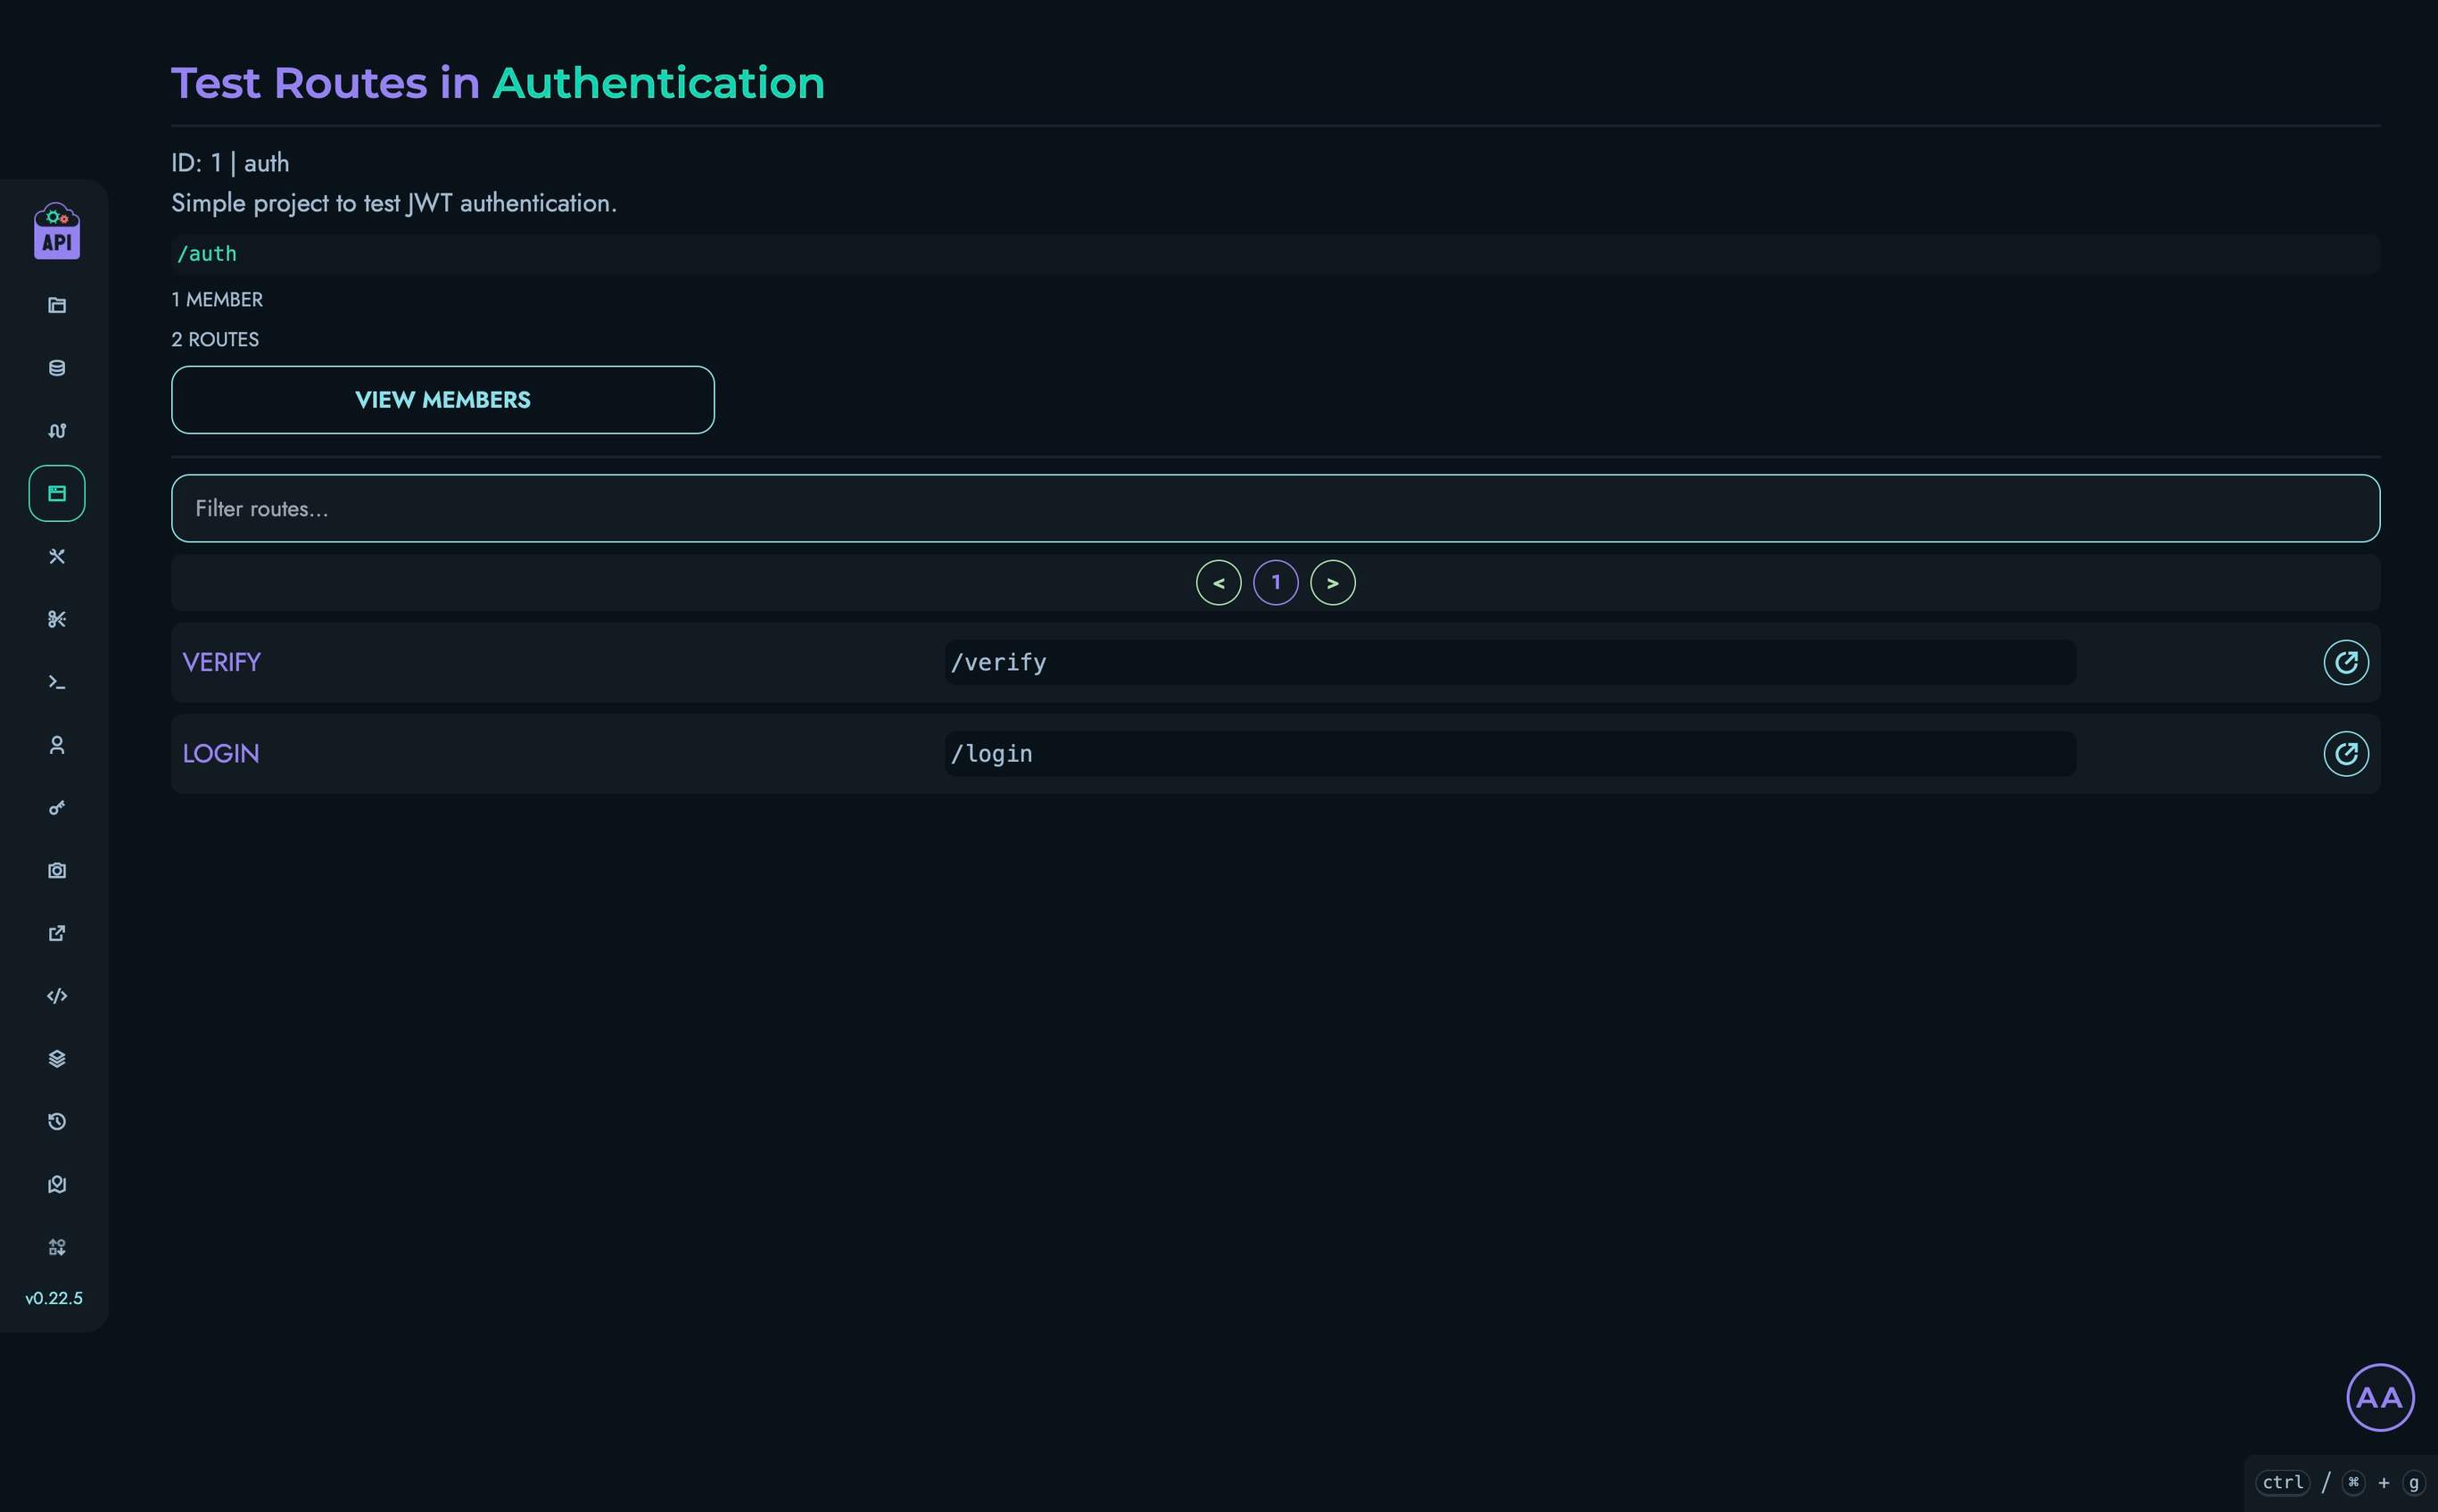
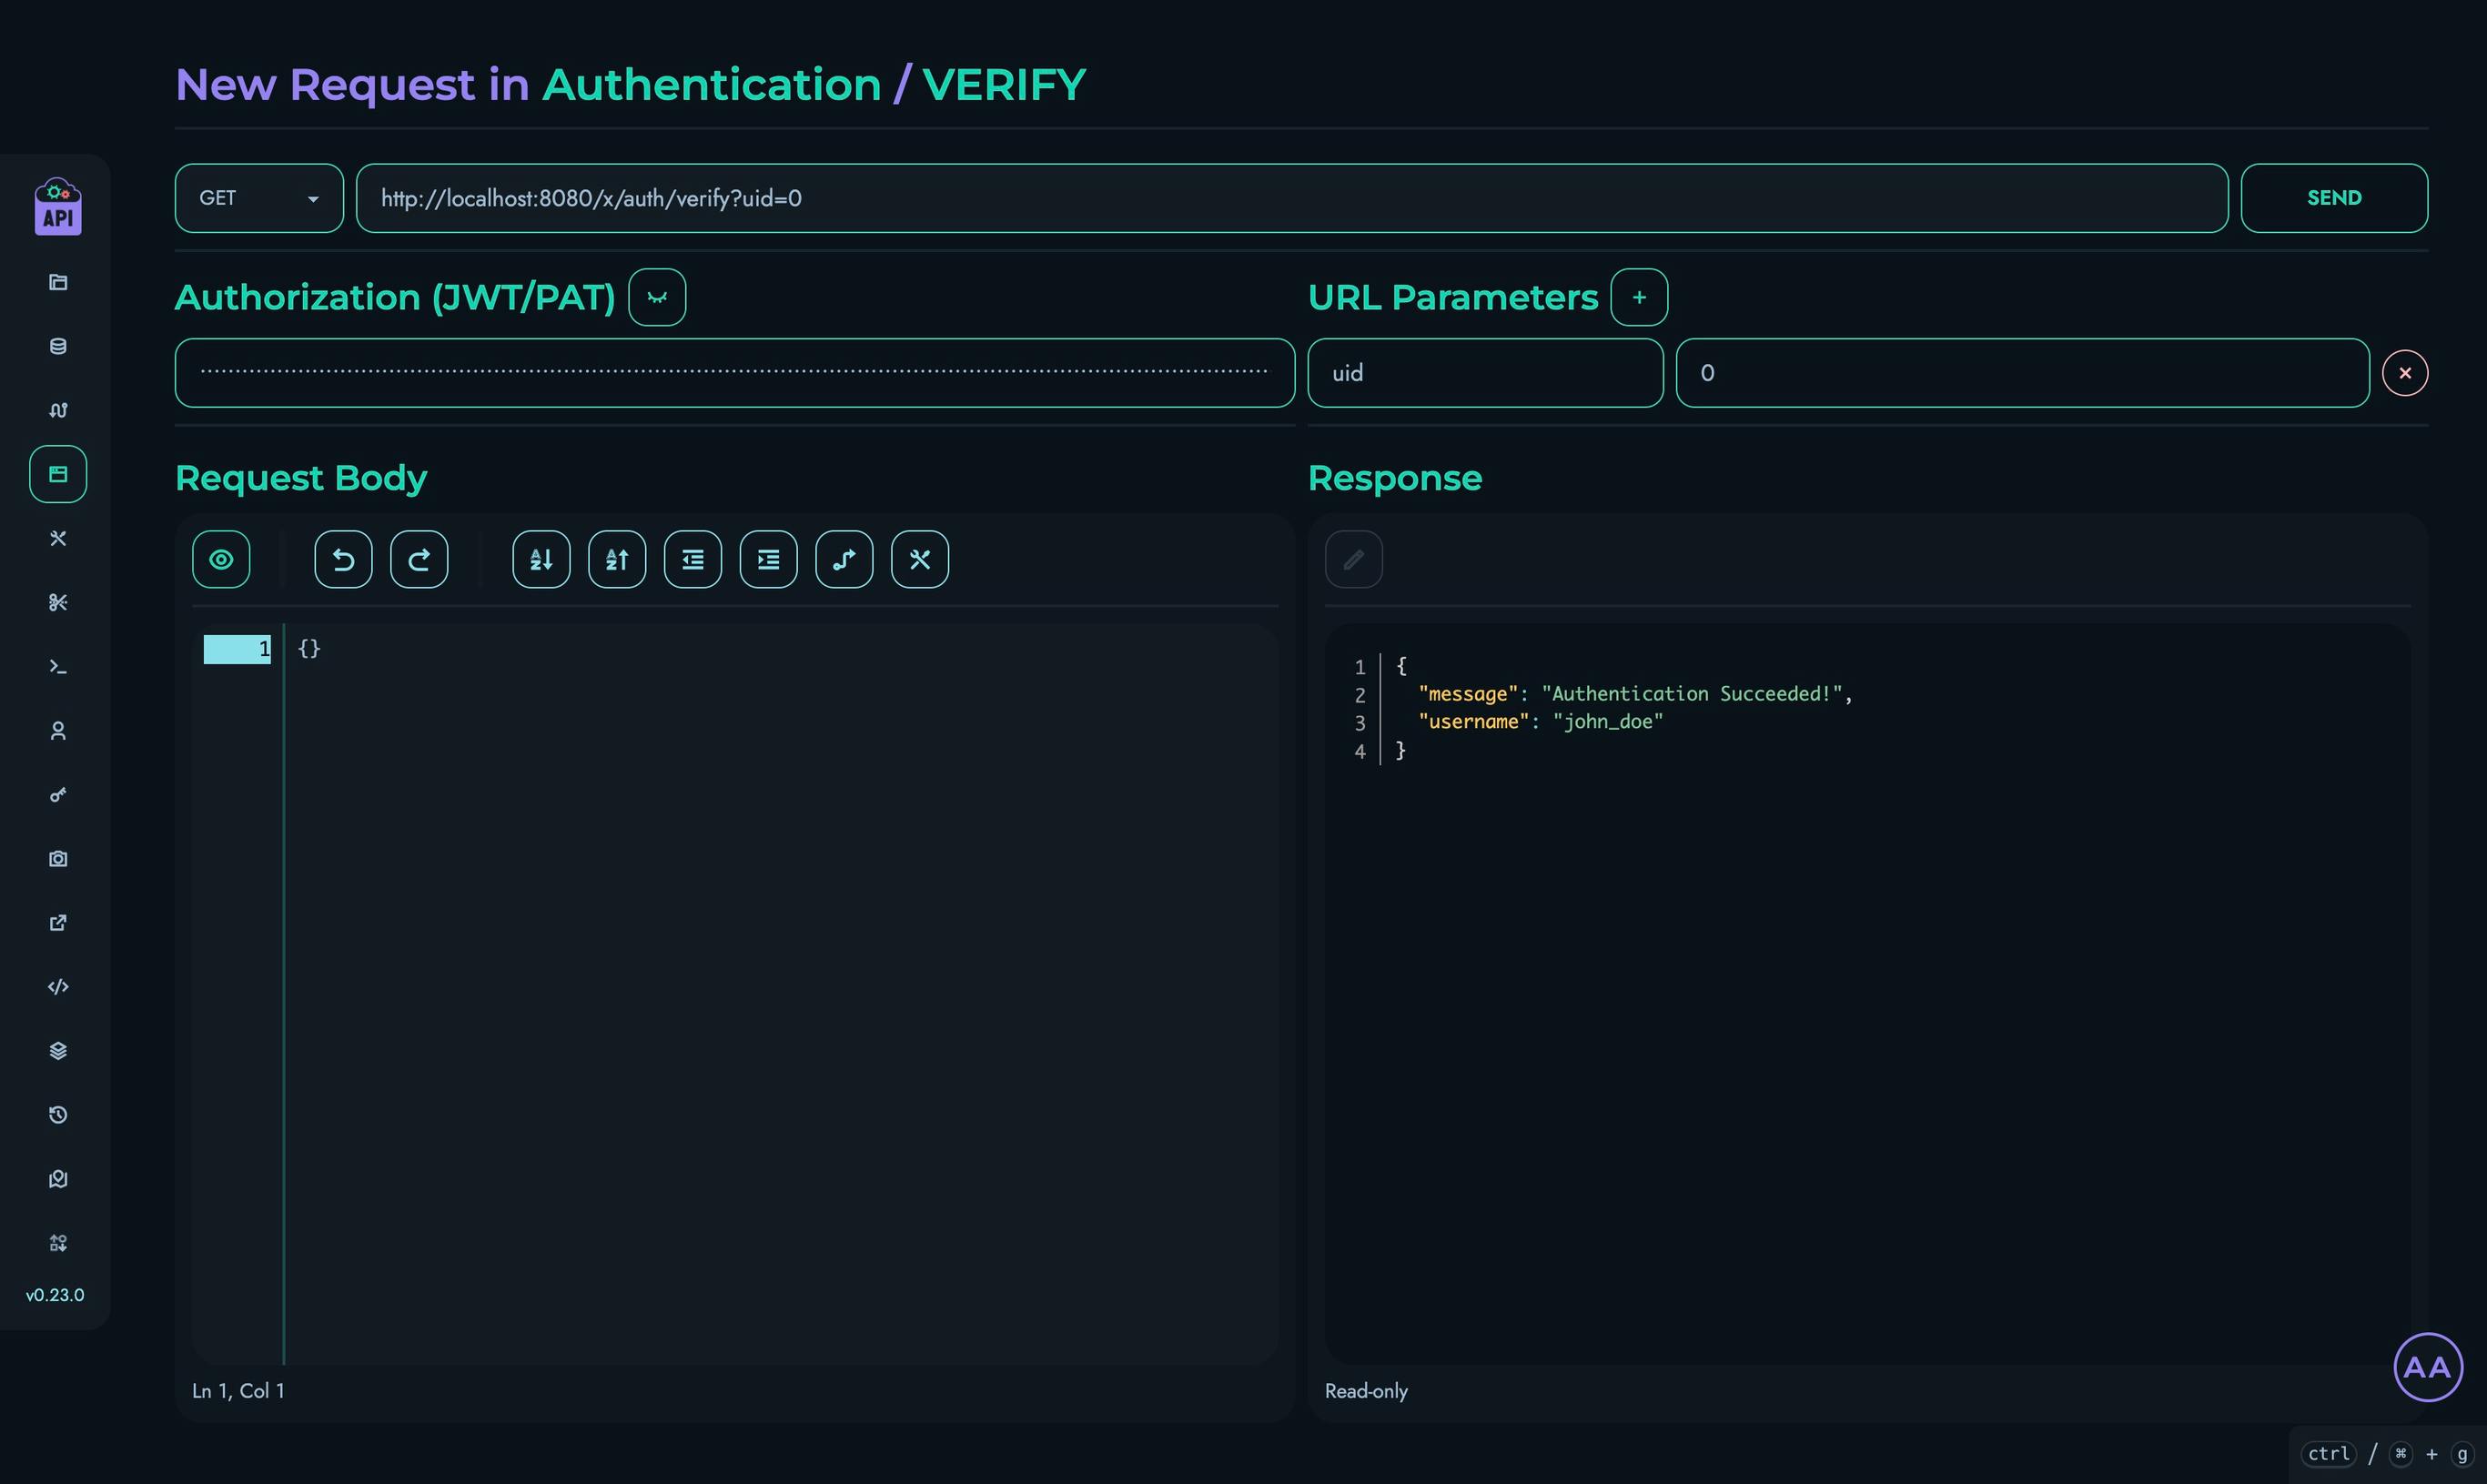
Testing the Verify Route
- Navigate to Playground in the top navigation bar
- Select your “Authentication” project
- Click on the “VERIFY” route
- Paste the JWT token that you copied from the previous section in the “Authorization” field
- Enter the value “0” for the “uid” field in the “URL Parameters” section
- Click “Send” to make a request to your API
- You should see a response like:
{
  "message": "Authentication Succeeded!",
  "username": "john_doe"
}
Testing Edge Cases
Let’s test some edge cases to ensure our authentication system is robust:
-
No Authorization Header / Invalid Token
- Try the verify route without an Authorization header or by setting it to a random value
- You should receive a 500 error response:
{
  "message": "Error: Failed decoding JWT (InvalidToken)",
  "status": 500
}
-
Wrong UID
- Try the verify route with a different value for the “uid” field
- You should receive a 403 error response:
{
  "message": "Error: Incorrect uid",
  "status": 403
}
Congratulations!
You’ve successfully implemented a complete JWT authentication system using Kinesis API! Here’s what you’ve accomplished:
- Created a project and collection to store user accounts
- Set up the necessary data structures for authentication
- Built a login route that validates credentials and generates JWT tokens
- Created a verification route that validates tokens
- Tested both successful authentication flows and edge cases
Next Steps
To build on this authentication system, you could:
- Add User Registration: Create a route that allows new users to register
- Add Role-Based Access Control: Extend the JWT payload to include user roles for authorization
- Create Protected Routes: Build additional routes that require valid authentication
- Add Refresh Tokens: Implement a token refresh mechanism for longer sessions
Continuous Improvement
Note: Kinesis API is continuously evolving based on user feedback. As users test and provide suggestions, the platform will become simpler, more intuitive, and easier to use. This tutorial will be updated regularly to reflect improvements in the user experience and new features. A dedicated “AUTH” block is planned for the future to dramatically simplify the process of adding authentication to your APIs.
We value your feedback! If you have suggestions for improving this tutorial or the Kinesis API platform, please reach out through our contact page or consider raising a new ticket.
Related Documentation
- Projects - Learn more about managing projects
- Collections - Detailed information about collections
- Structures - Advanced structure options
- Routes - More about creating routes
- Playground - Testing your APIs